How To Install Memcached on Ubuntu

28/12/2020
With the increase in traffic, it is not unusual that websites start getting slow and show degraded performance. This performance effect is due to the fact that the database used in the backend cannot cope up or scale based on the traffic the website has started receiving. One of the ways to prevent this from happening is to use a good caching system like Memcached.

What is Memcached

According to the official Memcached website:

Memcached is an in-memory key-value store for small chunks of arbitrary data (strings, objects) from results of database calls, API calls, or page rendering. Memcached is simple yet powerful. Its simple design promotes quick deployment, ease of development, and solves many problems facing large data caches. Its API is available for most popular languages.

Getting Started

We can get started with Memcached with just a few set of commands. Once the installation has completed, we will also test to verify it has been installed correctly and is running.

Installation

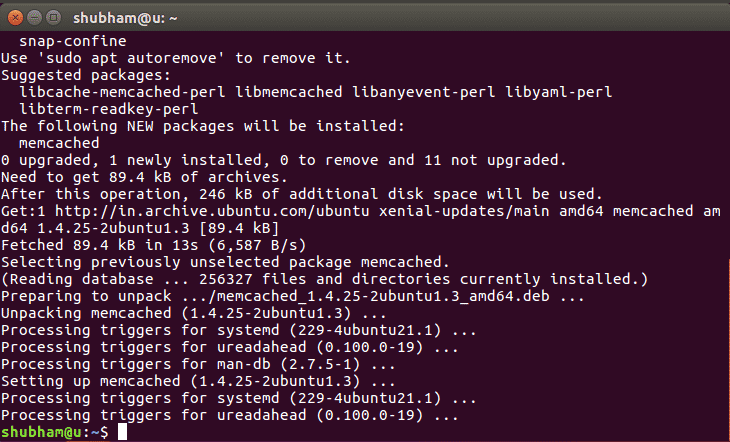
We will run the following apt-get based command to install Memcached on our Ubuntu 16.04 machine:

sudo apt-get install memcached

Here is what we get back with this command:

Starting Memcached

It is easy to start Memcached as a daemon server. By default, Memcached runs on port 11211. We can start using the command:

memcached -d

We can even run multiple instances of Memcached or run it on a different port using the same command:

memcached -p 11111 -U 11111 -d

These two commands produce no output:

Storing Data in Memcached

Now that our Memcached instance has started on port 11211, we can first verify that it is running:

Now, we’re ready to store and get data from memcached. Use the following format while storing data into Memcached:

set KEY META_DATA EXPIRY_TIME LENGTH_IN_BYTES

To get a key, use this format:

get KEY

To replace key-value, use trhe replace command as:

replace KEY META_DATA EXPIRY_TIME LENGTH_IN_BYTES

Finally, to remove key from Memcached, use the delete command:

delete KEY

Let’s try an example:

Conclusion

In this lesson, we looked at how we can install and start using Memcached which is an excellent Object caching system which stores data in the memory itself so that subsequent calls can be made faster to the database.

ONET IDC thành lập vào năm 2012, là công ty chuyên nghiệp tại Việt Nam trong lĩnh vực cung cấp dịch vụ Hosting, VPS, máy chủ vật lý, dịch vụ Firewall Anti DDoS, SSL… Với 10 năm xây dựng và phát triển, ứng dụng nhiều công nghệ hiện đại, ONET IDC đã giúp hàng ngàn khách hàng tin tưởng lựa chọn, mang lại sự ổn định tuyệt đối cho website của khách hàng để thúc đẩy việc kinh doanh đạt được hiệu quả và thành công.
Bài viết liên quan

Câu hỏi thường gặp khi mua và sử dụng proxy

1)Tôi có thể mua proxy cho nhưng nước nào? Trả lời: Hiện tại chúng tôi đang triển khai cho thuê proxy...
09/11/2022

Top data recovery tools for linux

Sadly sometimes we lose precious information by formatting a wrong partition or disk, due to hardware problems or transference...
29/12/2020

Install Manjaro Linux on VirtualBox

Manjaro Linux is based off of the Arch Linux distribution. It is meant to provide all the benefits of Arch Linux, its modularity,...
29/12/2020
Bài Viết

Bài Viết Mới Cập Nhật

Dịch Vụ Xây Dựng Hệ Thống Peering Với Internet Exchange (IXP)
04/04/2025

Dịch Vụ Triển Khai VPN Site-to-Site & Remote Access
04/04/2025

Dịch Vụ Thiết Lập Hệ Thống Tường Lửa (Firewall)
04/04/2025

Dịch Vụ Triển Khai Hệ Thống Ảo Hóa & Cloud
04/04/2025

Dịch Vụ Triển Khai Hệ Thống Ceph
04/04/2025