Adding Package Repository
Python 3 is not installed by default in CentOS 7. Python 3 is not available in the official package repository of CentOS 7 as well. But we can add Inline Upstream Stable (IUS) package repository on CentOS 7 to install Python 3.
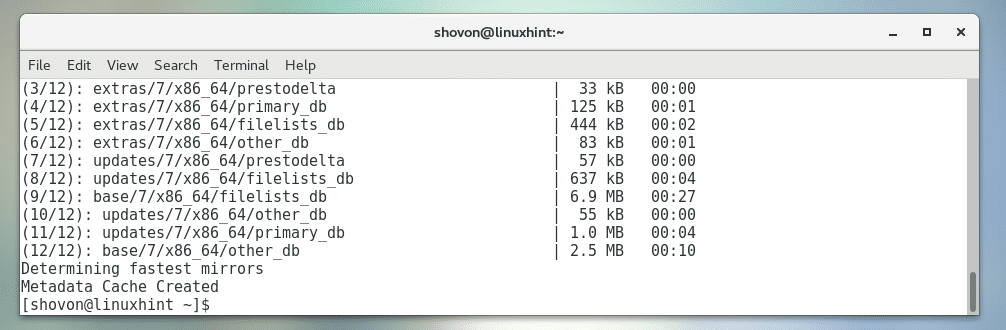
First update the yum package repository cache of your CentOS 7 machine with the following command:

The yum package repository cache should be updated.
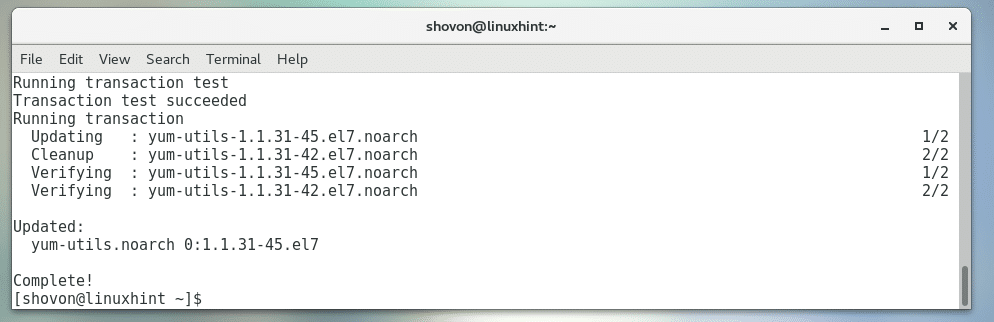
Now install yum-utils package with the following command:

Now press y and then press <Enter> to continue.
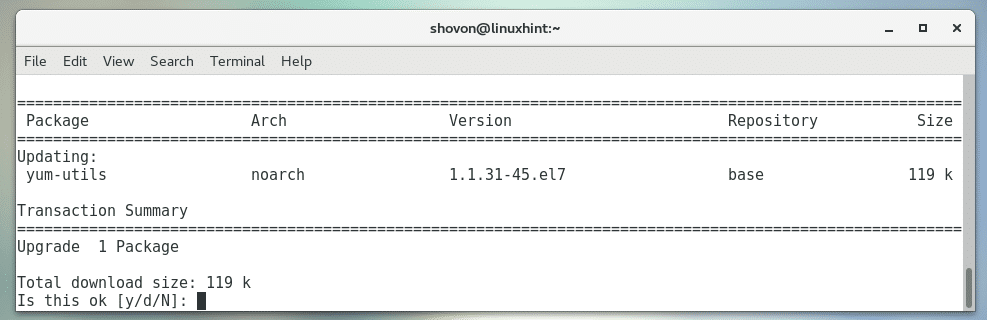
yum-utils should be installed.
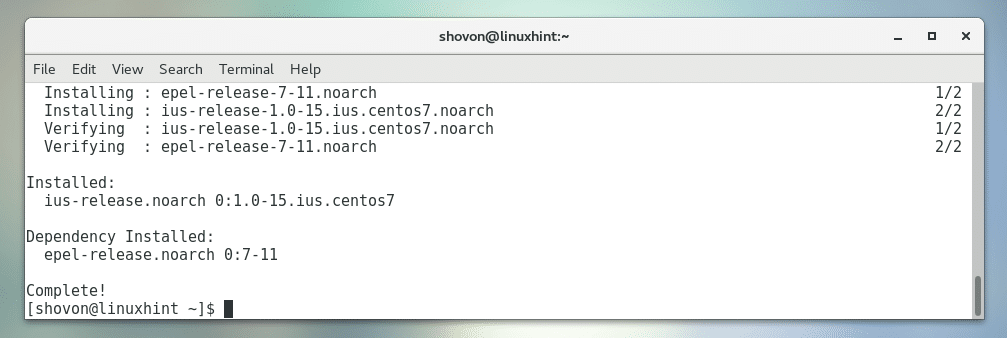
Now add the IUS package repository with the following command:

Now press y and then press <Enter> to continue.
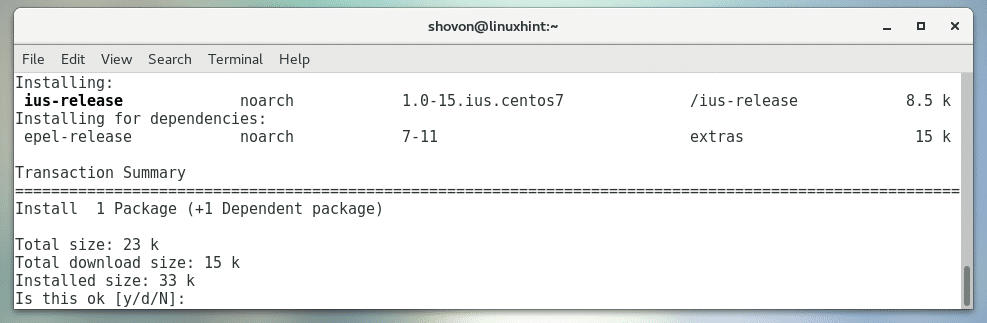
IUS package repository should be added.
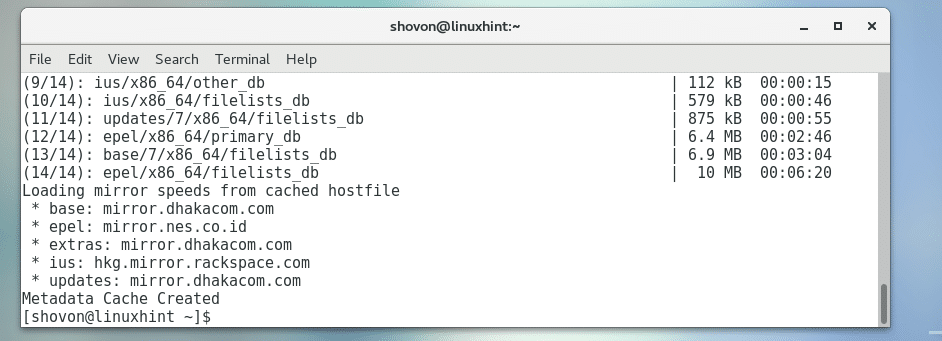
Now update the yum package repository cache again with the following command:
The yum package repository cache should be updated.
Now you’re ready to install Python 3.x.
Installing Python 3.4 and PIP for Python 3.4:
Only Python 3.4:
If you want to install only Python 3.4, not PIP for Python 3.4, run the following command:

Press y and then press <Enter> to continue.
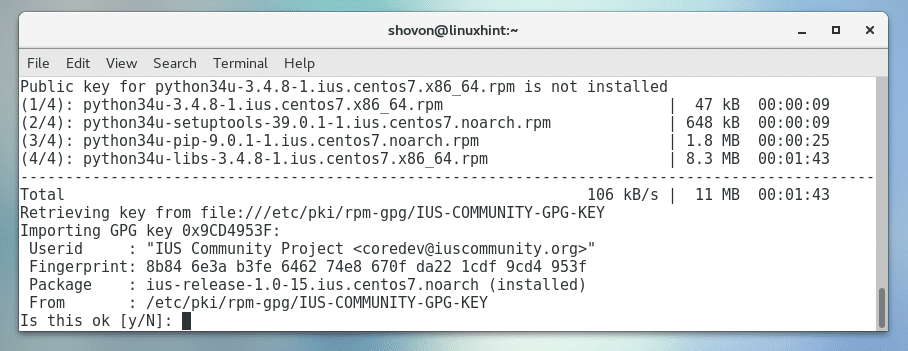
You may be asked to accept the GPG key, press y and then press <Enter> to continue.
Python 3.4 should be installed.
Python 3.4 Including PIP for Python 3.4:
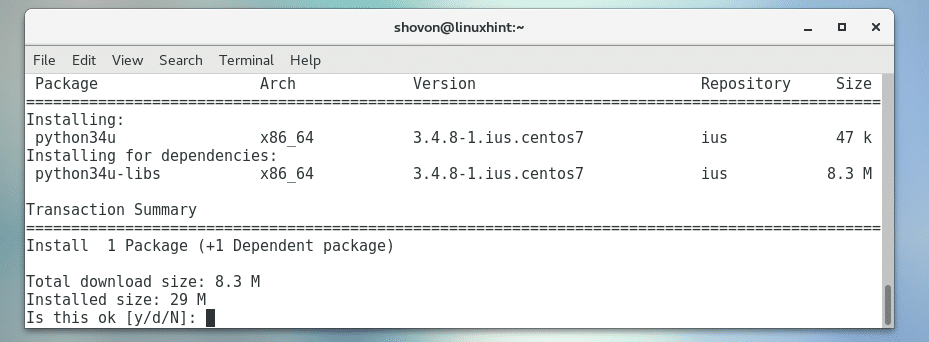
If you want to install Python 3.4 and PIP for Python 3.4, run the following command:

Now press y and then press <Enter> to continue.
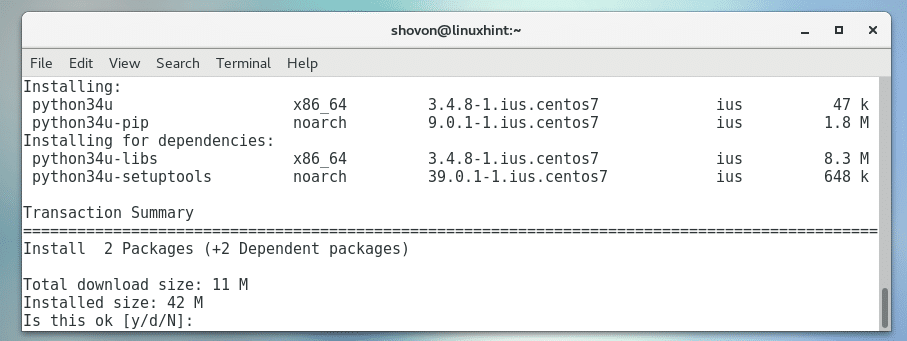
Now press y and then press <Enter> to continue.
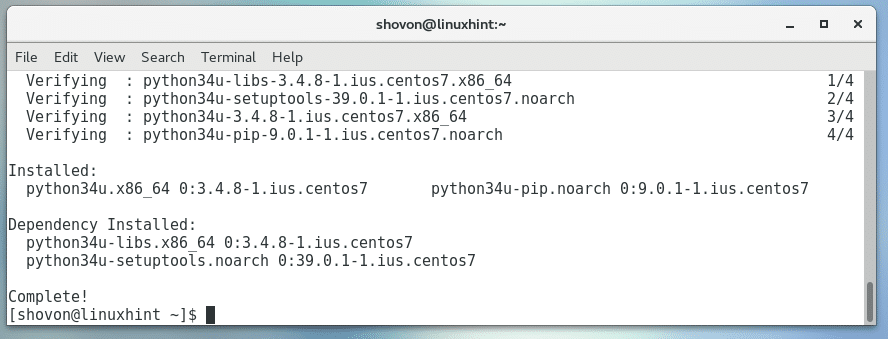
Python 3.4 and PIP for Python 3.4 should be installed.
Now you can check whether Python 3.4 is installed correctly with the following command:
As you can see, it is installed and working correctly.

You can also check whether PIP for Python 3.4 is installed correctly with the following command:
As you can see, it works.

Installing Python 3.5 and PIP for Python 3.5
Only Python 3.5:
You can install only Python 3.5 and leave PIP for Python 3.5 with the following command:

Now follow the steps of the Installing Python 3.4 and PIP for Python 3.4 section of the article above. Python 3.5 should be installed.
Python 3.5 Including PIP for Python 3.5:
If you want to install Python 3.5 and PIP for Python 3.5, run the following command:

Now follow the steps of the Installing Python 3.4 and PIP for Python 3.4 section of the article above. Python 3.5 should be installed along with PIP for Python 3.5.
To test whether Python 3.5 works, run the following command:
To test whether PIP for Python 3.5 works, run the following command:
Installing Python 3.6 and PIP for Python 3.6
Only Python 3.6:
You can install only Python 3.6 and leave PIP for Python 3.6 with the following command:

Now follow the steps of the Installing Python 3.4 and PIP for Python 3.4 section of the article above. Python 3.6 should be installed.
Python 3.6 Including PIP for Python 3.6:
If you want to install Python 3.6 and PIP for Python 3.6, run the following command:

Now follow the steps of the Installing Python 3.4 and PIP for Python 3.4 section of the article above. Python 3.6 should be installed along with PIP for Python 3.6.
To test whether Python 3.6 works, run the following command:
To test whether PIP for Python 3.6 works, run the following command:
Changing Python Version on the Fly
You can access Python 3 using python3 command.

The default version of Python 3.x used for python3 command is Python 3.4.x.
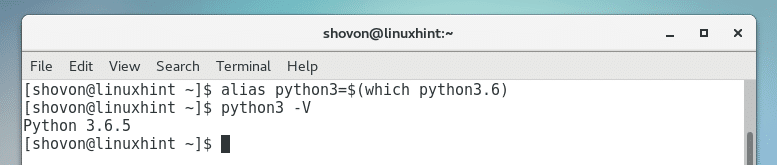
If you have multiple version of Python 3 installed, you can change it as follows:
NOTE: Here x = 4, 5, or 6 for Python 3.4, Python 3.5, and Python 3.6 respectively.

Now python3 is set to use Python 3.6.x as you can see from the screenshot below.
That’s how you install Python 3 on CentOS 7. Thanks for reading this article.