Selecting your Linux Distribution
Before you begin, you’ll first need to select the distribution you want to work on. Whichever you choose will determine the kind of working environment you want. Some of them include:
- Ubuntu: One of the most popular operating systems built on Unity. It is great for new users and offers a very similar environment as macOS does.
- Linux Mint: Released in 2006, this type is more Window- like and comes in with a range of desktops (Cinnamon, Mate etc.) for Users.
- Debian: This is perfect for people working on the server side. Although, Debian is a little complicated to set up and use, but offers a lot more features than Ubuntu and Mint.
- Fedora Linux: This distro is based on various packages such as DNF, RPM and GNOME. It is not recommended for beginners because of the complex working environment.
Try to get familiar with the distribution you want to install so you don’t have any issues later. We recommend starting with Ubuntu since it is the most used and offers plenty of community support in case if you get stuck somewhere.
Installing Linux on a Mac
Yes, there is an option to run Linux temporarily on a Mac through the virtual box but if you’re looking for a permanent solution, you might want to completely replace the present operating system with a Linux distro.
To install Linux on a Mac, you’ll need a formatted USB drive with storage up to 8GB. Remember this process will wipe out your current macOS/OS X installation and there is probably a very hard chance to recover it back. Also, don’t try to run macOS and Linux on dual boot because that won’t work too.
Follow the steps for installation below:
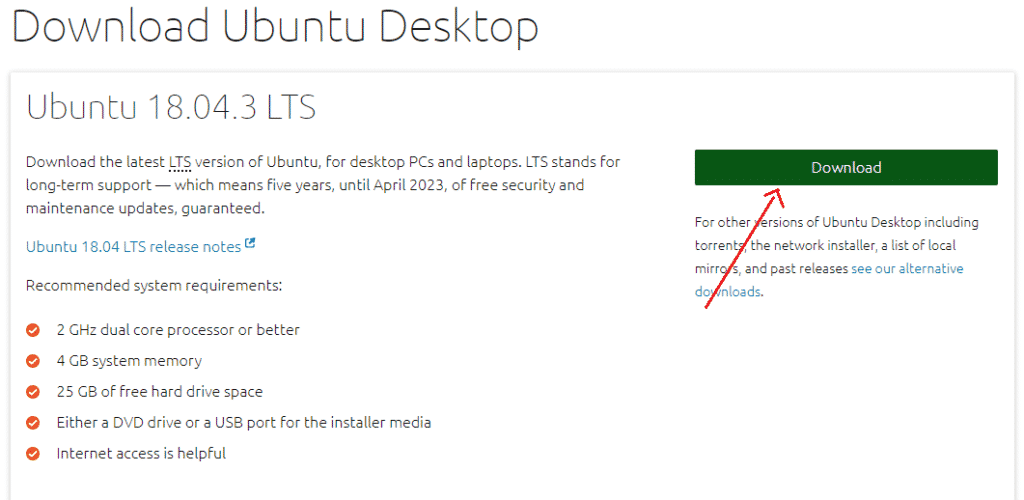
- Download Ubuntu or any other Linux distro you want to the Mac. Save it in your Downloads folder.
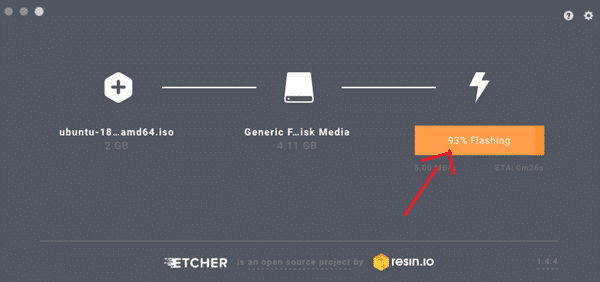
- Now download and install Etcher, an app that will help copy the Linux installation file to your USB drive. (https://www.balena.io/etcher/)

- Open the app and click on the Settings icon. Tick on the Unsafe Mode and click on Yes, Continue.
- Now Click on Select Image. Choose the name of the .iso file you downloaded in Step 1.
- Insert your USB Drive
- Under the Select Drive option, Click Change. Pick the drive option that matches with your USB drive in size. If you have inserted one drive in your Mac, the option will show /dev/disk1. If there are two drives attached, there will be an option for /dev/disk2 and so on. Note that /dev/disk0 is your Mac’s hard drive. Do not select that option.
- Now click Flash to start copying.
- Remove the USB Flash Drive and Shut down your Mac.
- Now attach the USB drive on the Mac again or to any other PC you want to install it to.
- Power up the PC while constantly holding the Option key
- From the start up screen, select the EFI Boot Option
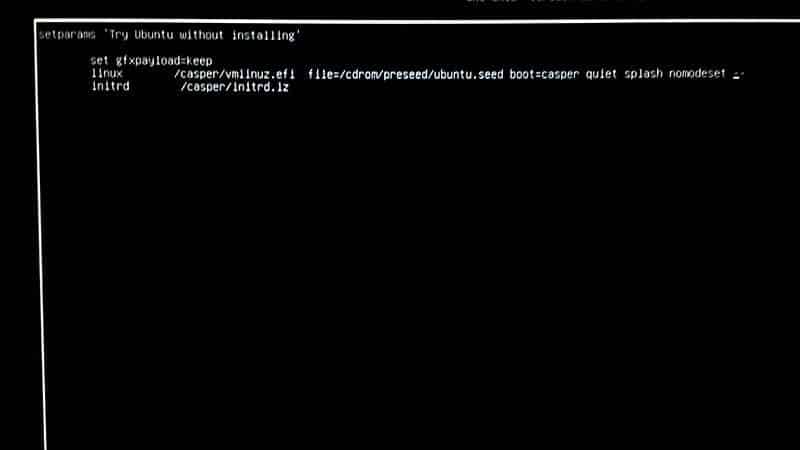
- You will see a screen with Ubuntu Installation Options that will ask you to either Try Ubuntu or Install Ubuntu. Press the letter ‘e’ to go the boot entry.
- Here, you will have to edit the boot entry. Change the line starting with Linux and add the word ‘nomodeset’ after ‘quiet splash’. It should be like this:
- Now, Press F10
- Ubuntu will start booting into trial mode
- Click on the option, ‘Install Ubuntu’
- Select your Language and Continue
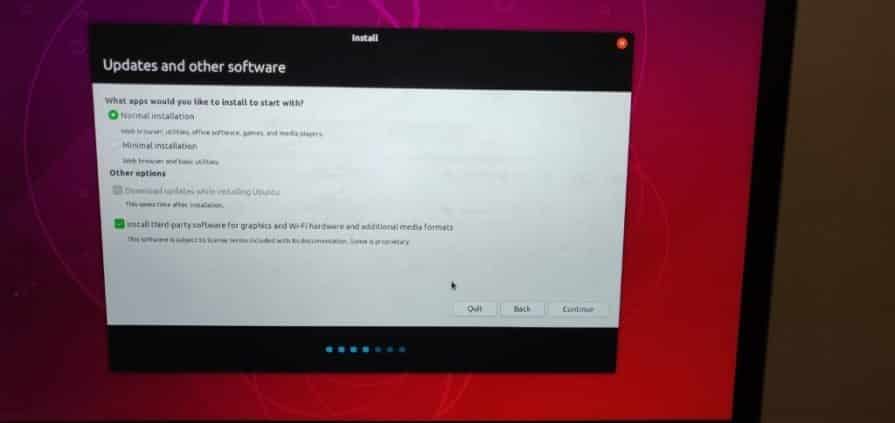
- Now, select the option ‘Install this third party software’ and click continue

- Click Yes to the alert option for /dev/sdb
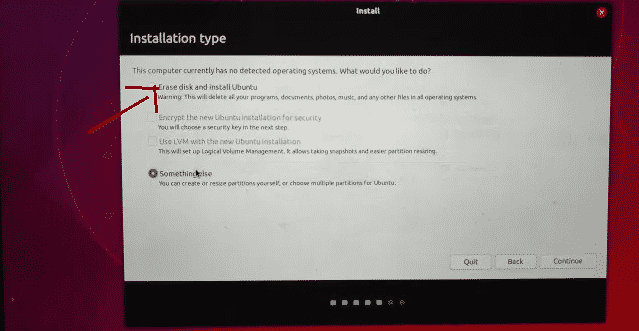
- Now select ‘Erase Disk and Install Ubuntu’ and click on continue
- Make sure you select the main hard drive and click on Install Now.
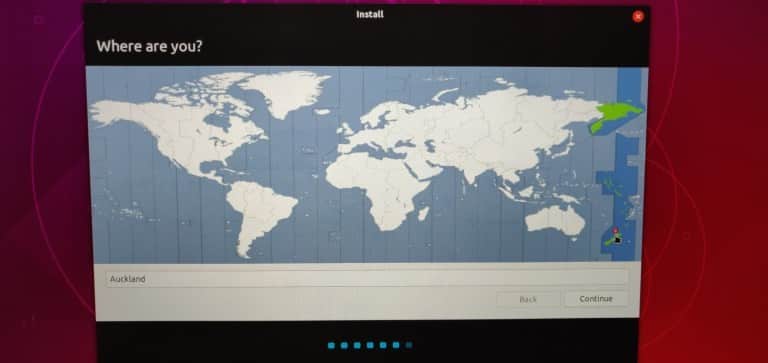
- Select your location and then click on continue
- Choose your keyboard layout and click on Continue
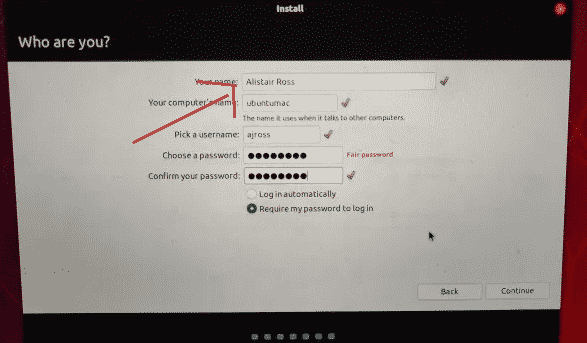
- Add a name and Password that you want to use
- Click on Continue and your Linux Distro will start installing
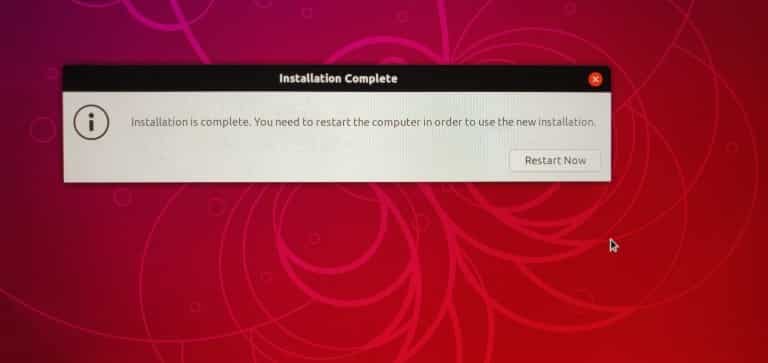
- Once the installation is finished, you will be asked to restart your Mac

- Now, login with your name and password to start using Ubuntu.


Note: During the installation process, we used the entire hard disk for Ubuntu in step 20, which means your MacOS will be permanently deleted. If you want to keep the MacOS, you will have to make disk partitions, a small 8GB partition and a larger 1000GB for Linux. You can also go to Disk Utility to create proper partitions before you start installing Linux. Have a look here (https://linuxnewbieguide.org/how-to-install-linux-on-a-macintosh-computer/)