Installing PHP, Apache and MariaDB:
As I’ve said earlier, WordPress is written on PHP programming language. So, you must have a working LAMP server installed on CentOS 8 in order to run WordPress.
First, update the DNF package repository with the following command:

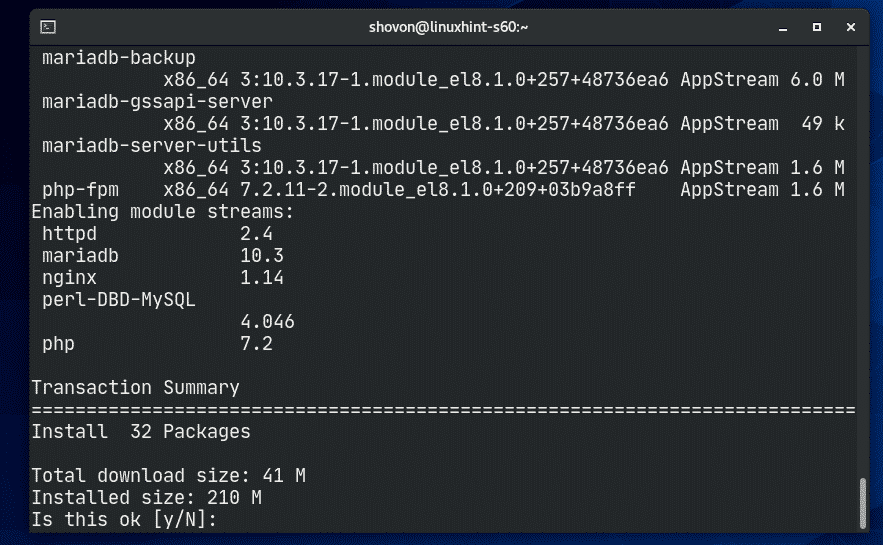
Now, install Apache, PHP, MariaDB with the following command:
httpd-tools php php-cli php-json php-gd php-mbstring php-pdo php-xml

To confirm the installation, press Y and then press <Enter>.
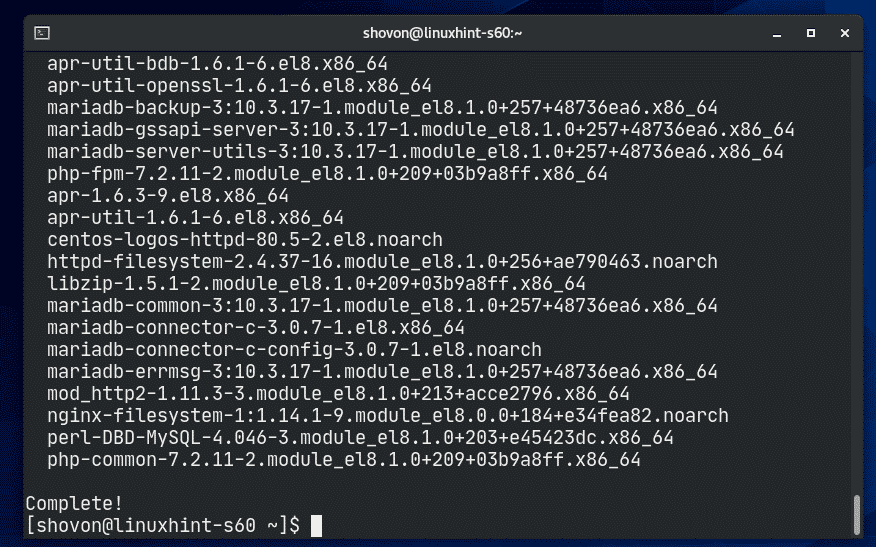
Apache, PHP and MariaDB should be installed.
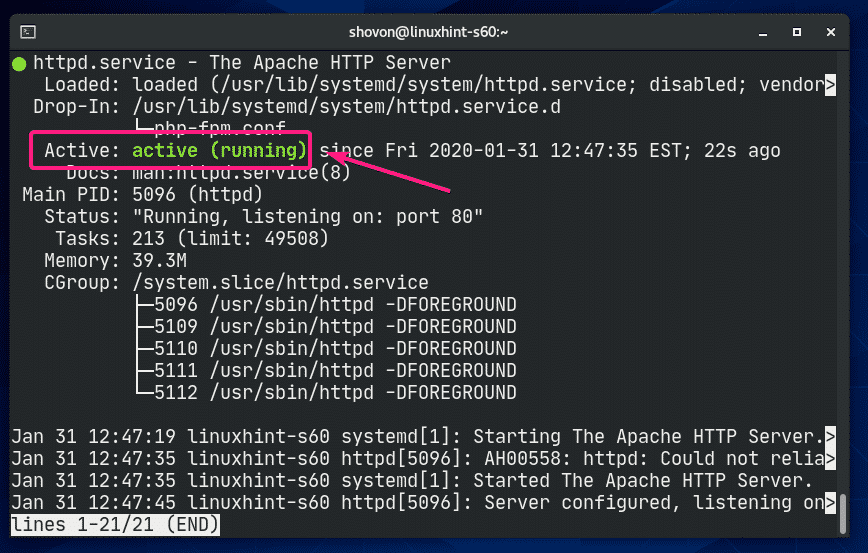
Apache httpd service won’t be running (inactive) by default on CentOS 8.

Now, start the Apache httpd service with the following command:

Now, Apache httpd service should be running (active).

Now, add Apache httpd service to the system startup with the following command:

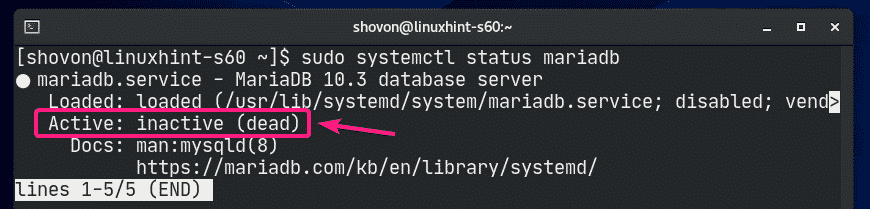
mariadb service won’t be running (inactive) by default on CentOS 8.
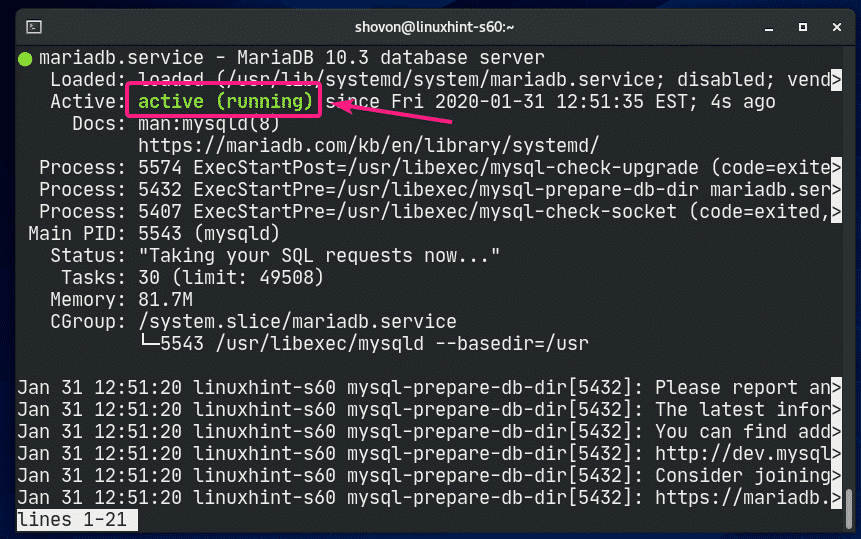
Now, start the mariadb service with the following command:

Now, mariadb service should be running (active).
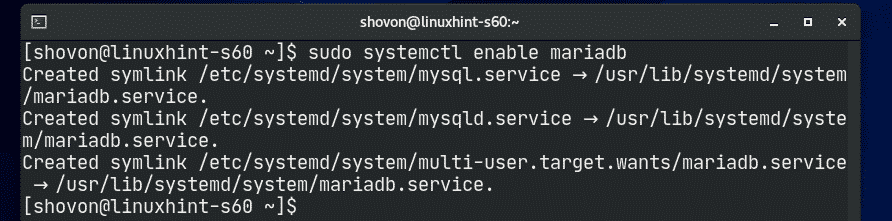
Now, add mariadb service to the system startup with the following command:
Creating a Database for WordPress:
Now, you have to create a new MariaDB database for WordPress.
First, login to the MariaDB shell with the following command:

Now, type in your password and press <Enter>. By default, no password is set. So just press <Enter> if you’re following along.

You should be logged into the MariaDB console.

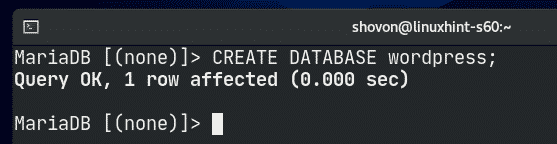
Now, create a new MariaDB database wordpress with the following SQL statement:
Now, create a new user wordpress with the password secret and grant the user wordpress all privileges (read, write, modify etc.) to the database wordpress with the following SQL statement:

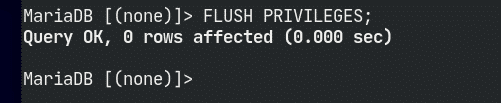
Now, for the changes to take effect, run the following SQL statement:
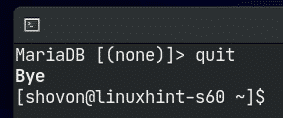
Now, exit out of the MariaDB database console as follows:
Downloading and Installing WordPress:
WordPress is not available in the official package repository of CentOS 8. So, you must download it from the official website of WordPress and install it on CentOS 8. It’s very easy.
First, navigate to the /var/www directory as follows:

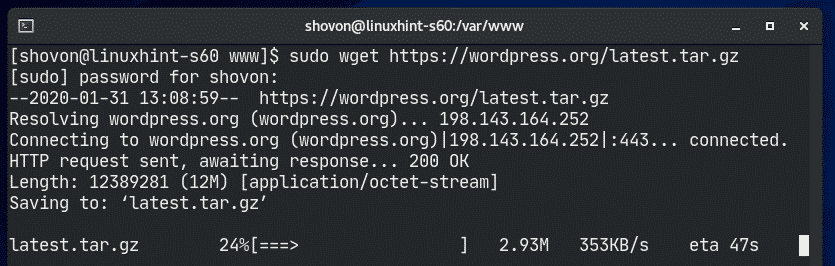
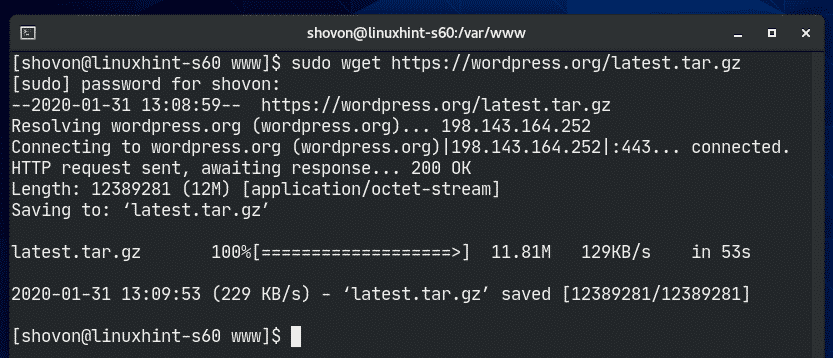
Now, download the latest WordPress archive from the official website of WordPress with the following command:

wget is downloading WordPress archive. It may take a few minutes to complete.
WordPress archive should be downloaded.
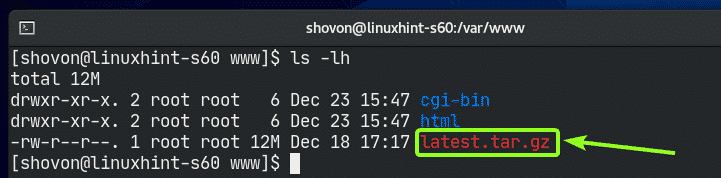
The WordPress archive file latest.tar.gz should be in the /var/www directory as you can see in the screenshot below.
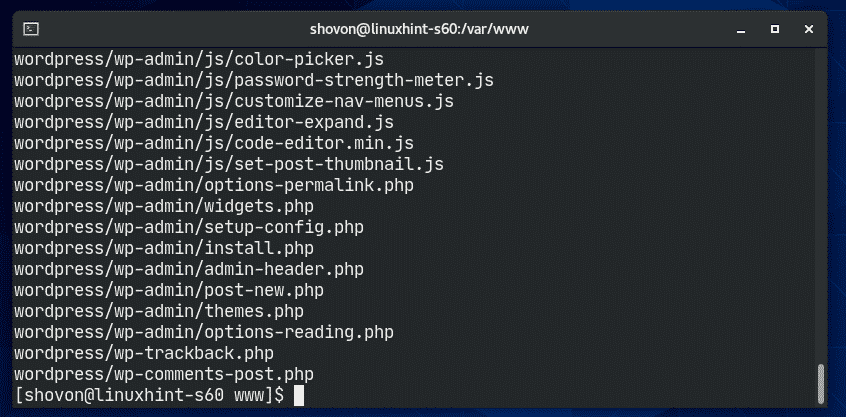
Now, extract the WordPress archive file latest.tar.gz with the following command:

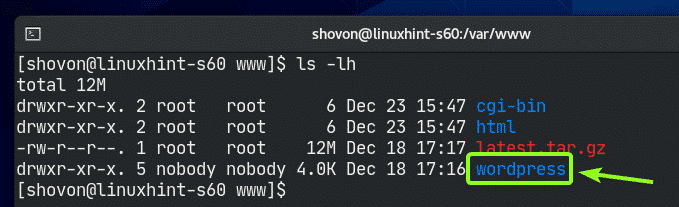
Once the WordPress archive file latest.tar.gz is extracted, a new directory wordpress/ should be created as you can see in the screenshot below.
Now, you can remove the latest.tar.gz file as follows:

Now, change the owner and group of the wordpress/ directory and its contents to apache as follows:

Now, change the permission or the wordpress/ directory and its content to 775 as follows:

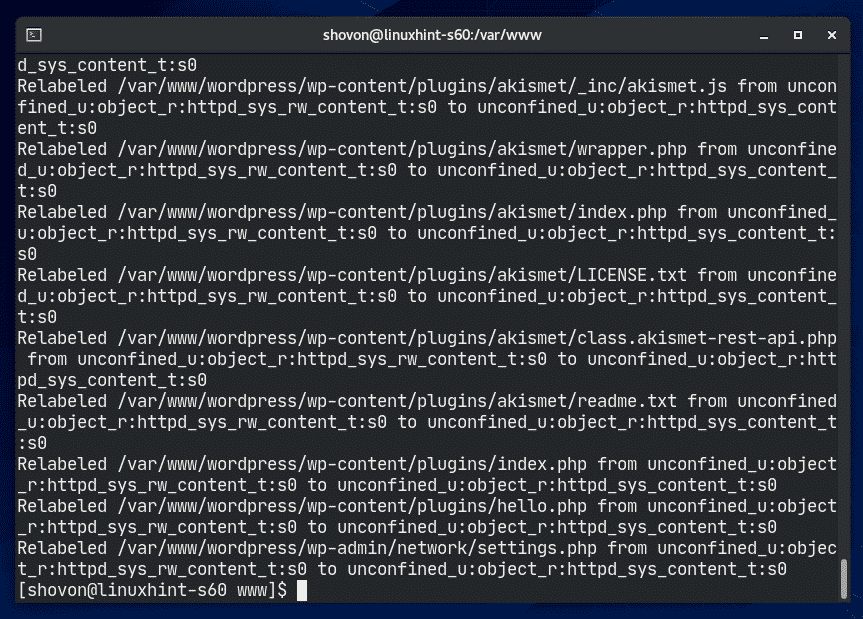
If you have SELinux enabled (which is very likely on CentOS 8/RHEL 8), run the following command to set the correct SELinux context to the /var/www/wordpress directory and its contents.
"/var/www/wordpress(/.*)?"

For the SELinux changes to take effect, run the following command:

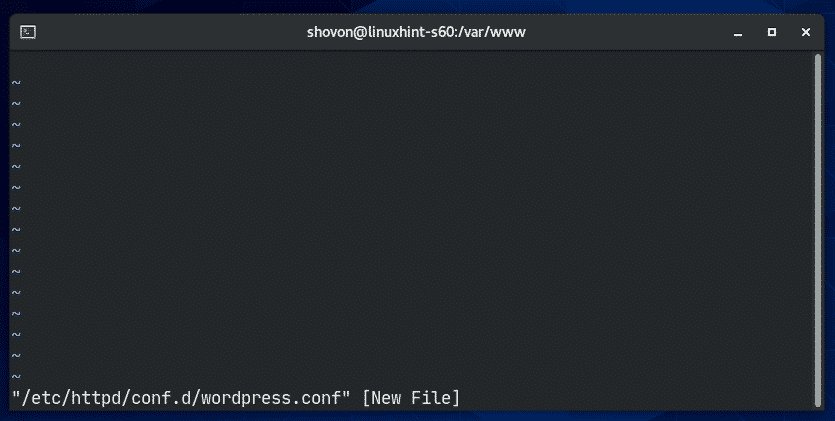
Now, create a new Apache configuration file wordpress.conf for WordPress with the following command:

Vi text editor should open. Now, press i to go to INSERT mode.
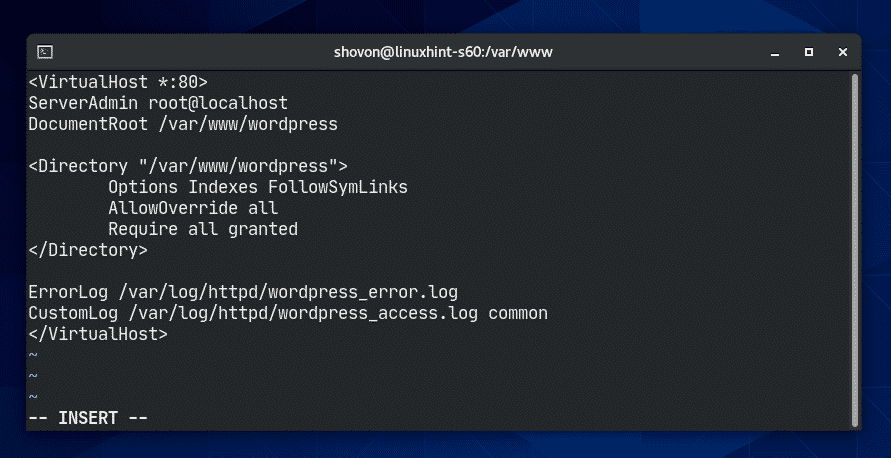
Now, type in the following lines of codes in the wordpress.conf file.
ServerAdmin root@localhost
DocumentRoot /var/www/wordpress
<Directory "/var/www/wordpress">
Options Indexes FollowSymLinks
AllowOverride all
Require all granted
</Directory>
ErrorLog /var/log/httpd/wordpress_error.log
CustomLog /var/log/httpd/wordpress_access.log common
</VirtualHost>
Finally, the wordpress.conf file should look as shown in the screenshot below.
Now, press <Esc>, type in :wq! and press <Enter> to save the file.
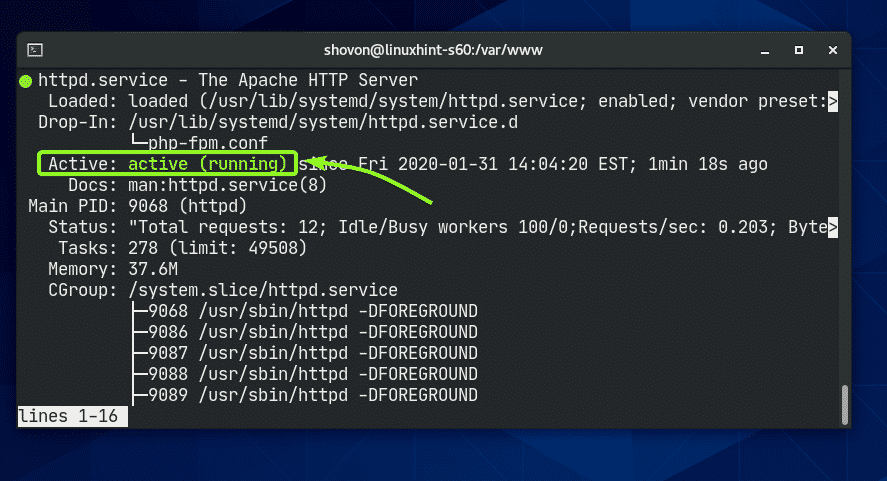
Now, restart the Apache httpd service with the following command:

Apache http service should be active without any errors as you can see in the screenshot below.
Accessing WordPress:
In order to access WordPress installed on your CentOS 8 machine, you must know the IP address or domain name of your CentOS 8 machine.
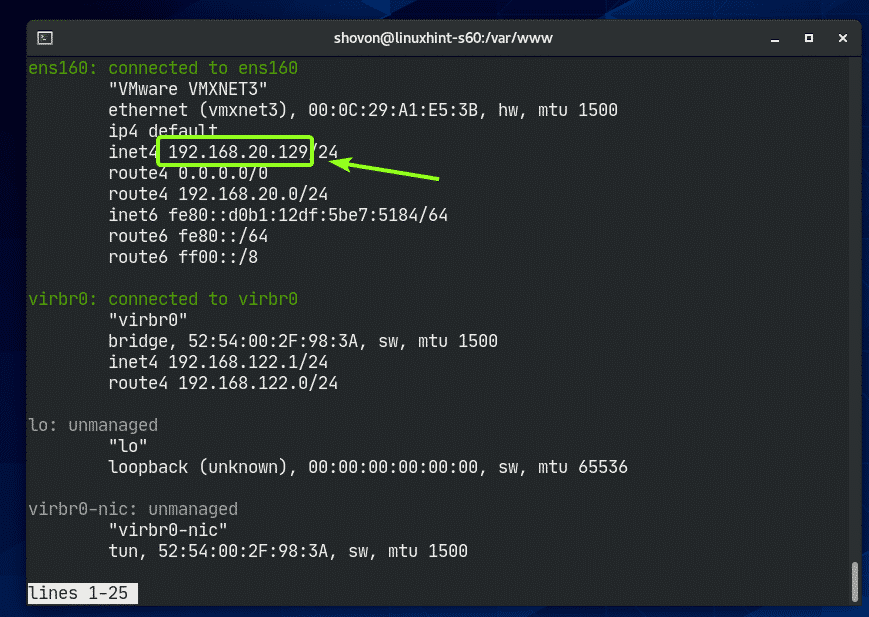
You can find the IP address of your CentOS 8 machine with the following command:
As you can see, the IP address of my CentOS 8 machine is 192.168.20.129. It will be different for you. So, make sure to replace it with yours from now on.
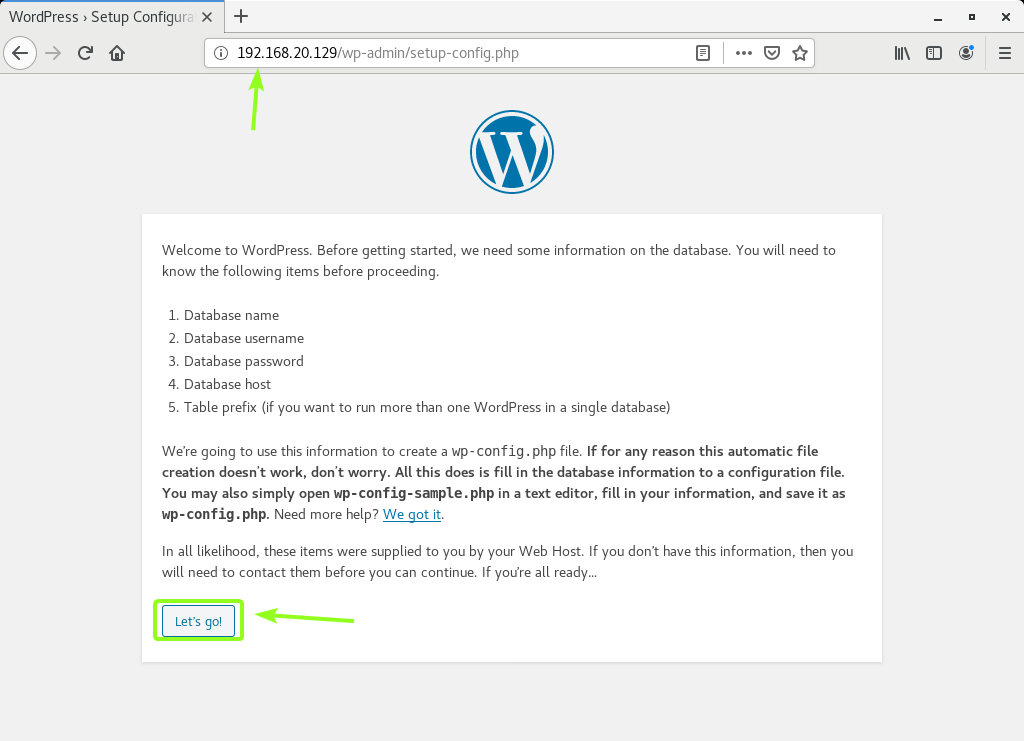
Now, open your favorite web browser and visit http://192.168.20.129. You should see the following page. Click on Let’s go.
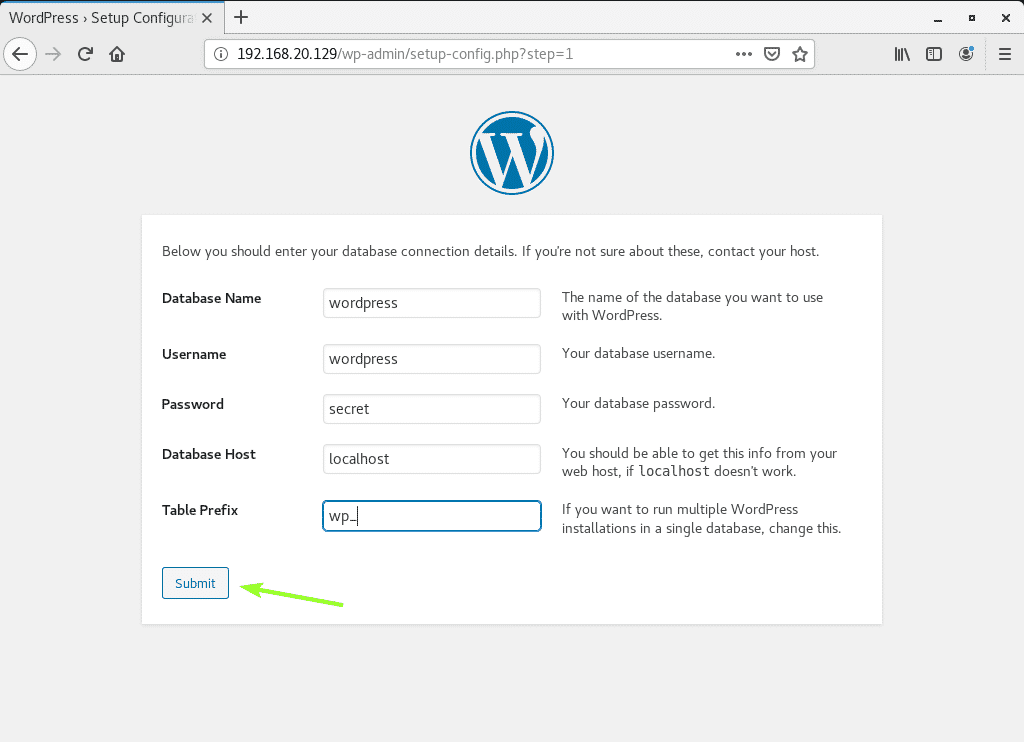
Now, type in the MariaDB database information (i.e. Database Name, Username, Password). Leave the Database Host and Table Prefix as it is if you don’t know what they are. Once you’re done, click on Submit
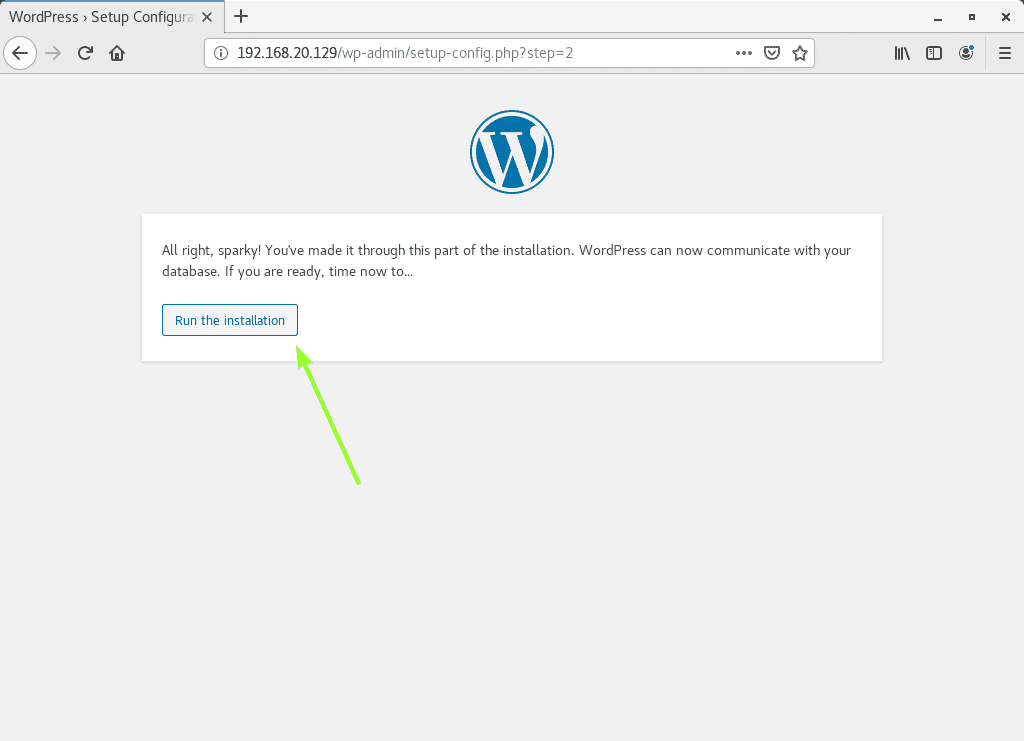
Now, click on Run the installation.
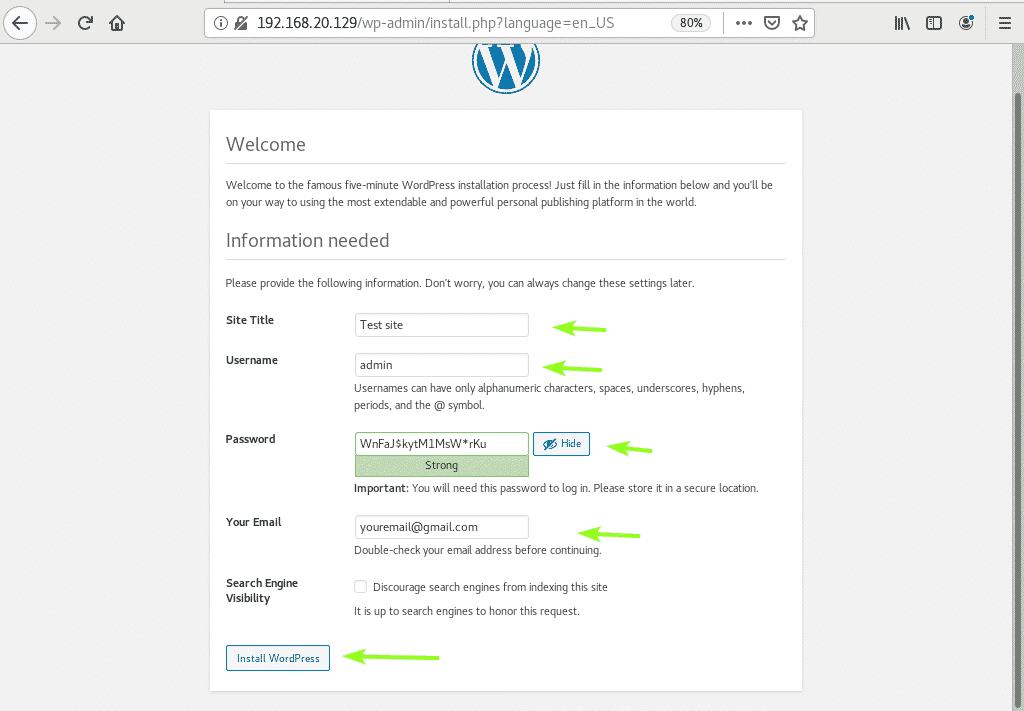
Now, type in your site details and click on Install WordPress.
Don’t forget to take a note of the Username and Password you’re setting here as you will need them very shortly.
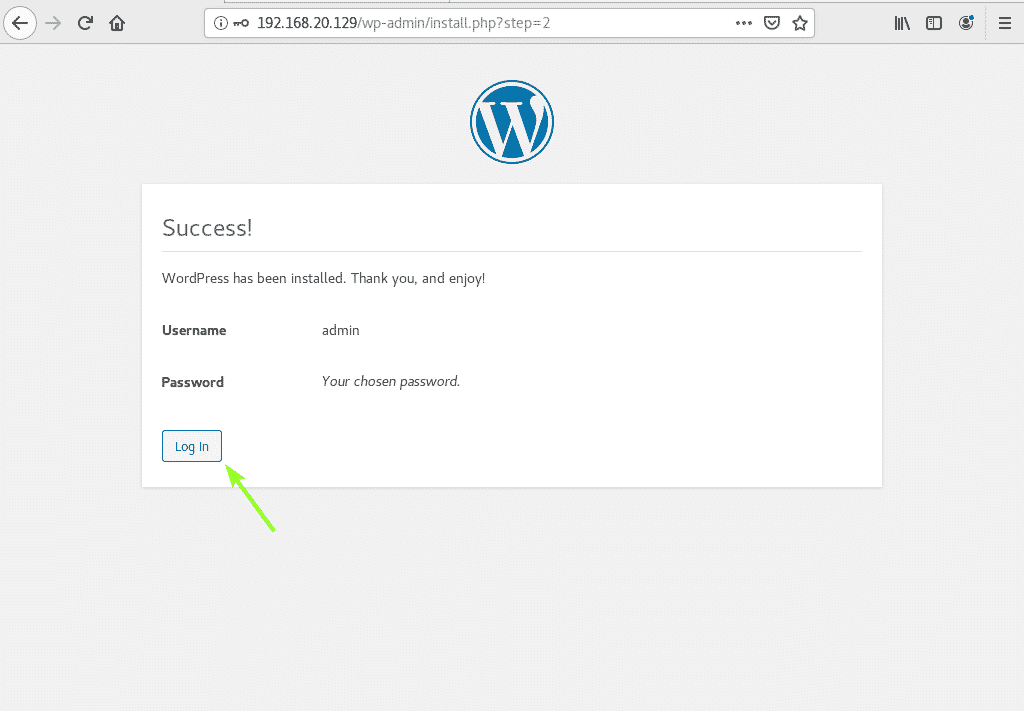
WordPress should be installed. Now, click on Log In.
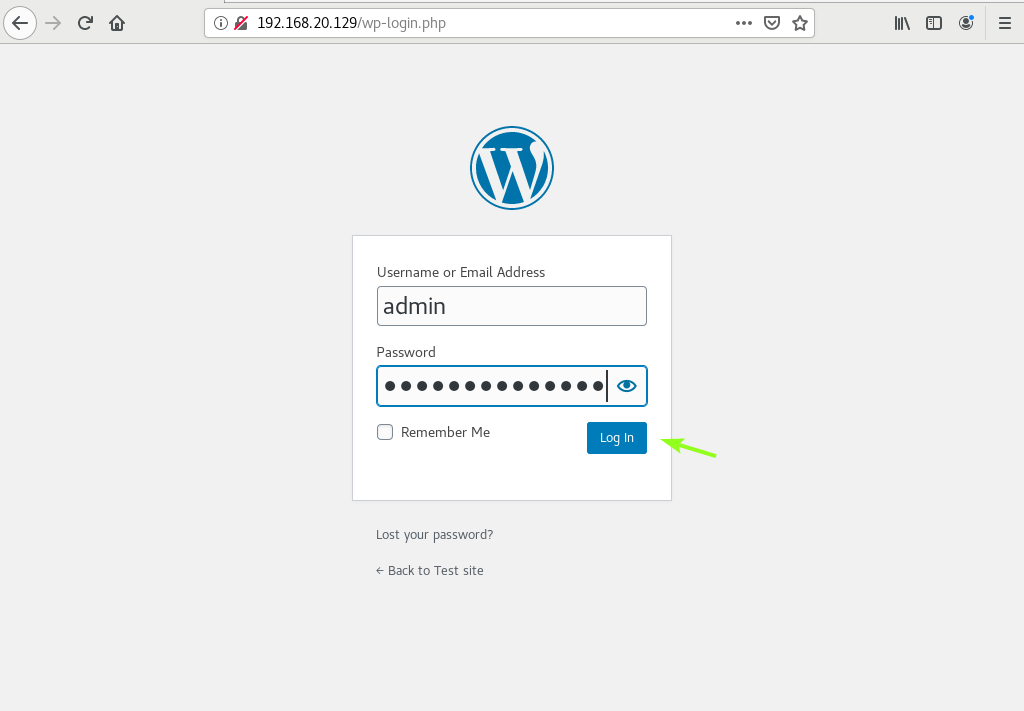
Now, type in your site Username and Password and click on Log In.
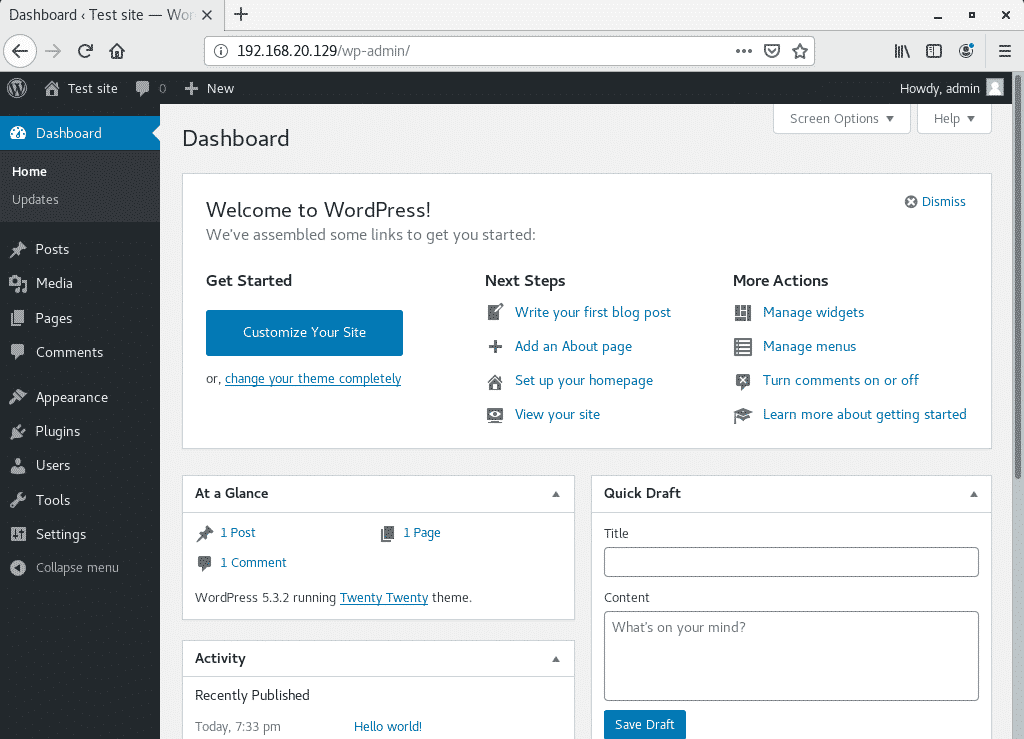
You should be logged in to the WordPress admin panel. You can manage your site from here.
So, that’s how you install WordPress on CentOS 8. Thanks for reading this article.