CentOS Delete Users

29/12/2020
Linux is, by default, designed in such a manner that it allows more than one user in a single system in a very secure manner. That’s why user accounts are important for keeping users organized and ensure privacy and security for everyone. For the professional/enterprise workspace, this is even more important. The system admin has to keep everything under control with proper user account management. Otherwise, there would be clashes and privacy/security issues that nobody wants to deal with.

CentOS is a great example of the professional workspace. It offers easy access to all the features of the RHEL (Red Hat Enterprise Linux). It’s possible to perform almost any action with the user accounts, for example, adding/deleting a user account(s), managing the permissions and others etc.

In today’s tutorial, we’ll start by deleting a demo user on CentOS.

Deleting a user account

At first, I’ll be creating a new user for deletion. This is not necessary to perform in the real life. Instead, you have to focus on the user’s data and permissions before deleting the account.

Let’s add a new user into the system. For this purpose, we need the root privilege.

su

Now, it’s time to create a new user!

adduser <username>

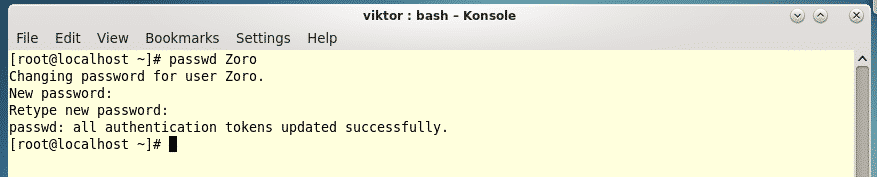
Don’t forget to add a password for the newly created account!

passwd <username>

Now, it’s time to delete the user! At first, make sure that the user is out of any group in your system –

usermod -G “” <username>

userdel <username>

Note – Depending on the situation in the real world, the following command should be used very carefully. This command will delete the user’s all files.

userdel -r <username>

Make sure that you also remove the user from the privilege list. Run the following command –

visudo

Find out the following line –

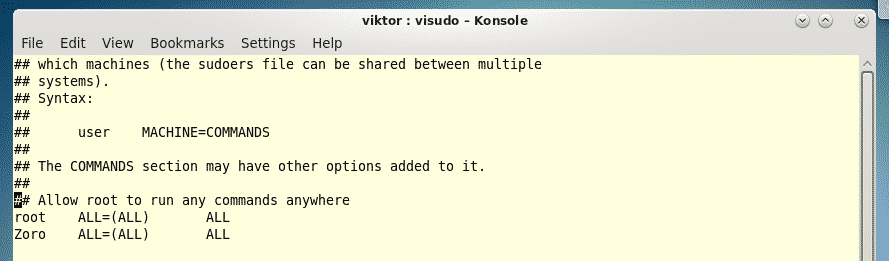
Remove the entry of the user –

Voila! The user account is completely gone from your system!

ONET IDC thành lập vào năm 2012, là công ty chuyên nghiệp tại Việt Nam trong lĩnh vực cung cấp dịch vụ Hosting, VPS, máy chủ vật lý, dịch vụ Firewall Anti DDoS, SSL… Với 10 năm xây dựng và phát triển, ứng dụng nhiều công nghệ hiện đại, ONET IDC đã giúp hàng ngàn khách hàng tin tưởng lựa chọn, mang lại sự ổn định tuyệt đối cho website của khách hàng để thúc đẩy việc kinh doanh đạt được hiệu quả và thành công.
Bài viết liên quan

Performance Testing [Phần 4] Hướng dẫn sử dụng Gatling Test

Tổng quan Tại bài trước, mình đã hướng dẫn các bạn quay một kịch bản gatling script đơn giản....
30/12/2020

Hướng dẫn cài đặt Zabbix trên RHEL/CentOS

Bước 1 – Cài đặt Apache Web Server, PHP và MySQL 1. Giao diện web của Zabbix Server yêu cầu hoạt động...
25/12/2020

CLI #2: Giới thiệu lệnh sysbench để benchmark hệ thống

Hôm nay Onet sẽ giới thiệu đến các bạn một công cụ dùng để benchmark hệ thống Linux (CPU, File...
30/12/2020
Bài Viết

Bài Viết Mới Cập Nhật

SỰ KHÁC BIỆT GIỮA RESIDENTIAL PROXY VÀ PROXY DATACENTER
17/02/2024

Mua Proxy v6 US Private chạy PRE, Face, Insta, Gmail
07/01/2024

Mua shadowsocks và hướng dẫn sữ dụng trên window
05/01/2024

Tại sao Proxy Socks lại được ưa chuộng hơn Proxy HTTP?
04/01/2024

Mua thuê proxy v4 nuôi zalo chất lượng cao, kinh nghiệm tránh quét tài khoản zalo
02/01/2024