In this tutorial, we will learn how to connect MariaDB with PyMySQL on Ubuntu 18.04 server.
Requirements
- A server running Ubuntu 18.04.
- A root password is set up on your server
Getting Started
Before starting, it is recommended to update your repository and packages with the latest version. You can do it with the following command:
apt-get upgrade -y
Once the server is updated, restart it to apply all the changes.
Install Required Packages
First, you will need to install MariaDB server and some required packages in order to install PyMySQL. You can install all of them with the following command:
libffi-dev libssl-dev libxslt-dev python-dev python-virtualenv -y
Once all the packages are installed, start MariaDB service and enable it to start on boot time with the following command:
Create Database
Next, you will need to create a database, database user and table on your server.
First, log in to MariaDB shell with the following command:
Enter your root password when prompt then create a database and user with the following command:
Next, flush the database with the following command:
Next, change the database to testdb and create table with the folowing information:
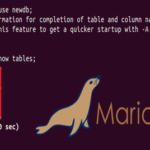
Next, exit from the MariaDB shell with the following command:
Setup Python Virtual Environment
Next, you will need to setup the Python virtual environment on your system.
To create a virtual environment, run the following command:
Output:
Next, activate the virtual environment with the following command:
Install and Test PyMySQL
Next, install PyMySQL library under virtual environment with the following command:
Output:
Downloading https://files.pythonhosted.org/packages/ed/39/15045ae46f2a123019aa968dfcba0396
c161c20f855f11dea6796bcaae95/PyMySQL–0.9.3–py2.py3–none–any.whl (47kB)
|████████████████████████████████| 51kB 644kB/s
Installing collected packages: pymysql
Successfully installed pymysql–0.9.3
Next, install Python MySQL connector with the following command:
Output:
Downloading https://files.pythonhosted.org/packages/80/58/6a7943792a9b0c627c569ebcead
62bfd4bfc5fdb99241594f198e82f42fb/mysql_connector_python–8.0.16–cp27–cp27mu–
manylinux1_x86_64.whl (13.1MB)|████████████████████████████████| 13.1MB 1.8MB/s
Collecting protobuf>=3.0.0 (from mysql–connector–python)
Downloading https://files.pythonhosted.org/packages/b2/a8/ad407cd2a56a052d92f602e164
a9e16bede22079252af0db3838f375b6a8/protobuf–3.8.0–cp27–cp27mu–manylinux1_x86_64.whl
(1.2MB)|████████████████████████████████| 1.2MB 1.6MB/s
Collecting six>=1.9 (from protobuf>=3.0.0->mysql–connector–python)
Downloading https://files.pythonhosted.org/packages/73/fb/00a976f728d0d1fecfe898238
ce23f502a721c0ac0ecfedb80e0d88c64e9/six–1.12.0–py2.py3–none–any.whl
Requirement already satisfied: setuptools in ./sqlenv/lib/python2.7/site–packages
(from protobuf>=3.0.0->mysql–connector–python) (41.0.1)
Installing collected packages: six, protobuf, mysql–connector–python
Successfully installed mysql–connector–python–8.0.16 protobuf–3.8.0 six–1.12.0
Next, create a sample Python code to connect MySQL database.
Add the following lines:
# Connect to the database
connection = pymysql.connect(host=‘localhost’,
user=‘testuser’,
password=‘password’,
db=‘testdb’,
charset=‘utf8mb4’,
cursorclass=pymysql.cursors.DictCursor)
try:
with connection.cursor() as cursor:
# Create a new record
sql = "INSERT INTO `users` (`email`, `password`) VALUES (%s, %s)"
cursor.execute(sql, (‘[email protected]’, ‘very-secret’))
# connection is not autocommit by default. So you must commit to save
# your changes.
connection.commit()
with connection.cursor() as cursor:
# Read a single record
sql = "SELECT `id`, `password` FROM `users` WHERE `email`=%s"
cursor.execute(sql, (‘[email protected]’,))
result = cursor.fetchone()
print(result)
finally:
connection.close()
Save and close the file. Then, run the Python code with the following command:
Once the connection established successfully, you should see the following output:
Congratulations! you have successfully install PyMySQL on your server and connect it to the MariaDB database.