1. Control Plane: It holds a registry of the details of all the running services and different policies that handle the traffic. The control plane must be scalable to handle thousands of instances and update the data plane. 2. Data Plane: It is mainly responsible for the transmission of data between the services. It must be high performance and integrated with the control plane.
Prerequisite
- A new virtual instance server
- Consul installed on the server
- If in case you don’t have Consul installed then learnhere
Creating a Service Definition
You can create a service using any text editor. Here, we are using nano text editor. You can create a web service configuration file using the following command. nano /tmp/consul_services/web.json A web service configuration will look something similar to this:
"services":[
{
"name":"serviceA",
"port":5000,
"check":{
"args":[
"curl",
"localhost:5000"
],
"interval":"3s"
}
},
{
"name":"serviceB",
"port":8000,
"check":{
"args":[
"curl",
"localhost:8000"
],
"interval":"3s"
}
}
]
}
Consul Connect
Consul Connect is a new feature in consul which gives you more secure transmission of data to service to service with the help of TLS encryption and identity-based authorization. It is easy to use and user-friendly. You can easily enable it with just one configuration option. And for the existing applications, you need to add just a single line to the service configuration.
There are many new functionalities available of consul with connect. Let’s get started to discuss some of them:
- Native Integration: You can natively integrate sensitive applications with consul connect APIs to create connections without proxy.
- Certificate Management: Consul generates and distributes certificates using a certificate authority provider.
- Encrypted Traffic: Consul connect uses TLS encryption to secure the data in transit. So you can deploy the services in low trust environments also.
- Proxy Sidecars: You can use proxy sidecars to create incoming and outgoing TLS connections automatically.
Proxy Sidecars
We know that we can use proxy sidecars to create incoming and outgoing connections. Here we will see an example of using proxy sidecars. Adding a single line to service configuration will enable that service to receive connect based connection. The line should start with connect like this:
"service": {
"name": "mysql",
"port": 3306,
"connect": { "proxy": {} }
}
}
You can see in the above configuration by adding just one line in the configuration it will automatically design the consul to start and manage proxy process for this service. You can add more line of configuration in the connect block to communicate with other services. For example, if this service wants to communicate to db service over connect then the configuration will be like this:
"name": "mysql",
"port": 3306,
"connect": {
"proxy": {
"config": {
"upstreams": [{
"destination_name": "db",
"local_bind_port": 9191
}]
}
}
}
}
}
All the transmission between the mysql service and db service will be fully secured and encrypted. You can also see that by adding connect into the configuration there is no change in the previous mysql service. So, in this way, any existing application also enables the connect based connection by adding just one line in the configuration.
Web Interface
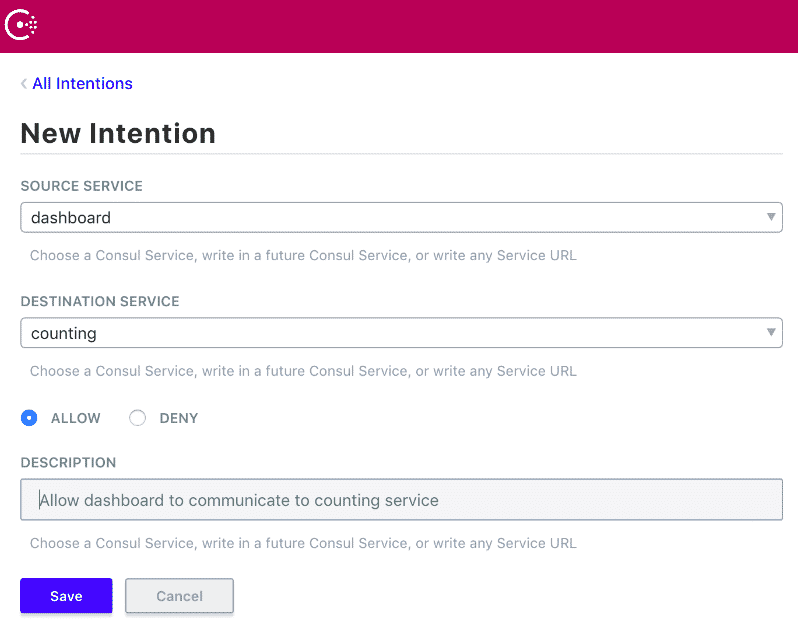
Open up your favorite web browser and visit http://YourDomain.com:8500 to access the consul dashboard. You can manage all your services, nodes and intentions from there. You can control the access between services from the Intention tab from the dashboard.
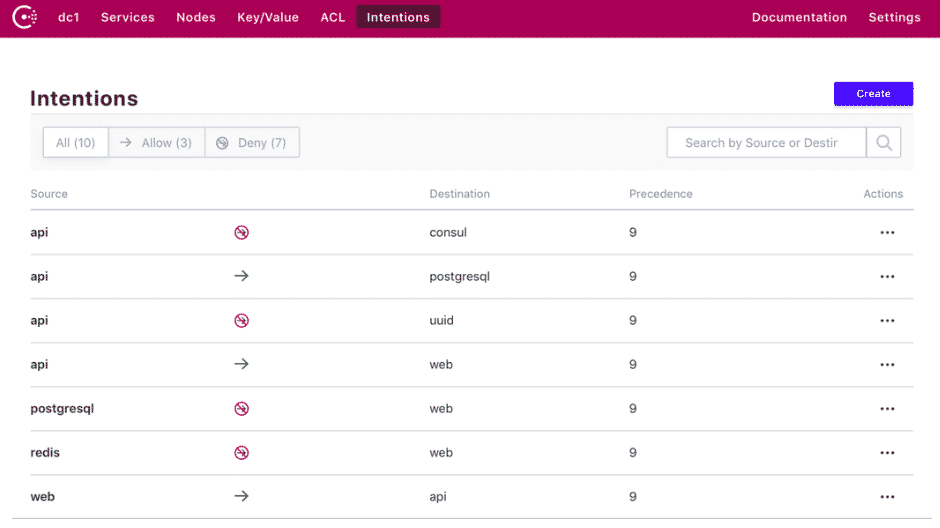 The intention is a policy that specifies the rule to communicate between services. You can also create new intentions to allow or deny access between any source service and destination service.
You can see a list of all the services under service tab from the dashboard.

Conclusion
In this guide, you have learned to install Consul on your server and using consul service mesh for communicating between services.