In this lesson on Logrus package in Golang, we will study various examples on how effective Logging can be done in Go and see how important logs are in Go programming language. We will get started now.
Starting with Go
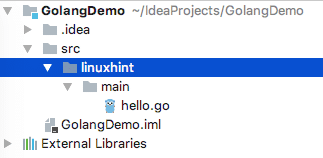
Here is the directory structure which I made for my Hello World program:
Here is the program we created:
import "fmt"
func main() {
fmt.Printf("Hello, world.n")
}
We can run the above program with following command:
Once we run this command, here is the output you will see:
Now that looks good. Let’s move to our main agenda.
Logrus Package in Golang
To start using Logrus package in the Go program, we must get it. Run the following command:
When we start using this package in IntelliJ, we see this error which we can resolve in one click:
Once you get the package, we can start to use it. Let’s start with a simple program.
Basic Logging with Logrus
We will start with very basic INFO level logging example. Logging can be done with String messages and meta-data in form of key-value pairs which appear like the same.
import (
log "github.com/Sirupsen/logrus"
)
func main() {
log.WithFields(log.Fields{
"website": "linuxhint.com",
"awesome": 100,
"help": 200,
}).Info("Golang pro")
}
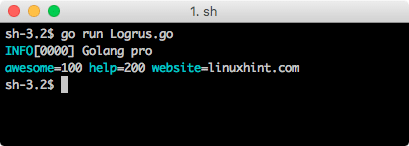
When we run this program, we can see the following output:
Now that is both useful and colorful!
Various Logging Levels
Now, we will try another example which will show the use of various Logging levels available in Logrus and in general. They are:
- Info
- Warning
- Fatal
- Debug
- Panic
Let’s try to build a program and see how these log levels differ when they appear in our program:
import (
log "github.com/Sirupsen/logrus"
)
func main() {
log.WithFields(log.Fields{
"website": "linuxhint.com",
"awesome": 100,
}).Info("Golang pro INFO message")
log.WithFields(log.Fields{
"website": "linuxhint.com",
"awesome": 100,
}).Warn("Golang pro WARN message")
log.WithFields(log.Fields{
"website": "linuxhint.com",
"awesome": 100,
}).Fatal("Golang pro FATAL message")
log.WithFields(log.Fields{
"website": "linuxhint.com",
"awesome": 100,
}).Panic("Golang pro PANIC message")
log.WithFields(log.Fields{
"website": "linuxhint.com",
"awesome": 100,
}).Debug("Golang pro DEBUG message")
}
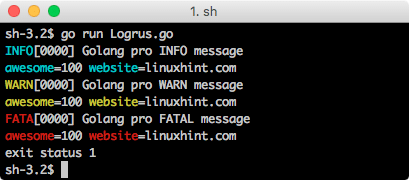
When we run this program, we will see the following output:
Noticed something? The log statements after the Fatal statement doesn’t even appear in our output. This is because as soon as a Fatal error is received, program execution stops in Golang.
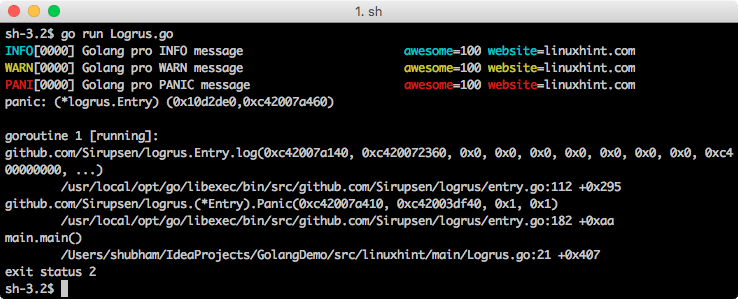
Let’s modify the order of these statements and check if some changes in output are also observed:
This time, even Panic Log level reacted in the same manner but output was very different and detailed.
With Panic log level, you make sure that enough information about the host machine also printed in the output in the console so that the work is debuggable.
Simpler way to make Logs
In above calls, Logs were pretty detailed and with metadata as well. There is an easier way to log your messages. Let’s try this now:
import (
log "github.com/Sirupsen/logrus"
)
func main() {
log.Debug("Debugging data here.")
log.Info("Messages for common info")
log.Warn("You should look at this warning!")
log.Error("Something failed but program will continue.")
// Calls os.Exit(1) after logging
log.Fatal("I am leaving.")
// Calls panic() after logging
log.Panic("I won’t be printed :(")
}
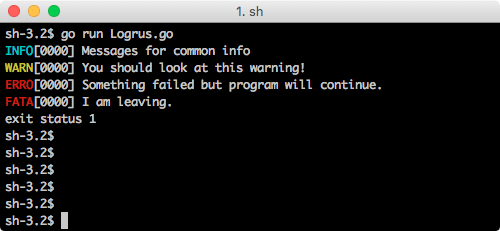
Here is the output for the program:
The behavior for logging was the same but this time, they were easy to make in just one line.
Conclusion
In this post, we studied simple but useful examples on how we can log important messages with different severity and verbosity in our applications using the Logrus package with Golang.

