Downloading CentOS 8 ISO Installation Image
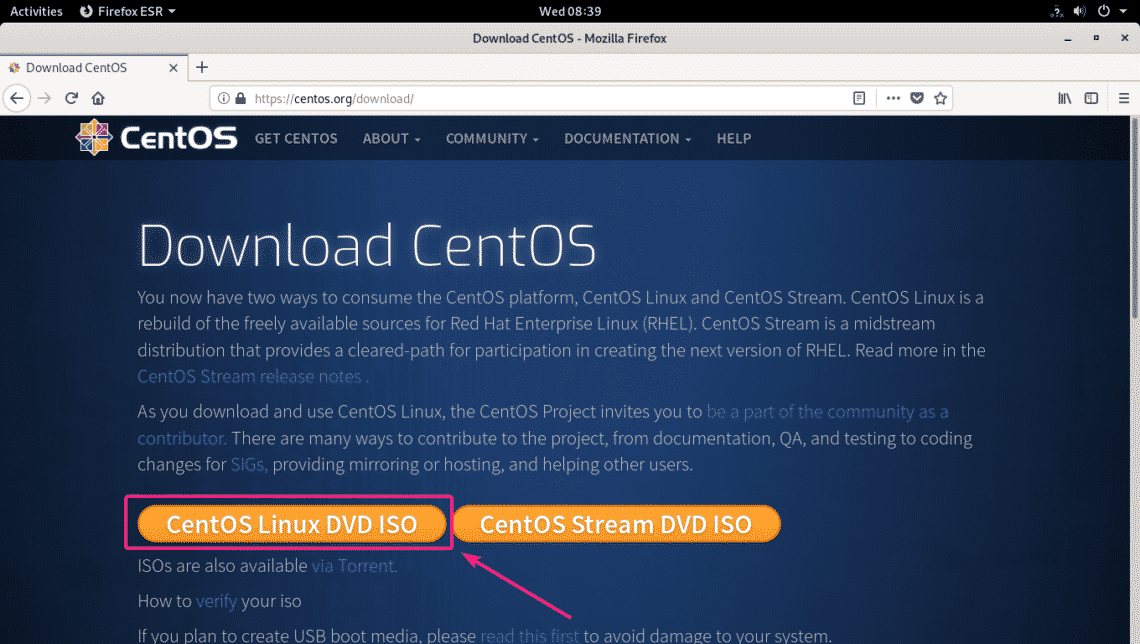
First, visit the official website of CentOS from a web browser. Once the page loads, click on CentOS Linux DVD ISO button as marked in the screenshot below.
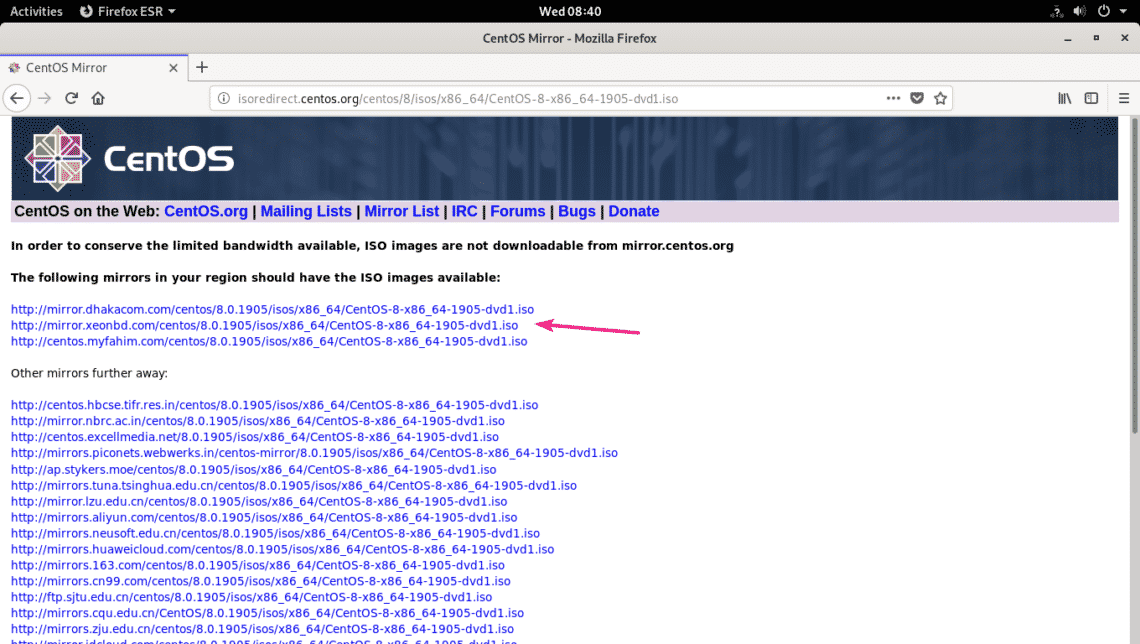
Now, click on the mirror link that is geographically closer to you.
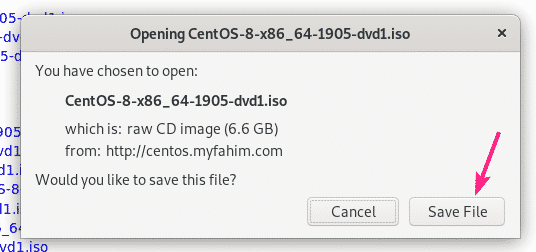
Now, click on Save File.
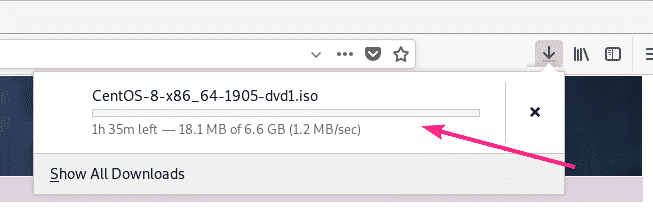
Your browser should start downloading the CentOS 8 ISO installation image. It may take a while for the download to complete.
Moving the CentOS 8 ISO Image to the KVM Storage Pool:
Once the CentOS 8 ISO image is downloaded, you should move the ISO image to your KVM storage pool where you usually keep all your ISO files. In my case, the storage pool is in the path /kvm/iso/.
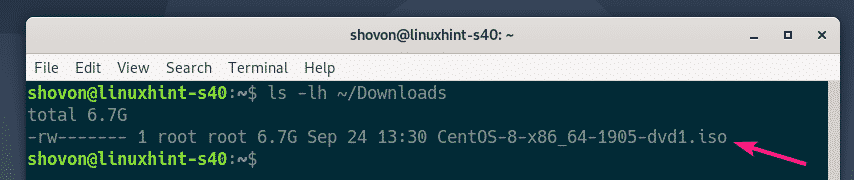
As you can see, the CentOS 8 ISO image is in the ~/Downloads directory.
Now, move the CentOS 8 ISO image to the KVM ISO storage pool (/kvm/iso in my case) as follows:

As you can see, the CentOS 8 ISO image is moved to the KVM ISO storage pool.

Creating a KVM Virtual Machine (VM) using Virtual Machine Manager:
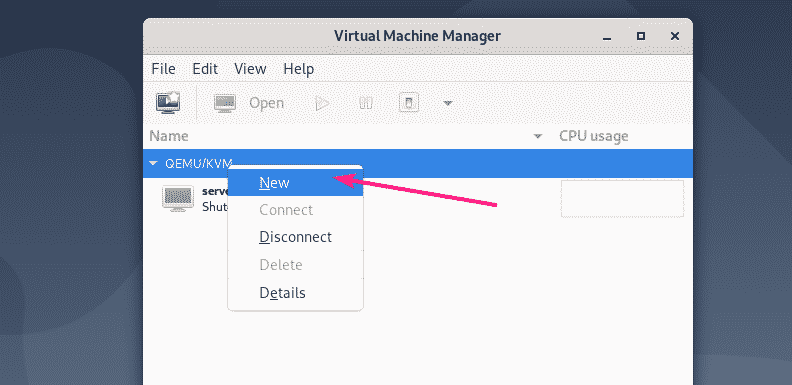
Now, open Virtual Machine Manager. Then, right click (mouse) on QEMU/KVM connection and click on New.
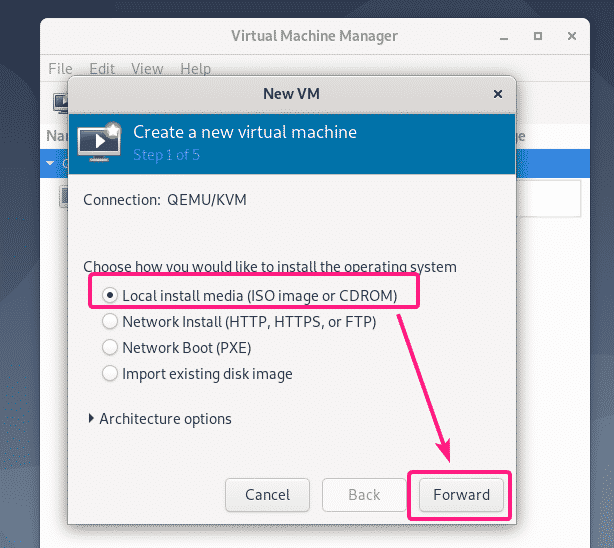
Now, select Local install media (ISO image or CDROM) and click on Forward.
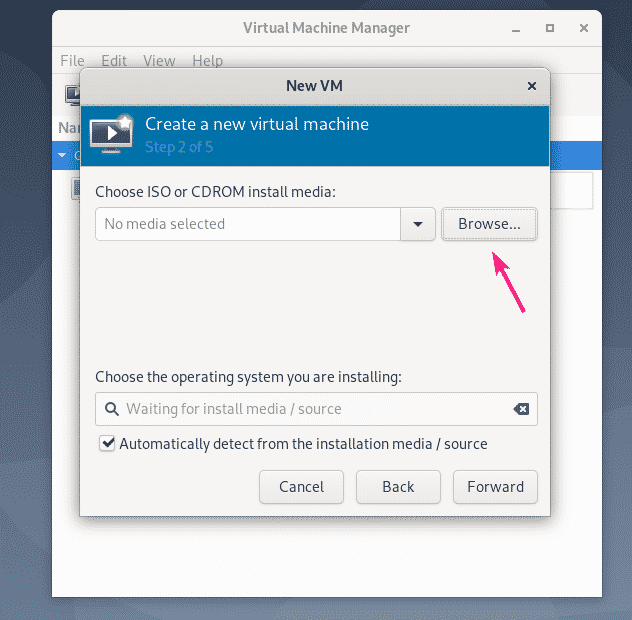
Now, click on Browse…
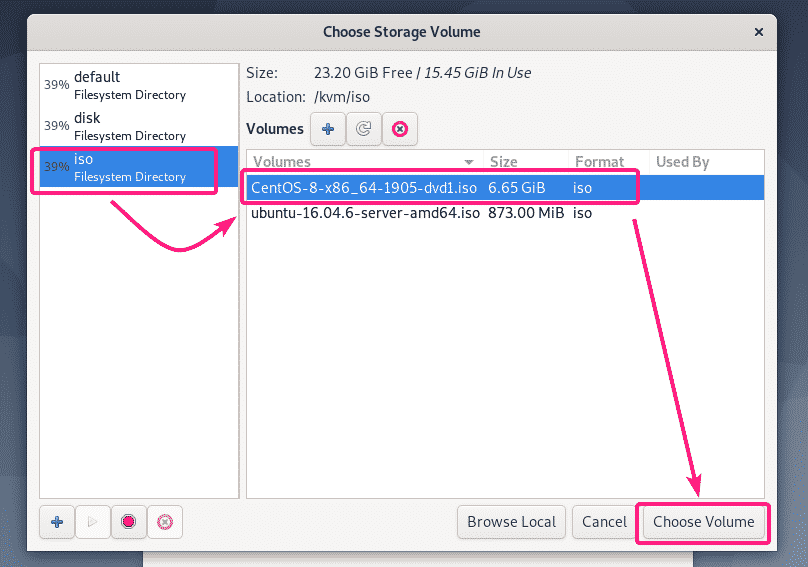
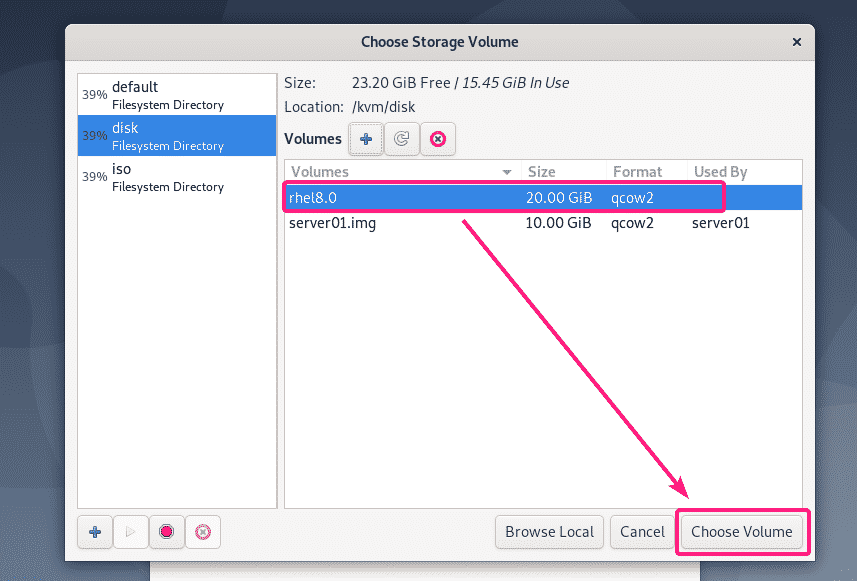
Now, select the CentOS 8 ISO image from the ISO storage pool and click on Choose Volume.
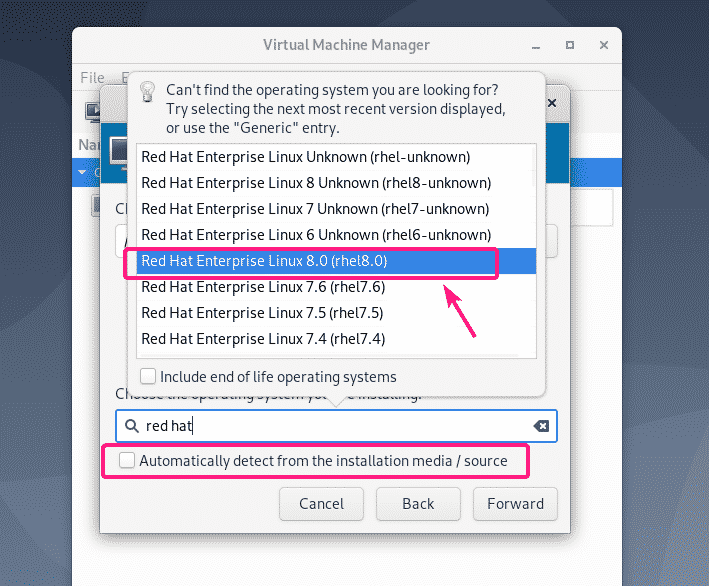
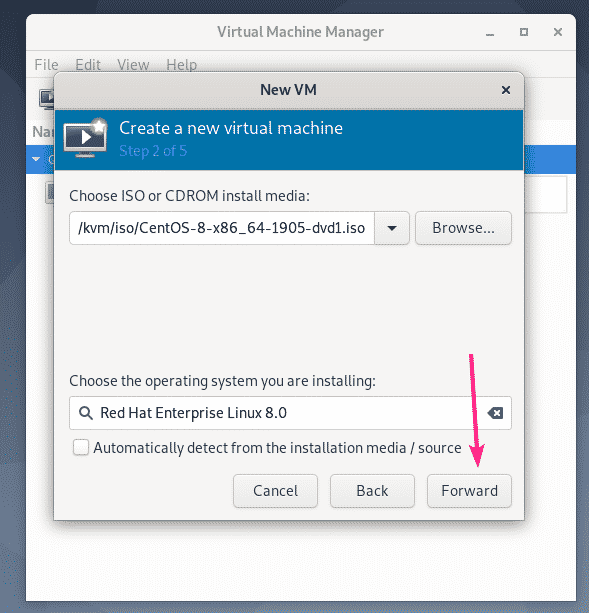
Now, uncheck Automatically detect from the installation media / source, type in red hat in the search box and select Red Hat Enterprise Linux 8.0 (rhel8.0) from the list.
Then, click on Forward.
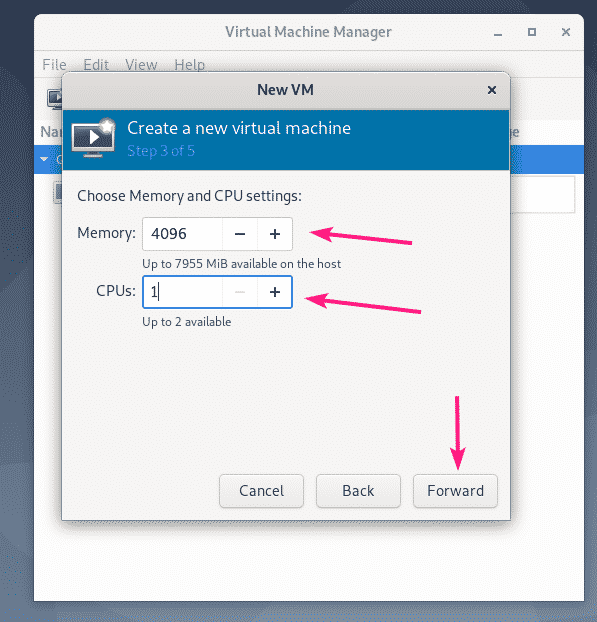
Now, type in the amount of memory you want this VM to have and the number of CPUs to allocate to the VM.
For CentOS 8 headless Server, 1 GB or 1024 MB is more than enough.
For CentOS 8 Server with GUI, you should at least allocate 3-4 GB or 3072-4096 MB of memory.
Once you’re done, click on Forward.
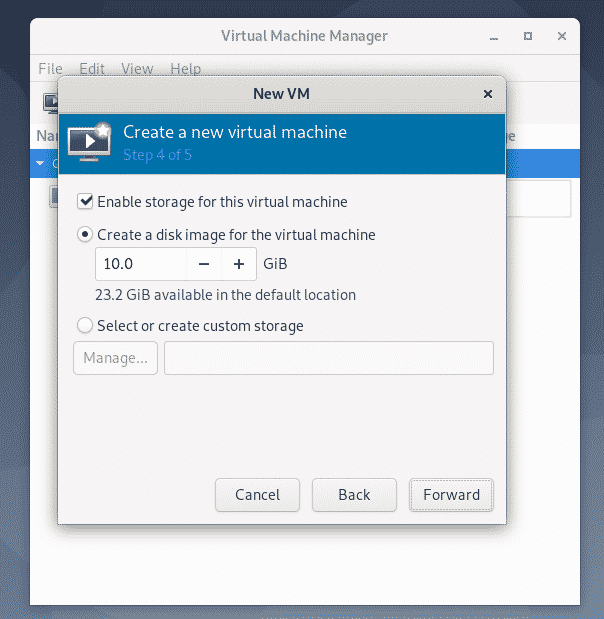
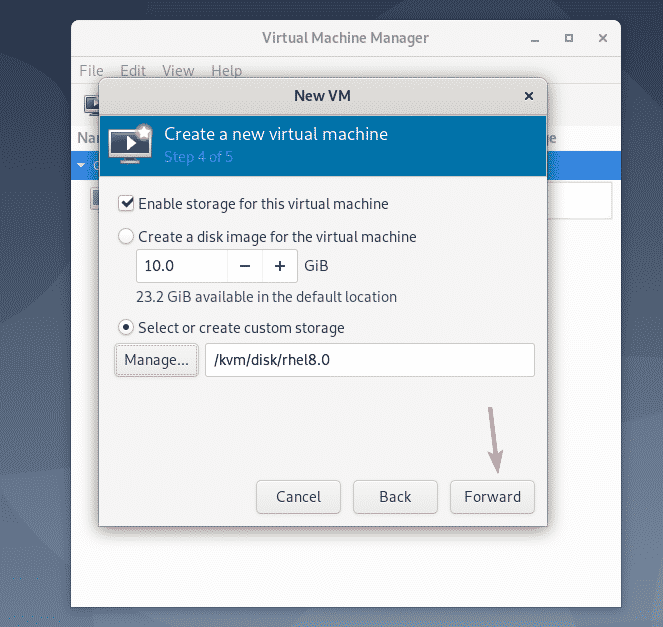
Now, you have to create a virtual hard disk for the VM.
The default storage pool where the virtual hard disk image will be saved is /var/lib/libvirt/images.
If you want to use the default storage pool, then select Create a disk image for the virtual machine and type in the virtual hard disk size in GB and click on Forward.
If you want to save the virtual hard disk image in a different storage pool, then select Select or create custom storage. Then, click on Manage…
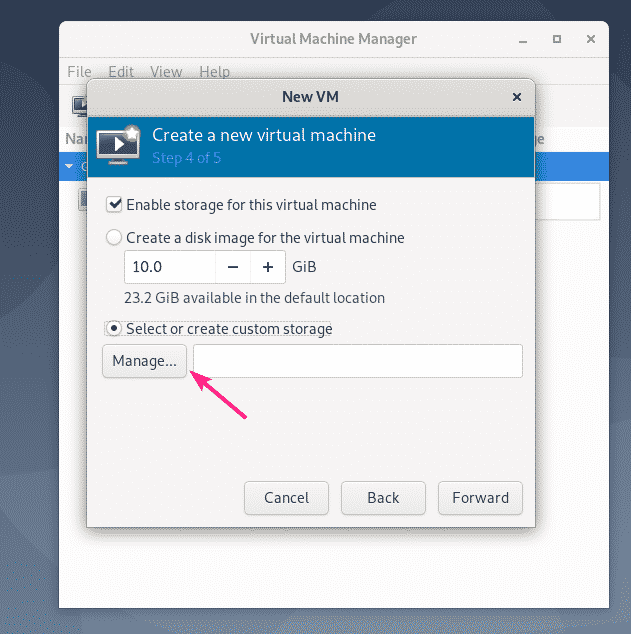
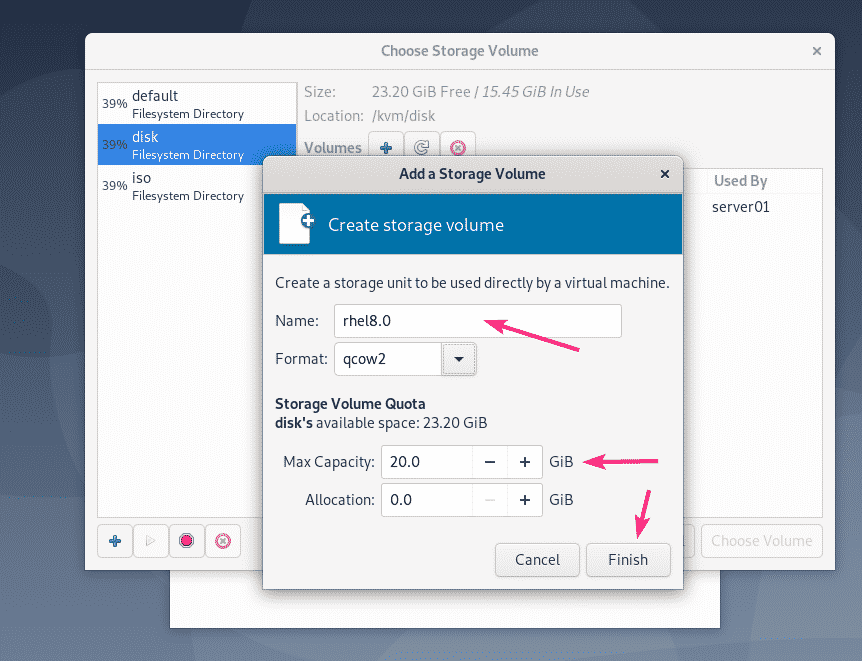
Now, select your storage pool and click on the + button as marked in the screenshot below.

Now, type in a Name of the virtual hard disk file. Also, type in the Max Capacity in GB.
For CentOS 8 headless Server and Server with GUI, 20 GB is enough for most purposes.
Once you’re done, click on Finish.
The virtual hard disk image should be created. Now, select the virtual hard disk image and click on Choose Volume.
Then, click on Forward.
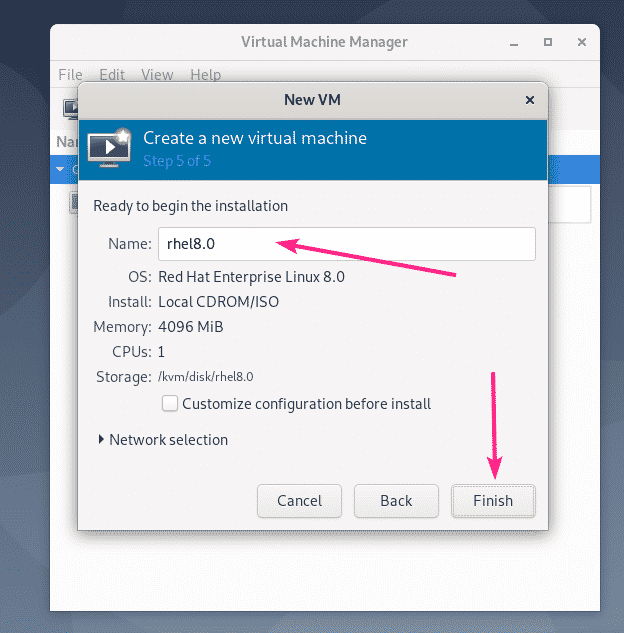
Now, type in a name for the VM and click on Finish.
A new VM should be created.
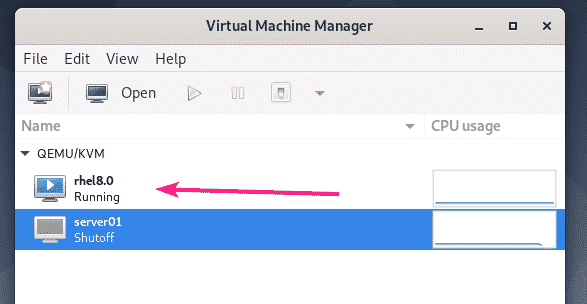
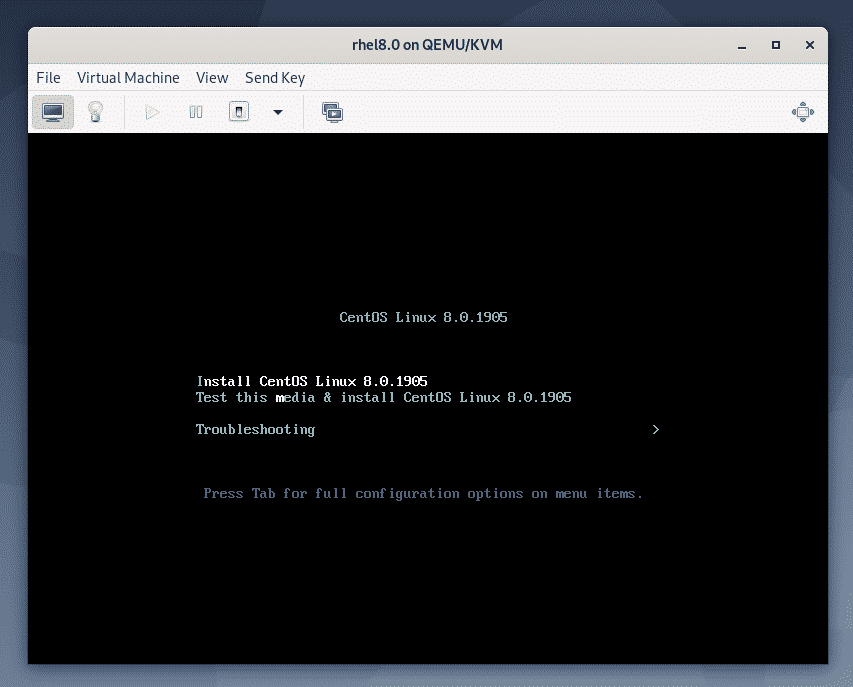
The VM should automatically start and boot into the CentOS 8 ISO installation image as you can see in the screenshot below.
Installing CentOS 8 on KVM/QEMU VM:
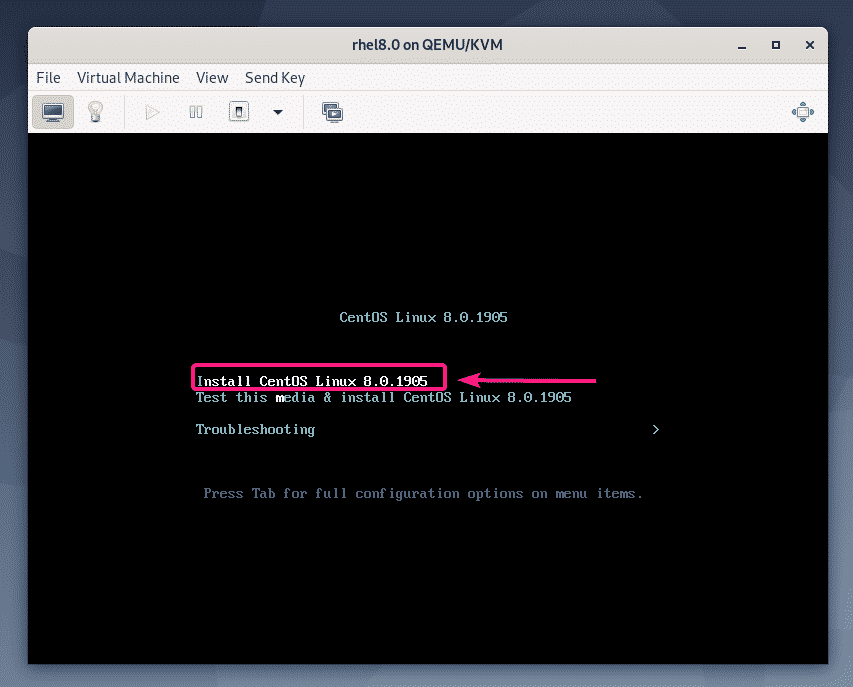
Now, select Install CentOS Linux 8.0.1905 from the list and press <Enter>.
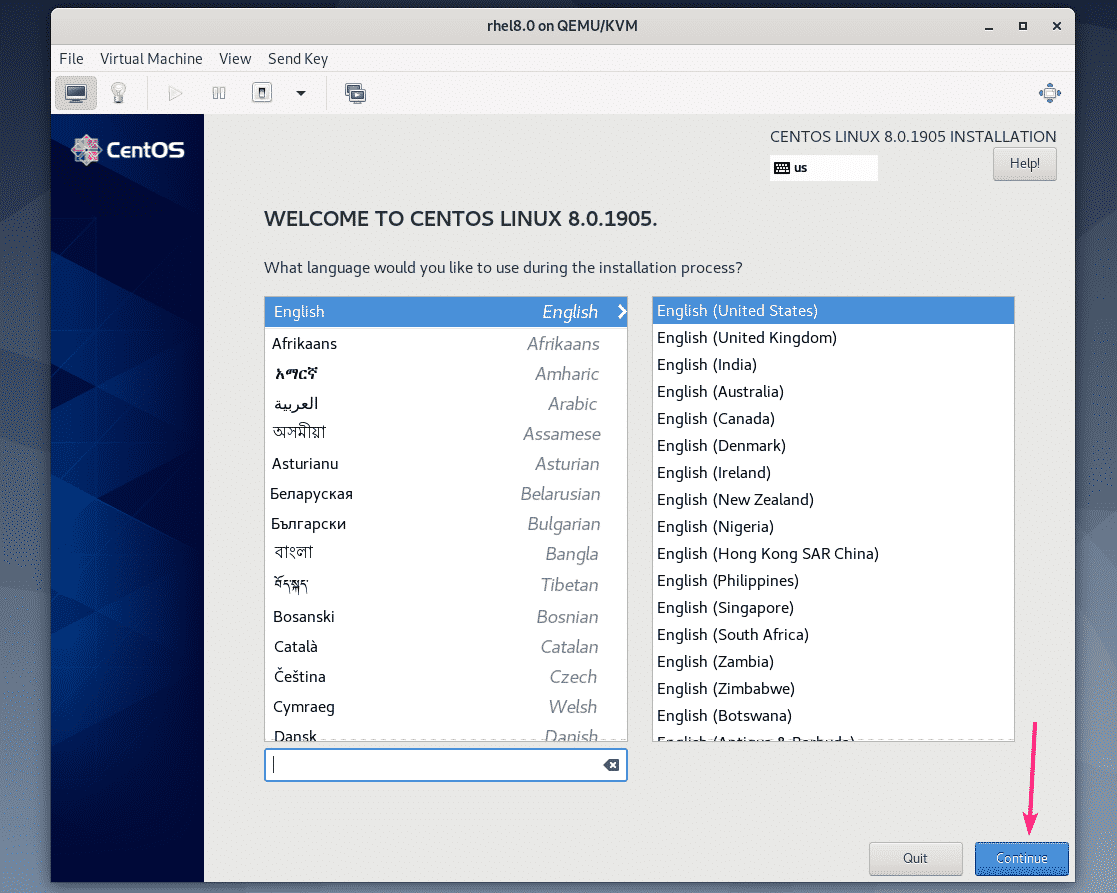
Now, select your language and click on Continue.
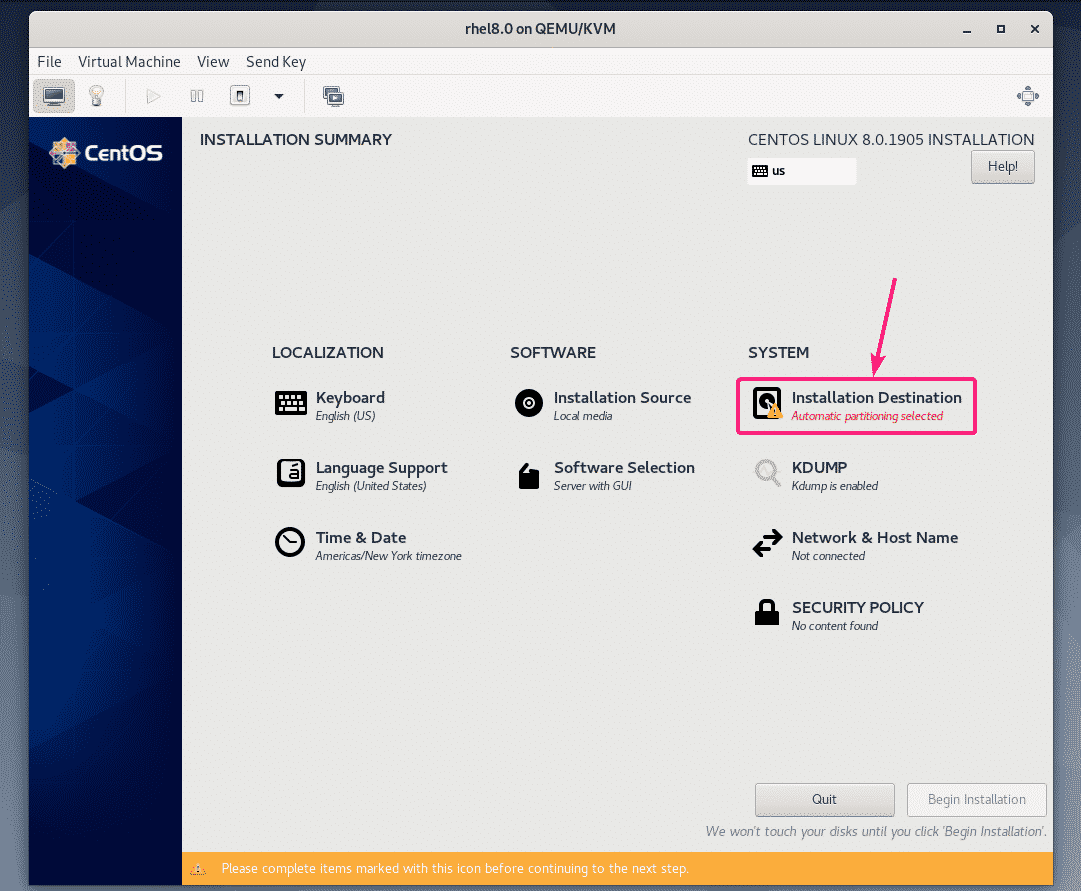
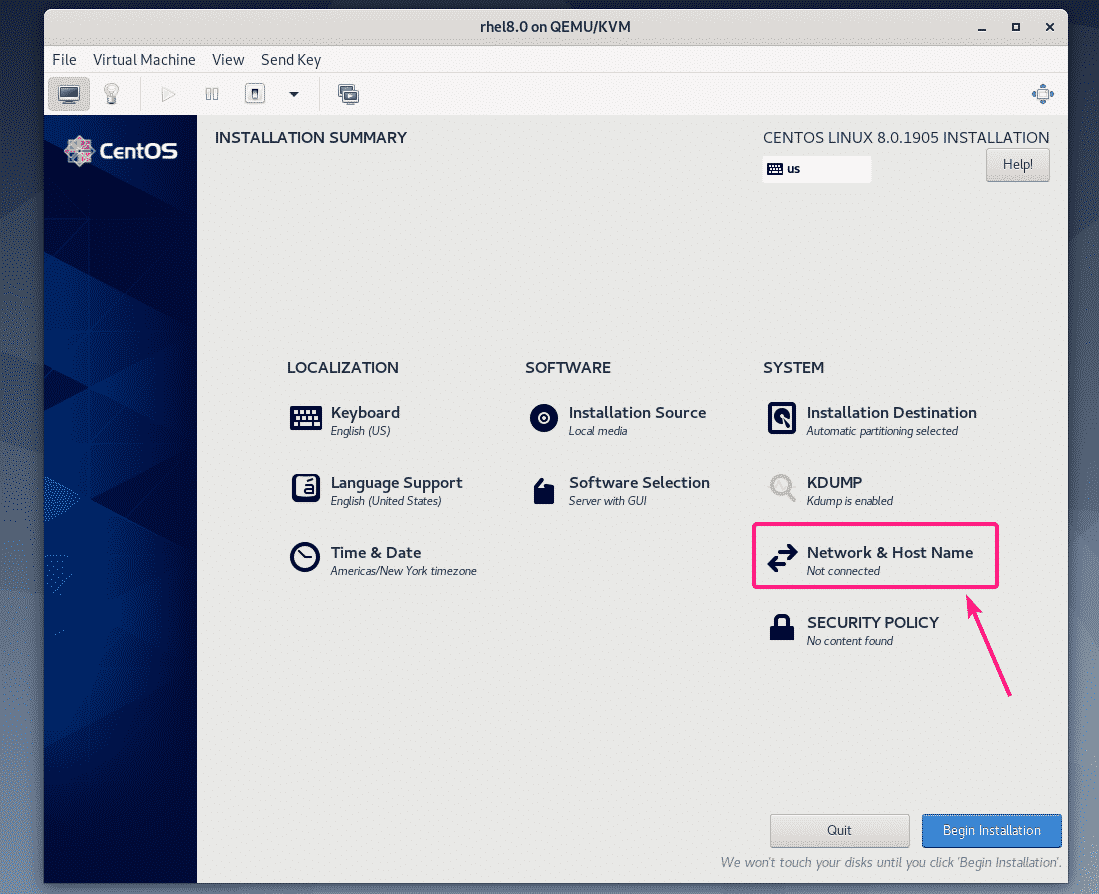
Now, click on Installation Destination.
Now, select the virtual hard drive, select Automatic from Storage Configuration section and click on Done.

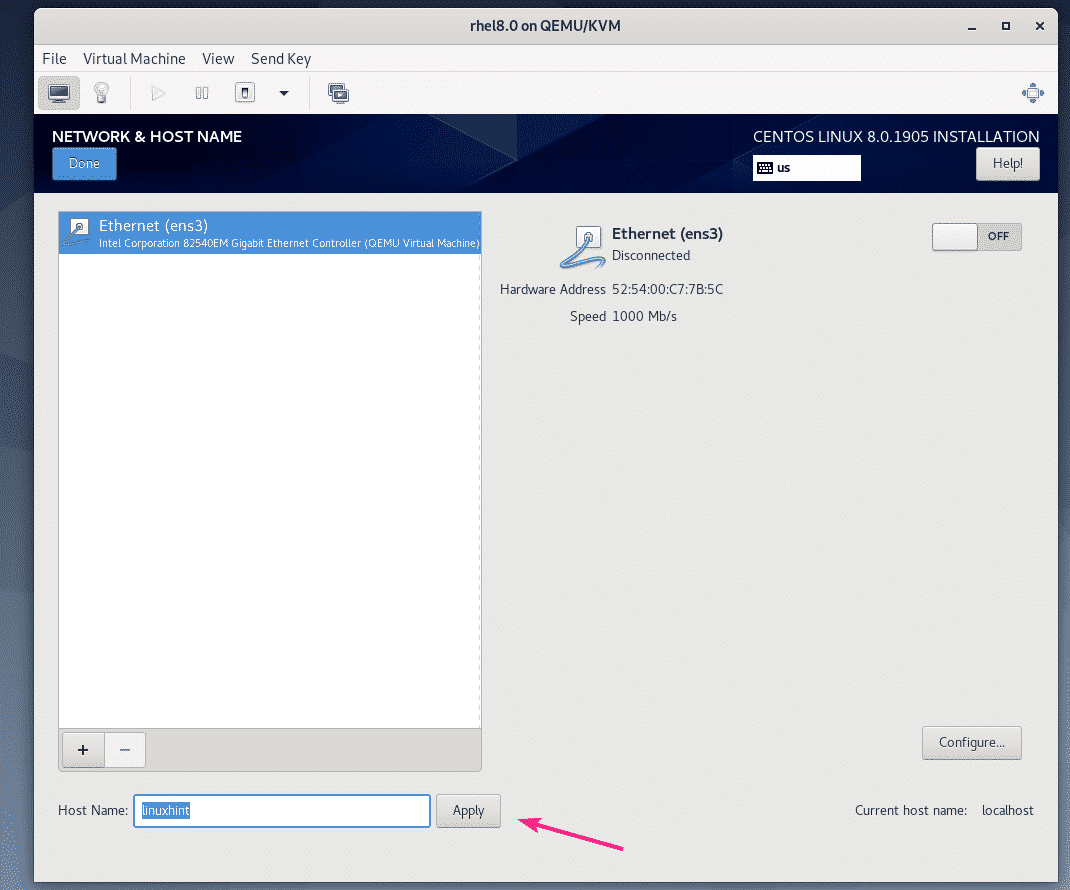
Now, click on Network & Host Name.
Type in a host name and click on Apply.
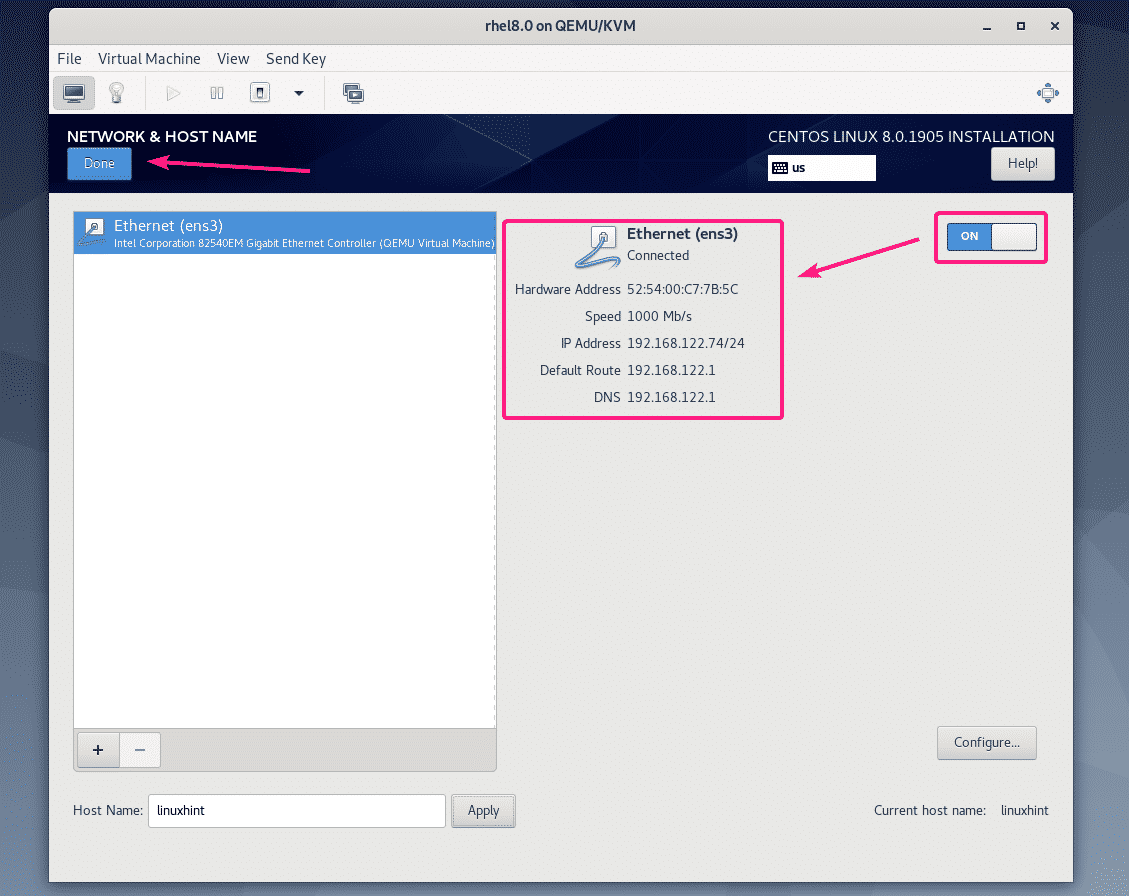
Now, click on the toggle button on the top right corner to activate the network adapter. Once the network is activated, click on Done.
If you want to set up your time zone, click on Time & Date.

Now, select your Region and City and click on Done.

If you want to install CentOS 8 server with graphical user interface, then you don’t have to do anything else.
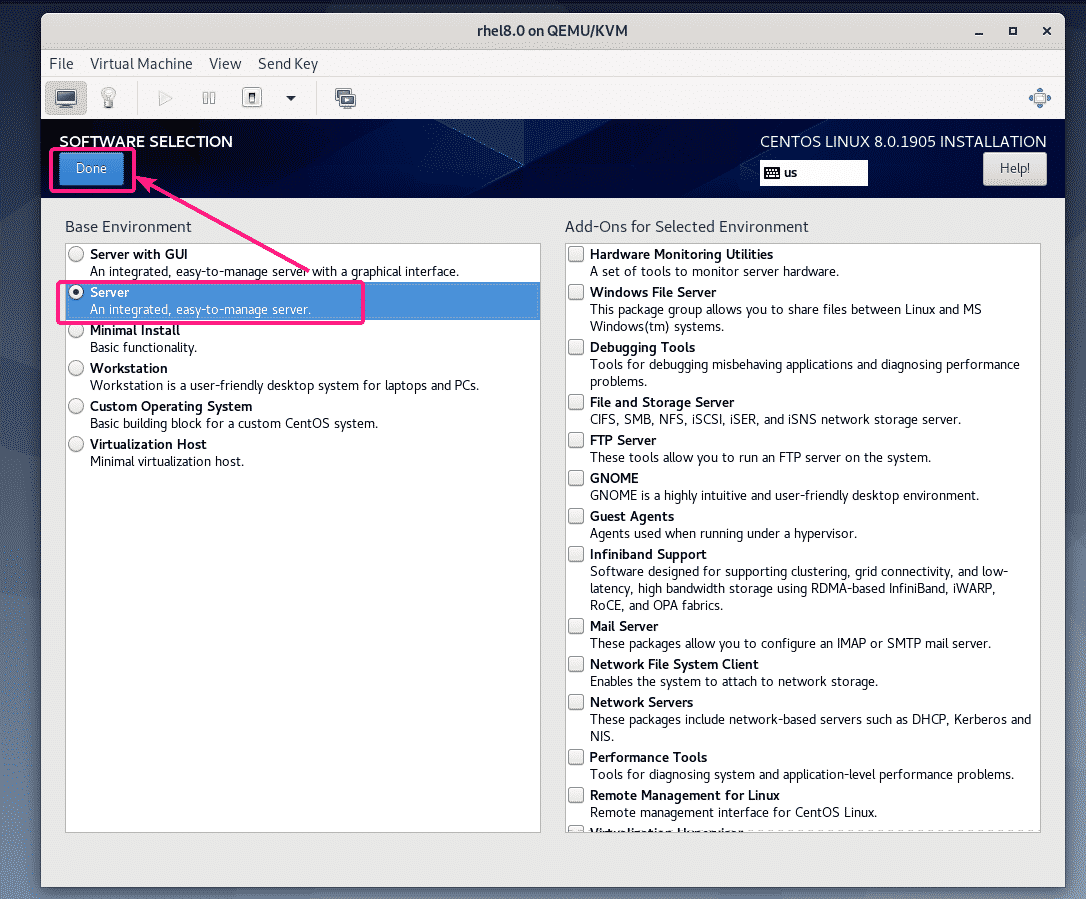
If you want to install CentOS 8 headless server, then click on Software Selection.

Now, select Server and click on Done.
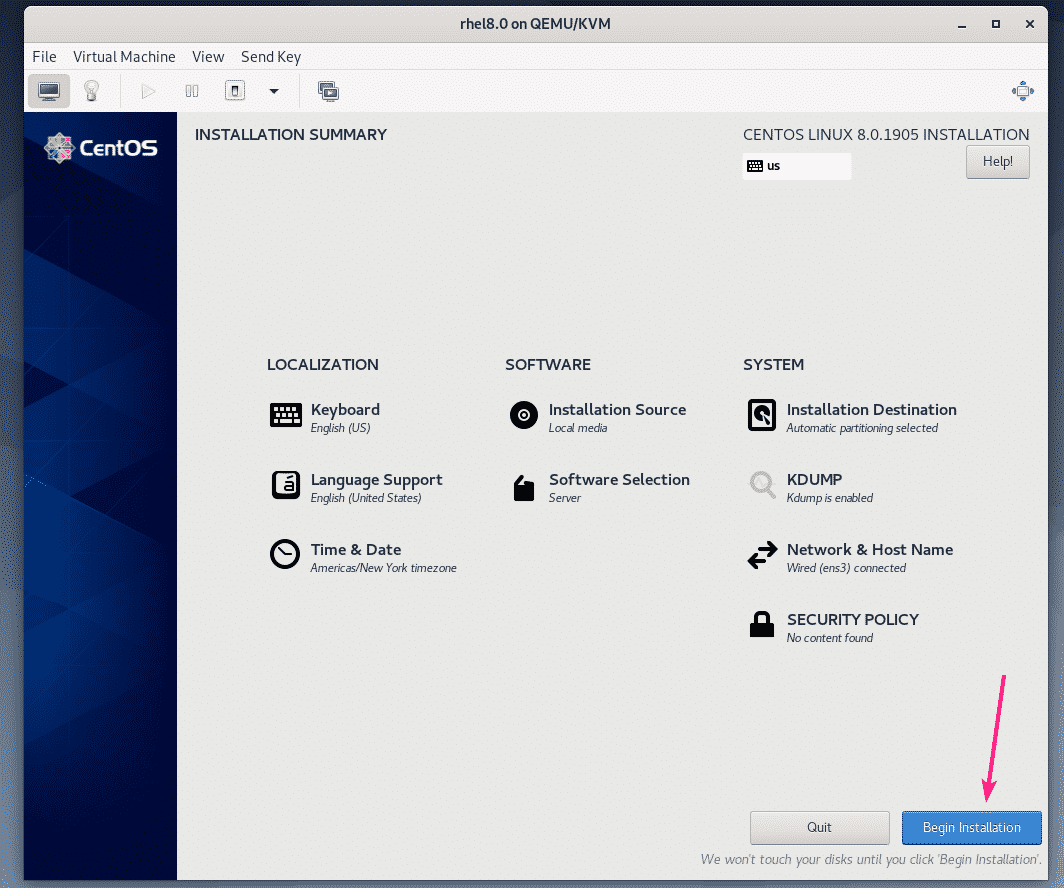
Once you’re happy, click on Begin Installation.
The installation should start.
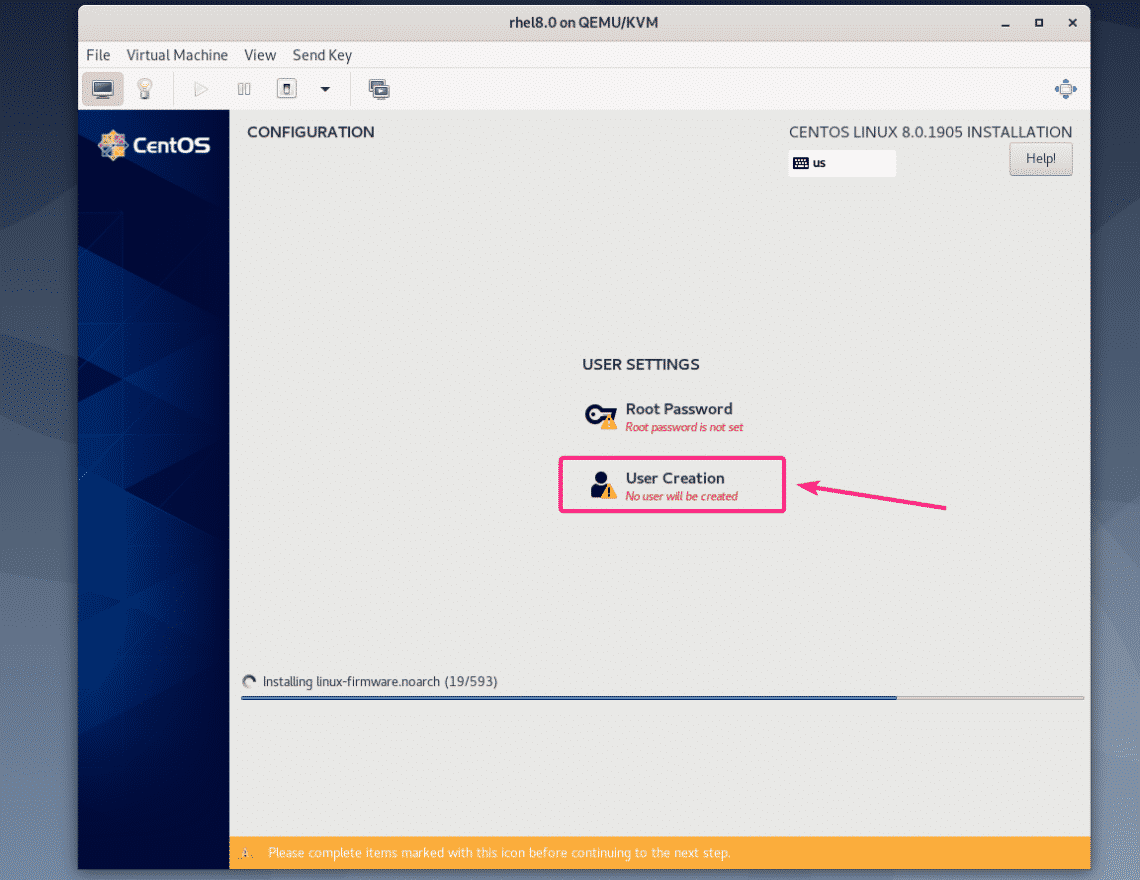
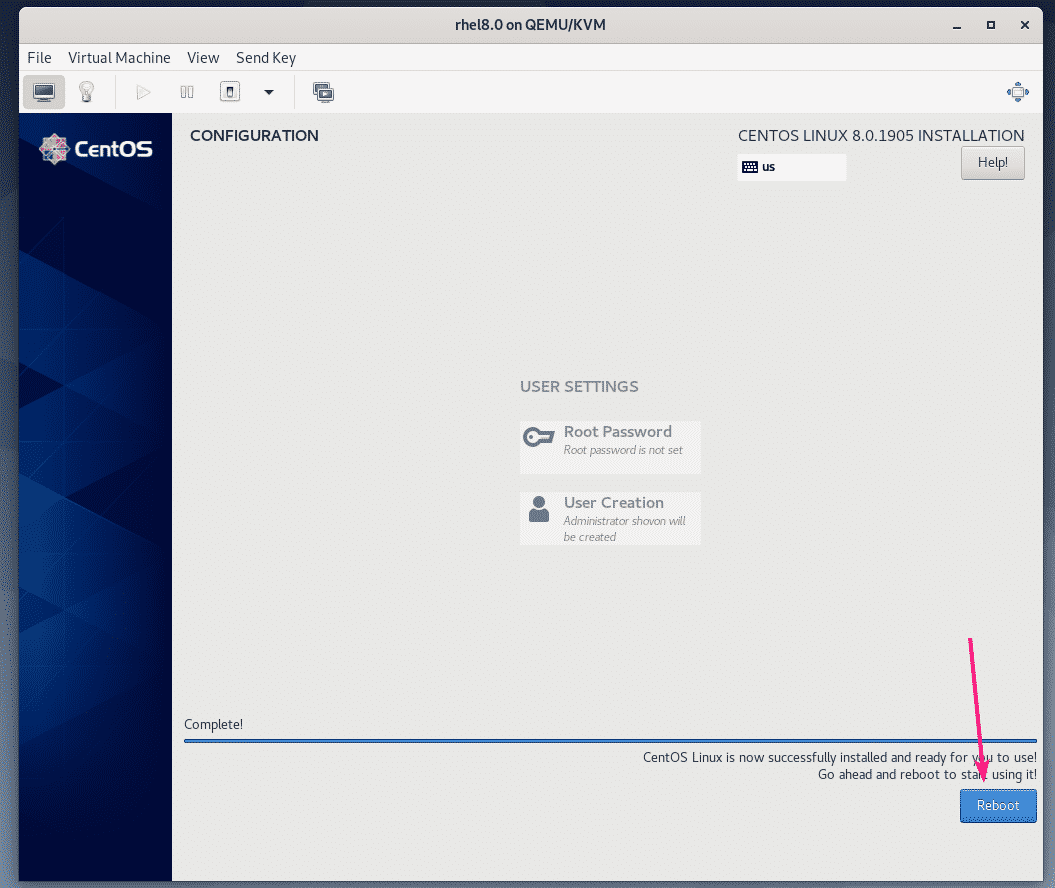
Now, you have to create a new login user. To do that, click on User Creation.
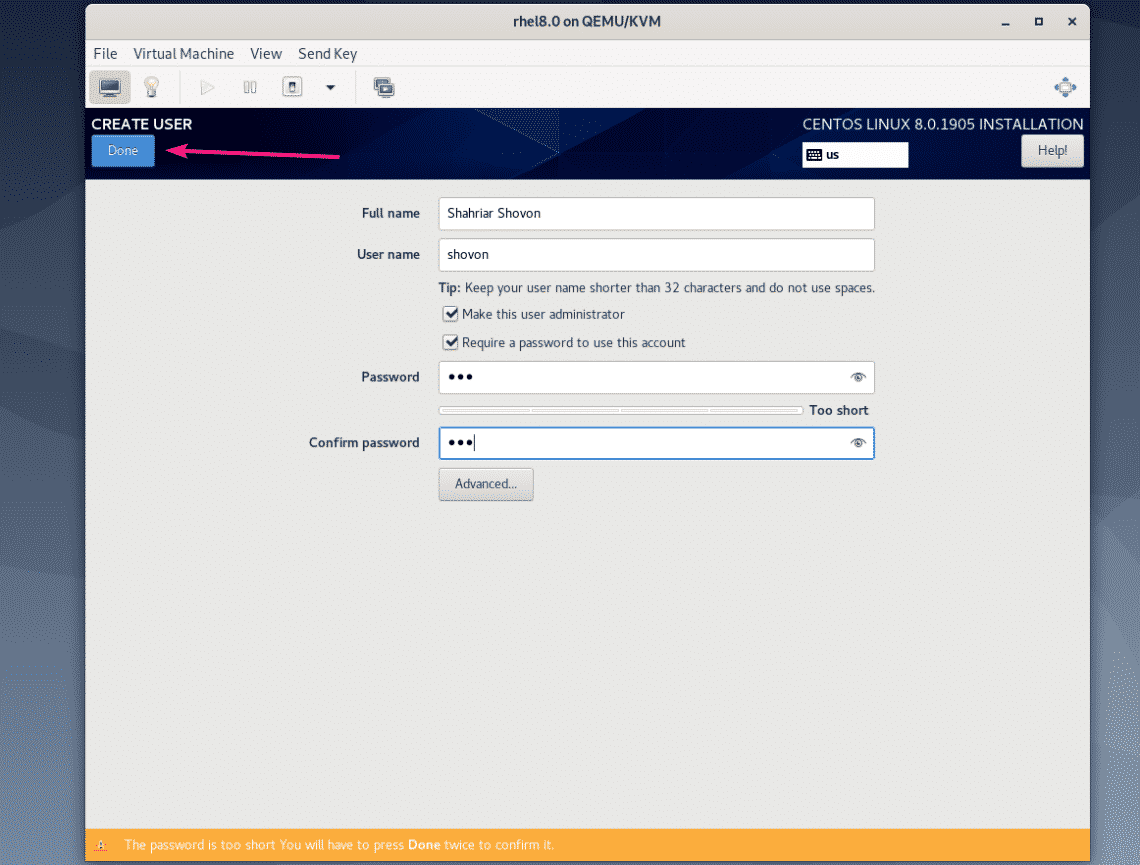
Type in your personal information, check Make this user administrator and click on Done.
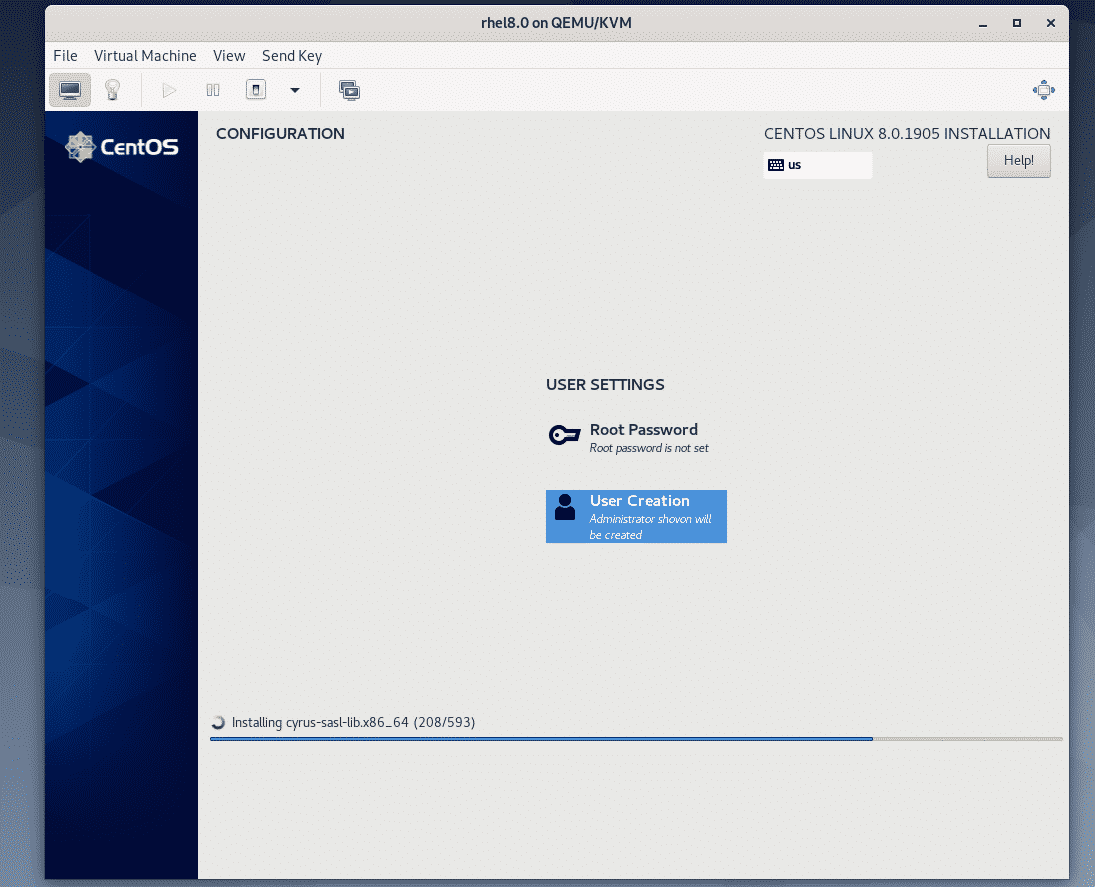
The installation should continue.
Once the installation is complete, click on Reboot.
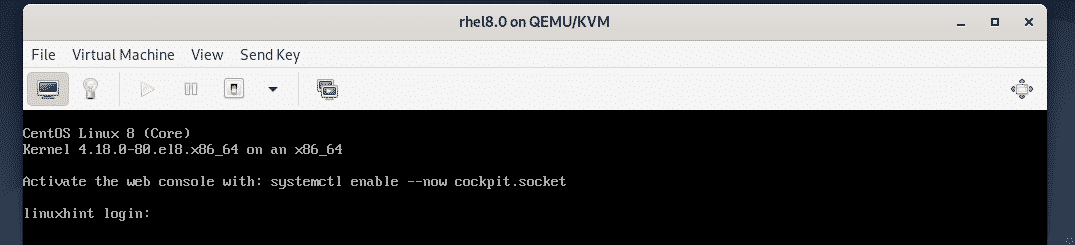
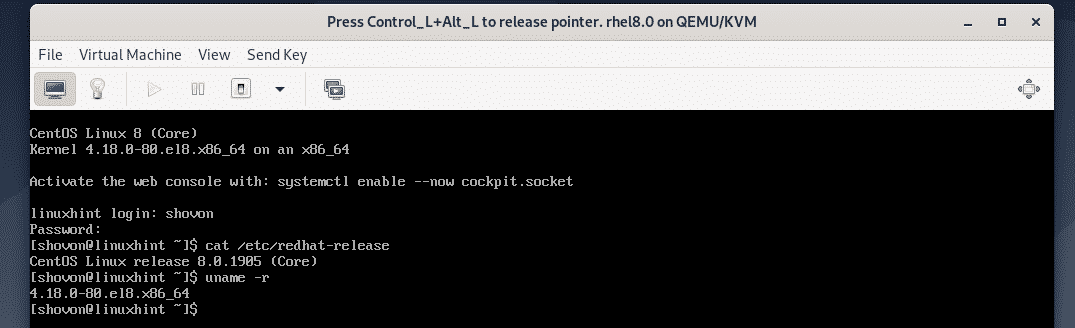
Once CentOS 8 boots from the virtual hard disk, you can login using the username and password that you’ve set during the installation.
As you can see, I am using CentOS 8 and the Linux kernel version is 4.18.0.
$ uname -r
So, that’s how you install CentOS 8 on KVM/QEMU virtual machine. Thanks for reading this article.