In this article, I will show you how to list users on CentOS 7. Let’s get started.
The /etc/passwd File:
The users details are stored in /etc/passwd file on CentOS operating system. This is a plain text file. So you can read that with less or cat command as follows:

As you can see, a list of all the users is printed. Information about a single user is stored in a single line /etc/passwd file. Each line contains a lot of information about that specific users separated by colon (:)

A line in the /etc/passwd file contains the following information separated by colon (:)
Username : Password : UID : GID : User Details : Home Directory Path : Default Shell
Here, Username – The login name of the user. It can’t have spaces and other special characters. Only alpha-numeric characters are allowed.
Password – On Linux based operating system such as CentOS the password is stored on /etc/shadow file. If the password is set, x is stored in this field.
UID – On Linux based operating systems, each user has an alphanumeric name or Username and a numeric ID which is called User ID or UID. For ordinary users, the UID starts from 1000. The root user has the UID 0.
GID – On Linux based operating systems, each group has a group name and a numeric ID which is called Group ID or GID. On Linux, every user must be a member of at least one group. So for each user created, a group is also created with the same name as the user name. The user is then added to the group. In this field, the GID of the primary group is added. Primary group is the default group of the user. If a user is a member of many groups, he/she can change it while he/she is logged in with newgrp command. The GID for the ordinary groups starts at 1000. If your Linux system is not specifically configured, the GID should be the same as the UID. The root group has the GID 0.
User Details – This field keeps full name and other personal information about the user as comma separated list. The most common use of this field is to set the Full Name of the user. Just type in the Full Name of your username here and it should be set.
Home Directory Path – This field keeps the path to a directory where all the user files will be stored. The $HOME shell variable is set from this field.
Default Shell – On Linux based operating systems, you must have a shell set for your user. By default, the sh (/bin/sh) and bash (/bin/bash) shell should be set for ordinary users who are able to log in to the system . But there are other shells such as zsh, csh etc. The system users has /sbin/nologin shell set, so they won’t be able to log into the system. If you want to disable login for some user, just set this field for these users to /sbin/nologin.
You can get the same information as it is in the /etc/passwd file with the following command:

Output of the getent password:

Extracting only List of Username from /etc/passwd File:
The /etc/passwd file has a lot of information. If you want to extract only the username from the colon(:) separated list, then you can use awk or cut command to do that.
You can run the following command to extract the login name or username using the cut command:

Or
As you can see, all the usernames are extracted.

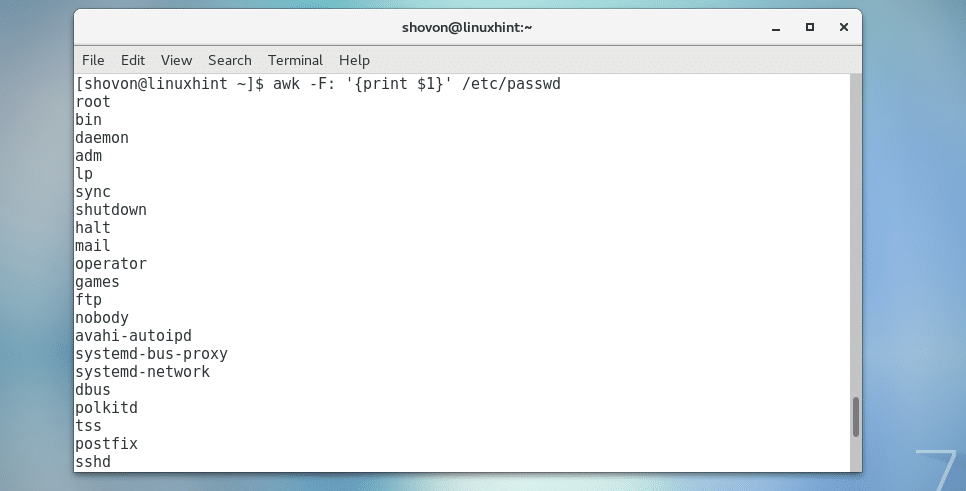
You can do the same thing with awk as follows:

Or,
As you can see, I get the same output.
Listing Users that Can Login to the System:
If you want to list all the users that can login to your CentOS operating system, then run the following command:

As you can see, only 4 users of my CentOS machine are able to log in and other users are system users. They can’t log in to the system.

So that’s how you list users on CentOS. Thanks for reading this article.