If you see words like “unmet dependencies”, “broken packages”, “packages have been kept back” in terminal output, chances are that you may have dependency conflicts. This article will list a few methods that can be used to prevent and fix these kinds of dependency errors. Note that the methods suggested below are not in any order.
Update Packages
The very first thing to do in case of errors is to run the update command. It will refresh any official and third party repositories you have added to your system and pull a new list of packages. Running the update command from terminal bypasses phased rollout of official Ubuntu packages through the GUI updater, so you always get the latest list of packages.
You can update repositories by running the following command:
Change Package Download Server
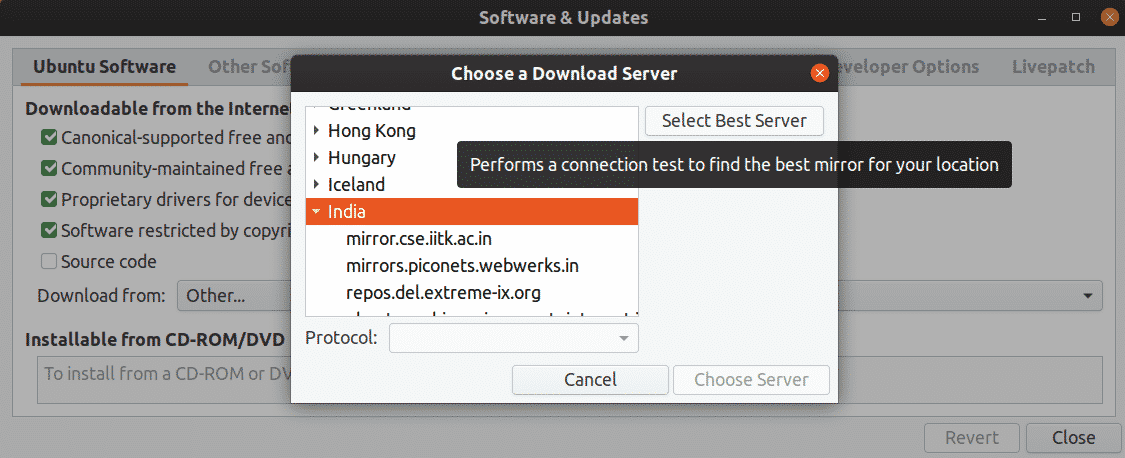
If you get “unable to locate package” errors when you run the update command above, try changing download mirrors. Ubuntu packages are served to end users from servers located across the world. Sometimes only partial or broken package updates are available from these servers resulting in errors during update. This issue is usually resolved automatically after a while when all Ubuntu packages are correctly cloned in these mirrors. However, you can manually change the mirror location to fix this issue.
To change the download server, launch the “Software & Updates” app from the app launcher. In the “Ubuntu Software” tab, selecting “Main server” in “Download from” dropdown list is almost guaranteed to fix any package availability issues. However, download speed may be low depending on your location and proximity to the servers. Ubuntu by default selects a server that will give you maximum speed based on your current location. You can override it by choosing any listed server or by clicking on “Select Best Server” to leave the choice on Ubuntu.
Upgrade Packages
Upgrading installed packages can fix dependency errors. There are two commands available to upgrade Ubuntu packages, both having different behaviors:
- “upgrade”: upgrades installed packages if any updates are available, doesn’t remove any package even if there are unmet and broken dependencies
- “dist-upgrade”: makes attempts to smartly upgrade packages and resolve dependencies, removes broken and installs new dependencies wherever required to fix errors
The commands to upgrade and dist-upgrade respectively are:
$ sudo apt dist-upgrade
Clean up Cached and Residual Packages
Ubuntu’s package manager “apt” keeps downloaded packages in a cache folder. Next time you need to reinstall a package that has been already cached, Ubuntu will get the deb package from cache folder instead of re-downloading it from server. Clearing this cache clears up disk space and also helps in fixing dependency and installation errors in some cases.
Apt’s package cache can be cleared by running the command below:
There is another apt command “autoclean” that clears package cache. However instead of clearing entire folder, it only removes packages that have been removed from repository servers.
Do a Mock Installation
It is possible to simulate the installation of a package to check any potential errors occurring during real installation. Run the command below while replacing “package name” with your desired package name (without quotes) to do a mock installation.
A mock removal can be done the same way:
Fix Broken Packages
It is possible to have broken packages and unmet dependencies, especially when you are installing multiple packages at once. The command below will make an attempt to fix these issues either by installing and repairing broken dependencies or by removing a package altogether that is responsible for dependency conflict.
Configure Packages Failed to Install Due to Interruptions
Sometimes the apt package manager stops abruptly leaving behind packages that failed to setup. These interruptions are usually because of factors out of control of the apt package manager. For instance, if you accidentally closed the terminal or your PC turns off suddenly, apt won’t be able to finish setup. Running the command below will fix package errors and dependency problems arising out of this issue.
Use PPA-Purge
A “Personal Package Archive” or a PPA is a software repository that allows Ubuntu users to upgrade or install new packages from unofficial sources. PPA-Purge is a tool that removes these third party PPA sources and downgrades packages installed from PPAs to stock versions. Using PPA-Purge will resolve any dependency conflicts arising from packages installed or upgraded from the PPA. To install PPA-Purge command line app in Ubuntu, run the following command:
To purge a PPA, run command in the following format:
For example, Geany text editor PPA added from here can be purged by running command:
Use Aptitude Package Manager
Aptitude package manager can be used instead of the default apt package manager in Ubuntu to resolve dependency errors. Aptitude is newer than apt package manager and it provides extra options, a terminal based frontend and general ease of use. Aptitude combines a lot of apt options in a single command so that you don’t have to run multiple commands to fix errors.
For instance, using aptitude package manager to remove even a single package will get you an option to remove unused and leftover packages, while there is a separate command in apt to do the same. Aptitude is much smarter in dependency conflict resolution than apt, it usually gives detailed feedback to solve conflicts, with multiple options that can be selected by the user. I always ensure that aptitude and PPA-Purge are installed on my system before getting any highly experimental packages.
Aptitude can be installed by running command below:
Aptitude and apt share a lot of command line options with aptitude having a few differences. You can explore all aptitude options from here.
Reinstall Ubuntu Desktop Package
Reinstalling “ubuntu-desktop” package will pull in essential packages that were installed by default in Ubuntu. It will get all packages that depends on ubuntu-desktop meta package. To reinstall ubuntu-desktop, run the command below:
Note that the above command will only install essential core packages and not apps like Firefox, Thunderbird, video player etc.
Remove or Disable PPAs Before Upgrading to a Newer Version of Ubuntu
Even though Ubuntu disables any PPAs before doing a system upgrade, to prevent unmet dependency errors during and after a system upgrade, you should manually remove any third party PPAs. The best way to do this is to run PPA-Purge command explained above.
You can also remove PPA repositories only. This may not however, prevent any dependency errors during upgrade. PPAs can be removed through two ways, the first one involves using command line and the second one requires using a GUI app. Note that these methods will only remove PPA repositories, leaving behind any previously upgraded or installed packages in the system.
To remove a PPA using command line, run the command below in the following format:
For example, Geany text editor PPA added from here can be removed by running the command:
To remove a PPA using GUI method, usually you have to launch the “Software & Updates” app from the app launcher. However due to a bug in Ubuntu, this method doesn’t always work and it fails to disable PPAs.
To get around this, we have to install Synaptic package manager which is a frontend for apt. To install Synaptic, run command:
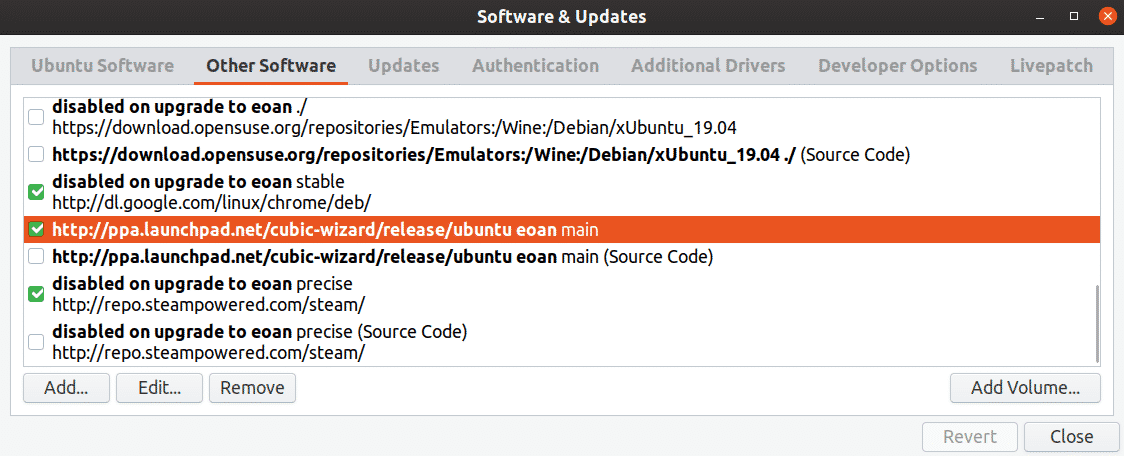
Launch “Synaptic Package Manager” from app launcher. Click on “Settings” > “Repositories”. Go to “Other Software” tab and click on a PPA that you want to remove to highlight it. Click on the “Remove” button at the bottom to remove the PPA from system. You can also disable a PPA without removing it so that it can be re-enabled after system upgrade. To do so just uncheck the checkbox in front of a PPA. Once you have followed the above steps, close “Software & Updates” window. When prompted to refresh the repositories, click on “Reload” button.
Be Cautious When Adding New PPAs to the System
Most of the times dependency errors arise when using third party PPAs or installing deb packages from unofficial sources. There is also a chance of malware getting in your system through a PPA. Therefore you should always be careful when adding any random PPA to your system. Only add a PPA if you trust its source and maintainers / developers. Even though we have not heard of malware or adware distributed through PPAs so far, there is always a risk as these are third party repositories having packages unverified by Ubuntu developers.
Conclusion
These are some methods that can be used to fix and prevent dependency errors in Ubuntu. Things tend to break, especially when using Ubuntu as your main development environment with tons of third party apps and command line tools. However, most of these dependency errors can be minimized by installing apps from official, reputed and trusted sources.