By default, CentOS 7 uses an old version of kernel, which is 3.10.x. But the old kernel doesn’t support some new hardwares that we have today. So it’s necessary to update the old kernel for better hardware support. In this article I will show you how to update the kernel of CentOS 7. Let’s get started.
Preparing for the Kernel Upgrade:
We must add ELRepo repository to CentOS 7 to update the kernel of CentOS 7. For more information, check the official website of ELRepo at http://elrepo.org/tiki/tiki-index.php. First we have to add the GPG key for ELRepo. To do that, run the following command:
$ sudo rpm --import https://www.elrepo.org/RPM-GPG-KEY-elrepo.org

Now we can add the ELRepo repository on CentOS 7. To do that, run the following command:
$ sudo rpm -Uvh http://www.elrepo.org/elrepo-release-7.0-3.el7.elrepo.noarch.rpm

The name of the ELRepo kernel repository is called elrepo-kernel. There are 2 kernels in ELRepo. One is called kernel-lt and the other is called kernel-ml. The difference between these 2 are, kernel-lt package provides the Long Term Support version of the latest Linux kernel, and the kernel-ml package provides Mainline Stable version of the latest Linux kernel. The kernel provided by kernel-ml is more updated than kernel-lt. Both of these kernels are safe. You can use any of them.
I will show you how to install both of them, but I will install kernel-ml in this article.
You can check the version of the currently installed kernel on CentOS 7 with the following command:
$ uname -r
You can see that; the kernel CentOS 7 is using right now is 3.10.0. We will soon update that. Let’s continue.

Installing Latest Long Term Support Kernel:
You can easily install long term support kernel or kernel-lt package provided by ELRepo on CentOS 7. At the time of this writing, the version of the kernel provided by kernel-lt package is 4.4.100.
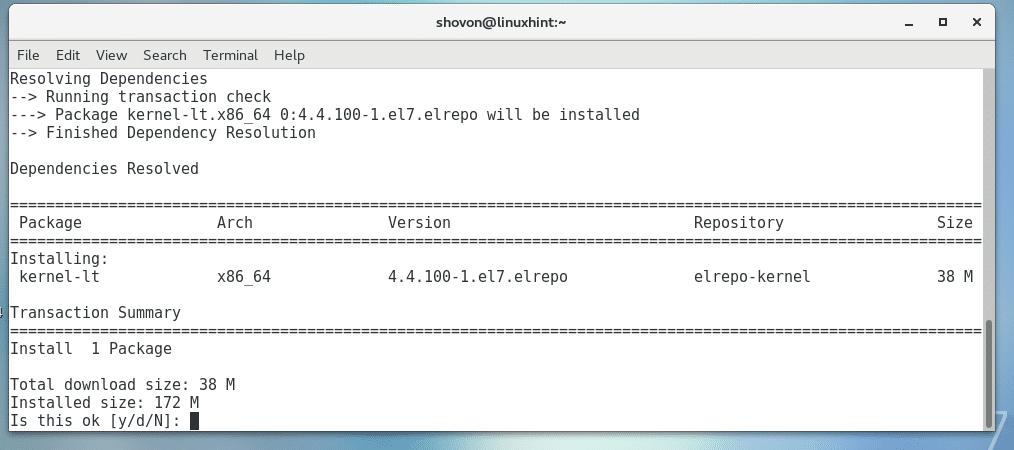
To install kernel-lt package on CentOS 7 from ELRepo, run the following command:
$ sudo yum --enablerepo=elrepo-kernel install kernel-lt

Press ‘y’ and press <Enter> to continue.
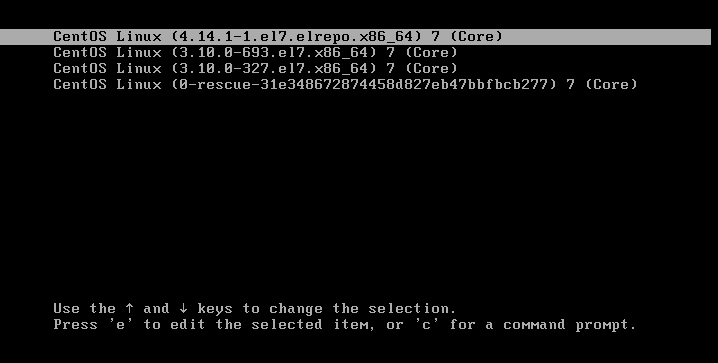
Once the installation is complete, just restart your computer. When it boots, select the new kernel from the GRUB menu. Your CentOS 7 operating system should use the new kernel afterwards.
Installing Mainline Stable Kernel:
You can easily install mainline stable kernel or kernel-ml package provided by ELRepo on CentOS 7. At the time of this writing, the version of the kernel provided by kernel-ml package is 4.14.1.
To install kernel-ml package on CentOS 7 from ELRepo, run the following command:
$ sudo yum --enablerepo=elrepo-kernel install kernel-ml

Now press ‘y’ and then press <Enter> to continue:

It should take a while to download and install the kernel. Once the installation is complete, run the following command to restart your computer.
$ sudo reboot

Once your computer boots, select the new kernel from the GRUB menu, it should be using the latest kernel that you just installed.
You can check and verify that its using the latest kernel with the following command:
$ uname -r

You can see that the kernel is updated.
So That’s how you update/upgrade the kernel of your CentOS 7 operating system. Thanks for reading this article.