TensorFlow is an open-source library built by Google to perform machine learning-oriented tasks. It has been used by various popular platforms like PayPal, Twitter, and Lenovo. TensorFlow is now widely used in cutting edge technologies based systems.
The TensorFlow installation on Ubuntu 20.04 is described in this article.
It is best practice to create a virtual environment and install TensorFlow. The virtual environment provides a different Python environment to developers and resolves the libraries and version dependencies issues.
TensorFlow installation on Ubuntu 20.04
Follow the below-given steps to install TensorFlow on Ubuntu 20.04:
Step 1: Verify Python 3.8 installation
Python installation is a pre-requisite for TensorFlow. Python 3.8 is pre-installed in Ubuntu 20.04. Run the following command to verify the installation of Python on your Ubuntu 20.04:
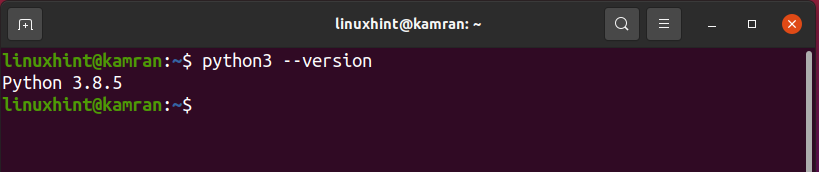
Python 3.8.5 is already installed on Ubuntu 20.04.
Step 2: Install Python virtual environment (venv) module
The next step is to install the Python 3 virtual environment using the venv module. The venv module is part of the package python3 venv and can be installed with the command:

After the successful installation of the venv module, create a virtual environment in the next step.
Step 3: Create a Python 3 virtual environment
Your home directory must have a virtual environment inside. In case you want to create the virtual environment into a new directory, then run the following command to create a new directory named tensor_environment:

Now use the following command to navigate to the newly created directory:

Now it is ready to create a virtual environment. The command’s syntax for creating a virtual environment is as follows:
You can write any virtual environment name. We are creating a tensor_venv virtual environment using the following command:

The virtual environment named tensor_venv is created successfully.
Before using a virtual environment, we need to activate it as follows:

The virtual environment name has appeared in the parenthesis on the command line. It is an indication that the virtual environment is activated successfully.
Step 4: Upgrade to pip version 19 or higher
PIP is a Python package manager that is used to install and maintain the Python packages. The TensorFlow can be installed using pip. The PIP version 19 or higher is required to install the TensorFlow. Upgrade to PIP version 19 or higher using the following command:
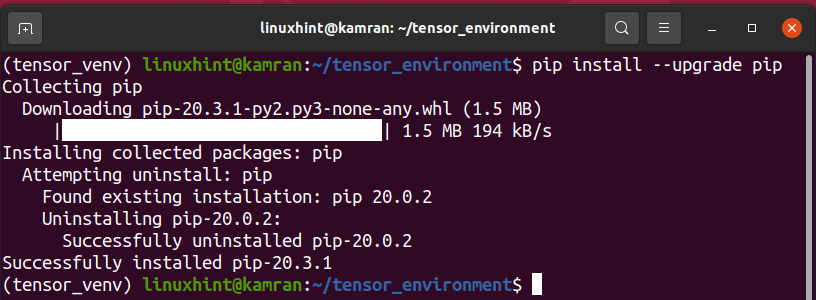
Alright! The PIP is upgraded to version 20.3.1 successfully.
Step 5: Install TensorFlow using PIP
It’s time to install the TensorFlow using pip. Run the following command to do so:
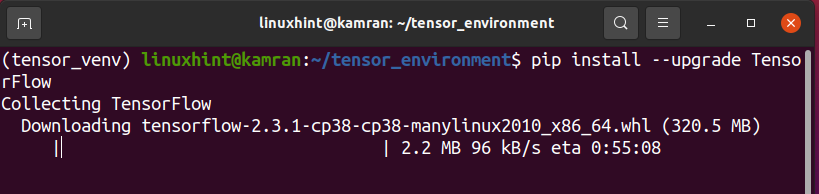
The TensorFlow installation will take a couple of minutes.
Step 6: Verify the TensorFlow installation
Upon successful TensorFlow installation, verify the installation using the following command:

The above command displays the TensorFlow version installed on your Ubuntu 20.04.
Conclusion
TensorFlow is now widely used in machine learning projects. It is a very efficient library and developed by Google. This guide demonstrates the installation procedure of TensorFlow on Ubuntu 20.04.