Genymotion is the next generation of the AndroVM open source project. It is a fast, simple and powerful cross-platform Android emulator that comes with pre-configured Android in it. It’s so easy to use and has lots of functionality that normal android emulator doesn’t. It can be very useful for developers, testers, salesman or even gamers. It’s available on following operating systems: Windows, Linux and Mac OS X.
Genymotion Features
Android as its best
- OpenGL acceleration to achieve the best 3D performance
- Enable full screen option and improve your experience
- Be precise in your UI development with the “pixel perfect” functionality
Fully controllable
- Start multiple virtual device at the same time
- Manage sensors:
- Battery level / status
- GPS
- Rotation
- Camera
- Override virtual device identifiers
- Directly command virtual devices sensors with app Shell
- Fully compatible with ADB. You can control your virtual device from the host
Manage your devices
- Easy to install
- Compatible with Microsoft Windows 32/64 bits, Mac OSX 10.6+ and Linux 32/64 bits
- Configure virtual devices:
- Screen resolution
- Memory quantity
- CPU unit quantity
- Download and deploy easily the latest Genymotion virtual device
How to Install latest Genymotion on a VirtualBox
- The app does not have a direct link to download the installer, so you need to register on site to download.
- Install virtualbox as its required
sudo apt-get install virtualbox
- Change directory to location of downloaded file > Run the following commands > Accept the default install path
chmod +x genymotion-2.8.1_x64.bin ./genymotion-2.8.1_x64.bin
- Change directory to where the app was installed (this will be displayed after the above is completed) and run the following command
./genymotion
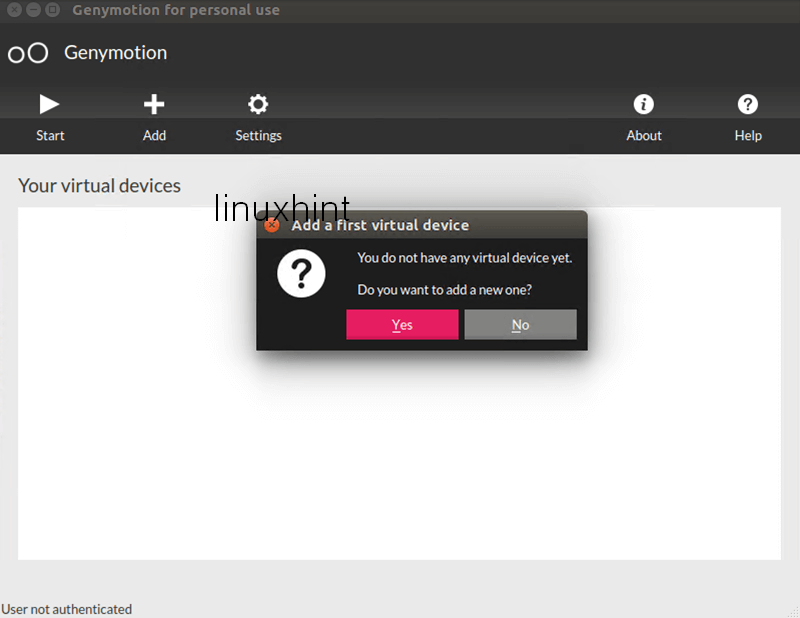
- Click Yes to add your first virtual device
- Sign-in with your credentials

- Select desired virtual device and click Next

- Enter name for device and click Next

- After setup is completed, click Start to launch device

ONET IDC thành lập vào năm 2012, là công ty chuyên nghiệp tại Việt Nam trong lĩnh vực cung cấp dịch vụ Hosting, VPS, máy chủ vật lý, dịch vụ Firewall Anti DDoS, SSL… Với 10 năm xây dựng và phát triển, ứng dụng nhiều công nghệ hiện đại, ONET IDC đã giúp hàng ngàn khách hàng tin tưởng lựa chọn, mang lại sự ổn định tuyệt đối cho website của khách hàng để thúc đẩy việc kinh doanh đạt được hiệu quả và thành công.