How to Install and Configure ZFS File System on CentOS 7
ZFS is a very popular file system on Linux. It is a 128-bit file system. Which means ZFS can grow to be very big. It supports logical volumes, raids, snapshots and many more advanced file system features. But getting ZFS to work on CentOS 7 is not that straightforward. In this article, I will show you how you install and do basic configuration of ZFS on CentOS 7.3 and CentOS 7.4. Let’s get started.
Installing ZFS File System
ZFS File System support is not enabled by default on CentOS 7. That is not the only problem. ZFS is not available in the official package repository of CentOS 7. You have to install it from the official package repository of ZFS. At the time of this writing, ZFS can only be installed on CentOS 7.3 and CentOS 7.4. You may take a look at https://github.com/zfsonlinux/zfs/wiki/RHEL-and-CentOS for more details.
First check what version of CentOS 7 you’re using with the following command:

As you can see from the screenshot below, I am using CentOS 7.4

Now you have to add the official repository of ZFS on CentOS 7 with the following command:
For CentOS 7.3
For CentOS 7.4

Now press ‘y’ and then press <Enter> to continue.

ZFS repository should be added.
There are two ways ZFS module can be loaded to the kernel, DKMS and kABI. The difference between these is that if you install DKMS based ZFS module, and then for some reason you update the kernel of your operating system, the ZFS kernel module must be recompiled again. Otherwise it won’t work. But the kABI based ZFS module has the upper hand in that it doesn’t require recompilation if the kernel of the operating system is updated.
In this article, I will install the kABI based ZFS kernel module.
When you install the ZFS repository on CentOS 7, the DKMS based repository is enabled by default. So you have to disable DKMS based repository and enable the kABI based repository.
To disable the DKMS based ZFS repository and enable kABI based ZFS repository, first open the yum configuration file of ZFS with a text editor with the following command:

You should see the following window as shown in the screenshot below:

First change the marked section of the screenshot from enabled=1 to enabled=0 to disable the DKMS based ZFS repository.

Now change the marked section of the screenshot from enabled=0 to enabled=1 to enable the kABI based ZFS repository.
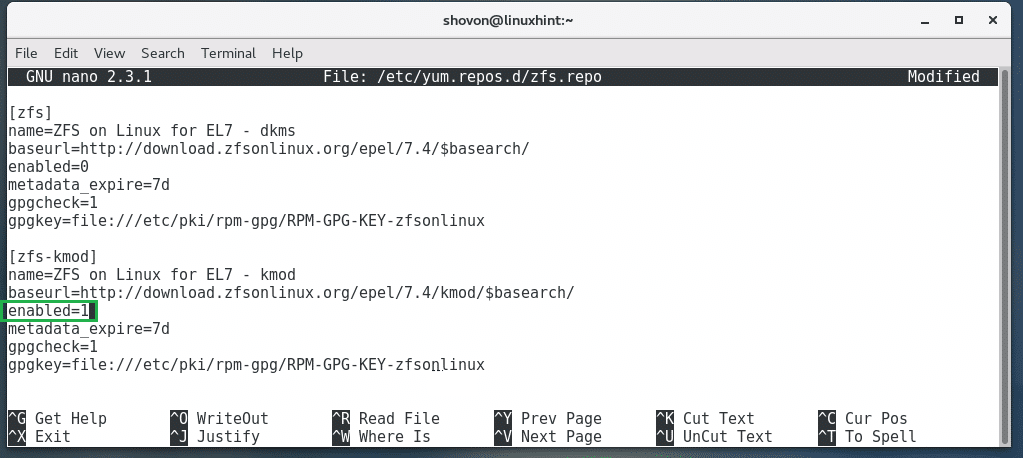
This is what the final configuration file should look like.

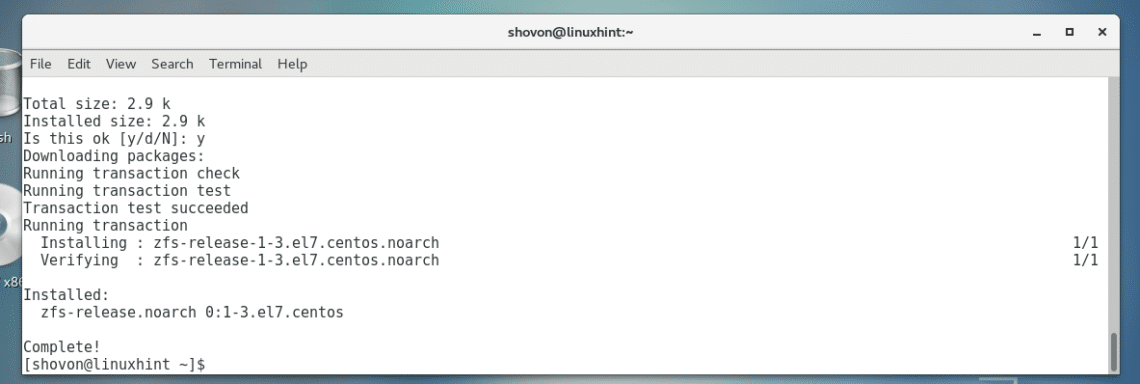
Now you can install ZFS File System on your CentOS 7 with the following command:

Now press ‘y’ and then press <Enter> to continue.

ZFS should be installed.

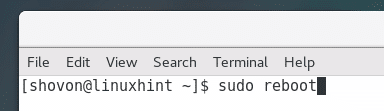
Now reboot your computer with the following command:
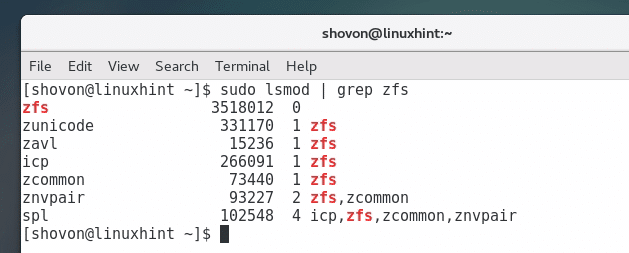
Once your computer starts, run the following command to check whether ZFS kernel module is loaded.

You may not see any output. If you don’t see any output, then ZFS kernel module is not loaded. In that case, run the following command to load the ZFS kernel module manually.

Now if you run lsmod command again, you should see ZFS kernel module loaded as shown in the screenshot below.
Basic Configuration of ZFS
Now you need a free disk drive or partition to configure ZFS. I am using VMware. So I added two SCSi disks in the CentOS 7.
You can check what disks you have with the following command:

As you can see from the screenshot below, I have sdb and sdc disks available and each of them are 20GB of size.

Now you have to create a ZFS pool. You can name your ZFS pool anything. A new directory with the same name as your ZFS pool will be created in the ROOT(/) directory. You also specify your storage devices or disk drives when you create a ZFS pool.
Run the following command to use sdb and sdc disks and create a files ZFS pool files.

You can run the following command to list all the available ZFS pool of your system:

As you can see, the files ZFS pool is listed and it has 39.7GB of free space.

Run the following command to see all the system mount points:
As you can see from the screenshot below, the files ZFS pool is mounted on the /files directory.

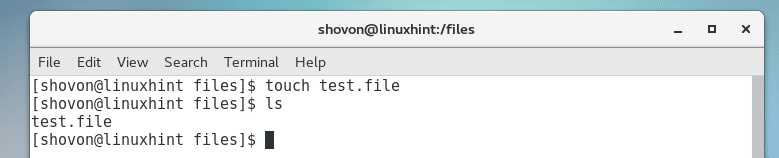
Now you can navigate to the /files directory with the following command:

By default, a ZFS pool is only writeable by the root user. If you as an ordinary user want to write to the ZFS pool, you have to change the permission of the ZFS pool.
You can run the following command to change the permission of your ZFS pool:

Note: Here shovon is my username. Your username should be different. The format of the command is:
The /files directory is now owned by the user and the group shovon.

Now you can create, remove, edit files and directories in /files.
That’s how you install and configure ZFS File System on CentOS 7. Thanks for reading this article.