Syntax:
chown [OPTION]… –reference=RFILE FILE…
`chown` command can be used with the filename or reference filename. OPTION, OWNER or GROUP are optional for this command. Three types of permissions of three types of users can be assigned for any file or folder. The user types are the user, group and others and permissions are read(r), write(r) and execute(x).
Options:
| Tag | Description |
| -c or –changes | Shows the changes in the ownership of the actual file. |
| –reference=FILE | Use to change the ownership of any file or folder based on the reference file. |
| -R or –recursive | Use to change the ownership of directories recursively. |
| –dereference | Act on where the symbolic links point to. |
| -h or –no-dereference | Act on symbolic links themselves. |
| -f or –silent or –quiet | Error messages will be omitted for those files whose ownership cannot be changed. |
| -v or –verbose | Shows the actions taken for every file for chown command. |
Example-1: Change the user ownership of a file
The user must have root privilege to change the user or group ownership of a file and folder. The following `chown` command will change the user ownership to ‘root’ for the text file ‘test.txt’.
$ sudo chown root test.txt
$ ls -l test.txt
Output:

Example-2: Change the group ownership of a file
The user has to use ‘:’ before the group name to change the group ownership of any file and folder. The following `chown` command will change the group ownership of ‘students.txt’ file to the group, ‘testing’.
$ sudo chown :testing students.txt
$ ls -l students.txt
Output:

Example-3: Change both user and group ownership of a file
Both user and group ownership can be changed together by using ‘chown` command. The following ‘chown` command will change the user ownership to ‘fahmida’ and group ownership to ‘testing’ for the file ‘test.txt’.
$ sudo chown fahmida:testing test.txt
$ ls -l test.txt
Output:

Example-4: Change the ownership of a file based on a particular user
If you want to change the ownership of any file or folder based on the current ownership then you have to use ‘–from’ option with the `chown` command. The first `chown` command in this example will not be able to change the ownership because the current owner is ‘fahmida’ not ‘root’. The second `chown` command will change the user ownership to ‘yesmin’ from ‘fahmida’ for the file ‘test.txt’.
$ sudo chown –from=root yesmin test.txt
$ ls -l test.txt
$ sudo chown –from=fahmida yesmin test.txt
$ ls -l test.txt
Output:

Example-5: Change the user and group ownership from one file to another filename
By using –reference option ownership of one file or folder can be easily copied to another file and folder. The following `chown` command will copy the user and group ownership of ‘test.txt’ file to ‘students.txt’ file.
$ ls -l students.txt
$ sudo chown –reference=test.txt students.txt
$ ls -l students.txt
Output:

Example-6: Change the user or group ownership of any directory recursively
The following `chown` command with -R option will change the user ownership to ‘root’ and group ownership to ‘testing’ for all the files and folders under ‘code’ folder.
$ sudo chown -R root:testing code/
$ ls -l code
Output:

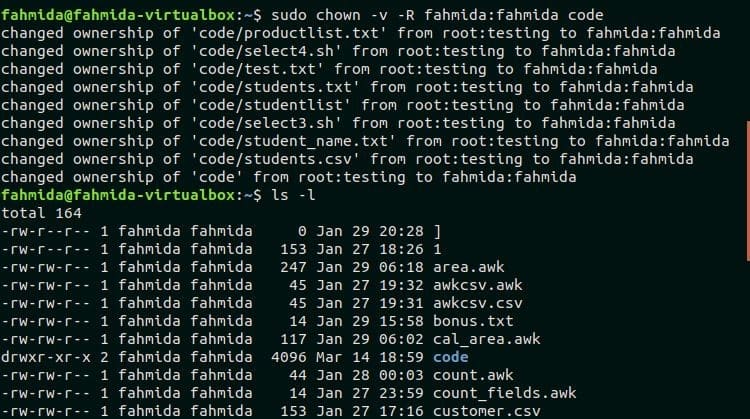
Example-7: List all the changes done by chown for any folder
The following `chown` command with -v option will show the list of all changes in ownership by executing the command.
$ ls -l
Output:
Conclusion
This tutorial will help the Linux user to know the use of `chown` command and apply the command properly to change the ownership for any file or folder.