OSI model and TCP/IP model:
We all know that OSI (Open Systems Interconnection) is a reference model for how applications communicate over a network.
Here are the 7 layers according to OSI model:
| Application Layer [Layer 7] |
| Presentation Layer [Layer 6] |
| Session Layer [Layer 5] |
| Transport Layer [Layer 4] |
| Network Layer [Layer 3] |
| Data Link Layer [Layer 2] |
| Physical Layer [Layer 1] |
There is another network model which is TCP/IP.
Here are the 4 layers according to TCP/IP model:
| Application Layer [Layer 4] |
| Transport Layer [Layer 3] |
| Internet Layer [Layer 2] |
| Network Access Layer [Layer 1] |
Relation OSI and TCP/IP model:
Below is the relation between OSI model and TCP/IP model.
| OSI Model | TCP/IP Model
|
| Application Layer | Application Layer |
| Presentation Layer | |
| Session Layer | |
| Transport Layer | Transport Layer |
| Network Layer | Internet Layer |
| Data Link Layer | Network access Layer |
| Physical Layer |
Now the question comes, in Wireshark what model we should be expecting?
Actually in Wireshark we observe below layers
| Application Layer [Layer 5] |
| Transport Layer [Layer 4] |
| Network Layer [Layer 3] |
| Data Link Layer [Layer 2] |
| Physical Layer [Layer 1] |
Now we understand that the above layers are not exactly OSI or TCP/IP but a combination of both models.
Let’s look into Wireshark capture and understand better.
What we see in Wireshark?
We will take some protocols as example and understand the layers through Wireshark. The interesting part is all protocol does not have all the layers.
Note:
As Wireshark decodes packets at Data Link layer so we will not get physical layer information always. In some cases, capturing adapter provides some physical layer information and can be displayed through Wireshark.
So here are the sequence layers seen in Wireshark
| Data Link Layer |
| Network Layer |
| Transport Layer |
| Application Layer |
Hope you understand that Wireshark is just showing in reverse order. If physical layer information is given to Wireshark then that time we should see physical layer information on top of Data link. See below picture.
| Physical Layer |
| Data Link Layer |
| Network Layer |
| Transport Layer |
| Application Layer |
HTTP [It has 4 layers]:
You can follow below link to understand HTTP through Wireshark
https://linuxhint.com/http_wireshark/
Here is the screenshot of a HTTP packet where we can see 4 layers.

We know HTTP is an application layer so we see application layer also.
Now let’s see a transport layer protocol in Wireshark.
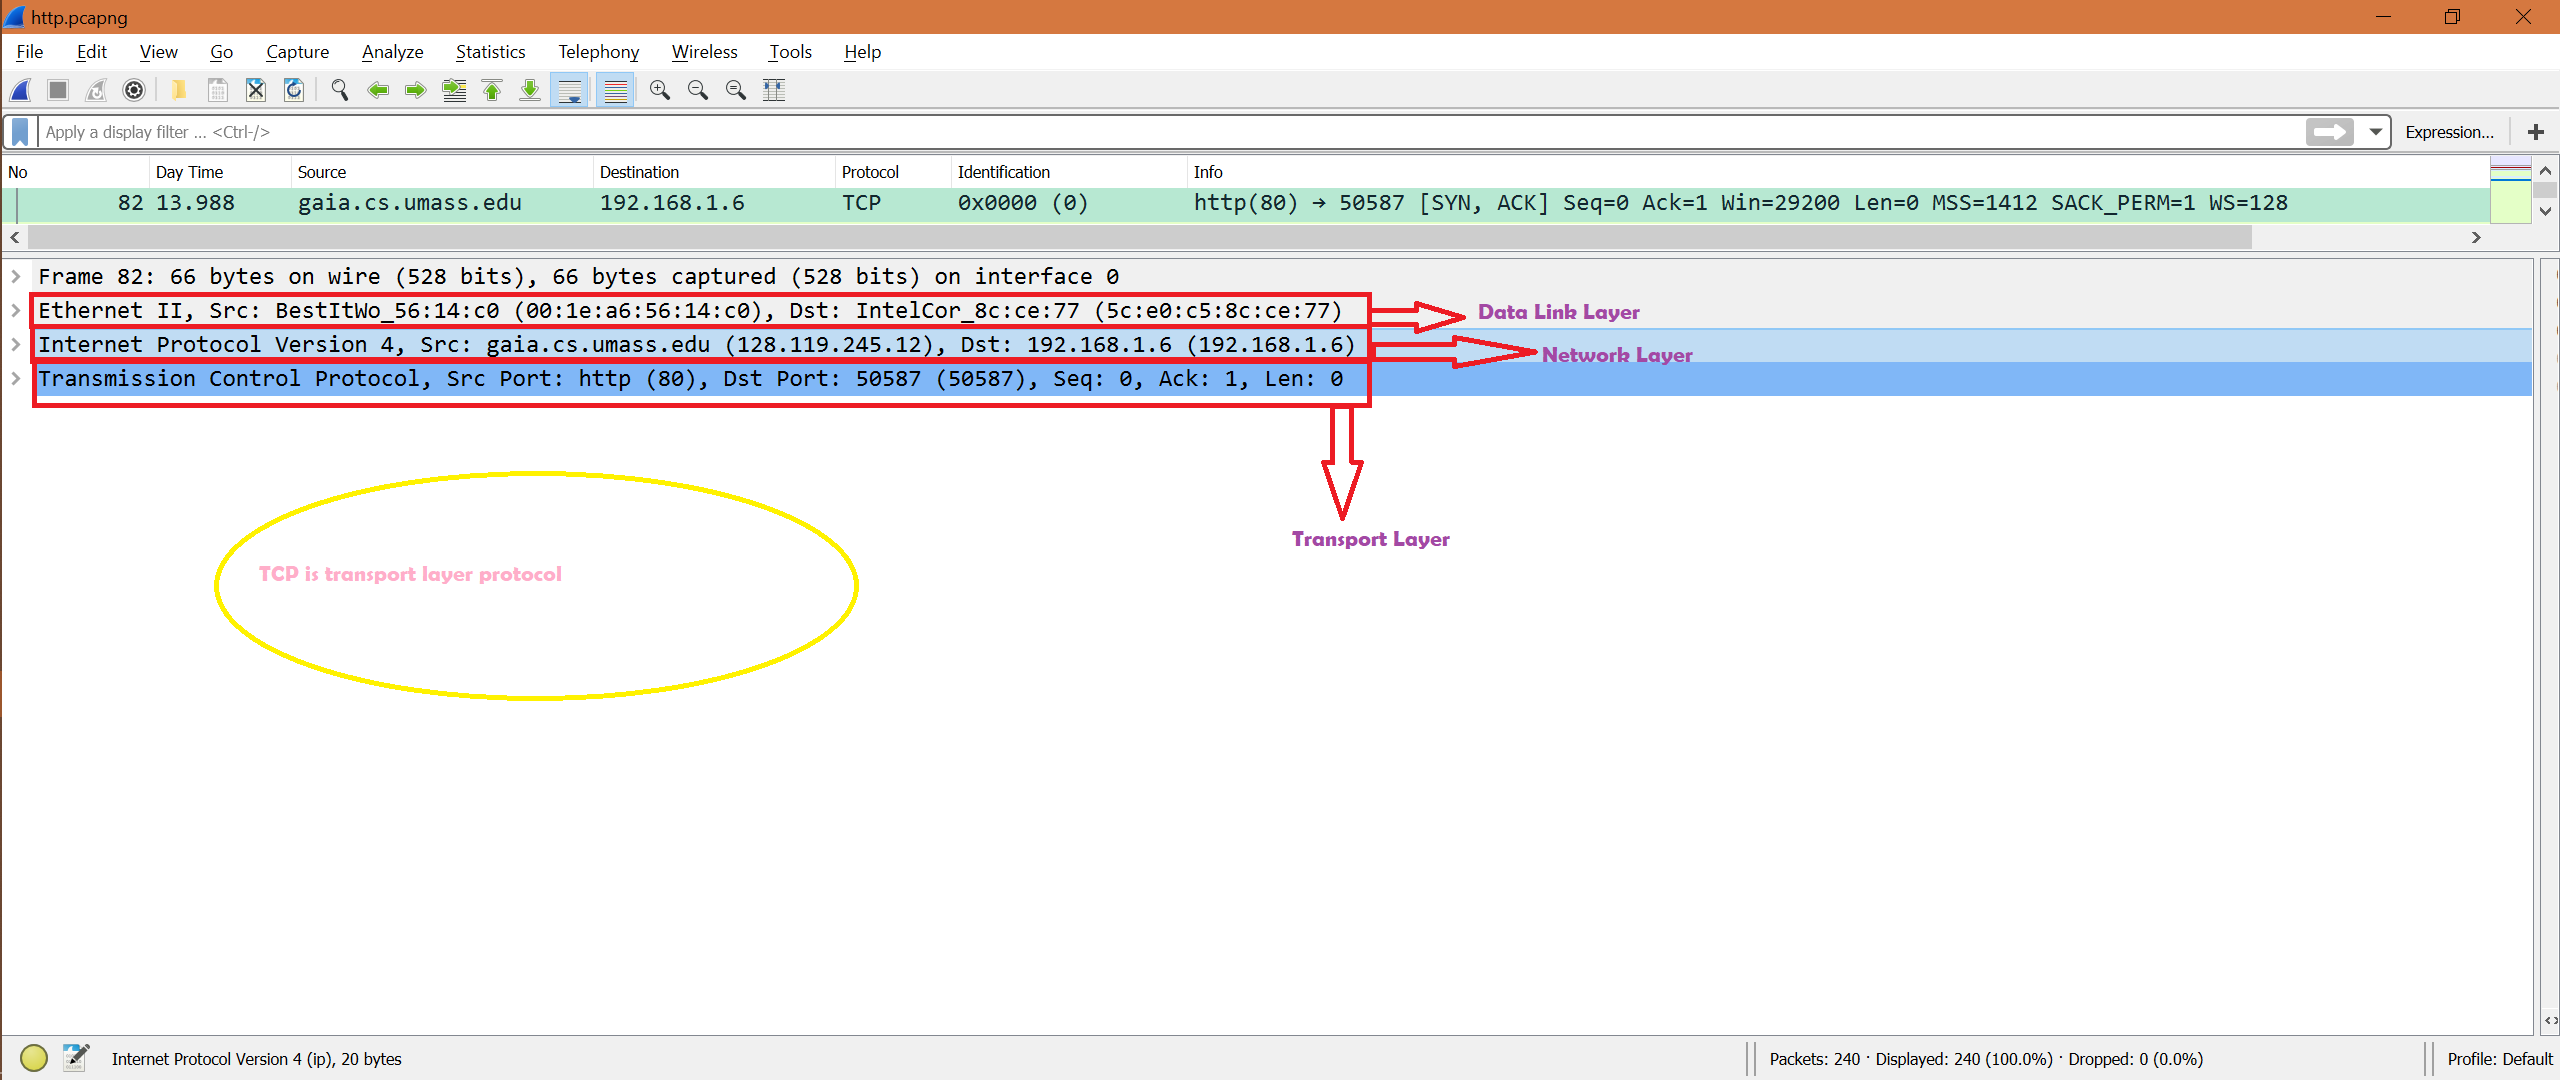
TCP [It has 3 layers]:
Here is the screenshot of a TCP packet where we can see 3 layers.
Let’s see ICMP packet.
ICMP [It has 2 layers]:
Here is the screenshot of an ICMP frame where we can see 2 layers.

Now let’s see one wireless TCP frame where we can see physical layer information.
Wireless TCP [It has 4 layers]:
Here is the screenshot of a TCP frame where we can see 4 layers including physical layer.

As TCP is a transport layer protocol so we did not see any application layer protocol.
Now let’s see Wireless capture for HTTP and hope to see all 5 layers including Application layer and physical layer.
Wireless HTTp [It has all 5 layers]:
Here is the screenshot of a HTTP frame where we can see including Application layer and physical layer.

Summary:
In summary we can say that depending on protocol different layers can been seen in Wireshark.
Reference:
If you want to know job of each layer, follow below link