Connecting to Wi-Fi on Raspberry Pi Headless (Without Monitor):
If you don’t have a monitor and also don’t have an Ethernet cable that can assign IP addresses to your Raspberry Pi via DHCP automatically, then you may think you don’t have a way to connect Raspberry Pi to your Wi-Fi network. But don’t lose hope. There are people configuring Raspberry Pi headless (without monitor). You can too. First, insert your microSD card on your computer. Then, flash the microSD card with Raspbian OS using Etcher.
NOTE: I have written a dedicated article on installing Raspbian on Raspberry Pi. You should take a look at it here on LinuxHint.com if you’re having problems with installing Raspbian on Raspberry Pi.
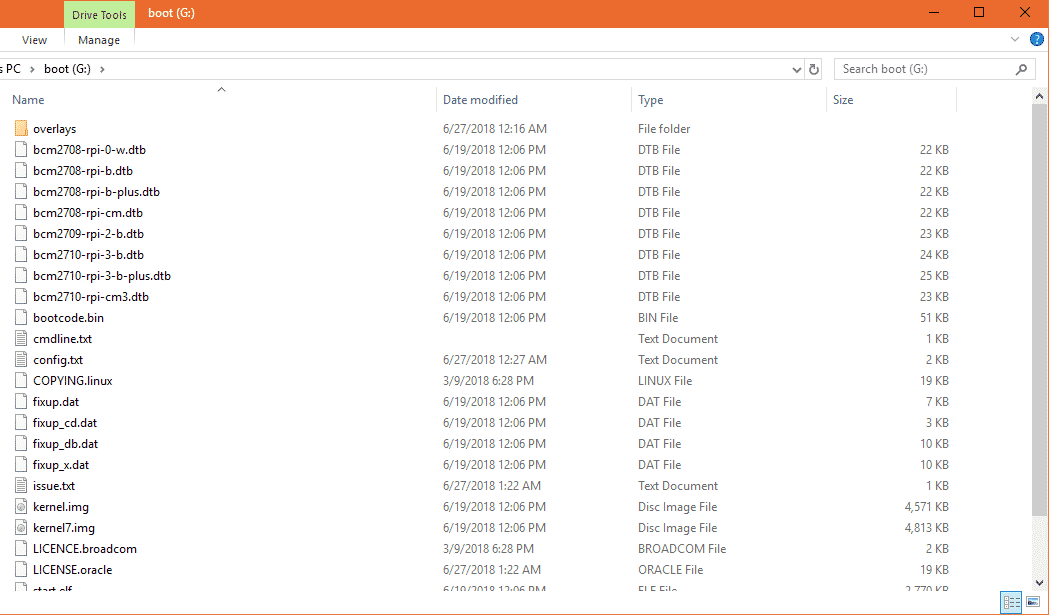
Then, eject your microSD and insert it on your computer again. You will find a boot partition as shown in the screenshot below. Double click on it.

You will see many files inside this directory. You will have to create 2 more files in this directory.
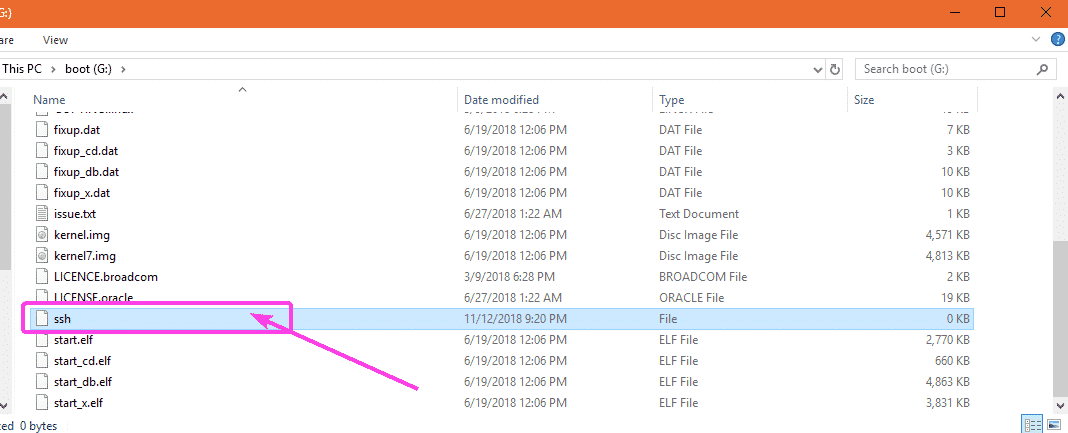
The first file is ssh (no extension). You don’t have to add anything in this file. The ssh file will enable SSH service. Without SSH enabled, you won’t be able to connect to your Raspberry Pi remotely. It will be useless.
The second file is wpa_supplicant.conf
In this file, you will have to type in the required configuration to connect to the Wi-Fi network. Just create a new file wpa_supplicant.conf and add the following lines to it. Be sure to make changes where necessary depending on your configuration. Finally, save the file.
ctrl_interface=DIR=/var/run/wpa_supplicant GROUP=netdev
update_config=1
network={
ssid="WIFI_SSID"
scan_ssid=1
psk="WIFI_PASSWORD"
key_mgmt=WPA-PSK
}
NOTE: Don’t forget change WIFI_SSID to your Wi-Fi SSID, change WIFI_PASSWORD to your Wi-Fi password.
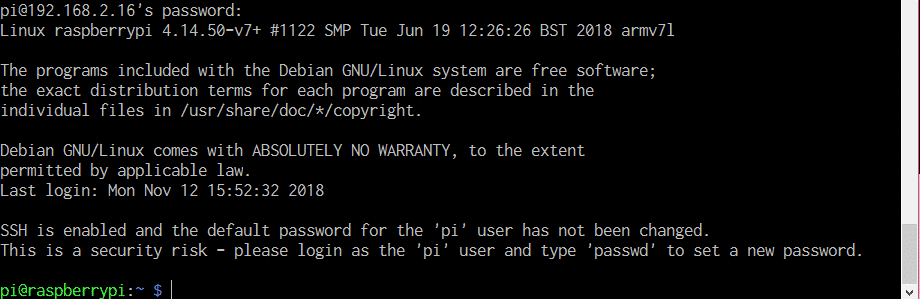
Now, eject the microSD card from your computer and insert it on your Raspberry Pi. Then, power on your Raspberry Pi. Your Raspberry Pi should be connected to the Wi-Fi network. You can find the IP address that is assigned to your Raspberry Pi via your Wi-Fi router from the control panel of your Router very easily. Mine is happen to be 192.168.2.16.
Now, your Raspberry Pi should be accessible remotely via SSH. The default username is pi and password is raspberry. To connect to your Raspberry Pi using SSH for the first time, run the following command:
Now, type in yes and press <Enter>.

Now, type in the password raspberry and press <Enter>.

You should be connected to your Raspberry Pi remotely.
Re-configuring Wi-Fi Configuration on Raspberry Pi:
If you have network connectivity already and can connect to the Raspberry Pi remotely via SSH or VNC, and want to change the Wi-Fi configuration, then all you have to do is edit the wpa_supplicant configuration file /etc/wpa_supplicant/wpa_supplicant.conf
First, connect to your Raspberry Pi remotely via SSH or VNC.
Then, edit the /etc/wpa_supplicant/wpa_supplicant.conf configuration file with the following command:

The wpa_supplicant.conf configuration file should be opened as you can see in the screenshot below.
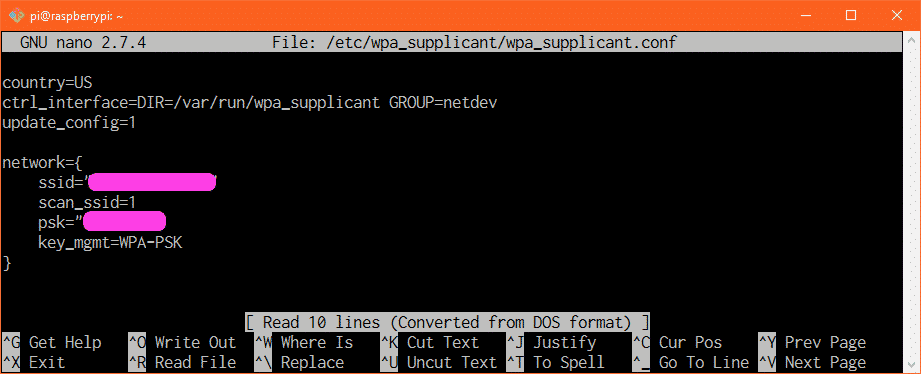
Now, modify your Wi-Fi connection details as required and save the file again by pressing <Ctrl> + x and then press y followed by <Enter>. Now, reboot your Raspberry Pi, the changes should be applied.
Adding Backup Wi-Fi Network:
You can add details of multiple Wi-Fi network on your Raspberry Pi. That way, if any Wi-Fi SSID is not available, Raspberry Pi will try to connect to the next Wi-Fi SSID. If it fails, it will try to connect to the next one and so on. I think this is an awesome feature of wpa_supplicant.
To add a backup Wi-Fi network on your Raspberry Pi, just edit the configuration file /etc/wpa_supplicant/wpa_supplicant.conf with the following command:
Now, type in the lines as marked in the screenshot below in the order in which you want the Raspberry Pi to try to connect to the Wi-Fi network.

For example, let’s say you have Wi-Fi networks with the SSID CSE_LAB1 and HOME1 respectively. You want to connect to the Wi-Fi SSID HOME1 when you’re home. But when you’re at the university, you want to connect to the Wi-Fi SSID CSE_LAB1. So, here, HOME1 is your primary Wi-Fi SSID and CSE_LAB1 is your secondary Wi-Fi SSID. The wpa_supplicant.conf configuration file should look as follows in this case.
ctrl_interface=DIR=/var/run/wpa_supplicant GROUP=netdev
update_config=1
network={
ssid="HOME1"
scan_ssid=1
psk="HOME1_PASS"
key_mgmt=WPA-PSK
}
network={
ssid="CSE_LAB1"
scan_ssid=1
psk="CSE_LAB1_PASSWORD"
key_mgmt=WPA-PSK
}
Make sure you reboot your Raspberry Pi for the changes to take effect. So, that’s how you configure Wi-Fi on your Raspberry Pi single board computer using wpa_supplicant. Thanks for reading this article.