Changing Screen Resolution Using vga Kernel Parameter:
This is the traditional method of changing screen resolution using the Linux kernel boot parameter. It will work on CentOS 7 and older Linux distributions very well.
The vga kernel boot parameter accepts a code which represents the screen resolution. Each of the supported screen resolution on your monitor has a unique decimal number.
The easy way to find the codes is to use vga=ask boot parameter when you boot into your operating system.
To do that, go to the GRUB menu, select an entry and press e.

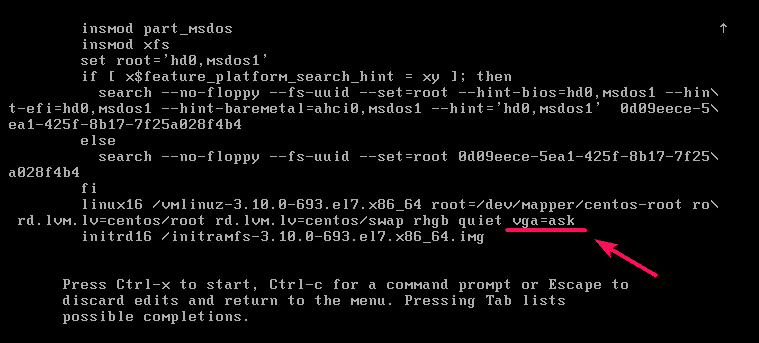
Now, add vga=ask at the end of the line that loads the kernel as shown in the screenshot below. Note that, the line that loads the kernel starts with linux. Once you’re done, press F10 to boot.
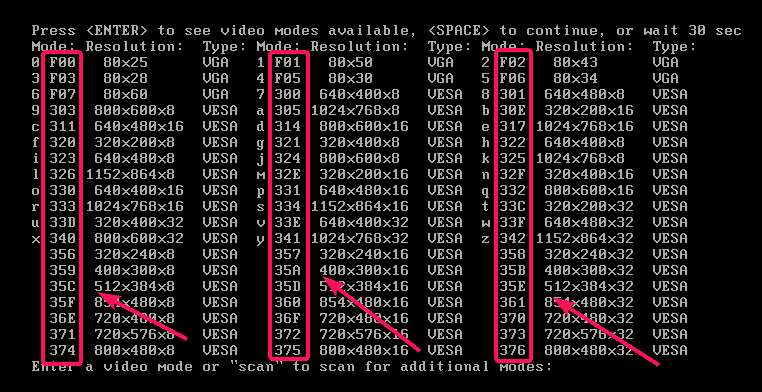
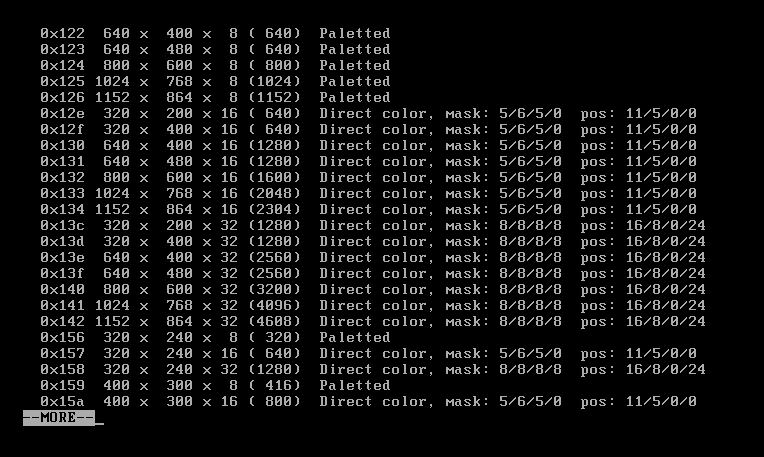
Now, press <Enter> to see all the supported screen resolutions.

As you can see, all the supported screen resolutions and a hexadecimal code for each screen resolution is listed. If you want to test a screen resolution to see how it works on your computer, just type in the hexadecimal code and press <Enter>.
Let’s say, the screen resolution you picked works and you would like to set it as the default screen resolution. To do that, you have to modify the GRUB configuration files on your computer.
Let’s say, the screen resolution you would like to set is 1024x768x32, which has the hexadecimal code 341. When you set it as the default on the GRUB configuration file, you have to change the hexadecimal code to an equivalent decimal code.
So, you have to add vga=833 kernel boot parameter on the GRUB configuration file.
First, open the GRUB configuration file with the following command:

Now, add vga=833 to the end of the GRUB_CMDLINE_LINUX as shown in the screenshot below. Once you’re done, save the file.

Now, update the GRUB configuration files with the following command:

GRUB configuration files should be updated. Now, the next time you boot, the new screen resolution should be applied.

Now, reboot your computer with the following command for the changes to take effect:
Changing Screen Resolution Using gfxpayload:
On newer version of GRUB, the screen resolution is set using gfxpayload. So, the vga parameter may not work correctly. If it is the case for you, then this section is for you. It’s also easy to set screen resolution using this method than the traditional method.
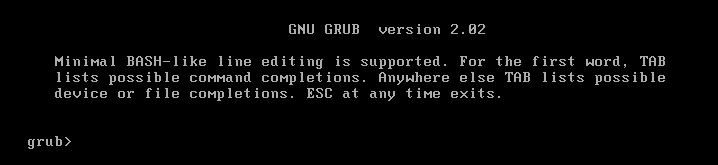
First, press c from the GRUB menu to go to the GRUB command prompt.

You should be in the GRUB command prompt.
Now, run the following command to enable the pager module.

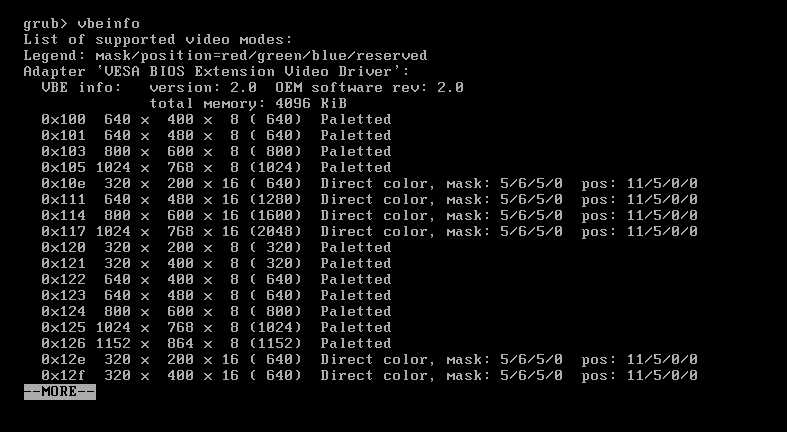
Now, to find the supported screen resolution on your computer, run the following command:

As you can see, all the supported screen resolutions are displayed. The output is very long, so, it uses the pager. You can press <Enter> to navigate forward and see whether the screen resolution you’re looking for is supported.
As you can see, more screen resolutions are displayed. Here, you don’t have to remember any codes. Just remember the screen resolution. For example, if you want to set the screen resolution 1024x768x32, then this is what you have to put in the GRUB configuration file. Very simple.
In order to set the screen resolution, open the GRUB configuration file with the following command:

The configuration file should be opened. Now, add the line GRUB_GFXPAYLOAD_LINUX=1024x768x32 as shown in the screenshot below. Once you’re done, save the file by pressing <Ctrl> + x followed by y and <Enter>.

Now, update the GRUB configuration files with the following command:

The GRUB configuration files should be updated. The next time you start your computer, the new screen resolution should be applied.

Finally, reboot your computer with the following command for the changes to take effect:
So, that’s how you set screen resolution using the kernel boot parameters on Linux. Thanks for reading this article.