Time is a very important part of our everyday computing. We, humans, may even tolerate hours of time mismatch but in the case of the computer, even a millisecond mismatch can cause some real trouble. For ensuring that your system’s time is on the correct path, it’s necessary to set the right time zone. When you first install Ubuntu, you can choose the right time zone. In case you need to change the time zone, this guide will help you out.
Changing time zone
There are 2 different approaches to changing the time zone – using system tools and using commands.
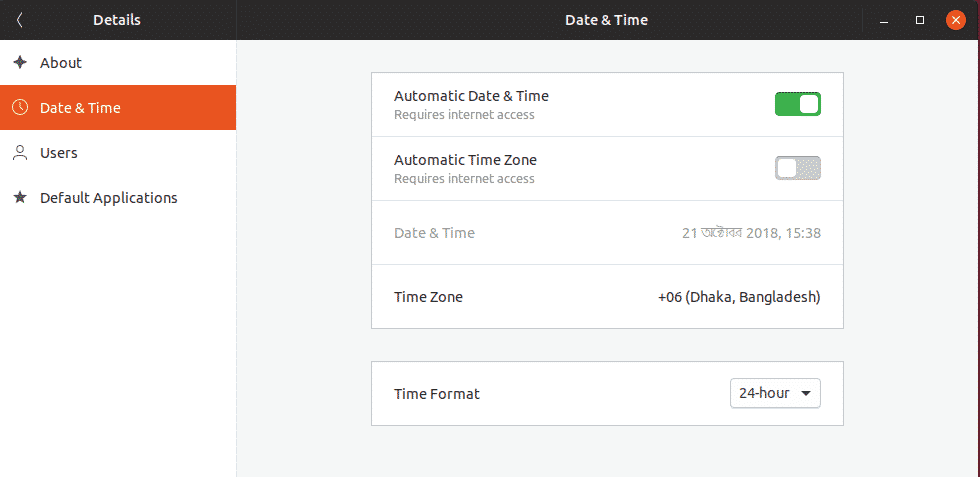
Change time zone from system settings
Open the GNOME menu.

Search for “time zone”.

Select the “Date and Time” from “Settings” section.

Uncheck the option “Automatic Time Zone”.

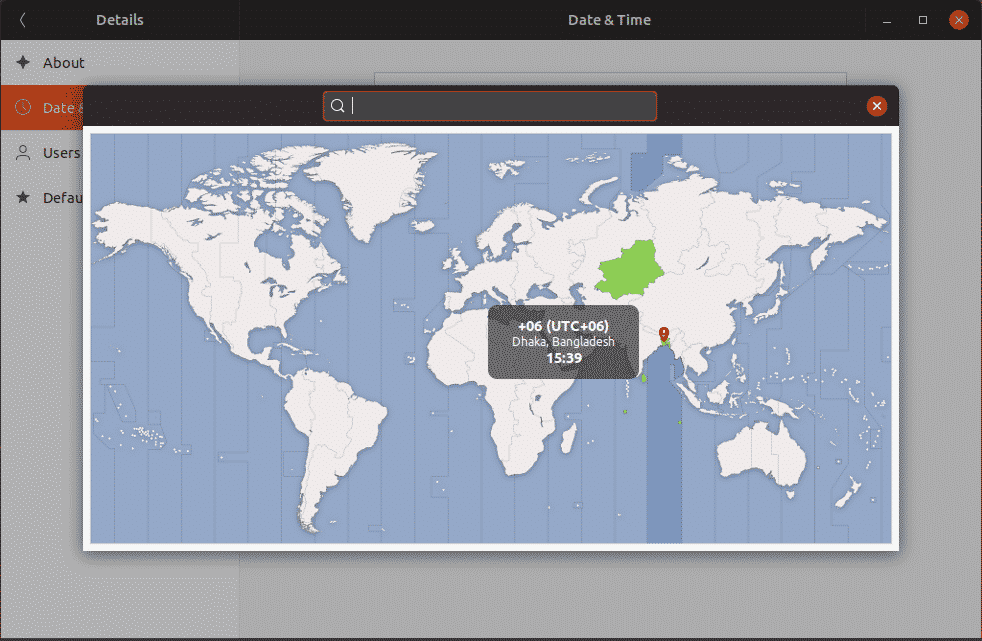
Click on “Time Zone”.

Change to the time zone you want, then close the window.
It’s recommended to restart your system to make sure that all your software are working the updated time zone.
Changing the time zone using the commands
Open up a terminal and run the following commands –
sudo -s
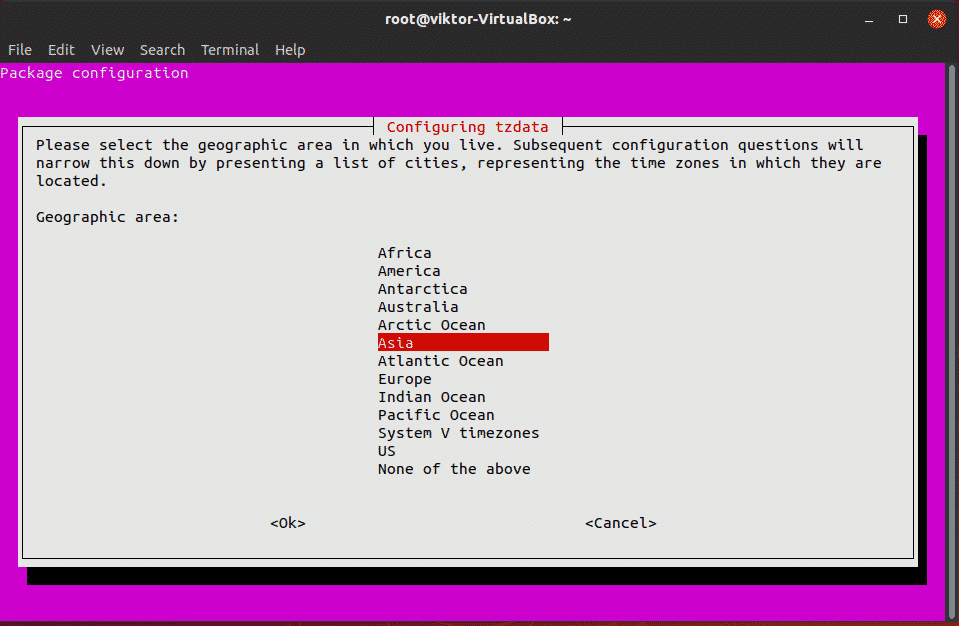
dpkg-reconfigure tzdata
dpkg-reconfigure tzdata
Follow the on-screen steps for selecting your target time zone.


Once the time zone change is complete, you’ll see the following confirmation message –

Enjoy!
ONET IDC thành lập vào năm 2012, là công ty chuyên nghiệp tại Việt Nam trong lĩnh vực cung cấp dịch vụ Hosting, VPS, máy chủ vật lý, dịch vụ Firewall Anti DDoS, SSL… Với 10 năm xây dựng và phát triển, ứng dụng nhiều công nghệ hiện đại, ONET IDC đã giúp hàng ngàn khách hàng tin tưởng lựa chọn, mang lại sự ổn định tuyệt đối cho website của khách hàng để thúc đẩy việc kinh doanh đạt được hiệu quả và thành công.


