1. Why are good outputs so important in bash scripts?
There are many, many times when you, as a system administrator, need to write bash scripts able to provide clear and easy-to-read outputs. Interactive scripts are on the other side of this same coin; to prompt appropriate messages in a systematic and eye-catching manner can avoid incorrect inputs and give further directions of what the program is requesting.
Imagine a script that requires multiple data as input. While the user enters different information, the shell needs to execute exhaustive and time-consuming calculations. Unless the program prints out messages alerting of what it is doing, or the estimated duration of the execution, many operators tend to terminate the application.
Unfortunately, you cannot count on advanced publishing application, like Adobe InDesign, to complete this task on terminals. Despite the graphics limitation in terminal emulators, more traditional text processing utilities and filters are good choices to start. There are also few techniques that can make your bash script outputs look better without risking performance or making a mess in your code.
In this article, you find an easy approach to create awesome outputs in shell scripts using only tput, printf and shell expansions. This technique also helps you to speed up the coding process to create alerts and comments without the need of reusing tput or escape characters again and again.
Here is an example of table that uses this technique:

2. Tips and tricks to create awesome outputs using only tput, printf and shell expansions
2.1 shell expansions: an overview
Bash can perform seven forms of shell expansions: filename, brace, tilde, parameter, arithmetic and variable expansions, command substitutions, and word splitting. In the next example, the touch command utilizes a brace expansion to generate three different files in a single expression.
$ ls
file-1.txt file-2.txt file-3.txt
The shell executes the expansions before the command is processed. The expansion is divided into tokens and then the command line uses those indicators. Being more specific, the brace expansions generates a series of three tokens in the last command; subsequently, the shell concatenates those elements with the parameter of the command to execute. The order is as follows:
- tokens generated: file-{1…3}.txt becomes file-{1,2,3}.txt
- expansions executed: file-1.txt file-2.txt file-3.txt
- command performed: touch file-1.txt file-2.txt file-3.txt
To detail every aspect of the bash expansions is out of the scope of this article; however, the official Bash documentation can help beginners to understand peculiarities found in shell expansions. There two expansions, though, that are important to understand the technique used in this article: parameter expansion and command substitution.
2.1.1 How parameter expansion and command substitution work
In essence, parameters expansions substitute a variable for its contents. This mechanism is handy to perform different shell substitutions and expansions, including selections and substring expansions with indexed arrays.
Here is the essential syntax for parameter substitution:
Sometimes, braces are optional, but the dollar sign ($) is always required to perform parameters, arithmetic expansions and command substitutions. As a good practice, it is recommended to enclose the variable with braces and isolate the expansion with double quotes.
$ echo $myName
diegoaurino
$ echo "${myName}"
diegoaurino
One important thing that is possible to do with parameter expansions is to set a command as variable and then use it later without typing the full command again and again.
$ echo "${txUnderline}Underlined Text"
Underlined Text
The last example reveals how the technique used in this article works. The txUnderline variable includes, as its value, the tput command surrounded by a command substitution. When the echo command receives the variable as a parameter expansion, Bash expands its values as a command substitution. Finally, the shell only needs to replace the output of the command with the command itself.
The command substitution occurs in a subshell environment. The standard output of the command – without the newline character at the end of the output – replaces the command in the command line. If you are a beginner and you are having an “inception moment”, that is all right.
There are two ways to perform command substitutions:
And
`command`
For consistency reasons, the first one is preferred over the old-school backquotes style.
2.2 tput and bash expansions
In the last example, the tput command underlines the entire output. tput, the portable terminal control, can change and control terminal characteristics, like make text bold, clear the screen, brighten output up, return the number of columns, save and restore cursor position, etc. Many utilities and shell scripts provided by GNU distributions use tput to create visual effects or formatted outputs.
In other words, tput was specially designed to be used in shell scripts. To avoid repetitions in argument strings, it is a good idea to combine shell mechanisms, like parameters expansions and command substitutions, with tput capabilities.
You can use the following list in your next script.
bgBlack=$(tput setab 0) # black
bgRed=$(tput setab 1) # red
bgGreen=$(tput setab 2) # green
bgYellow=$(tput setab 3) # yellow
bgBlue=$(tput setab 4) # blue
bgMagenta=$(tput setab 5) # magenta
bgCyan=$(tput setab 6) # cyan
bgWhite=$(tput setab 7) # white
# foreground color using ANSI escape
fgBLack=$(tput setaf 0) # black
fgRed=$(tput setaf 1) # red
fgGreen=$(tput setaf 2) # green
fgYellow=$(tput setaf 3) # yellow
fgBlue=$(tput setaf 4) # blue
fgMagenta=$(tput setaf 5) # magenta
fgCyan=$(tput setaf 6) # cyan
fgWhite=$(tput setaf 7) # white
# text editing options
txBold=$(tput bold) # bold
txHalf=$(tput dim) # half-bright
txUnderline=$(tput smul) # underline
txEndUnder=$(tput rmul) # exit underline
txReverse=$(tput rev) # reverse
txStandout=$(tput smso) # standout
txEndStand=$(tput rmso) # exit standout
txReset=$(tput sgr0) # reset attributes
It is just a brief set of the tput capabilities to help you to create your own scripts using these snippets. You can even create terminal games using tput capabilities. The GNU documentation for tput lists the full capabilities of the program. In the last session, this article gives examples of use in bash functions.
Note: be aware that, depending on the theme, color schemes or typeface used, your terminal emulator can output a completely different color; in general, the default configurations of each terminal are the best place to test scripts. Terminals on the WSL are also bad places to make tests with tput; some of the terminals and console emulators for Windows print a trailing newline and carriage return by default.
2.3 printf: an overview
For convenience reasons, many Linux users depend only on the echo command to output strings and variables. By contrast, the printf command tends to be a more robust choice. To explain why, a quick look at the basic syntax of both can give a hint.
This represents the echo syntax and usage:
The simplicity of the syntax above is handy in many situations, especially on the command line. This explains why echo is so popular. On the other hand, the printf usage looks challenging at first glance:
As you can see, printf utility inherited aspects of its syntax from the homonymous function in the C programming language. The FORMAT parameter signs how to output the ARGUMENT. It makes printf less attractive to use on the command line because the echo command can be faster to complete more simple tasks. Here are examples:
Your username is bashUser
$ echo Your username is $USER
Your username is bashUser
However, the format capabilities of printf are perfect for complexes output tasks when writing in scripts and help to avoid code repetition. As an illustration, imagine you need to format a long .txt file that includes a single column of numerical values. Every five numbers represent a unique value associated with an element; for example, the first represents elementOne, the second, elementTwo, and so on; the sixth belongs to elementOne, et cetera. Your job is to output a table listing every value associated with an element in a different column. To complete this job using echo can be laborious, but printf makes it easier.
93525 27194 75712 92845 97337
66920 93193 93730 51837 63153
67571 70957 37864 79374 71710
92206 30200 23248 13139 86719
71494 15622 13092 98846 49628
There are no problems of using both echo and printf in the same script, because you can utilize only the best of each one. If you want to output a modest new line, for example, it is faster type echo than printf “n”. The only reason to keep away from the echo command is to prevent compatibility problems between UNIX-like operating systems. A quick search on Google can give you different methods to resolve conflicts regarding the echo usage in different environments. The FORMAT parameter in printf also prevents compatibility glitches.
The documentation for printf gives an extensive list of format strings, modifiers and escape codes that are hard to show in a single article. But, sticking with the basics, here are some essential examples of use:
The last command uses two conversion characters as FORMAT parameters; the % character associated with the s prints a string of characters given as ARGUMENTS. A good practice is to enclose both arguments and format string in double quotes to allow shell expansions and substitutions. The command also prints the three argument strings without spaces between.
The echo command automatically outputs a newline at the end of the last string; the same does not occur with printf. The command above makes use of the newline escape character sequence (n) to print each string of characters in a new line. This behavior is very important in shell scripts because the user has total control of the format string without specifying control options.
In the last example, the format string is more restrictive. It prints each string of character accepted as parameters within spaces in the same line.
This final command hints how printf creates columns in tables. The first and second strings of characters are printed from the twentieth column; as the first string of characters has 7 characters, it starts from the thirteenth position. You can think this behavior as a right alignment from the twentieth column in the terminal emulator. Thus, the next strings begin at the twenty-first position and the last one, from fortieth-first, and is right aligned from the seventieth.
2.4 putting anything together in a script
This section shows a collection of bash script functions to use in real world scenarios.
2.4.1 function to print a given Unicode n times
# usage: xUnicode [unicode number] [n times]
function xUnicode()
{
local uCharacter=$1
local nTimes=$2
local nLines=$3
local lineTemplate=$(printf "u$uCharacter%.0s" `(seq 1 $nTimes)`; echo)
echo $lineTemplate
}
# example:
# xUnicode 26a1 50
Here the last four numbers of a given Unicode character are used as a variable expansion inside the format string. This function produces an output as follows:
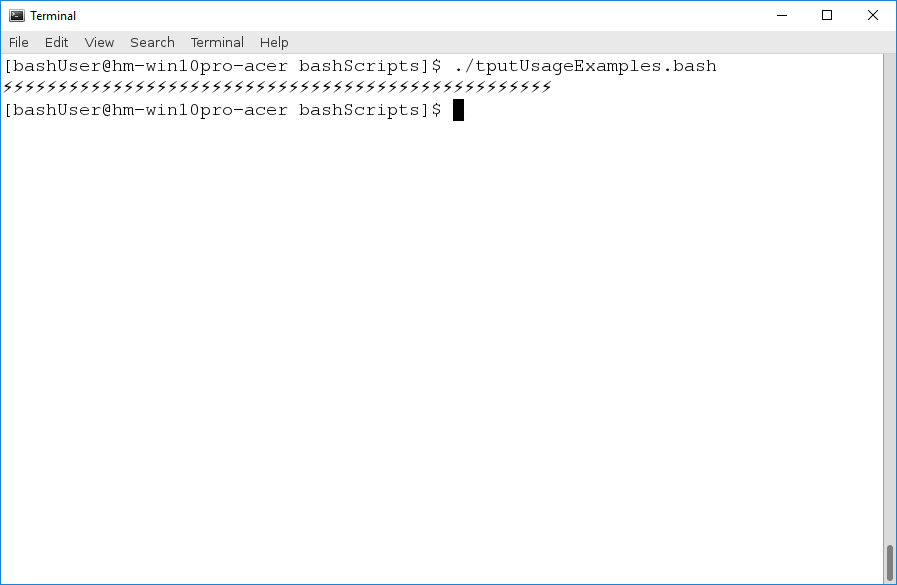
The amp-what website is a good place to find Unicode characters, symbols and icons.
2.4.2 Function to wrap a line with tput capabilities
# usage: lineWrapTput "$(function to call)" "[tput format alias]"…
# up to tree aliases
function lineWrapTput() {
printf "$2$3$4%s${txReset}n" "$1"
}
# example:
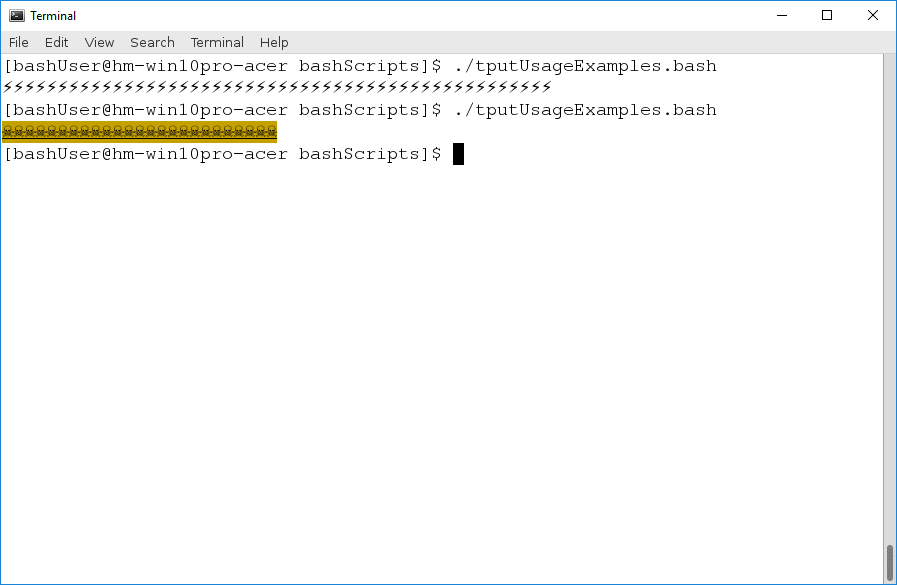
# lineWrapTput "$(xUnicode 2620 25)" "${bgYellow}" "${fgBlack}" "${txUnderline}"
In the format string parameter of the printf command, up to three tput format variables are given. The ${txReset} variable ensure that only the string of characters is surrounded by tput. Then, the newline is printed. The output of this function is:
2.4.3 Functions to print a line n times and generate messages
# usage: xLine [$var] [n-times]
function xLine () {
for i in $(seq 1 $2)
do
echo $1
done
}
# function to generate alert messages
# usage: wrapMessage ["message"] [unicode number] "[tput format alias]"…
# up to tree aliases
function wrapMessage() {
local message=$1
local messageUpper=${message^^}
local messageSize=${#messageUpper}
lineWarning=$(lineWrapTput "$(xUnicode $2 $messageSize)" $3 $4 $5)
xLine $lineWarning 2
echo $3$4$5$messageUpper${txReset}
xLine $lineWarning 2
}
# example
# wrapMessage "USB device has exceeded the power limits of it’s hub port" 26a1 ${bgYellow}
${fgBlack} ${txBold}
These last two functions combined can generate an alert message like this:
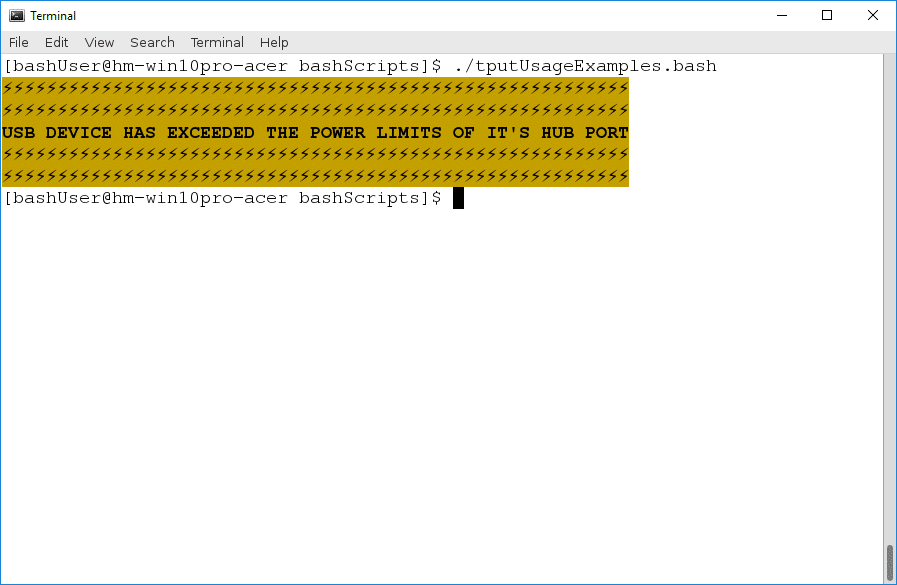
The first one is straightforward. The other combines lines with Unicode characters and the message inputted by the user. It counts the number of characters in the message string and then generates two lines of Unicode characters with the same length of the message. The function also applies tput color and readability effects.
Here you can find the full script.
Now you know the proper way to use this technique, it is your turn to be creative.
- Try to improve the script above to receive parameters from the command line.
- Try to create functions to print different types of messages and progress bars.
- Try to source the script that you modify in other scripts that requires to print success or alert messages.
Please, post your discoveries and questions on @LinuxHint twitter.