Ubuntu is a popular Linux distribution for home usage as well as enterprise users. Many users of Ubuntu rely on the Graphical User Interface for things like upgrade and package management. This tutorial teaches how to upgrade packages, upgrade the OS version, and automate the upgrade with ease all from your command line prompt.
Upgrade Ubuntu 14.04 to 16.04
Upgrading Ubuntu from 14.04 to 16.04 involves typing a couple of commands:
sudo su
apt-get install update-manager-core
do-release-upgrade
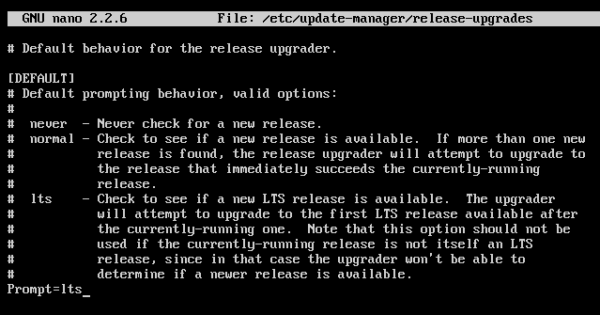
Before running the commands above be sure to edit the file /etc/update-manager/release-upgrades to indicate the default behavior for the release upgrader. In this release-upgrades file there are currently three methods to change the upgrade behavior, the first one is checking no updates, second method makes the current operating system to upgrade to the next immediate version, third method upgrade LTS version to next immediate LTS version. do-release-upgrade actually initiates the upgrade. After this command, it shows a couple of windows while performing the whole upgrade process automatically. It usually takes maximum a couple of minutes depending on the speed of the Internet connection with which the computer is connected.
Update Package List with apt-get update
Packages are application software that are installed to perform various tasks on the computer. Ubuntu uses the apt-get command to manage these packages, and with this command not only can packages can be installed, but also upgrade and uninstalled as well. The following instructions show how to update the package list to upgrade them.
As seen in the following command, it automatically downloaded the package list and metadata from the given online based repositories. This information will be used when upgrading the packages, so it’s recommended to perform this command before upgrading any package to obtain the latest version of it.
Upgrade Packages with apt-get upgrade
The difference between update and upgrade in this context is update retrieves the information about newer packages from repositories, so it can be used to move to the newer version of the currently installed packages. The upgrade can be performed with two commands in Ubuntu. apt-get upgrade and apt-get dist-upgrade. Upgrade command basically upgrades the packages to the newer version as its name implies without doing anything else, on the contrary dist-upgrade intelligently handles the dependencies of packages, and therefore while the packages are being upgraded, it’s possible new packages will be installed, and existing packages uninstalled depending on the package list installed on the system. So it’s advisable to always use apt-get dist-upgrade in most cases.
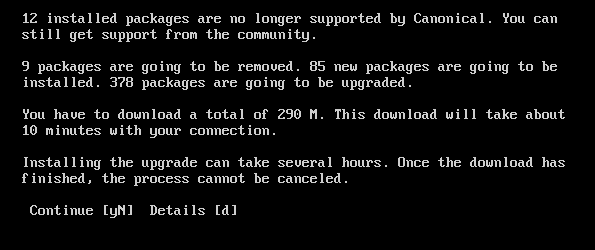
In this example below, since it uses the dist-upgrade command to perform the upgrade, upgrader intelligently handles the dependencies based on the package list available in the system. As seen, it removes 9 packages, abstains from upgrading one package, and also installs 85 packages which weren’t installed with the plain apt-get upgrade command.
Automate the Upgrade Process
Automation of the upgrade process will let the system handle the upgrade automatically without intervention by the administrator. This makes the maintenance not only efficient but also prevents the system from getting exposed to harmful malware and attacks.
apt-get install unattended-upgrades
Ubuntu, by default, provides unattended-upgrades to automate the upgrade process. It will automatically upgrade the packages whenever the newer updates are available. You can edit the /etc/apt/apt.conf.d/50unattended-upgrades file to configure the properties of this feature. By default, Ubuntu automatically installs security upgrades, but with a slight change in the file, regular updates can also be installed. In the second screenshot, it demonstrates how the unattended-upgrade is configured to send emails when problems or new package upgrades are found.
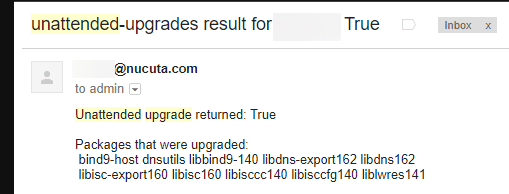
The following screenshot demonstrates how an unattended-upgrade email looks, when the email server is properly configured in the system. It returns true if the given conditions in the above files came true, and consequently installs the described updates in the system. If it upgraded some packages, the full description of the installation is included in the email along with the name of the packages.
Additionally, Ubuntu provides a few more settings to specify the frequency of the upgrade process. This dictates WHEN the upgrade process will be invoked. Edit /etc/apt/apt.conf.d/10periodic to modify these settings.
APT::periodic::update-package-lists dictates “apt-get update” to be run every n number of days, here it states 1; hence “apt-get update” is automatically invoked every day, APT::periodic::download-upgradable-packages dictates “apt-get upgrade –download-only” to be run in every n number of days, here it states 1; hence, “apt-get upgrade –download-only” is automatically invoked every day. Autoclean is not necessary, but it helps system to be free of packages which are no longer useful.
Get Notifications When New Updates Are Available
Apart from the automation of the upgrade process, the information about new packages can be retrieved by automated email. This tutorial uses apticron for this purpose, which is highly efficient and could identify the availability of new packages faster than the manual way. The biggest advantage of this method is the ability to identify newer upgrades without even logging in to the server, if unattended-upgrade is turned on along with this, it’s possible to see which packages were actually upgraded. However, there are downsides for automated upgrade too, such as configuring the new packages when they are automated will not have human oversight, so just receiving an email notice might be better. Or you can blacklist such packages when automatically upgrading in unattended-upgrades to ensure only safe packages are automatically upgraded.
apt-get install apticron
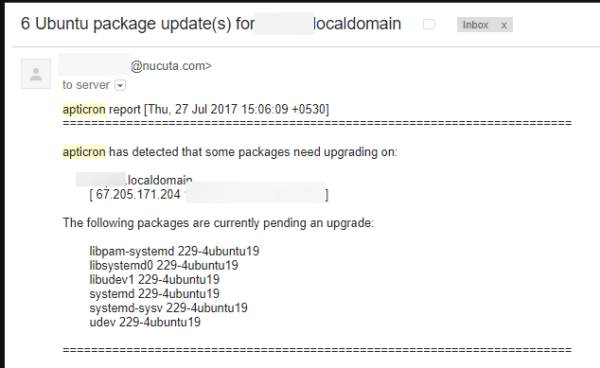
Once apticron is installed with the given command above, it can be configured in the file: /etc/apticron/apticron.conf. The only thing to be stated is the email address of the recipient who is responsible for managing the server, presumably the administrator. If the email server is properly configured, the apticron email should look like in the following screenshot. It contains the date of the report, server name and IP, which packages have new upgrades along with their package names, and their full details which weren’t mentioned here due to the space.


