In this article, I will show you the top 10 GNOME 3 Tweaks using GNOME Tweak Tool. Let’s get started.
Removing the Watermark Logo from the Desktop Wallpaper
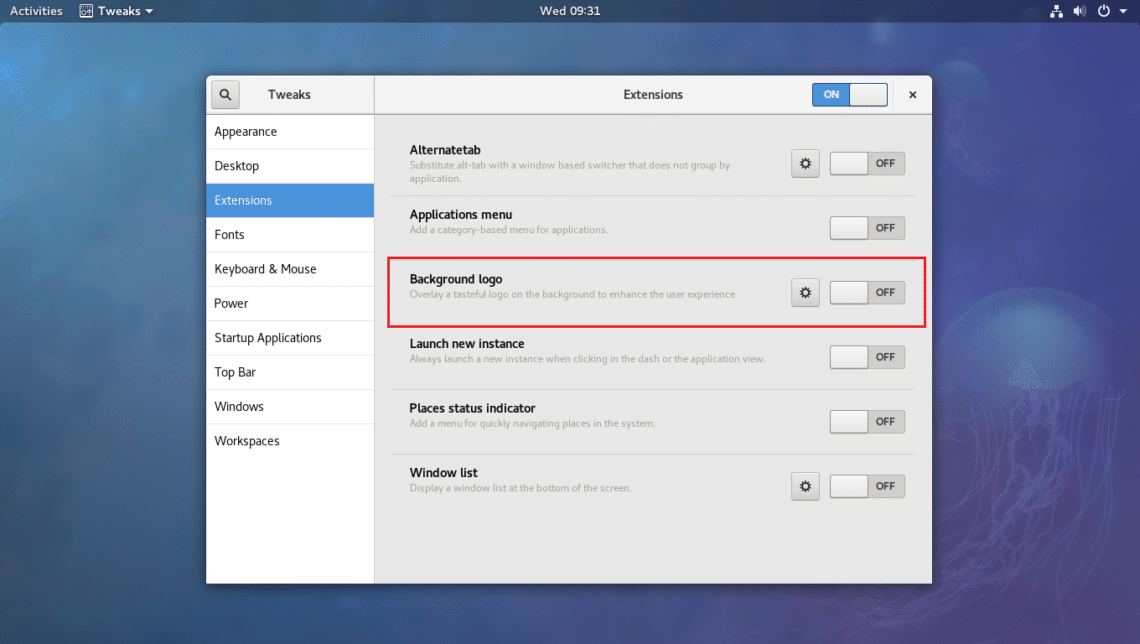
When you start a GNOME 3 Desktop, some distributions may leave a watermark logo on your desktop like Fedora.
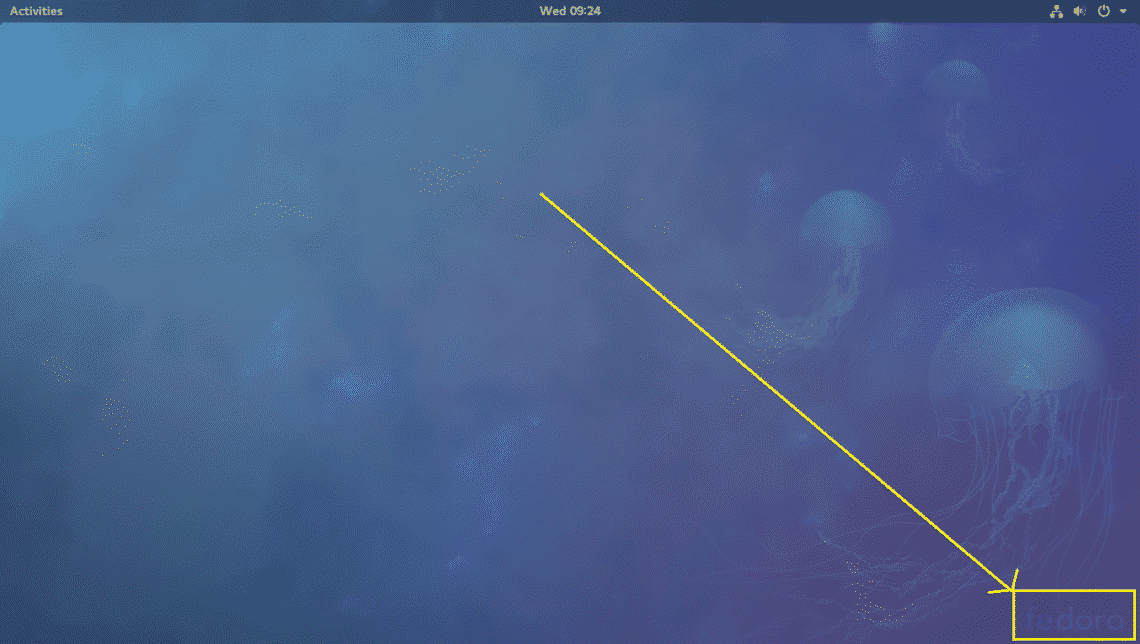
If it’s annoying, you can easily remove it using the GNOME Tweak Tool.
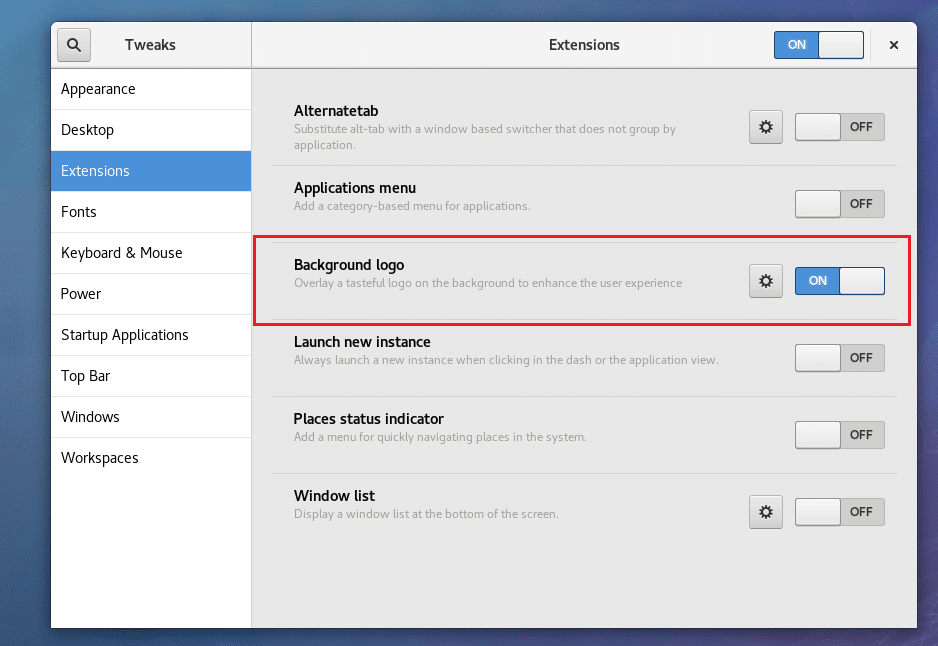
Just open GNOME Tweak Tool and go to Extensions and toggle OFF the Background logo. The watermark should be removed.
The watermark logo should be removed.
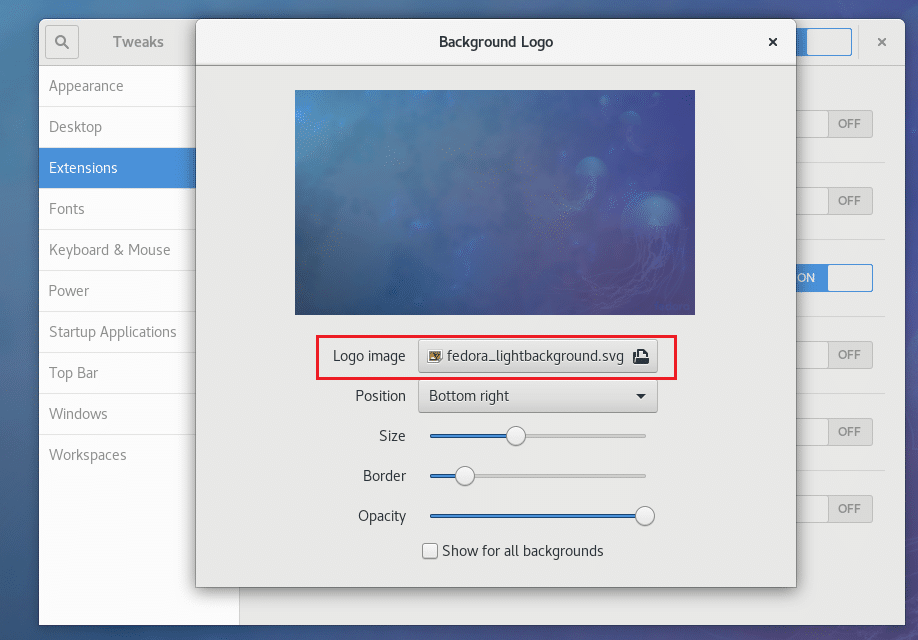
Alternatively, you can enable the watermark logo and add your own logo to the Desktop. Just click on the gear icon.
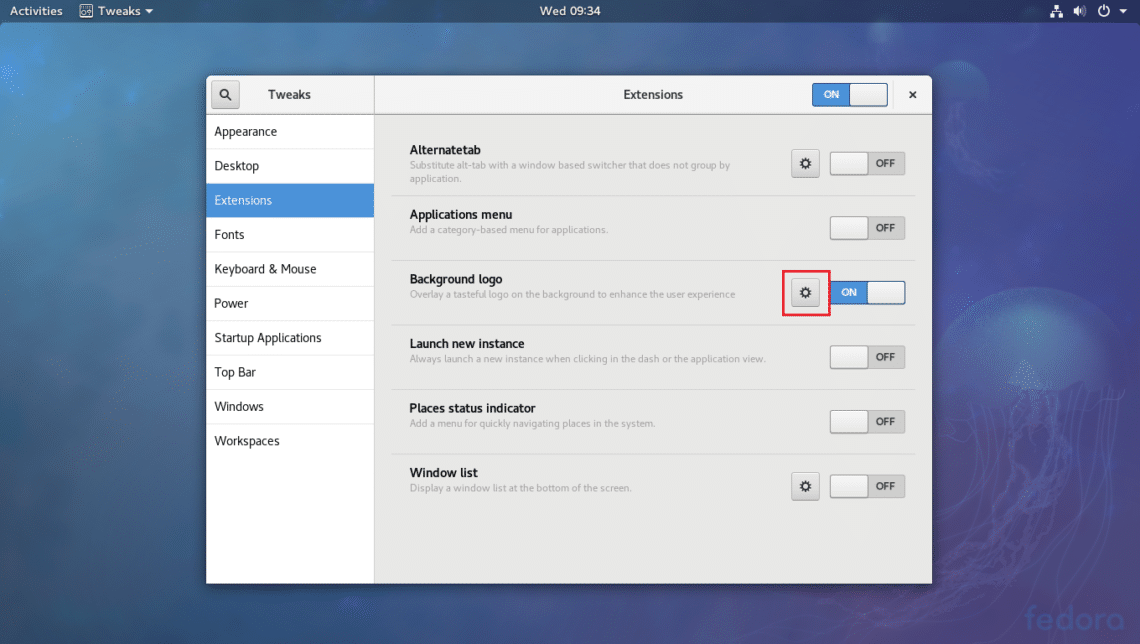
And change the image by clicking on the marked section as shown in the screenshot below.
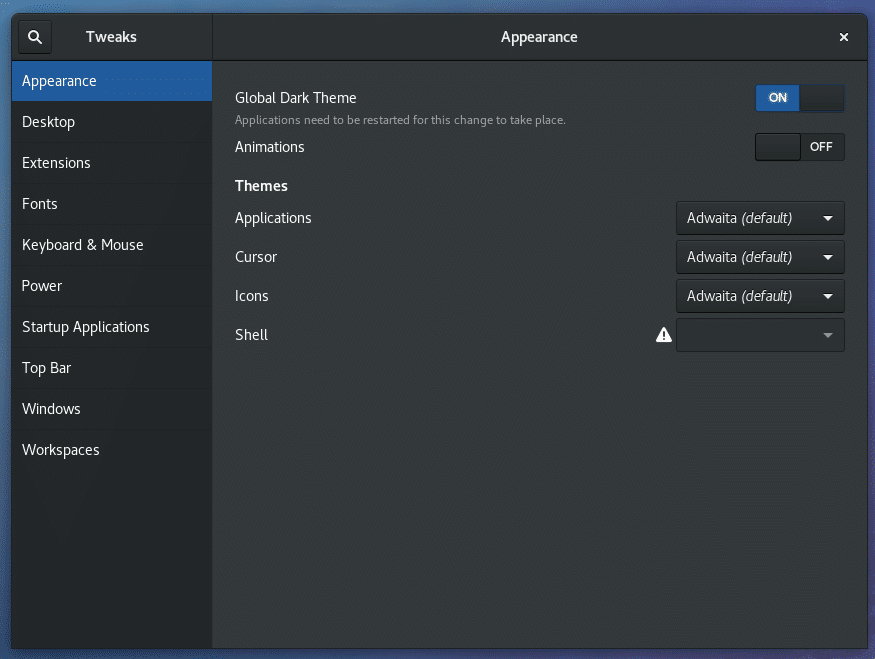
Enable Global Dark Theme
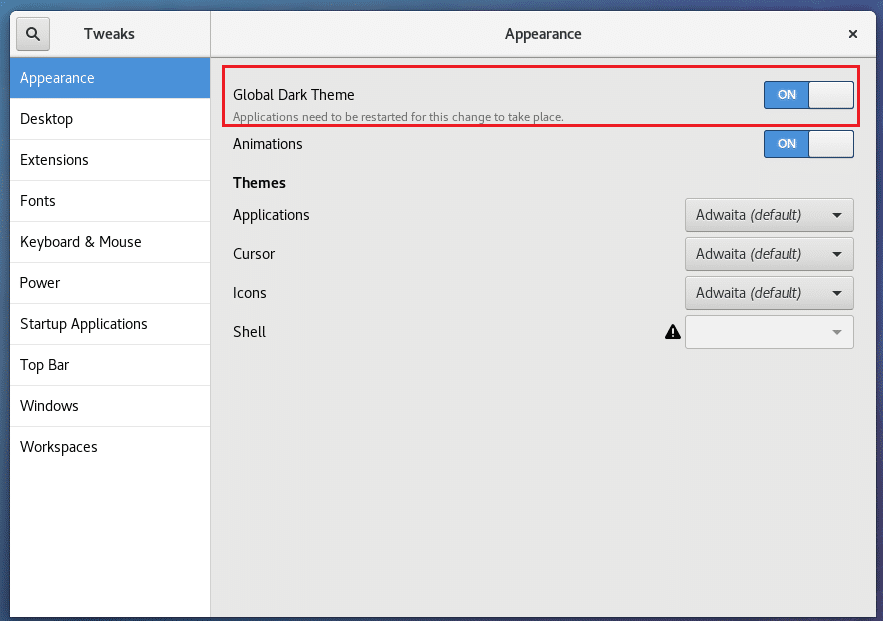
By default, on GNOME 3 desktop, a white theme is enabled. But if you want, you can enable a global dark theme. Doing so will change the look and feel of all GNOME 3 apps.
Just open GNOME Tweak Tool and go to Appearance and toogle ON Global Dark Theme as shown in the screenshot below.
Now all the GNOME 3 apps should have a dark UI as you can see in the screenshot below.
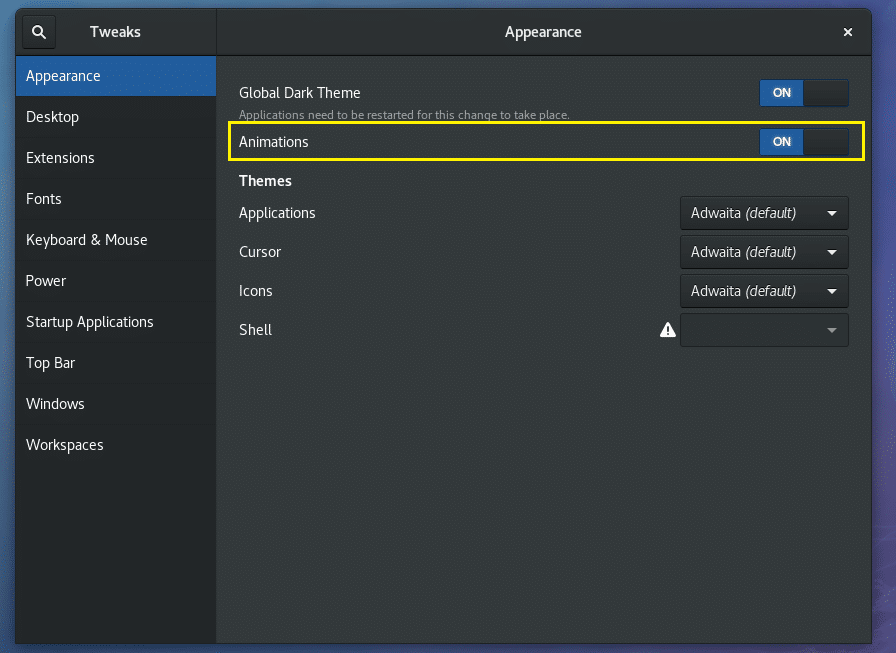
Disabling Animations
You can disable GNOME 3 animations to speed up the UI. If you have low spec hardware, you may benefit from this.
Just Open up GNOME Tweak Tool and go to Appearance and toogle OFF the Animations.
Before:
After:
You should notice your computer is a little bit faster.
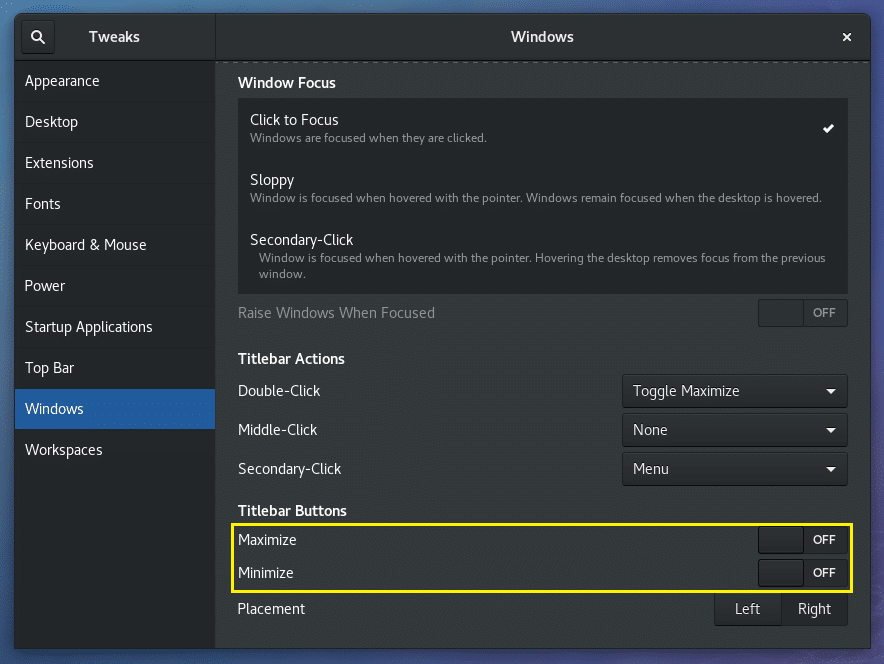
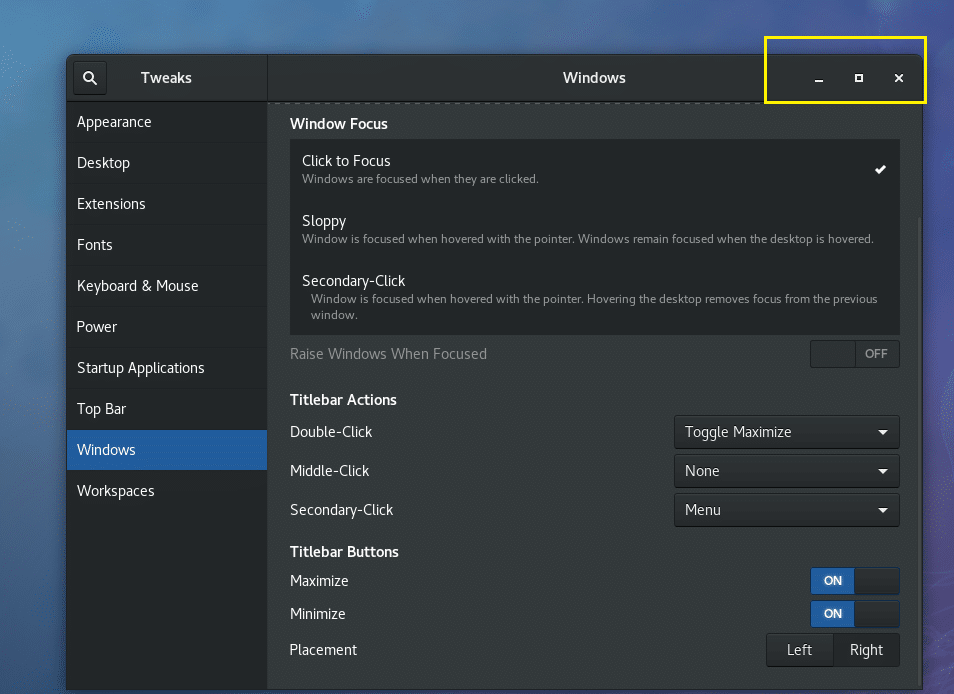
Adding Maximize and Minimize Buttons in the Titlebar
By default, GNOME 3 desktops window Titlebar don’t have any maximize and minimize buttons.
If you do need them, as most people including me do, just open GNOME Tweak Tool and go to Windows. Then in the Titlebar Buttons section, just toggle ON the Maximize and Minimize sections as marked in the screenshot below.
Before:
After:
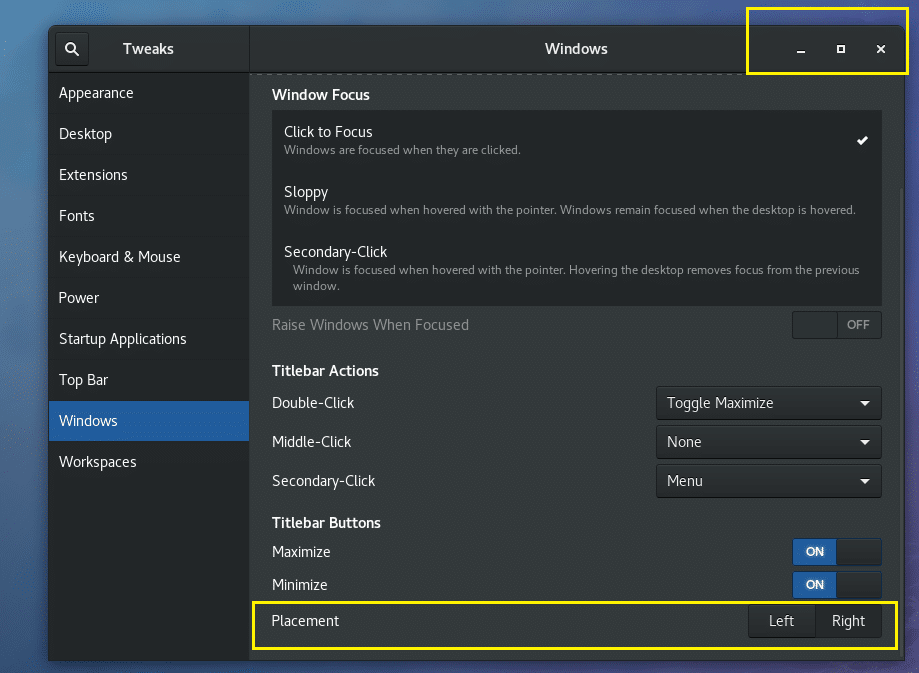
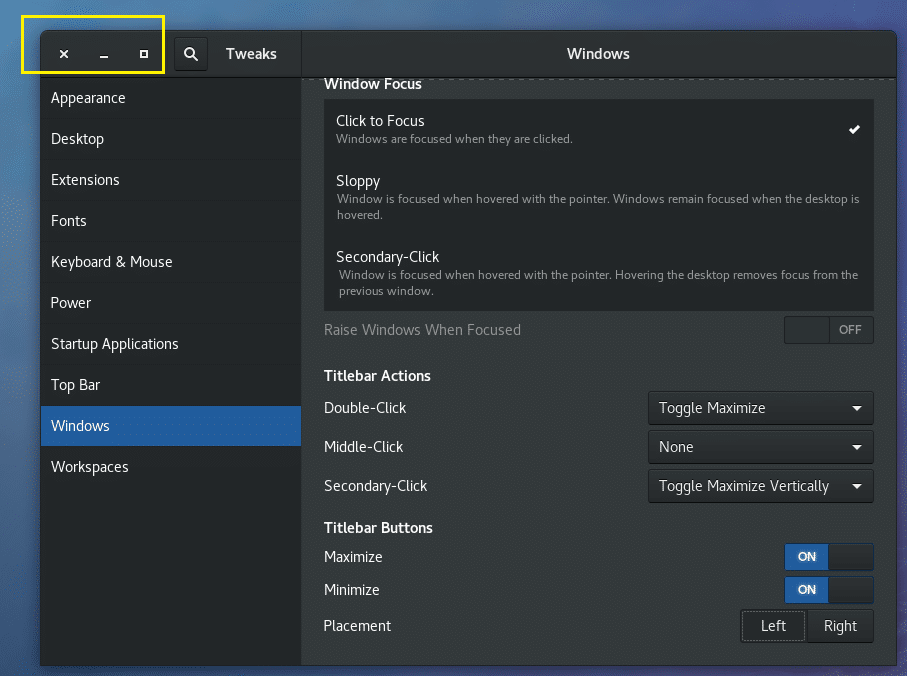
Changing the Placement of the Titlebar Buttons
You can change the place of the Titlebar buttons to either Left or Right. By default, it is in the Right.
Open GNOME Tweak Tool and go to Windows and change the Placement to Left or Right depending on your preferences.
Before:
After:
Changing Fonts
You can open up GNOME Tweak Tool and go to Fonts. From there you can change the Window Title fonts, the Interface fonts, the Document fonts, and the default editor Monospace fonts as marked in the screenshot below.

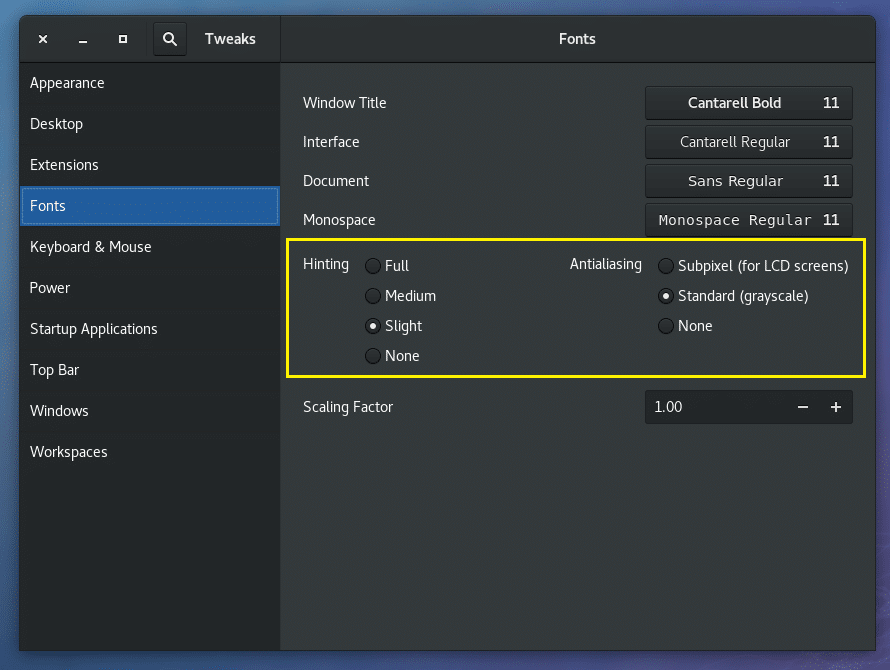
Configuring Fonts Anti-aliasing
You can change the fonts Anti-aliasing settings using the GNOME Tweak Tool.
Just open GNOME Tweak Tool and go to Fonts and then change the settings in the marked section of the screenshot below as you need.
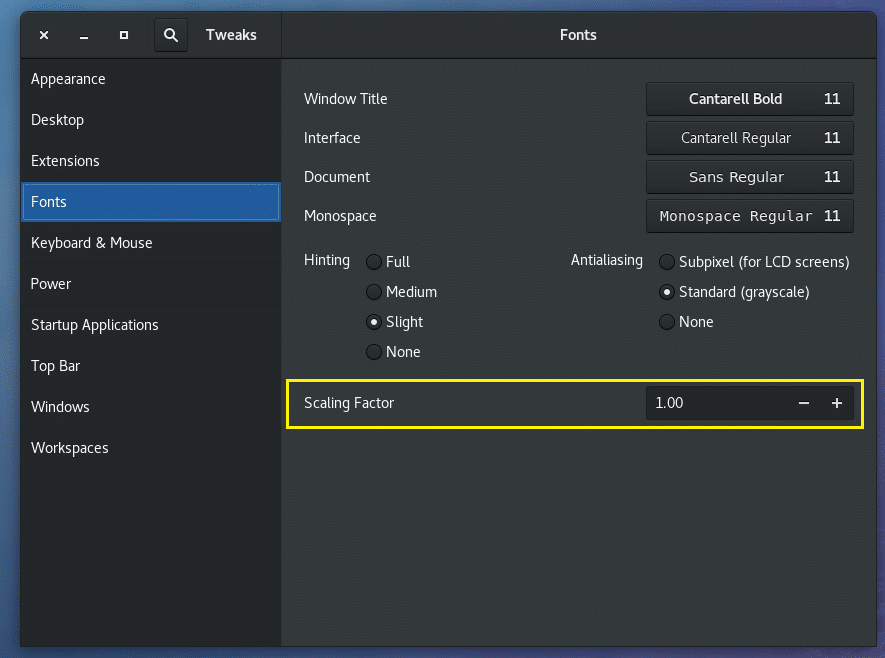
Configuring GNOME for HiDPI Monitor
You can change the Scaling Factor in the Fonts section of GNOME Tweak Tool. If you have a HI resolution monitor, the fonts on your screen may look too small. By changing the Scaling Factor you can save yourself from configuring every application you use for HiDPI monitors manually.
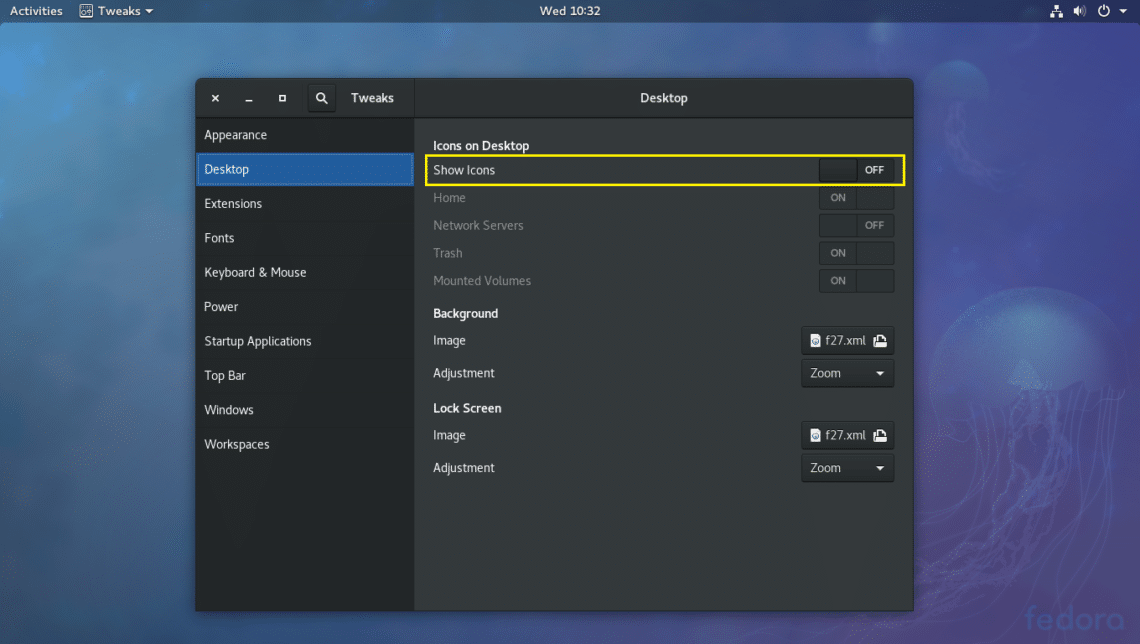
Enable Desktop Icons
By default, desktop icons are disabled on GNOME 3 desktops.
To enable desktop icons, open GNOME Tweak Tool and go to Desktop section and toggle ON Show Icons. Desktop icons should be enabled.
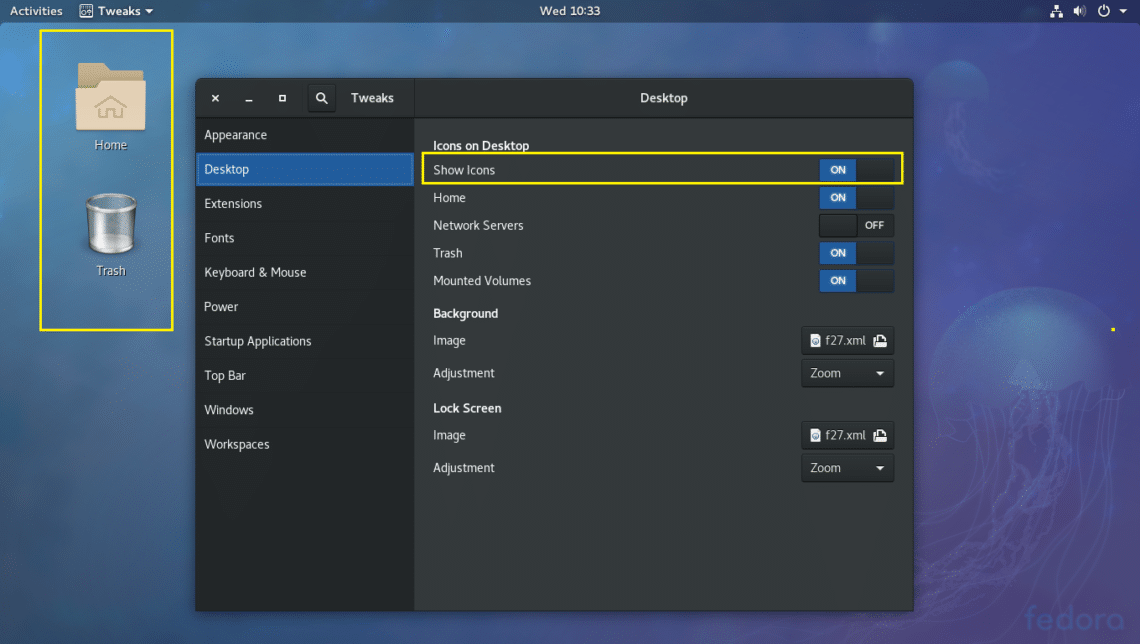
Before:
After:
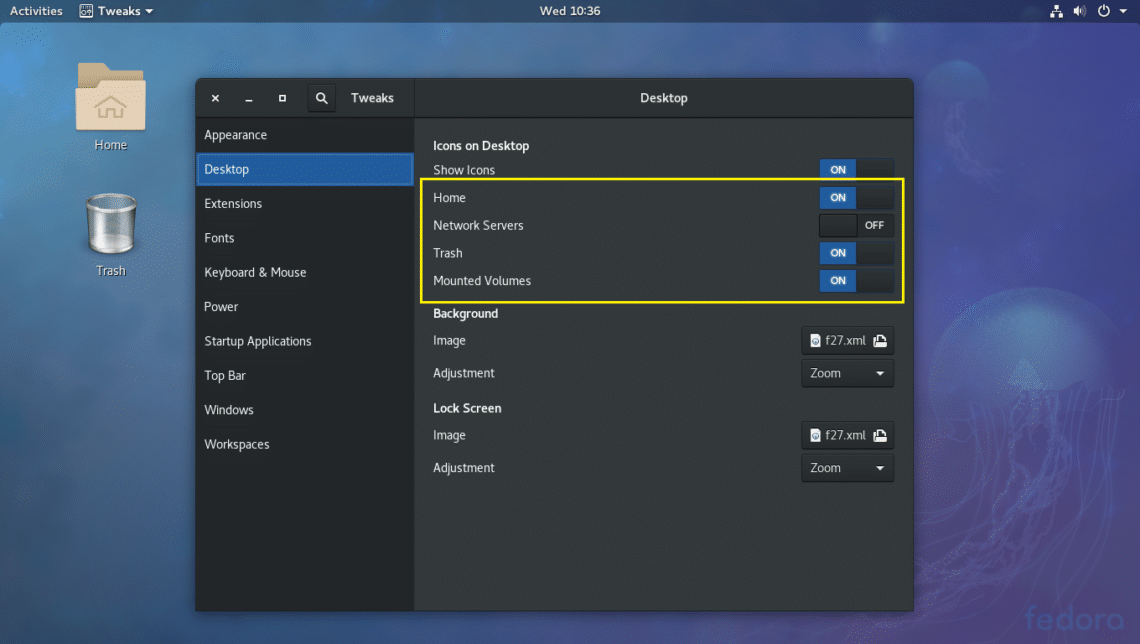
You can also choose what icons to show on the desktop. For example, you can toggle the Home, Network Servers, Trash, Mounted Volumes to either ON or OFF to show or hide them from the desktop respectively.
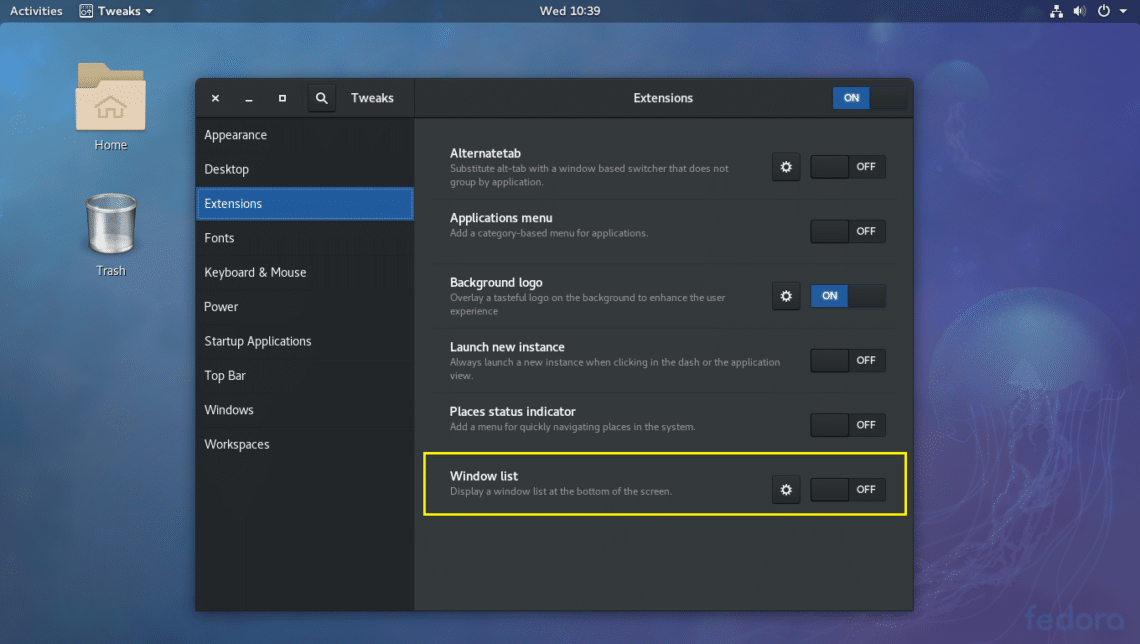
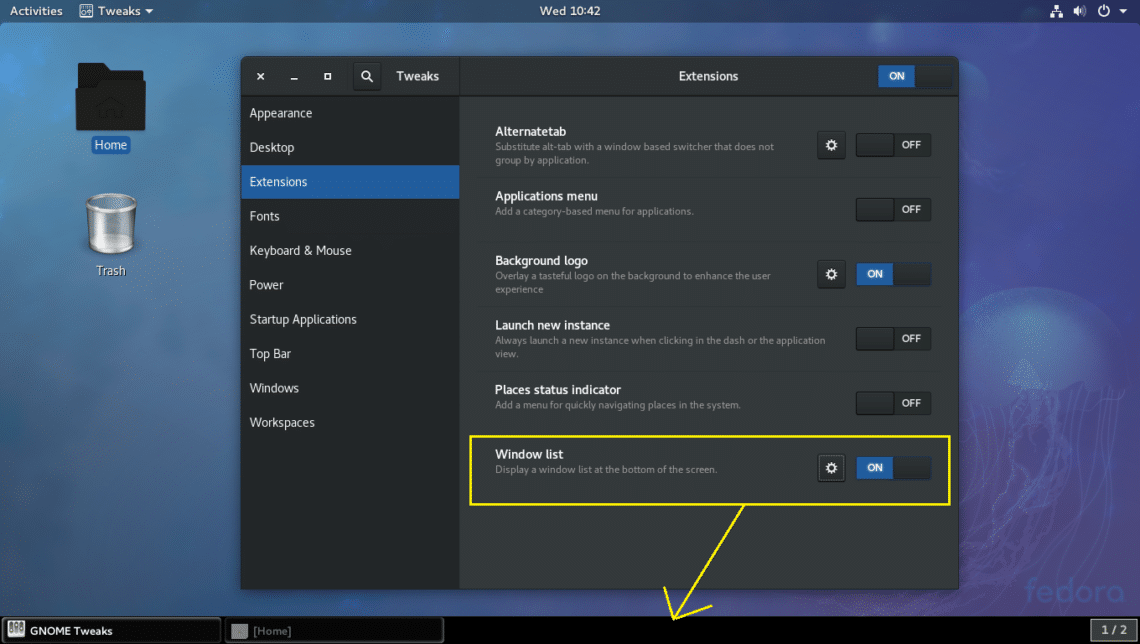
Enable GNOME 3 Window List Panel
GNOME 3 desktop may be a little discomforting for you because by default it doesn’t have any Window List panel where you can see all the opened applications. Instead it has an Activities panel.
But you can enable Window List Panel using GNOME Tweak Tool.
Open GNOME Tweak Tool and go to Extensions. Now toggle ON Window list as marked in the screenshot below.
Before:
After:
These are the most basic but very important tweaks you can do with GNOME Tweak Tool on GNOME 3 Desktop Environment. Thank you for reading this article.