Installing GNOME Tweak Tool:
GNOME Tweak Tool is available in the official package repository of Ubuntu 18.04 LTS. So, it is very easy to install.
First, update the APT package repository cache with the following command:

The APT package repository cache should be updated.
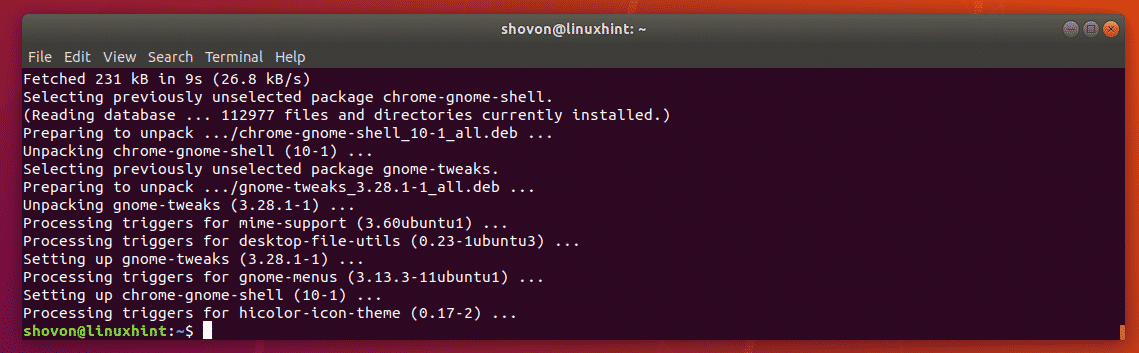
Now, install GNOME Tweak Tool and browser driver for GNOME Shell with the following command:

GNOME Tweak Tool and GNOME Shell’s browser driver should be installed.
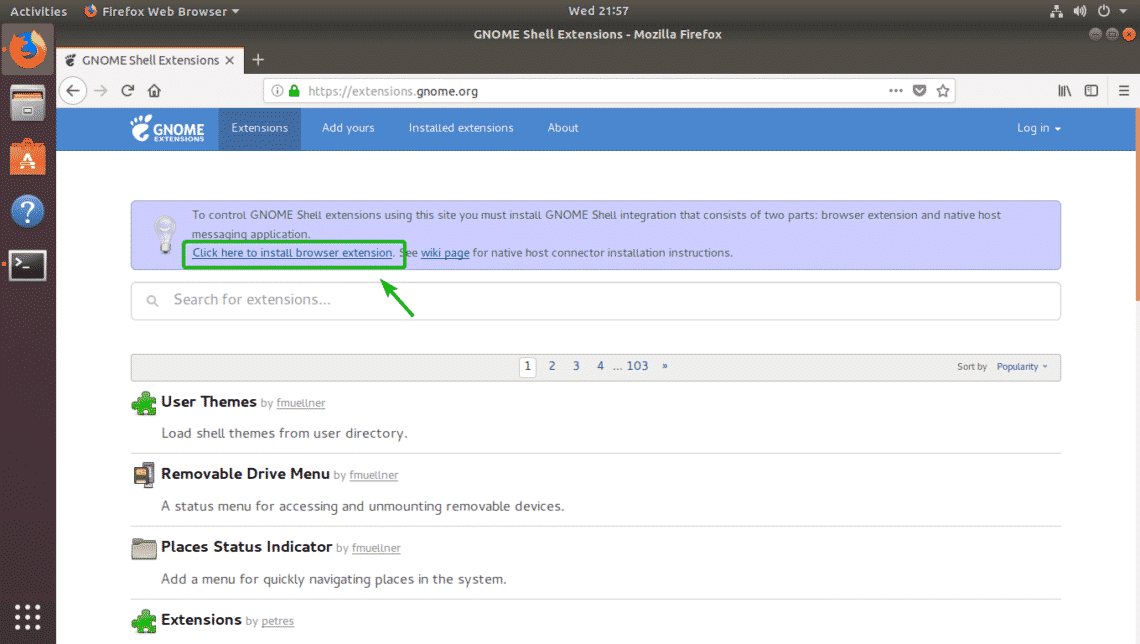
Now, open Firefox or Chrome/Chromium and then go to https://extensions.gnome.org. When the page loads, click on Click here to install browser extension as marked in the screenshot below.
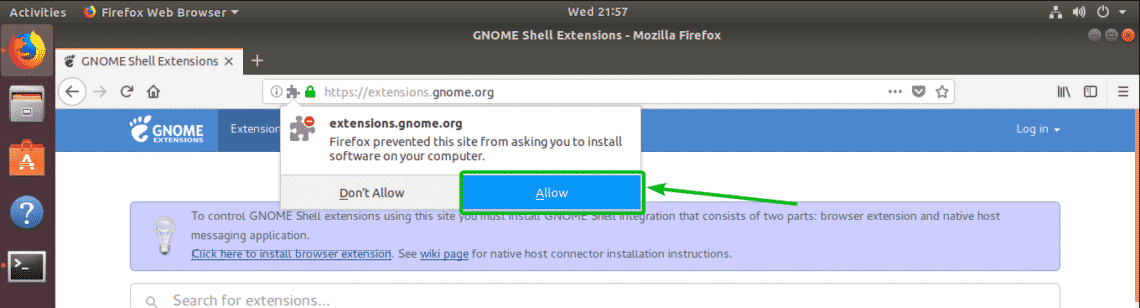
Now, click on Allow.
Now, click on Add.
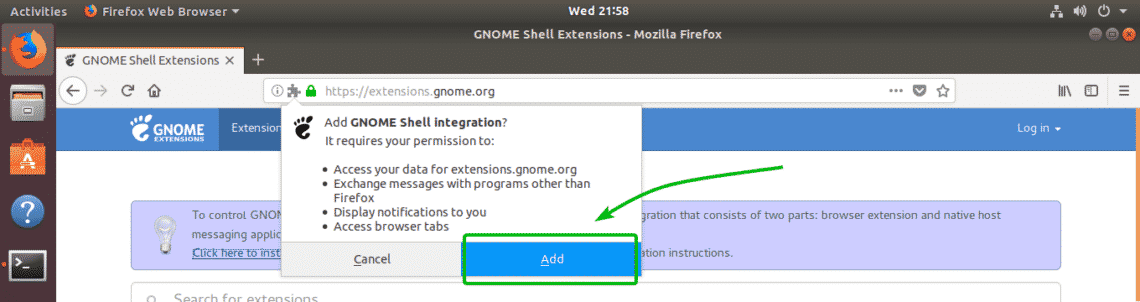
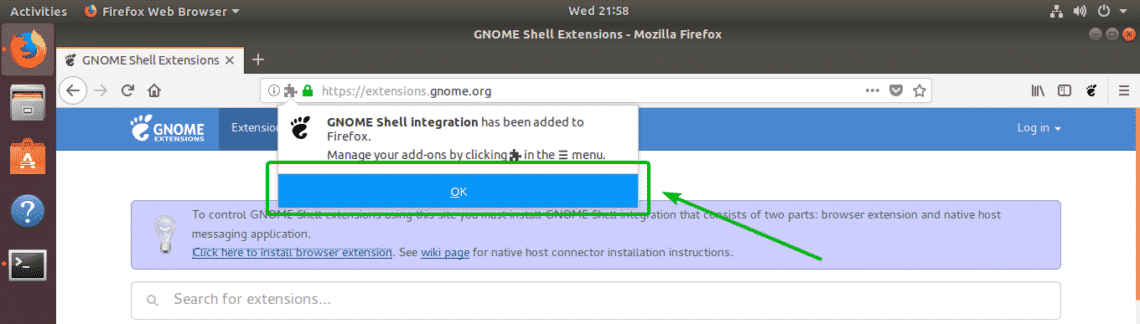
GNOME Shell integration browser extension should be installed.
Installing Desk Changer:
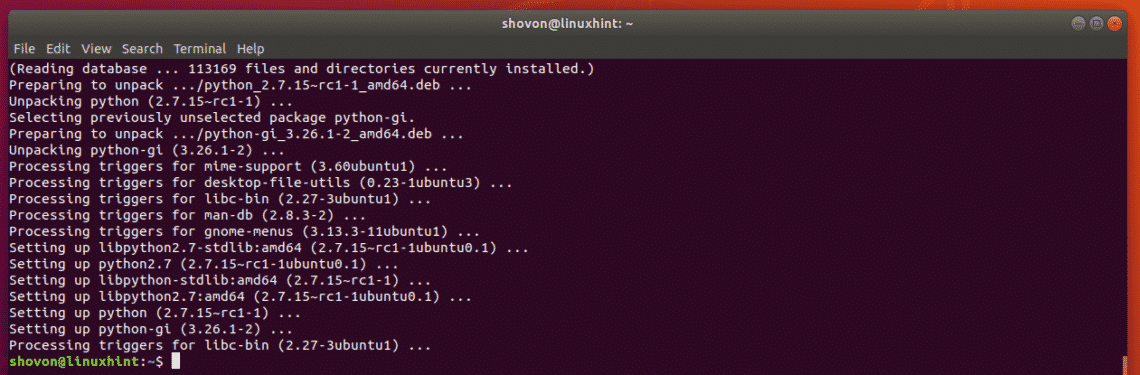
On Ubuntu 18.04 LTS, you must install python-gi package for Desk Changer to work. Luckily, the python-gi package is available in the official package repository of Ubuntu 18.04 LTS.
You can install the python-gi package on your Ubuntu 18.04 LTS machine with the following command:

Now, press y and then press <Enter>.

python-gi should be installed.
Now, go to the official page of Desk Changer at https://extensions.gnome.org/extension/1131/desk-changer/ from the browser where you installed GNOME Shell integration extension and click on the toggle button as marked in the screenshot below.
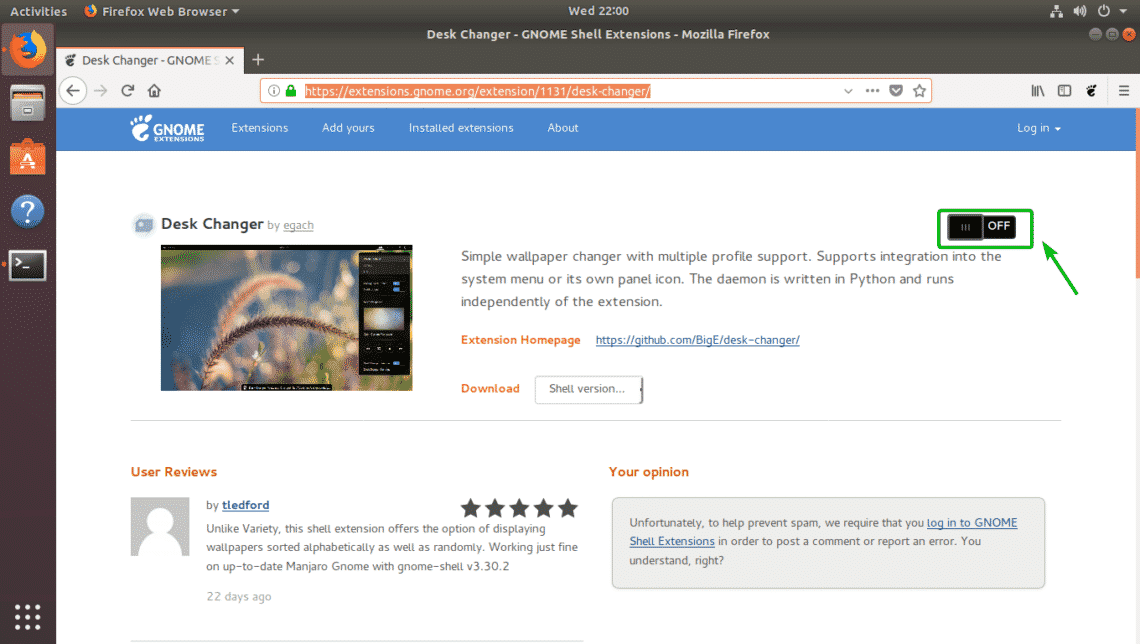
Now, click on Install.
Desk Changer should be installed. You should see a new icon at the top right corner of your GNOME 3 Desktop Environment.
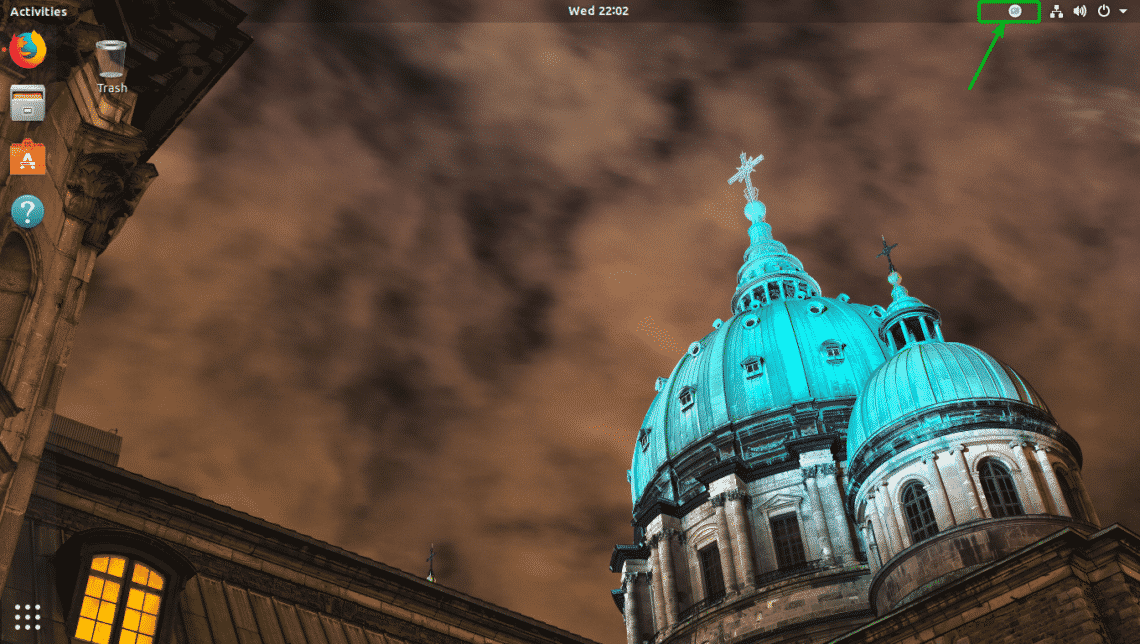
If you click on the icon, Desk Changer menu should show up. From here you can configure Desk Changer and change wallpapers.

Adding Desk Changer Wallpaper Directory:
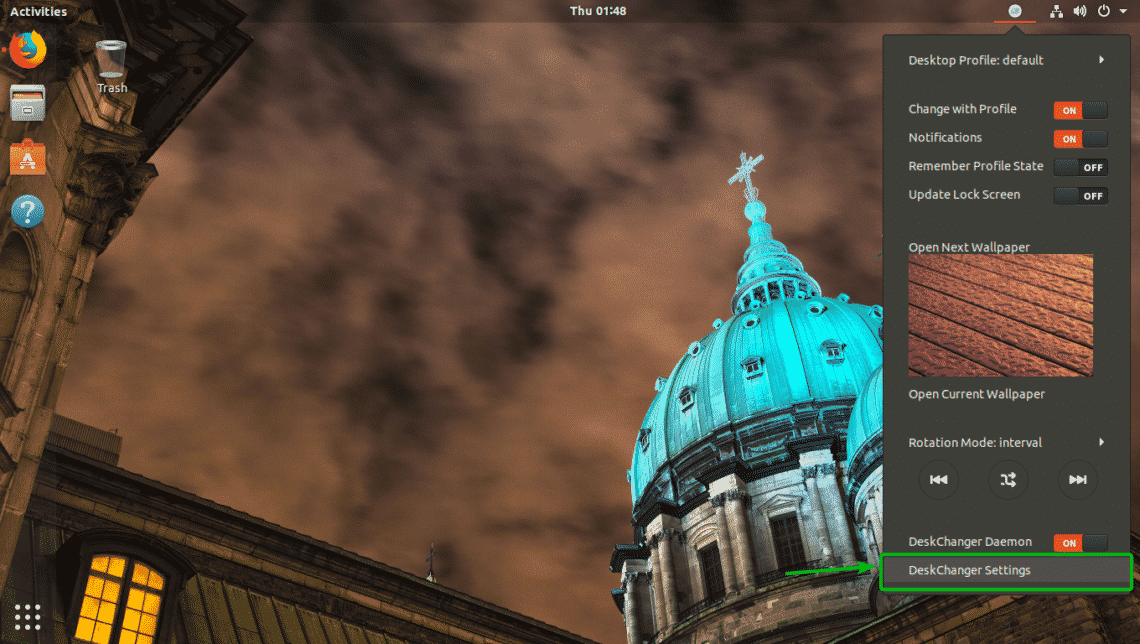
The default wallpaper directory of Desk Changer is /usr/share/backgrounds. Desk Changer randomly selects wallpapers from this directory. If you want, you can add additional directories from where Desk Changer can use wallpapers from.
To add a new wallpaper directory, click on DeskChanger Settings from the Desk Changer menu.
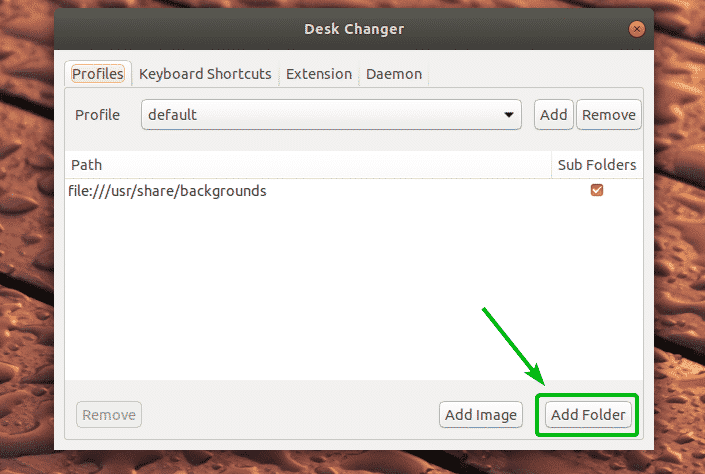
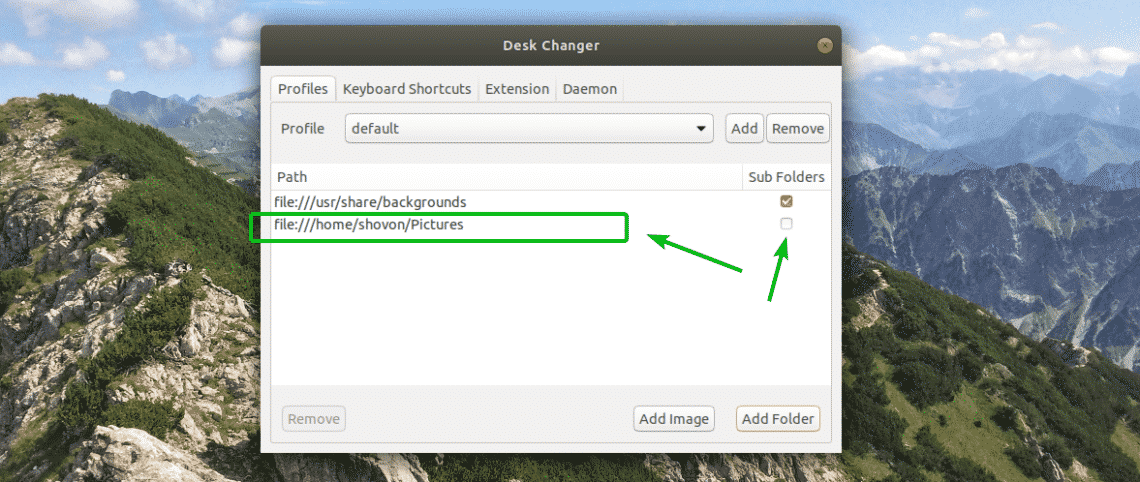
Now, from the Profiles tab, click on Add Folder.
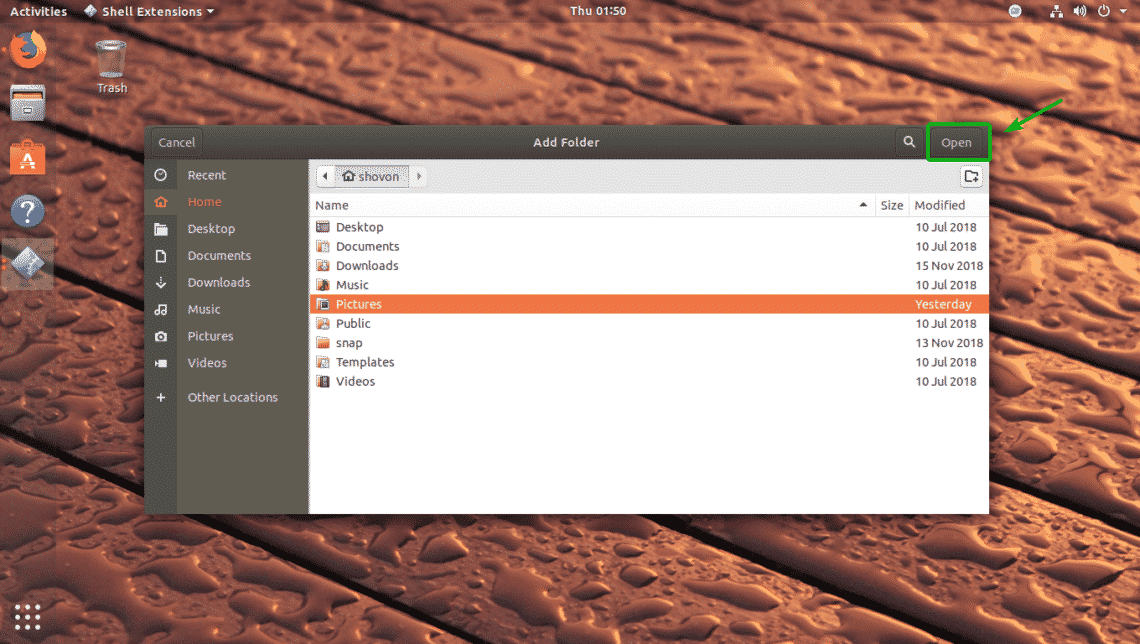
Now, select a new wallpaper directory and click on Open.
As you can see, the new wallpaper directory is added. You can also check the Sub Folders checkbox if you want to include wallpapers from the sub directories of the directory you just added.
Update Lock Screen Wallpaper:
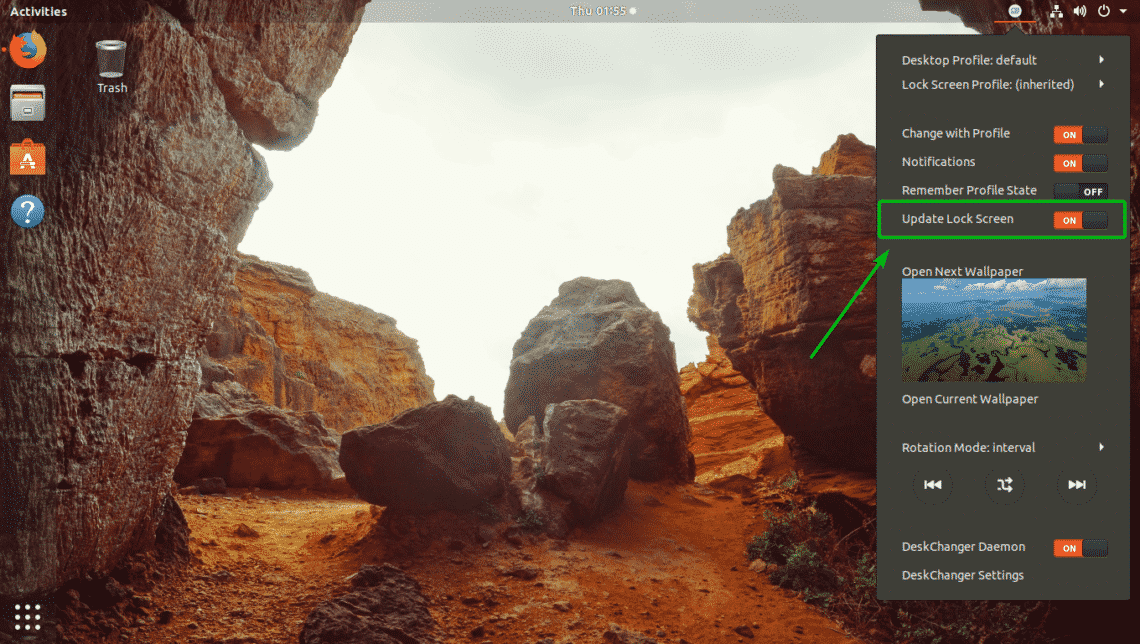
You can also set the lock screen wallpaper to be the currently set desktop wallpaper as well.
To do that, toggle ON Update Lock Screen from the Desk Changer menu.
Save Profile State:
Desk Changer can also remember your profile state. But it is disabled by default. If you want Desk Changer to start from where it left off everything when you shut down your Ubuntu 18.04 LTS machine, then this is a real handy option for you.
To enable it, toggle ON Remember Profile State from the Desk Changer menu.
Changing Wallpapers Manually and Configuring Randomness:
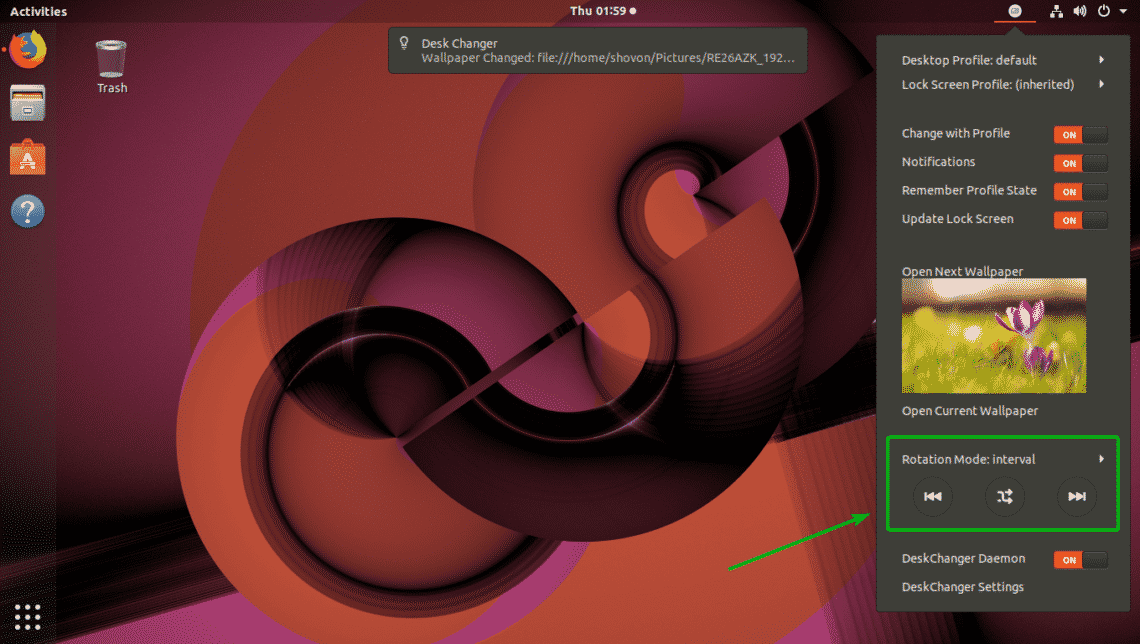
You can click on the forward and backward icons to change the wallpapers and lock screen wallpapers manually.
By default, the wallpapers are randomly picked from the wallpaper directories. You can click on icon to toggle between random and linear method of selecting wallpapers for your desktop and lock screen.
Changing Rotation Mode of Desk Changer:
You can configure how often you want Desk Changer to change your desktop background or the lock screen wallpaper. By default, it is set to change every 300 seconds interval. But, you can set it to hourly to change the wallpaper every hour. You can even set a custom interval in seconds.
You can also disable the automatic wallpaper change feature of Desk Changer altogether and manually use the backward and forward buttons from your Desk Changer menu to change images.
To change the rotation mode of Desk Changer, go to the Desk Changer settings (Desk Changer Menu > DeskChanger Settings).
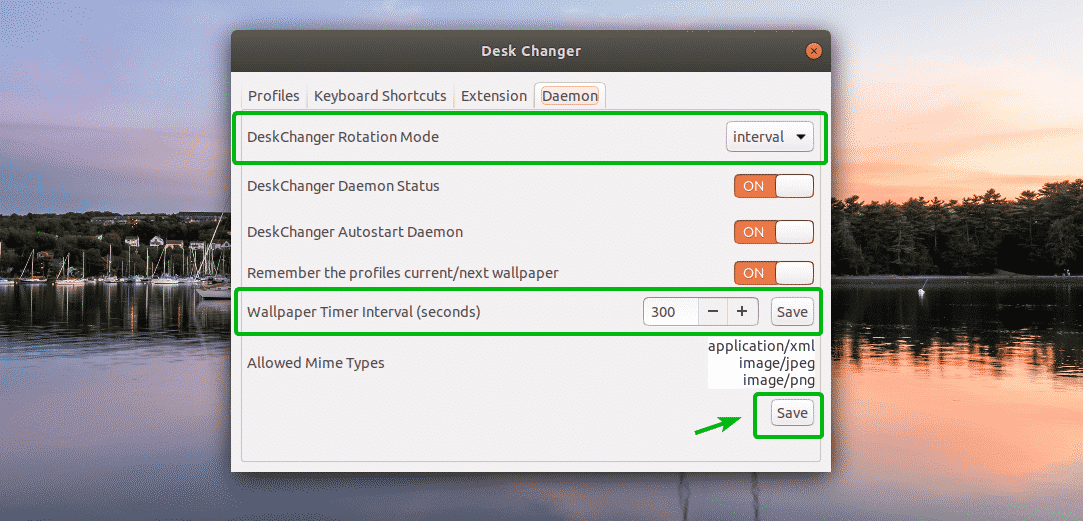
Now, from the Daemon tab, select the rotation mode you want from the DeskChanger Rotation Mode dropdown menu. The rotation modes are interval, hourly and disabled.
If you want to change the interval (how often the wallpaper changes), then set it in the Wallpaper Timer Interval (seconds) text box.
Once you’re done, click on Save to save the changes.
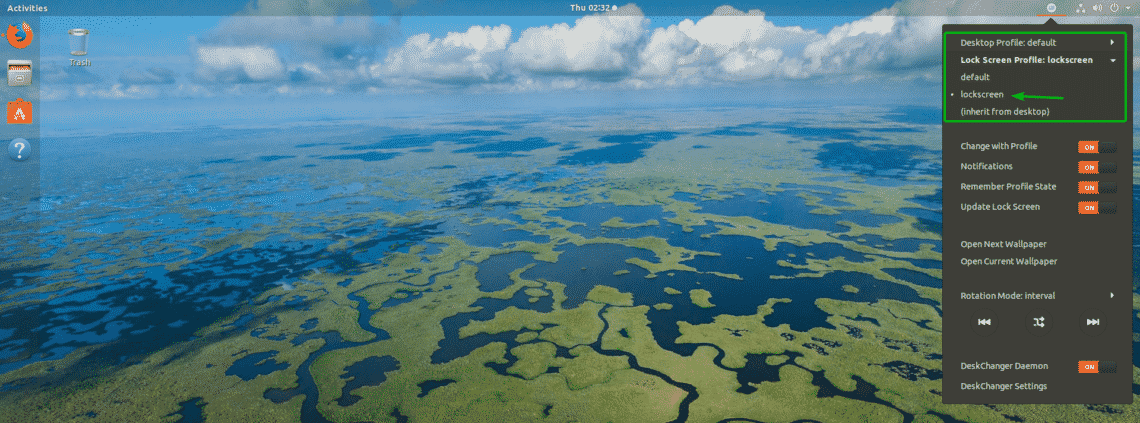
Desk Changer Profiles:
Desk Changer is very customizable. You can have multiple profiles in Desk Changer. Each profiles can have their own wallpaper directories. You can also set a different profile for Desktop and Lock Screen.
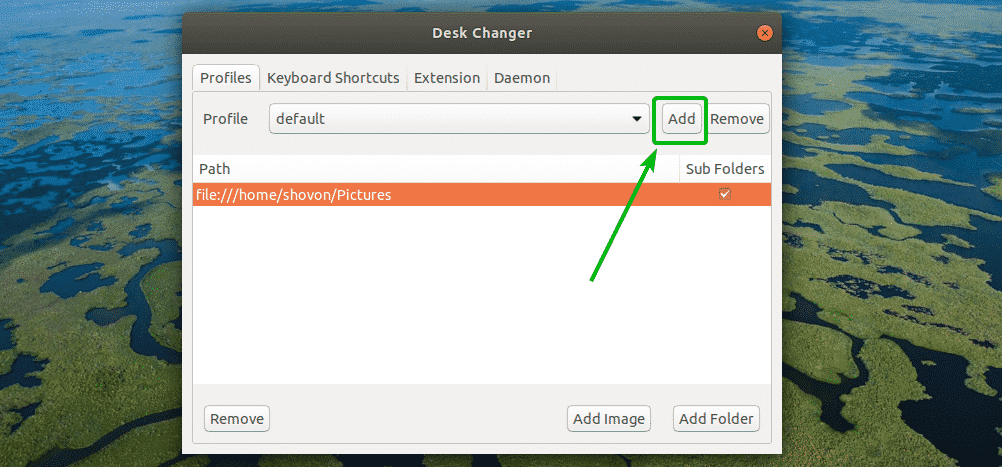
To create a new Desk Changer profile, go to the Desk Changer settings (Desk Changer Menu > DeskChanger Settings).
Now, from the Profiles tab, click on Add.
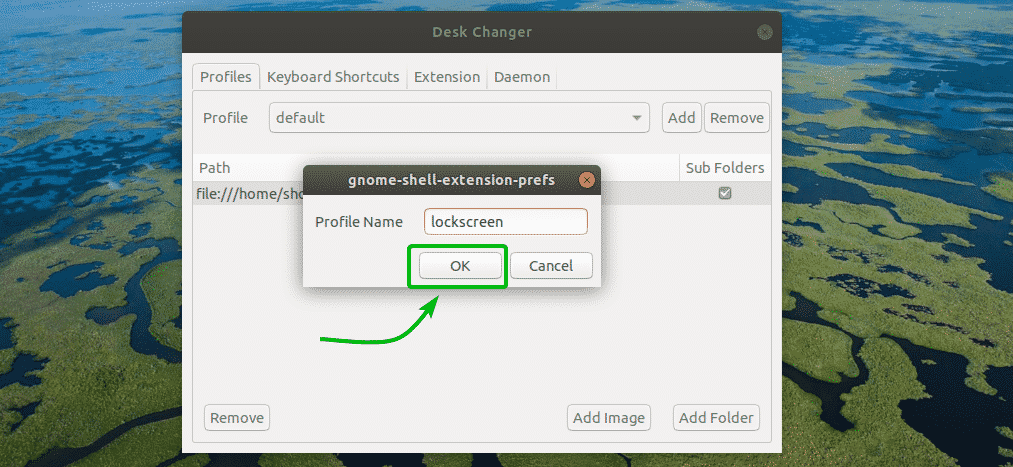
Now, type in the Profile Name and click on OK.
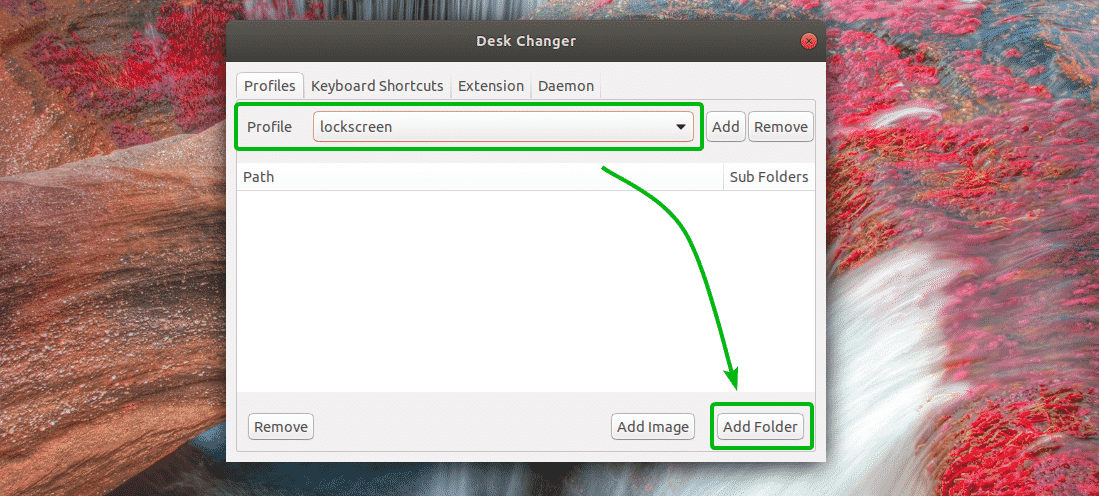
A new profile should be created. Now, select the profile from the Profile dropdown menu and click on Add Folder to add a wallpaper directory.
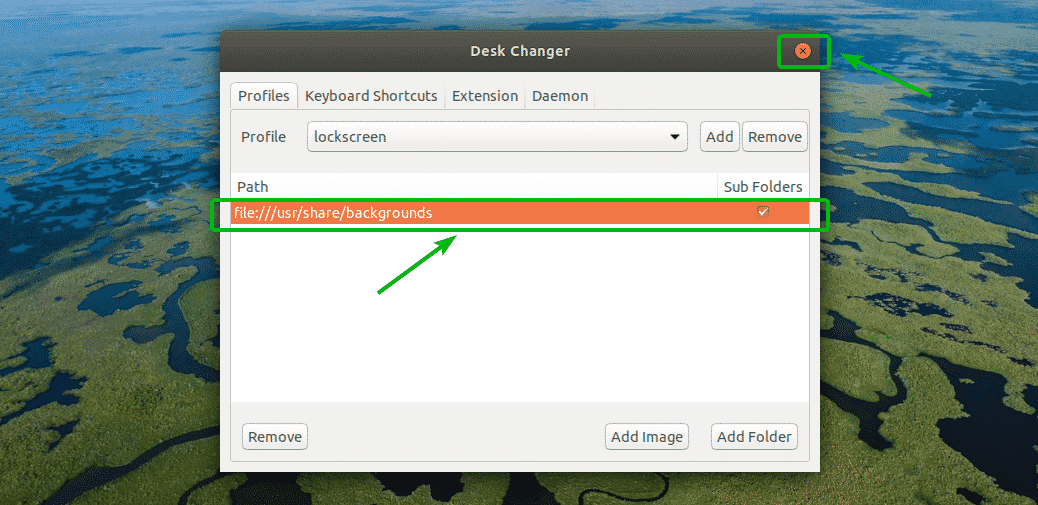
Once you’ve selected a wallpaper directory, close Desk Changer settings.
Now, you can click on either the Desktop Profile or the Lock Screen Profile dropdown menu from the Desk Changer menu and select the profile you want from there.
So, that’s how you install and use Desk Changer GNOME 3 extension on Ubuntu 18.04 LTS. Thanks for reading this article.