Oracle JDK:
Oracle JDK was known as SUN JDK before and it was the official proprietary implementation of Java language. Now, it is maintain by Oracle team. Many new features are added in the new version of Oracle JDK. Some features are mentioned here.
- It is available in both free and commercial version and it is under Oracle Binary Code License Agreement.
- It includes Java plug-ins and Java Web Start.
- It contains many third-party open-source and commercial components.
- It is better for developing commercial Java application.
Open JDK:
Open JDK is an open source implementation of Java Standard Edition platform and it can be used as an alternative of Oracle JDK. Some important features of OpenJDK are mentioned here.
- It is completely free to use and it is under GPL v2 license.
- It contains most of the necessary features of Oracle JDK to develop Java application.
- It has the ability to update JDK packages automatically by using package manager.
- The source code is improving regularly by the contribution of open source developer.
From the above features, it is clear that you can gain maximum facilities of Java Development Kit by using Open JDK without any cost. How you can install Java 9 using Open JDK on Ubuntu is shown in this tutorial.
Installing Java 9:
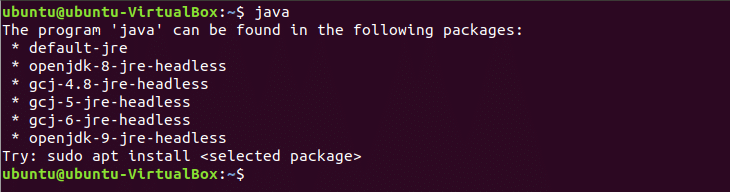
First of all, you have to check if any old version of Java is installed on your system or not.
If the following information appears then Java is not installed before. OpenJDK is the default option of installing Java on Ubuntu.
If any old version of Java is installed on your system then you have to remove it before running the installation command of Java 9. Run the following command to remove previously installed Java package.
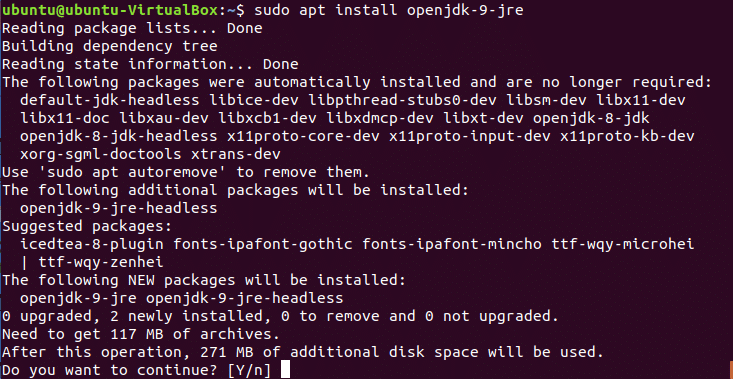
You can install JRE or JDK based on your requirements. First, run the command to install JRE and check it is working or not. The following command will install Java version 9 using JRE package. Press ‘y’ when it will ask for permission to complete the installation process.
After completing the installation process you can check JRE package is working or not by executing the following command.
The output of the command will show the version number of OpenJDK, Java tool for executing java code and OpenJDK VM type which can be 32-bit VM or 64-bit VM depends on your computer configuration.

It is mentioned before that JRE is used for executing Java application only. So if you need Java just for executing any games or other types of applications then the above installation is OK for you. But if you want to use Java for developing Java application then you should install JDK package of OpenJDK. You need to remove JRE, before running the command of installing JDK. The following command will remove JRE from your system
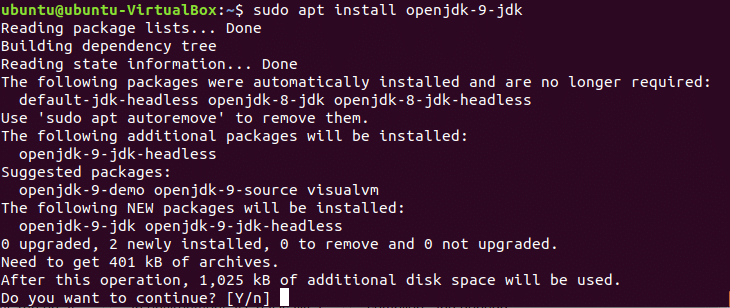
Run the command to install JDK package of OpenJDK that will install necessary compiling and debugging tools with JRE. Press ‘y’ when it will ask for permission to complete the installation process.
Test the package is working properly or not after completing the installation process.

Testing Java:
Write a very simple Java code to test installed Java program. Open a text editor and write the following Java code. Remember to keep the same name for class and file name. Here, class name is ‘FirstJava’. So, the filename will be ‘FirstJava.java’.
public static void main(String[] args){
System.out.println("This is my first Java program.");
}
}
Open the terminal and go to the FirstJava.java file location.

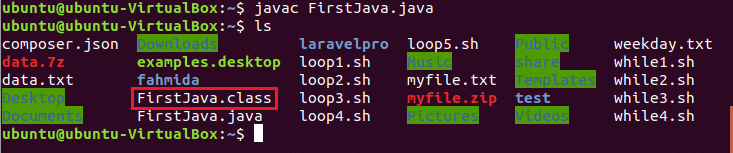
Run javac command to compile the code and create class file. If the code compiles successfully then ‘FirstJava.class’file will be generated.
Run java command to run the class file.
The output of the program is a simple text, “This is my first Java program”. So, the following output will appear after executing the class file.

If you are planning to use Java in your Ubuntu operating system then try the above tutorial to install Java in your system and use it.