Wouldn’t it be just cool if we had some programmed package which could accept some PDF files and return the text it contains? It turns out that we do have a library to do just that. Tesseract is an open source framework written in C++ which allows us to work with PNG images, JPG images and PDF files and return the text the file contains so that we can use that text as we want.
In this lesson on Tesseract with Java and Maven, we will see how we can develop a simple Java application which accepts a PDF file and returns the text it contains with Tesseract OCR service. We will also see why Tesseract is so successful. One of the reason for Tesseract being so successful package is that it is backed by Google itself.
To work with this lesson, it is important to install Tesseract OCR Engine on your system. Head over to the official Github repo to follow the installation instructions. Directly from the GitHub repo, “Tesseract was originally developed at Hewlett-Packard Laboratories Bristol and at Hewlett-Packard Co, Greeley Colorado between 1985 and 1994, with some more changes made in 1996 to port to Windows, and some C++izing in 1998. In 2005 Tesseract was open sourced by HP. Since 2006 it is developed by Google.”
Maven Dependency
We will start by making a simple Java project which is based on Maven and contains the following maven dependency:
<groupId>net.sourceforge.tess4j</groupId>
<artifactId>tess4j</artifactId>
<version>4.3.0</version>
</dependency>
This is a Maven dependency which is provided by a wrapper project which you can refer here to gain more understanding. From the website, Tess4J is simply described as a Java JNA wrapper for Tesseract OCR API.
Project Structure
We have a very simple project with a single source code file. The current project structure will look something like this:
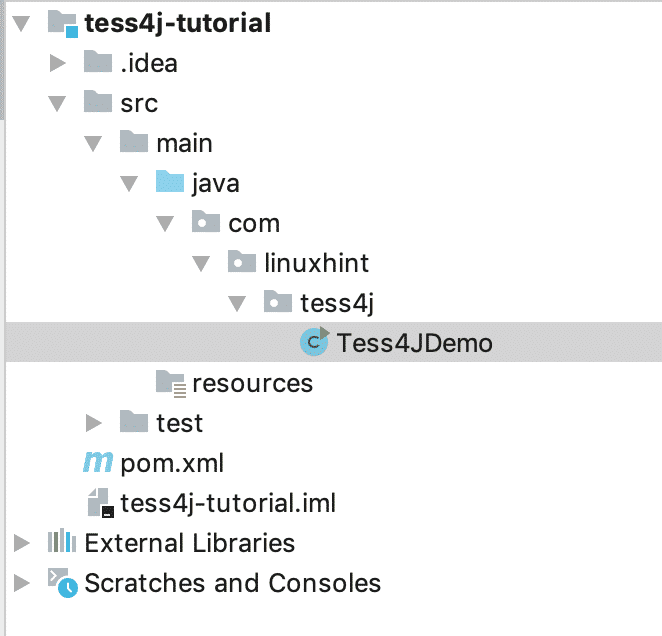
As we mentioned, we have a single source code file which we will use. We might put a PDF file in the resources folder a little later to demonstrate reading a PDF file and extracting text from it.
Building Tesseract object
Once we have a sample source code class where we can start (as shown in the project structure in the last section), we can start adding some code to it. As of now, it is an empty class:
public class Tess4JDemo {
}
As we have talked about Tesseract before, Tesseract can be used to extract text from documents like PDF documents. To do this, we have to train Tesseract library about how documents are structured and what text it can contain.
Apart from this, as Tesseract supports about 37 languages, you have to explicitly inform Tesseract about which language we are reading right now (if that information is actually available to us).
We will define a simple Java method for Tesseract:
}
Inside this method, we can make a new instance of Tesseract from the Maven library we added earlier:
Just to make it clear, here is the import statement we have for the above instantiation:
Next, we will add some properties to this instance like where the training data for this library can be found. This is very important as without setting a path for training data, Tesseract can provide highly inaccurate results. Fortunately, training data for Tesseract comes with its installation so all you need to do is look at the right place. Here is how we set the training data path:
instance.setLanguage("eng");
As we are using a Macintosh for this tutorial, our data path looks something like the above. Apart from the training data path, I also provided Tesseract with the information that we will be using the English language.
Next we will be telling Tesseract that the output we need is in the format something called as the HOCR format. Basically, HOCR format is a simple XML based format which contains two things:
- The text PDF document will contain
- The x and y coordinates of that text on each page. This means that a {DF document can be exactly drawn in the same manner back from an HOCR output
We can enable HOCR format as:
Finally, I can return the instance we made above. Here is the complete source code of the method we just defined here:
Tesseract instance = new Tesseract();
instance.setDatapath("/usr/local/Cellar/tesseract/4.0.0/share/tessdata");
instance.setLanguage("eng");
instance.setHocr(true);
return instance;
}
Using Tesseract
You might not believe it but setting up a Tesseract object was that easy. We can put it to use now with a simple definition in a main function:
Tesseract tesseract = getTesseract();
}
Can you guess what is left now? The only thing we need to do now is providing a file to Tesseract which it can parse and read its Text. Now we can, easily pick up a PDF document to read it but that sounds quite textual. Why don’t we try an image straightaway?
For this lesson, we created a very simple image which we will put to use:
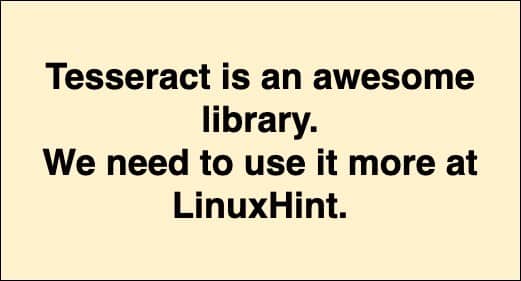
Once you have this image (or any other image of your choice), we can complete our main method so that we can finally parse the selected image:
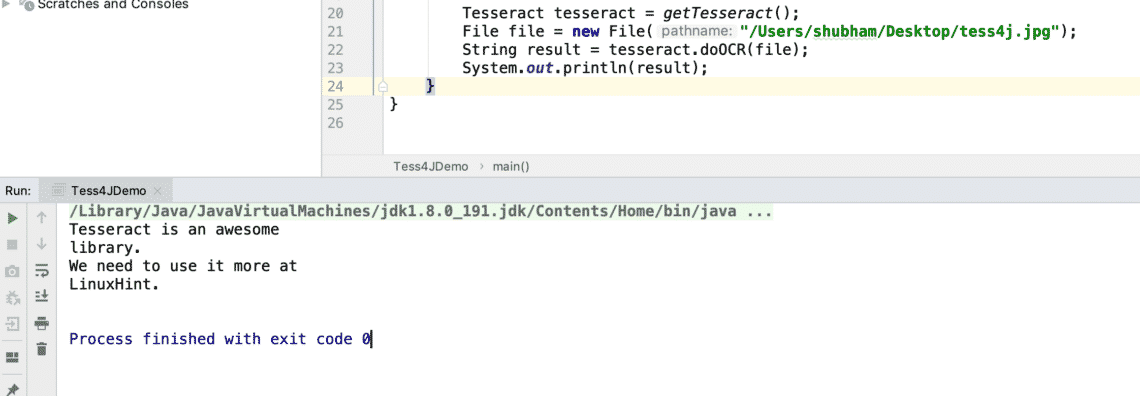
Tesseract tesseract = getTesseract();
File file = new File("/Users/shubham/Desktop/tess4j.jpg");
String result = tesseract.doOCR(file);
System.out.println(result);
}
If we look closely, there is nothing magically which happened here. That is the power of this simple wrapper for Tesseract library we are provided with.
Now we are ready to run the above program. You can run it to see a weird output in XML format. If you’re having trouble of understanding the output, simply comment out the property where we enabled HOCR output. Once you do that, you will see a simple output as:
A quick note that try to avoid PNG images and use JPEG images instead if you’re working with images at all. This is because Tesseract is very bad at reading PNG images due to its compression techniques.
Limitations of Tesseract OCR Engine
According to Tesseract page FAQ itself, “Tesseract is an OCR engine rather than a fully featured program similar to commercial OCR software such as Nuance’s Omnipage. It was originally intended to serve as a component part of other programs or systems.
Although Tesseract works from the command line, to be usable by the average user the engine must be integrated into other programs or interfaces, such as FreeOCR.net, WeOCR or OCRpous. Without integration into programs such as these, Tesseract has no page layout analysis, no output formatting and no graphical user interface (GUI). “
If we look at the above limitation, the above limitation was also solved by Tess4J library by providing a simple but effective Java JNA wrapper over the C++ library which can be put to use literally anywhere.
Conclusion
In this quick lesson on Tesseract and Java, we made a very simple example of Tesseract OCR engine which allows us to read text from various format files like PDF and image files. This is a very important skill to have as reading text from files like PDF and images is the first step you need to do if you want to apply any Natural Language Processing (NLP) techniques on these data formats.
The fact that Tess4J is available is awesome because this way, we can actually use a C++ library in a very simple environment which is otherwise hard and tricky to use to. Of course, all the source code of the lesson is available at Github. Please share your feedback freely about the lesson on Twitter with @linuxhint and @sbmaggarwal (that’s me!).