In this article, I will show you how to use the NodeJS debugger. I am using NodeJS 8 on Debian 9 Stretch for the demonstration. But everything shown in this article should work on any latest NodeJS version on any Linux distributions, Mac OS and Windows. So Let’s get started.
Installing NodeJS:
NodeJS may not be installed on your computer by default. But it is freely available to download and install. Just go to the official website of NodeJS at https://nodejs.org/en/ and download NodeJS for your operating system. It is available for Mac OS, Linux and Windows. So no matter what operating system you have, you should be able to install it.
Setting Up the Test Program:
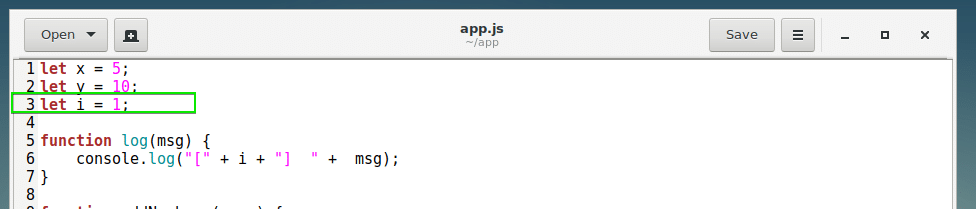
The NodeJS program I used in this article is given below:
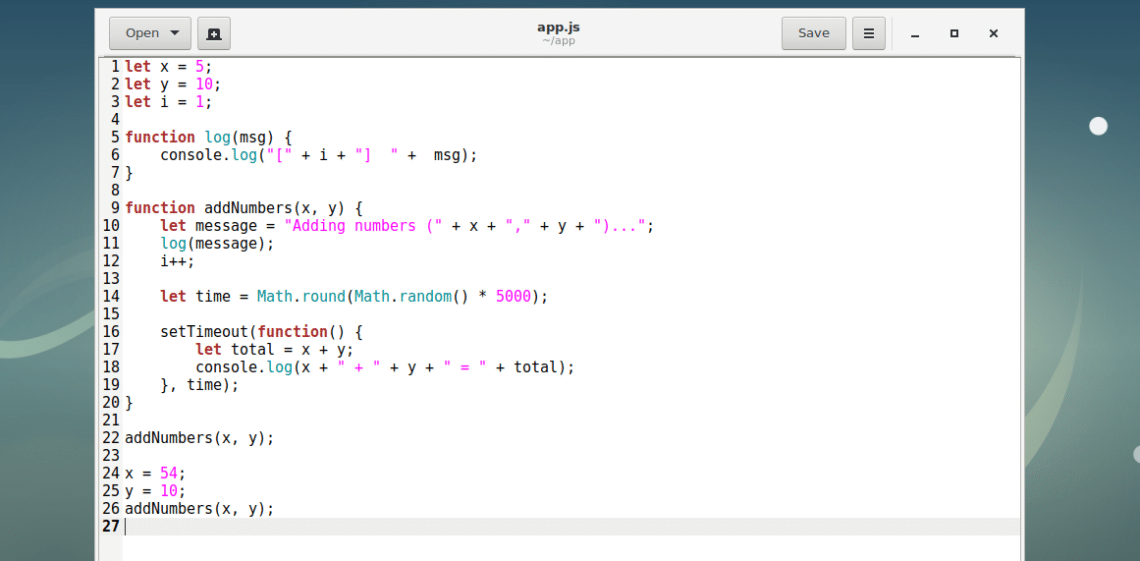
This is a simple NodeJS program that adds 2 numbers.
You can run the NodeJS script app.js with the following command:

In the next section, I will show you how to use the NodeJS debugger.
Starting NodeJS Debugger:
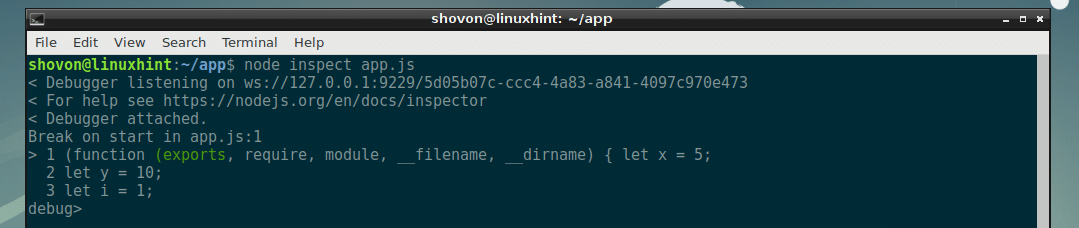
To debug the NodeJS script app.js, you have to run the script app.js with the NodeJS debugger.
You can start the NodeJS debugger for app.js the following command:

NOTE: On older version of NodeJS, you run node debug app.js instead to start the NodeJS debugger.
NodeJS debugger should start as you can see in the screenshot below.
Now you can run many commands here to debug the NodeJS script app.js.
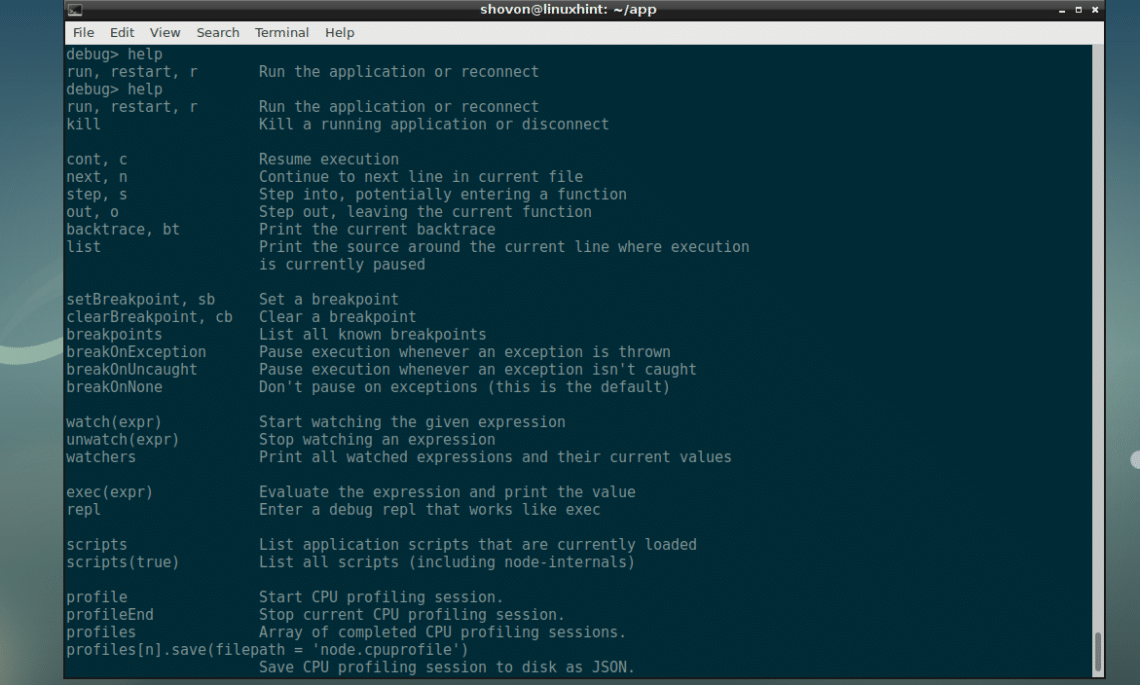
Getting Help with NodeJS Debugger:
You can run the following command to get a list of commands and functions that you can use to debug a NodeJS script in the NodeJS debugger:

As you can see, all the commands and functions with short description of what they do are listed. When you are having a hard time remembering what commands or functions to run, this is a good place to get some help.
Auto Completion on NodeJS Debugger:
You can partially type in a command or function and press <Tab> to get auto completion.
Before pressing <Tab>:

After pressing <Tab>. As you can see, the function is auto completed.

In the next sections, I will show you how to do different debugging task with NodeJS debugger.
Setting Breakpoints with NodeJS Debugger:
A NodeJS script has many numbered lines when viewed in a programming text editor. You can set breakpoints on any of these lines. Let’s say you set a breakpoint on line 3, and start the NodeJS script. Then the NodeJS debugger would run line 1 and 2 and stop at line 3. Then you can check whether the results up until this point is correct and continue the program as usual. You can set as many breakpoints as you need.
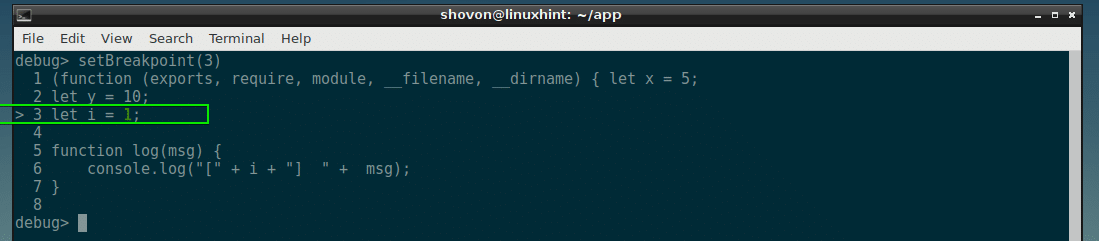
To set a breakpoint, you run the setBreakpoint() function. The function accepts an integer parameter as line number to which you want to set a breakpoint.
To set a breakpoint on line 3,
Run the following command:

As you can see, a breakpoint is set on line 3, which is marked by an arrow (>).
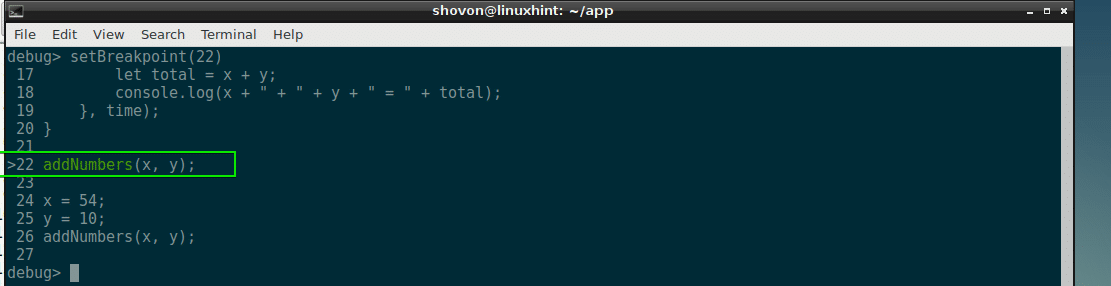
Now let’s set a breakpoint on line 22 as well:
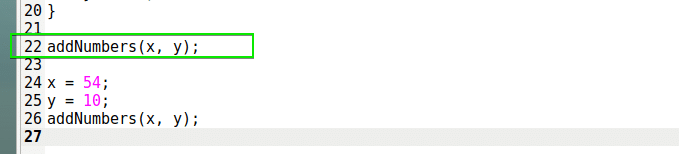
As you can see, a breakpoint is set on line 22 as well, just before the first addNumber() function is executed.
Removing or Clearing Breakpoints with NodeJS Debugger:
To remove a breakpoint, just run the clearBreakpoint() function.
Pass in the line number at which you have a breakpoint set as an argument to the function clearBreakpoint(), the breakpoint should be removed or cleared.
Listing All the Breakpoints with NodeJS Debugger:
You can list all the breakpoints you have already set with the NodeJS debugger with the following command:
As you can see, I have breakpoints set on line 3 and line 22.

Using REPL in NodeJS Debugger:
The full form of REPL is Read–Eval–Print Loop. You can use REPL in NodeJS debugger to check the contents of variables and functions and many more. It is really useful.
To start REPL, run the following command:
As you can see, REPL has started.

Now you can press <Tab> twice to see what variables and functions are available at the moment in your NodeJS script.

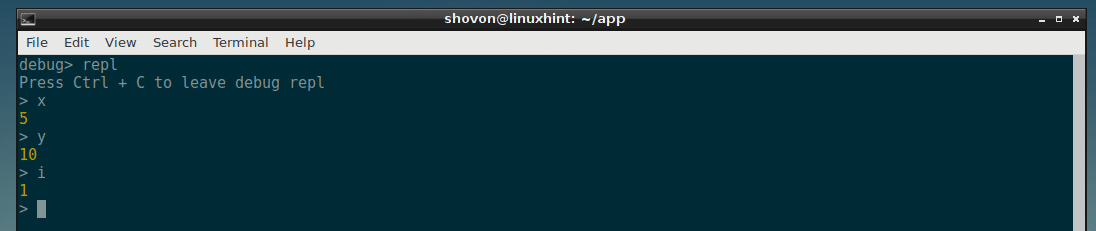
You can also print the content of any variable you wish. Just type in the name of the variable and press <Enter>.

You can also check functions as well.

To exit REPL, press <Ctrl> + c. You should be back to the debugger.

Using the cont Command in NodeJS Debugger:
Now that you have all the breakpoints set, you can run the cont command or c command to continue running the lines till the first breakpoint.

Now I can check the value of x and y from REPL and as you can see it is correct.

To go to the next breakpoint, you can run c command again.

The variables are printed with REPL.
Running the c command again completes the program as there are no more breakpoints.

Resetting Program Execution:
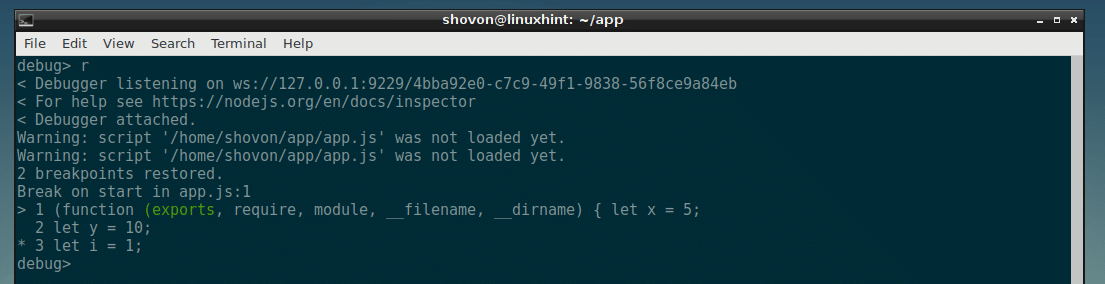
If you want to start executing lines from the beginning of your NodeJS script, you have to reset the debugger.
You can reset the debugger with the following command:
Debugging NodeJS Script Line By Line:
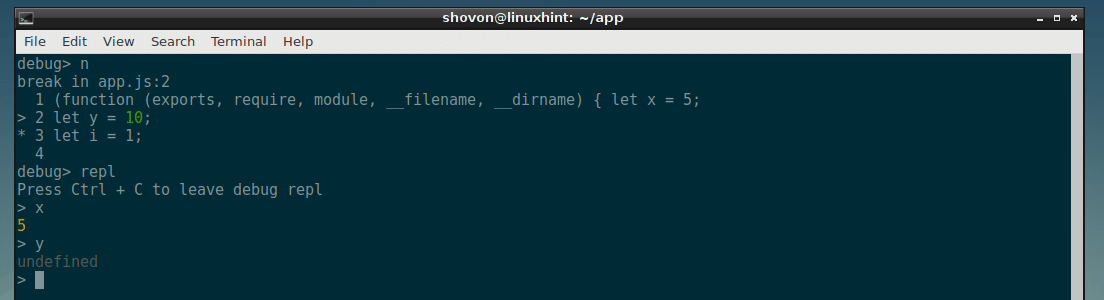
You can use the next or n command to run a NodeJS script line by line.
At first, I have no value set for x and y.

I executed 1 line:
Now x is set to 5 and y is still undefined.
You can move line by line and keep debugging your NodeJS script like this.
Though there are many things I could not cover, but this is the basics of using the NodeJS debugger to debug a NodeJS app. Now it should be easy to learn more about NodeJS debugger with the help command. Thanks for reading this article.