Before Installation
You have to update the system and confirm that the following packages are installed and working properly before starting Magento Installation steps.
- Apache2
- MySQL 5.6+ or MariaDB
- PHP 7+
Run the following commands to update and check your system is ready to start the installation.
$ Apache2
$ PHP –v
$ mysql
If the following output appears then Apache, PHP and MySQL are installed.
Magento Installation Steps
Step-1: Download Magento Installer
Go to the following URL address, select the latest version of Magento and click on DOWNLOAD button. Here ‘Magento Open Source 2.2.6 tar.gz’ is selected and downloaded.
https://magento.com/tech-resources/download
You have to create an account in Magento site to download Magento. So, the following screen will appear before download. Create an account or login to your existing account to start the download process.
Step-2: Create folder and unzip Magento installer
By default, Magento will be downloaded on Downloads folder. Run the commands to create a folder named ‘magento’ under /var/www/html folder and copy the downloaded Magento file on that folder.
$ ls
$ mkdir /var/www/html/magento
$ cp Magento-CE-2.2.6-2018-09-07-02-12–38.tar.gz /var/www/html/magento
Go to magento folder and unzip Magento installer.
$ ls
$ tar xzvf Magento-CE-2.2.6-2018-09-07-02-12–38.tar.gz /var/www/html/magento
Step-3: PHP Settings
You have to set permission to edit and save php.ini file.
Open php.ini file from the location /etc/php/7.1/apache2/ and increase the memory limit and enable the following extensions.
Step-4: Database Setting
Login to MySQL server.
Create a database, ‘magento’.
Step-5: Setting Necessary Permissions
Run the following commands to set the necessary permissions for magento folder and restart the apache server.
$ sudo chmod -R /var/www/html/magento
$ sudo service apache2 restart
Step-6: Setup Magento
Open a browser and enter the following URL and click on Agree and Setup Magento button.
If any necessary PHP extension is missing then it will be displayed in this page. Here, two extension are missing or not working, soap and bcmath.
Install the missing extensions.
$ sudo apt-get install php7.1-bcmath
Again run the setup. If everything is ok then click on Next button. Fill up the following form with database hostname, username, password and database name. Click on Next button.
Set the base URL of the store and admin in this step. Here, I have removed admin prefix for easy access.
Next step is for customizing the store. Keep default settings and click on Next.
Create admin account to login to the dashboard of admin panel and click Next.
Click on Install Now button after completing all setup.
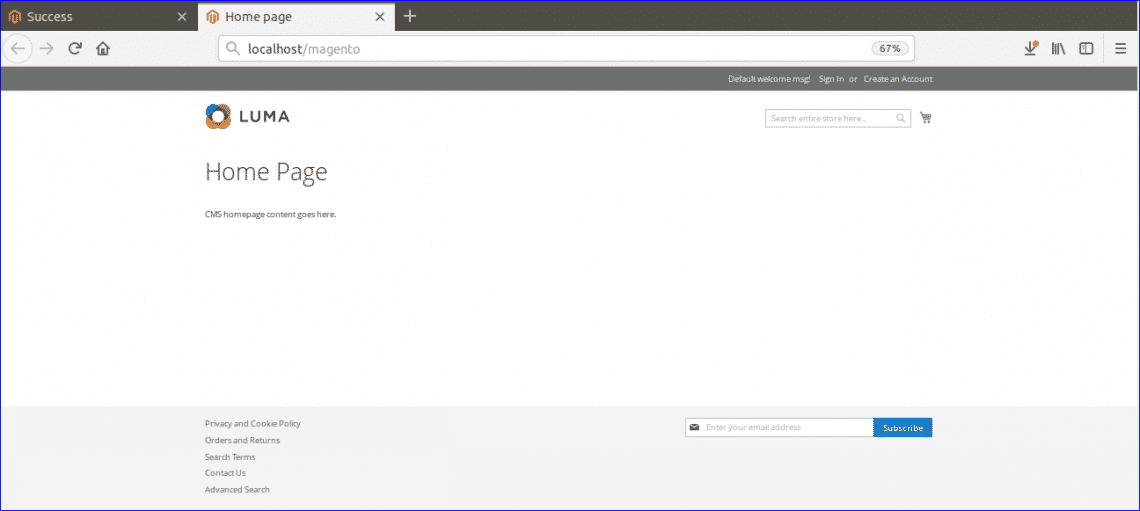
If the installation completes successfully then the following screen will appear.
Step-7: Verify Magento is working or not
Run the following URL from the browser to test the store view is working or not.
Run the following URL to login to Admin Panel. Provide the valid username and password that you have created in previous step.
http://localhost/magento/admin

The following admin panel will appear if Magento is installed and working properly.

Hope, this tutorial will help you to learn and use Magento on Ubuntu.