You can fill the requested information or leave it blank and press ENTER to continue, finally type Y to confirm and press ENTER to finish.

Once existing you can modify a user granting it sudo rights by adding it to the sudo group. To modify a user the command is usermod:

Where:
-a: add
-G: group
To check if the user was properly added to the sudo group you can run:
If the output is similar to the following then you’ll see a similar screen:

Otherwise if the user isn’t in the sudo group the output will be like:
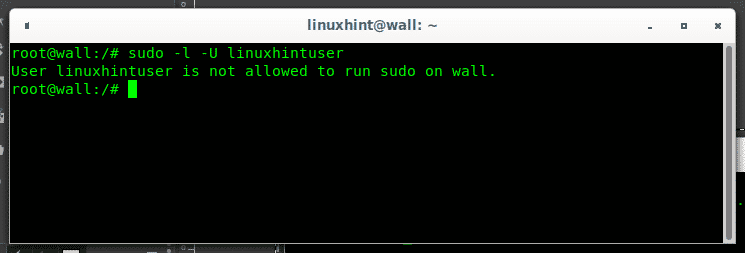
Where:
-l: list
-U: username
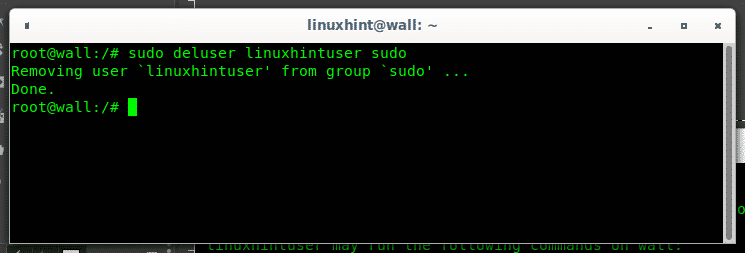
How to remove a user from the sudo group on Debian 10 Buster
Removing a user from the sudo group can be achieved invoking the command deluser followed by the username and the group name like in the following example:
deluser options:
–group {Remove a group.This is the default action if the program is ran as delgroup.}
–help {Display brief instructions. }
–quiet {Suppress progress messages.}
–system {Only delete if user/group is a system user/group. This avoids
accidentally deleting non-system users/groups. Additionally, if the user does not exist,
no error value is returned. This option is mainly for use in Debian
package maintainer scripts.}
–only-if-empty {Only remove if no members are left.}
–backup {Backup all files contained in the userhome and the mailspool-file to
a file named /$user.tar.bz2 or /$user.tar.gz.}
–backup-to {Place the backup files not in / but in the directory specified by
this parameter. This implicitly sets –backup also.}
–remove-home {Remove the home directory of the user and its mailspool.
If –backup is specified, the files are deleted after having performed the backup.
}
–remove-all-files {Remove all files from the system owned by this user.
Note: –remove-home does not have an effect any more. If –backup is specified,
the files are deleted after having performed the backup.}
–version {Display version and copyright information.}
(Source: man page)
How to fully delete a user on Debian 10 Buster
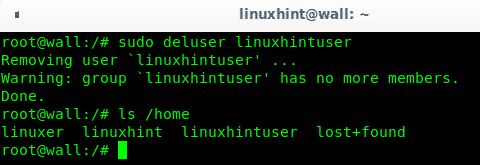
To remove a user keeping his home directory as instructed in the man above, run:

You can check the home directory is still there by running an ls on the /home directory:
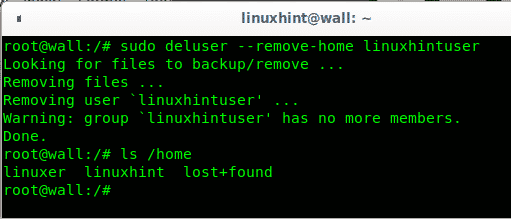
You can add the option –remove-home before the username to remove the home directory too:
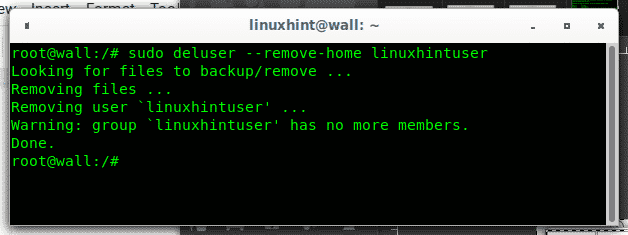
A new ls on the /home directory will show this time the home directory was removed together with the user linuxhintuser:
About sudo
The command sudo allows regular unprivileged users to run command as root, sudo means “super user do”. Users with sudo privileges can run commands allowed within the file /etc/sudoers, of which below you can see a sample:

In this default configuration the following lines show full rights for sudo group users:
root ALL=(ALL:ALL) ALL
# Allow members of group sudo to execute any command
%sudo ALL=(ALL:ALL) ALL
The sudo command addition means increased security allowing users to use privileged rights only when necessary decreasing possibility to run any privileged command by mistake.
I hope you found this brief tutorial showing How to Create a New Sudo User on Debian 10 Buster useful, thank you for reading it .