What is a PPA?
A “Personal Package Archive” or a PPA is an application repository that can be used to upgrade and install packages from unofficial sources.
Difference Between PPAs and Other Repositories
Deb packages (sort of Ubuntu’s equivalent to Windows’ .exe installers) can be served through any repository that adheres to Debian’s rules and guidelines for creating and maintaining repositories. For instance, openSUSE build service often provides repositories that can be used to install and upgrade packages in Ubuntu. On the other hand, a PPA is hosted on Canonical’s servers and is served through its Launchpad platform. Users hosting PPAs on Launchpad don’t require their own server to distribute packages, while other repositories need a server to do the same. In this article, terms like PPA and repository will be used interchangeably.
PPA / Repository Formats
Below are some examples of PPA / repository patterns:
- deb http://myserver/path/to/repo stable myrepo
- deb-src http://myserver/path/to/repo stable myrepo
- http://myserver/path/to/repo myrepo
- https://packages.medibuntu.org free non-free
- http://extras.ubuntu.com/ubuntu
- ppa:user/repository
- ppa:user/distro/repository
- multiverse
Security Concerns with PPAs
Even though we have not heard of malware or adware distributed through PPAs so far, there is always a risk that these third party repositories may contain malicious packages. You should always be careful when adding any random repository, as packages in these PPAs may not have been verified by Ubuntu developers. Only add a PPA if you trust its source.
Taking a Backup of Repository Sources
Ubuntu maintains a list of repositories in “/etc/apt/sources.list” file. Before doing anything mission critical or manually editing this text file, you should take a backup of sources by running the command below:
Adding a PPA Using Command Line
To add a PPA, run the commands below while replacing “ppa:name” with your desired PPA address:
$ sudo apt update
For example, command for adding Geany text editor PPA would be:
If no errors are observed, run the command below to upgrade existing packages:
If you added a PPA to install a new package, run command below while replacing “package-name” with your desired package name:
Removing a PPA Using Command Line
To remove a PPA using command line, you have to run the command below in the following format:
For example, Geany text editor PPA added from here can be removed by running the command:
Another method to remove a PPA is to manually delete a PPA source file from system. To see all PPA files, run the command below:
You will see a file list in terminal. Any file ending with “.list” extension can be deleted to remove a PPA from system. To do so, run command in the following format:
Refresh system repositories by manually triggering an update.
For example, Geany text editor PPA added from here can be removed by using the command:
ubuntu-ppa-eoan.list
Using PPA-Purge to Remove PPAs
PPA-Purge is a command line utility that removes a PPA source while downgrading packages installed from the specified PPA to stock versions. To install PPA-Purge command line app in Ubuntu, run the following command:
To purge a PPA, run a command in the following format:
For example, Geany text editor PPA added from here can be purged by running command:
Graphical Method to Add, Remove and Disable a PPA
In most cases, using “Software & Updates” app can be used to manage PPAs that have been added to system. However due to a bug, this app fails sometimes doing tasks that require root access. To overcome this, you will have to install Synaptic package manager by running the command below:
Launch “Synaptic Package Manager” from application launcher. Click on “Settings” > “Repositories” and go to “Other Software” tab. Click on “Add..” button at the bottom and then enter a PPA address in the input box. Click on “Add Source” once done.
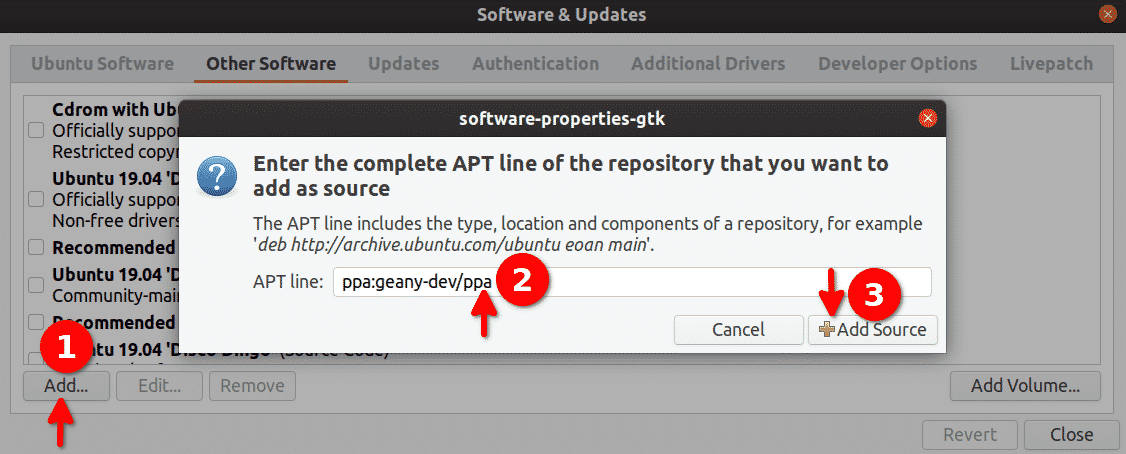
Click on “Close” button and when prompted to refresh repositories, just click on “Reload” button.
Removing and disabling repositories can be done the same way. Click on the “Remove” button at the bottom to remove a PPA from system. You can disable a PPA by unchecking the checkbox in front of a PPA source address.
Browsing All Repositories Added on Your System
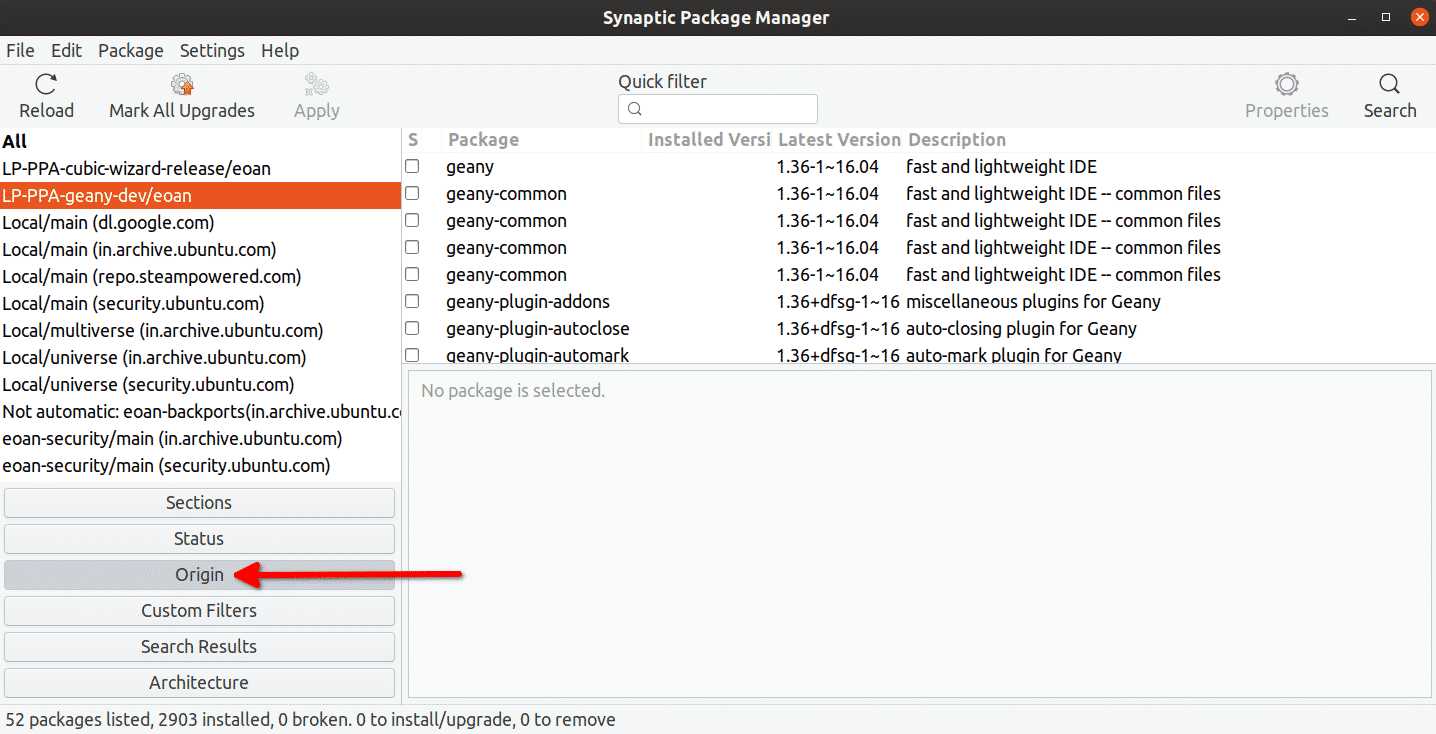
To see all PPA repositories added on your system, launch Synaptic app and click on “Origin” button, as shown in the screenshot below:
Conclusion
PPA repositories are an excellent way to add third party apps to your system as not everything can be maintained and included in official repositories. This has been one of the many reasons of Ubuntu’s rising popularity over the years. However, new distribution agnostic solutions like Snap and Flatpak packages provide granular permissions control and isolated sandboxes, giving them an extra layer of security over typical PPAs.