But how do you transfer a downloaded disk image to a USB flash drive? In this article, we provide three solutions to help you create a bootable Linux USB flash drive on Linux, Windows, macOS, and even Android.
Create a Bootable Linux USB with Etcher (Linux, Windows, macOS)
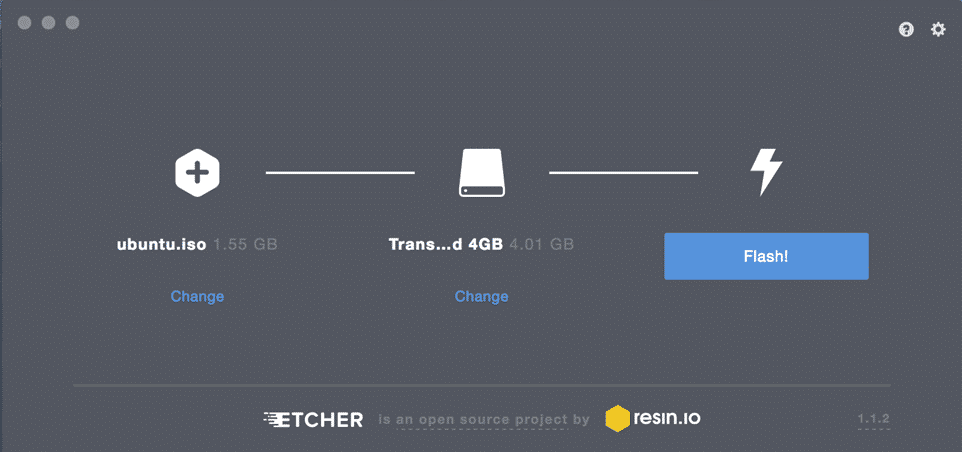
Written in Electron, Etcher is a cross-platform open source utility for flashing disk images to USB drives and memory cards. It runs on Windows, macOS, and Linux and provides an approachable graphical user interface that reduces the process of creating a bootable Linux USB to just three simple steps.
Unlike other similar software tools, Etcher prevents users from accidentally wiping their entire hard drives, which is something you’ll definitely appreciate if you’ve never created a bootable USB before and understandably feel anxious about the process.
To create a bootable Linux USB with Etcher:
1. Download Etcher from its official website.
- Etcher offers precompiled binaries for Linux, Windows, and macOS).
2. Launch Etcher.
3. Select the ISO file you want to flash to your USB drive.
4. Specify the target USB drive if the correct drive is not selected already.
5. Click the Flash! button and wait for the process to finish.
- You may be asked to enter the admin password.
Create a Bootable Linux USB with dd (Linux, macOS)
dd is a command-line utility for Unix-like operating systems whose primary purpose is to read/write data from/to device files, such as USB flash drives. Because dd is bundled in GNU coreutils, you can find it on virtually all Linux distributions, as well as on macOS.
To create a bootable Linux USB with dd:
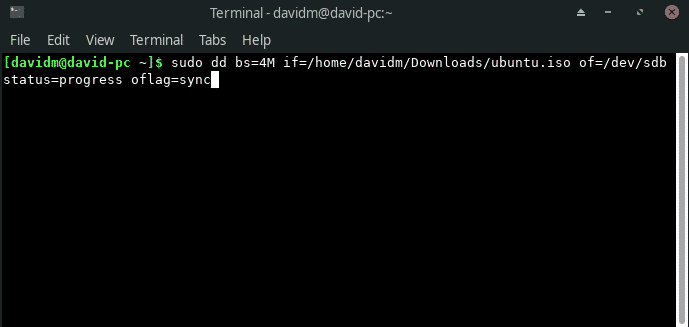
- Open your favorite terminal emulator.
- Issue the following command (replace /dev/sdx with your drive and path/to/ubuntu.iso with the actual path to the ISO file you want to flash):
- Wait for dd to finish.
The version of dd included in GNU coreutils doesn’t provide any progress indication. If you’d like some reassurance that the transfer is progressing as it should, you can use the following command (replace dd-pid with the process-id of dd, which you can find using htop):
dd for windows
There’s actually a version of dd for Windows that provides all the functionality you need to transfer an ISO file to a USB flash drive. To install it:
- Download the latest version from its official website.
- Extract the downloaded archive to a new folder on your hard drive.
- Open Command Prompt and navigate to the folder with dd for Windows.
- Use dd for Windows just like you would the version included in GNU coreutils.
Unfortunately, dd for Windows was last updated in 2010, and many users have reported issues when using the utility in Windows 10. Considering that dd for Windows doesn’t even support data conversion, such as byte order swapping and conversion to and from the ASCII and EBCDIC text encodings, you’re probably better off using either Etcher or Rufus, which we describe in the next chapter.
Create a Bootable Linux USB with Rufus (Windows)
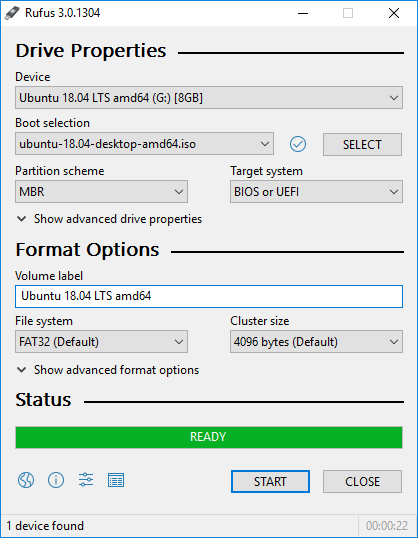
Before the release of Etcher in 2016, Rufus was the best way to create a bootable Linux USB in Windows. This bootable USB flash drive creator is much faster than all of its Windows competitors, and it can create live USB drives for systems with both BIOS and UEFI. Rufus has been translated into several dozen languages, and it’s compatible with Windows 7 and newer, both 32- and 64-bit.
To create a bootable Linux USB with Rufus:
- Download Rufus from its official website.
- You can choose between an installer and a portable version.
- Install it if you’ve downloaded the installer. Otherwise, you can just launch it.
- Select the target USB device.
- Click the SELECT button next to the boot selection dropdown menu and specify the ISO file you want to flash.
- Choose the correct partition scheme for your system.
- Click the START button.
- Wait for Rufus to finish.
In addition to creating live Linux USB flash drives, Rufus can also flash Windows disk images.
Create a Bootable Linux USB with EtchDroid (Android)
The last utility we want to describe is called EtchDroid, and its purpose is to write OS images to USB drives on Android smartphones and tablets.
Why would you want to use your Android device to create a bootable Linux USB? Well, imagine you find yourself in the middle of nowhere, and your laptop stops working after a botched system update. Without another computer to use, your only option on how to create a bootable Linux USB to fix the issue is your Android device, and that’s where EtchDroid comes in.
To create a bootable Linux USB with EtchDroid:

- Download EtchDroid from Google Play or F-Droid.
- Connect a USB flash drive to your Android device using a USB OTG adapter.
- Launch EtchDroid and select the Write raw image or ISO option.
- Select your ISO image.
- Select the USB flash drive.
- Tap Write to write the image to the USB flash drive.
EtchDroid has been tested with Ubuntu and its derivatives, Debian, Fedora, Arch Linux, and Raspberry PI SD card images. It doesn’t work with Windows, macOS, and old GNU/Linux distros. Support for Windows installation ISO files is on the developer’s to-do list.