In this article, I will show you how to install and configure iSCSI Storage Server on CentOS 7. Let’s get started.
How iSCSI Works:
iSCSI is used to share a block device such as /dev/sdb, or a partition /dev/sdb1, or a LVM Logical Volume (LV) /dev/iscsi/data etc over the network.
The iSCSI server shares the block devices. The iSCSI client connects to the server and once connected, the iSCSI client can use these block devices. The iSCSI client can format the block devices into as many filesystem as the client supports such as EXT2, EXT3, EXT4, FAT32, XFS, ZFS, BTRFS and so on.
Network Diagram:
This is how the computers used in this article are connected and the network is configured.
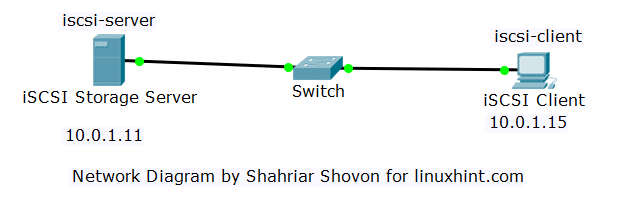
The iscsi-server hosts the iSCSI server. It has the IP address 10.0.1.11.
The iscsi-client connects to the iscsi-server and uses the iSCSI disks. It has the IP address 10.0.1.15
Installing iSCSI Server:
On the iscsi-server machine, the iSCSI server software must be installed.
First update YUM package repository cache with the following command:

Now install iSCSI server package with the following command:

Type in y and then press <Enter> to continue.
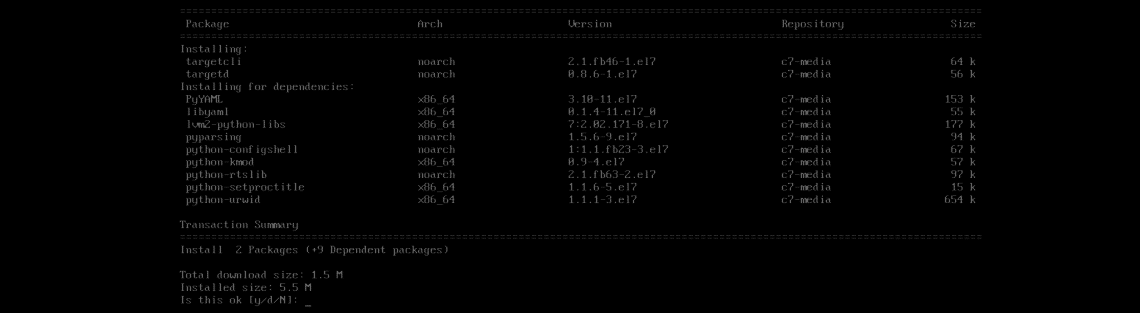
iSCSI server packages should be installed.

Installing iSCSI Client Utilities:
On the iscsi-client machine, you have to have iSCSI client utilities installed.
Update the YUM package repository cache with the following command:

Run the following command to install iSCSI client utilities:

Now type in y and press <Enter> to continue.

iSCSI client utilities should be installed.

Initializing Disk for iSCSI Server:
You can share standard disk partitions with iSCSI server. You can also share LVM Logical Volumes (LVs). I recommend you use LVM if you don’t want to share the whole hard drive, instead share small parts to many iSCSI clients.
In this section, I will set up LVM on the hard drive /dev/sdb and make some logical volumes (LVs) so that I can share them using the iSCSI server.
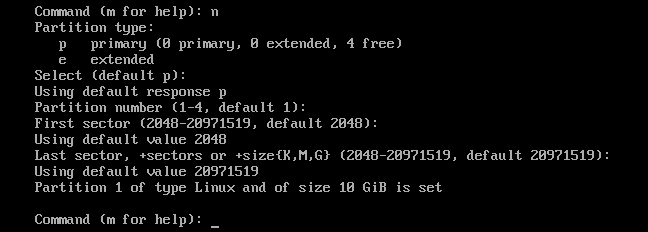
First I am going to make a single Linux LVM partition /dev/sdb1 on /dev/sdb with fdisk.

Press n and then press <Enter>.

Press <Enter>.

Press <Enter>.

Press <Enter>.
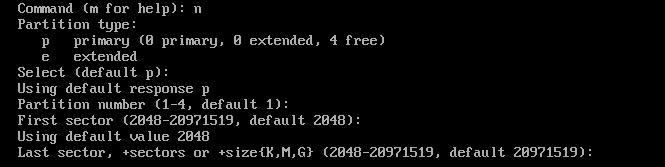
/dev/sdb1 should be created.
Press t and then press <Enter>.

Type in 8e and press <Enter>. The partition type should be changed to Linux LVM.

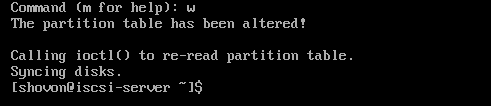
To save the changes, press w and then press <Enter>.
Now add /dev/sdb1 to LVM PV with the following command:

Now create a VG iscsi and add PV /dev/sdb1 to it with the following command:

Now create a 512MB small LV web in VG iscsi with the following command:

Now create a 2GB LV data in VG iscsi with the following command:

Now the LVs are available as /dev/iscsi/web and /dev/iscsi/data block device.

Sharing Block Devices Using iSCSI Server:
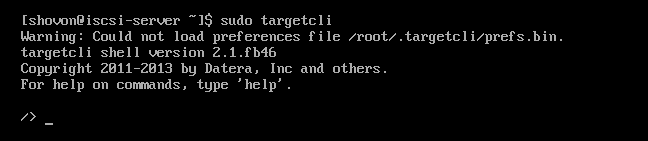
The targetcli command is used to manage iSCSI shares/targets on CentOS 7.
Run the following command to start targetcli on the iscsi-server machine:
Now create a new iSCSI backstore block web with LV /dev/iscsi/web with the following iSCSI command:

Create another backstore block data with LV /dev/iscsi/data with the following command:

Now create a new iSCSI target with the following command:
Make a note of the marked string as we will need it while connecting to our iSCSI server.

If you want to give the iSCSI target your own identifier, you can:

The current state of iSCSI target configuration looks as follows:
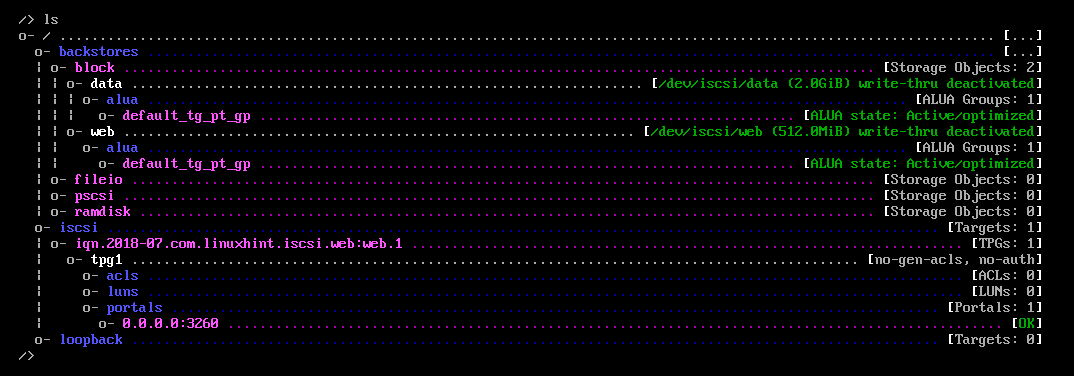
Now you have to create a LUN on the iSCSI target iqn.2018-07.com.linuxhint.iscsi.web:web.1 you have just created.
Run the following command:

Now add the backstores web and data you’ve created earlier with the following commands:


Now you have to create an Access Control List (ACL) on the target iqn.2018-07.com.linuxhint.iscsi.web:web.1 with the following command:

By default, the iSCSI targets will be read only. To write into the targets, disable write protection with the following command:

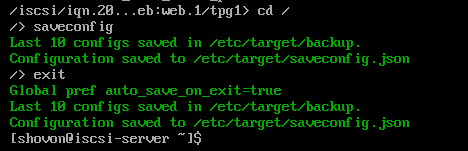
Now run the following commands to save the changes:
/> saveconfig
/> exit
Connecting the iSCSI Server:
In this section, I will configure the iSCSI client iscsi-client machine so that it will be able to connect to the iSCSI server iscsi-server.
First you have to set the iSCSI initiator name to the ACL of your iSCSI target, which in my case iqn.2018-07.com.linuxhint.iscsi.web:web.1
Run the following command to set the iSCSI initiator name to the file /etc/iscsi/initiatorname.iscsi:
sudo tee /etc/iscsi/initiatorname.iscsi

Now you can run the following command to search for the iSCSI targets from the iscsi-client machine:

As you can see, we are able to connect to the iSCSI server.

Now run the following command to login to the target iqn.2018-07.com.linuxhint.iscsi.web:web.1:
–portal 10.0.1.11 –login

You should be successfully logged in.

Now you should be able to find the new block devices on the iscsi-client:
As you can see, the 512MB and 2GB block devices are available on the iscsi-client.
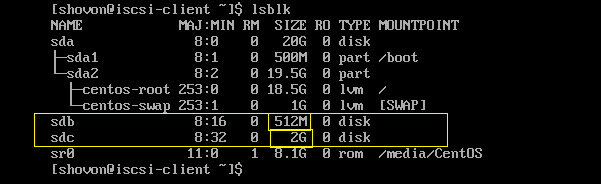
Now you can create partitions on the block devices, format the partitions, mount it, share it on the iscsi-client machine just as you do your ordinary hard drives.
Opening iSCSI Port with FirewallD:
If you’re using firewall, then iSCSI port 3260/TCP should be blocked.
Now the run following commands to open iSCSI port 3260/TCP using firewall-cmd:
$ sudo firewall-cmd –reload

That’s how you install and configure iSCSI Storage Server on CentOS 7. Thank you for reading this article.