How To Open Port 80 on CentOS7

28/12/2020
If you’re planning to host websites on CentOS 7, then you might install a web server software such as Apache or Nginx. A web server like Apache by default works on port 80. That is if you go to the IP address or hostname or domain name of your server from a web browser, then the web server should send you a web page. In a CentOS 7 server, many services like that should be installed. Like the web server works on port 80, a DNS server works on port 53, SSH server works on port 22, a MySQL server works on port 3306 and so on. But you don’t want others to connect to these services. If someone gains access to your SSH server, then he/she may be able to control your server, like stop some services, install some new services, change your password and many unexpected things can happen. That is why a firewall program is used to allow outsiders to connect to specific port and block others. For a web server, the port is 80.

In this article, I will show you how to open port 80 and block all the other ports on CentOS 7 with firewalld. Let’s get started.

Installing a Web Server

In this section, I will show you how to install a web server on CentOS 7. I included this section so that you can have a real life experience on what I am talking about.

The most widely used web server software is Apache. Apache is available on the official package repository of CentOS 7.

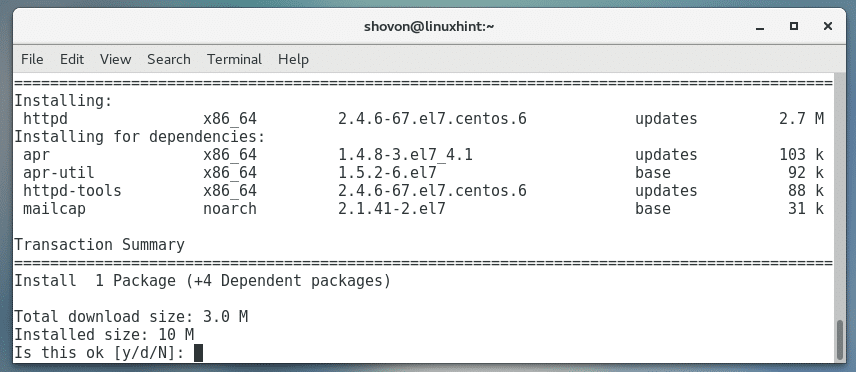
To install Apache web server, run the following command:

$ sudo yum install httpd

Press ‘y’ and then press <Enter> to continue.

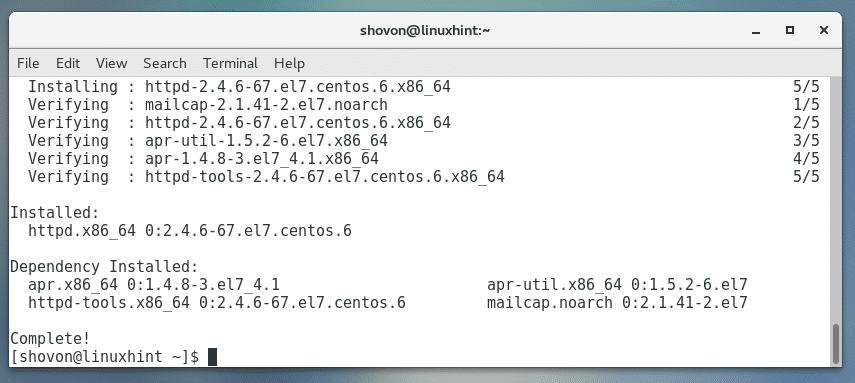
Apache web server should be installed.

Now run the following command to check whether Apache HTTP server is running or not:

$ sudo systemctl status httpd

As you can see from the screenshot below, the Apache HTTP server is not running.

You can start Apache HTTP server with the following command:

$ sudo systemctl start httpd

You will want the Apache HTTP server to start automatically on system boot. You can add Apache HTTP server to the startup with the following command:

$ sudo systemctl enable httpd

Apache HTTP server is added to the startup.

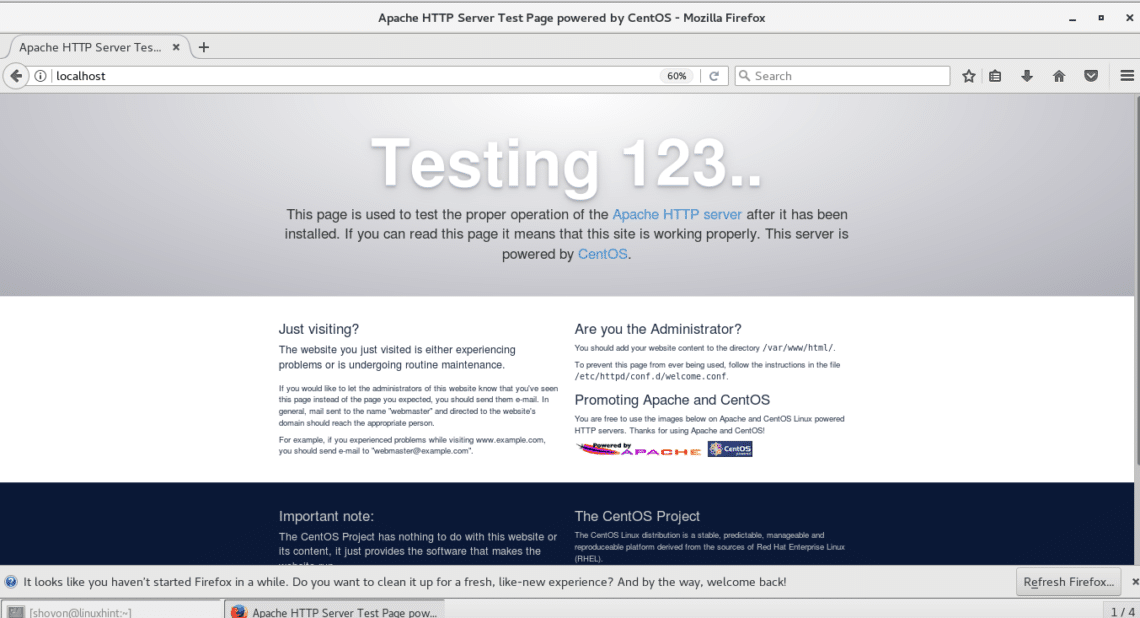
Now open up a web browser and go to http://localhost

You should see the following page as shown in the screenshot below.

Checking for Open Ports with nmap

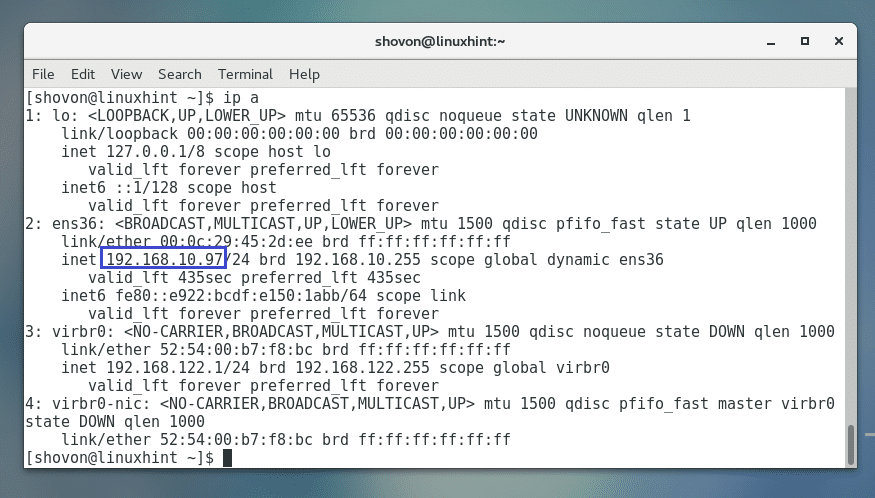
First check the IP address of your CentOS 7 server with the following command:

$ ip a

As you can see from the screenshot below, the IP address of my CentOS 7 server is 192.168.10.97

You can check for all the open ports with nmap utility from another computer as follows:

$ nmap -sT 192.168.10.97

As you can see, right now, only the port 22 is open. What we are interested in is opening only port 80 and closing others.

Opening Port 80 and Closing Others

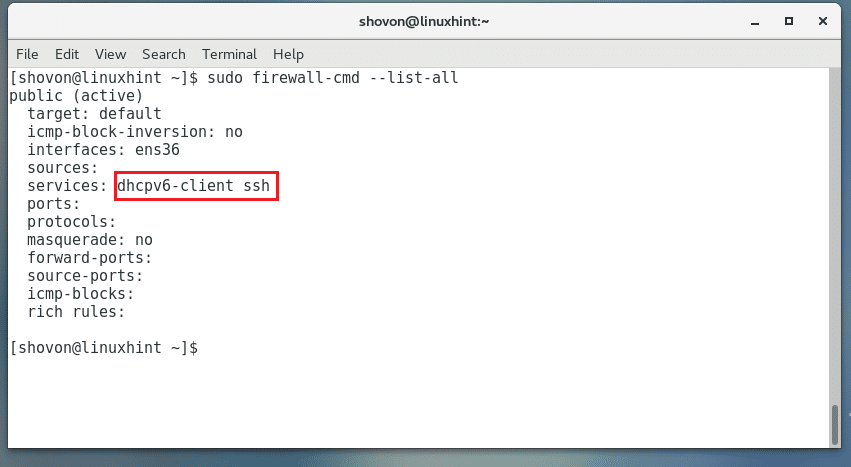
First check all the allowed services with the following command:

$ sudo firewall-cmd –list-all

As you can see I have dhcpv6-client and ssh services allowed from outside. You may have more or less services allowed.

Now you have to disable them one by one.

You can remove the ssh service with the following command:

$ sudo firewall-cmd –remove-service=ssh –permanent

You can remove the dhcpv6-client service with the following command:

$ sudo firewall-cmd –remove-service=dhcpv6-client  –permanent

Now add HTTP service or port 80 with the following command:

$ sudo firewall-cmd –add-service=http –permanent

Once you’re done, restart firewalld with the following command:

$ sudo firewall-cmd –reload

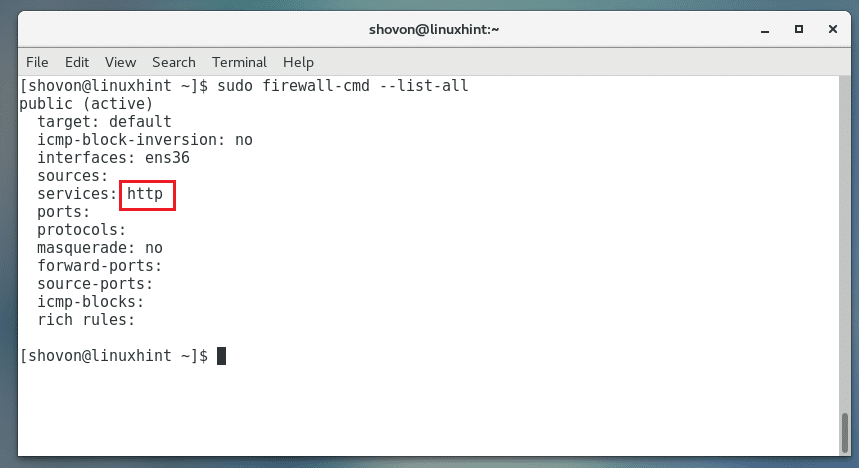
Now if you check the firewalld services again:

$ sudo firewall-cmd –list-all

You should see only http service allowed as marked in the screenshot below.

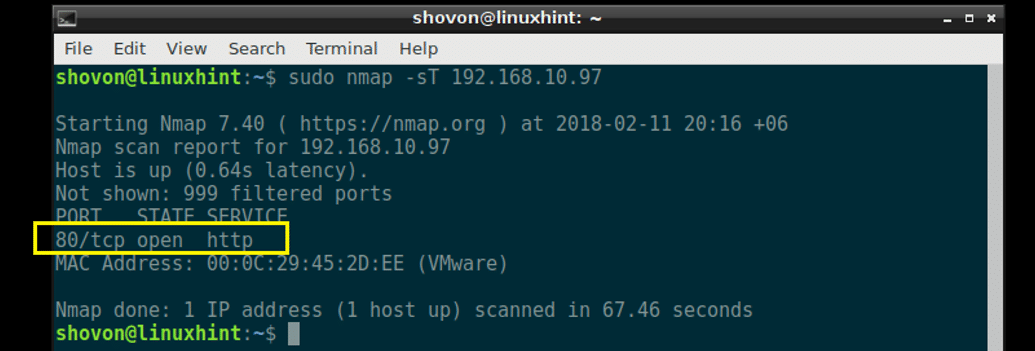
Now you may do a port scan with nmap from another computer:

$ sudo nmap -sT 192.168.10.97

You should be able to see only port 80 open as shown in the screenshot below.

You can also test whether you can access the web server if you open up a browser and type in the web server’s IP address.

I can access the web server from a browser as you can see from the screenshot below.

So that’s how you open port 80 and block every other ports on CentOS 7. Thanks for reading this article.

ONET IDC thành lập vào năm 2012, là công ty chuyên nghiệp tại Việt Nam trong lĩnh vực cung cấp dịch vụ Hosting, VPS, máy chủ vật lý, dịch vụ Firewall Anti DDoS, SSL… Với 10 năm xây dựng và phát triển, ứng dụng nhiều công nghệ hiện đại, ONET IDC đã giúp hàng ngàn khách hàng tin tưởng lựa chọn, mang lại sự ổn định tuyệt đối cho website của khách hàng để thúc đẩy việc kinh doanh đạt được hiệu quả và thành công.
Bài viết liên quan

[Ubuntu] Hướng dẫn khôi phục tên network interface về dạng eth[x] trên Ubuntu 16.04 / 18.04

Khi mới quản trị hệ thống, bạn sẽ nhận thấy tên interface mạng mặc định trên Ubuntu theo...
30/12/2020

Tìm hiểu về công nghệ Livestream

Livestream hay streaming video ngày nay đã là những thuật ngữ không còn xa lạ trong đời sống hàng...
30/12/2020

Jitsi [Part 1]- Giới thiệu công cụ hội nghị truyền hình mã nguồn mở

Jitsi là giải pháp hội nghị truyền hình được xây dựng dựa trên một loạt các open-source project...
30/12/2020
Bài Viết

Bài Viết Mới Cập Nhật

Thuê mua proxy V6 uy tín, chất lượng tại đâu?
11/05/2024

Thuê mua proxy Tiktok tăng doanh thu, hiệu quả cao
11/05/2024

Thuê mua proxy xoay ở đâu uy tín, chất lượng, giá tốt?
11/05/2024

Thuê mua proxy game nâng cao trải nghiệm trò chơi
10/05/2024

Thuê mua proxy Airdrop tốc độ nhanh, hiệu quả cực tốt
10/05/2024