Samba can be used to set up storage server or sharing files and directories on the Linux system.
In this article, I will show you how to install and configure Samba share with Windows and CentOS 7. Let’s get started.
Network Diagram for the Samba Storage Server:
The Samba server and client computers are set up the following way:
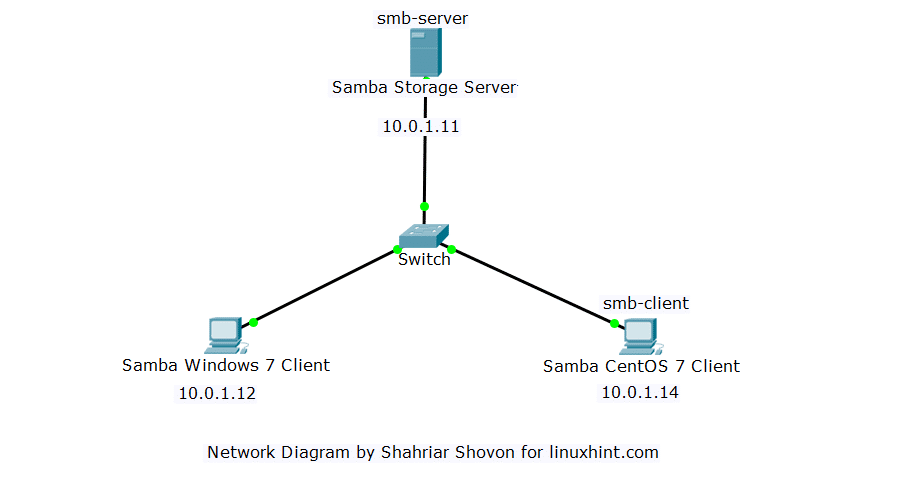
The Samba Storage Server (based on CentOS 7) has the hostname smb-server and IP address 10.0.1.11
The Samba CentOS 7 Client has the hostname smb-client and IP address 10.0.1.14
The Samba Windows 7 Client has the IP address 10.0.1.12
These computers are in the same network 10.0.1.0/24
Configuring DNS for Samba Server:
Before you get started, make sure your DNS server is configured correctly. Otherwise, Samba may fail to start.
Configuring a full DNS server is out of the scope of this article, so I edited the /etc/hosts file of every CentOS 7 machine and added the following line there.
On the smb-server and smb-client machine, you can simply run the following command to add the above line to the /etc/hosts file:

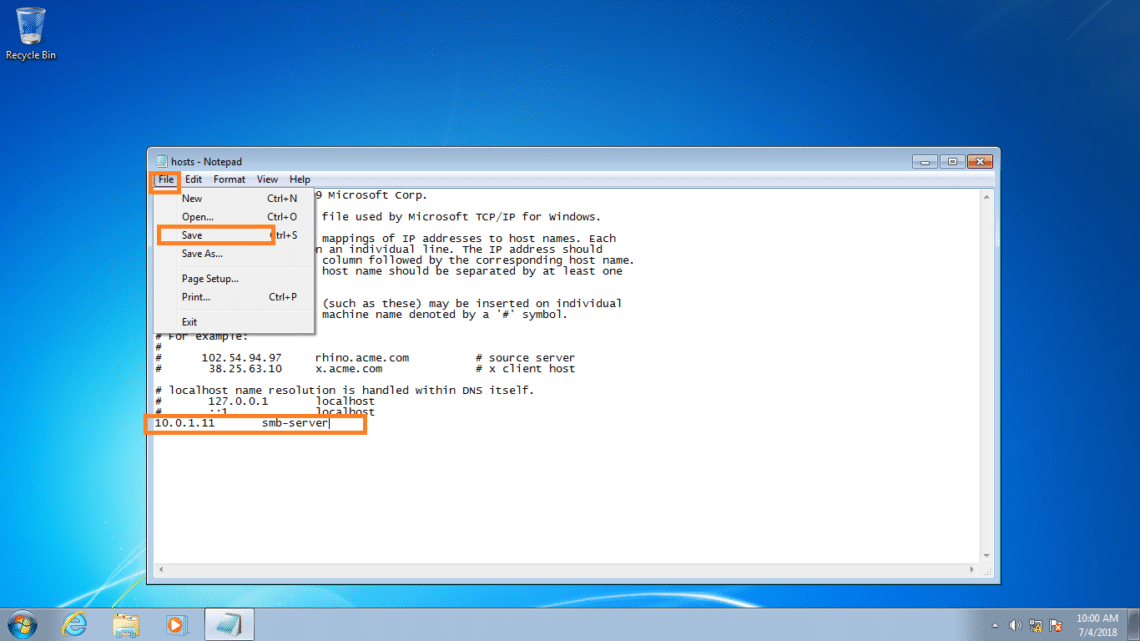
For Windows client, I used Notepad to edit C:WindowsSystem32Driversetchosts file and added the following line there:
Step 1:
Go to the Start menu and search for notepad. Now right click on Notepad icon and click on Run as administrator.

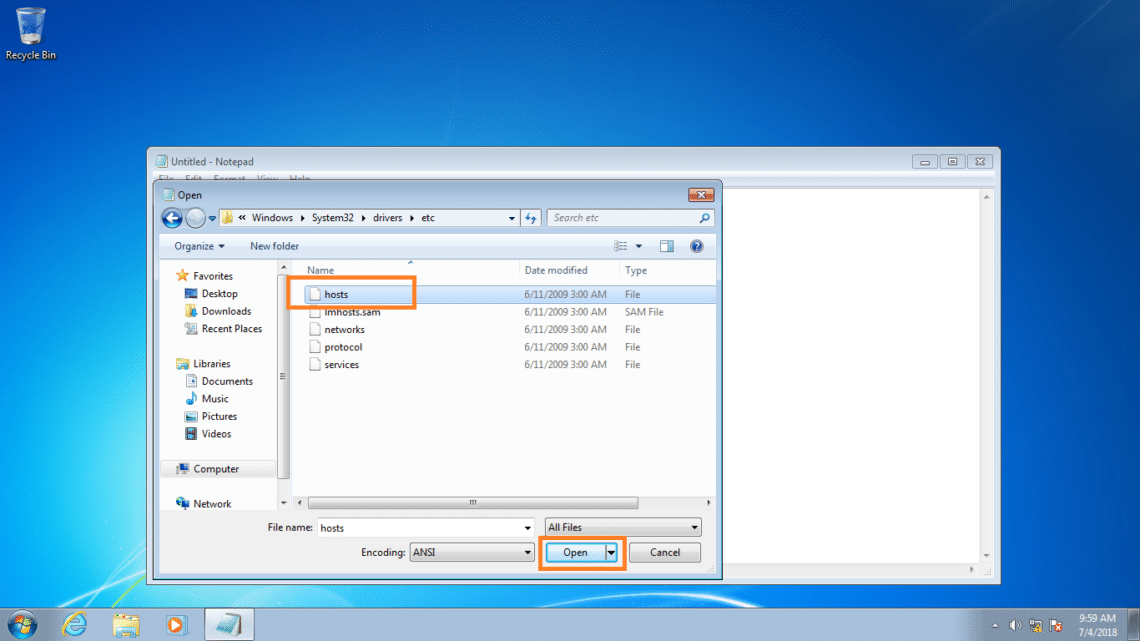
Step 2:
Now press <Ctrl> + o to go to File > Open… and select the file C:WindowsSystem32Driversetchosts
Step 3:
Now add the above line to the end of the file. Now press <Ctrl> + s or go to File > Save to save the file.
Installing Samba Server:
Samba server is not installed by default on CentOS 7. So you have to install it on the smb-server machine.
Before installing Samba server, run the following command to update the YUM package repository cache:

Now update your CentOS 7 system with the following command:

If update is available, you should see the following window. Press y and then press <Enter> to continue.

The update process should take a while to finish. Once completed, run the following command to reboot your system.
Now install Samba server with the following command:

Now press y and then press <Enter> to continue.
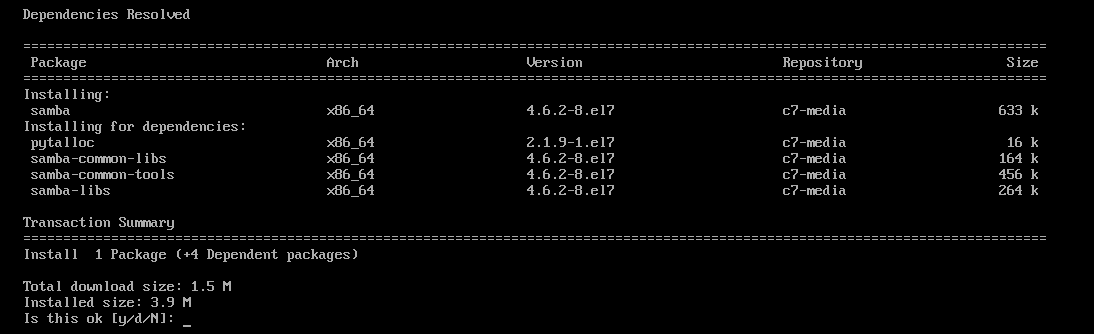
Samba server should be installed.

The samba services smb and nmb are stopped by default. You must start them before doing anything.
Start the smb service with the following command:

Start the nmb service with the following command:

Now you have to add the smb and nmb services to the system startup so that they start when the server computer boots.
Add the smb service to the system startup with the following command:

Add the nmb service to the system startup with the following command:

Adding and Listing Samba Users:
Windows users have different files and directory permission schemes than Linux. To add these additional parameters to the existing Linux users, pdbedit command is used.
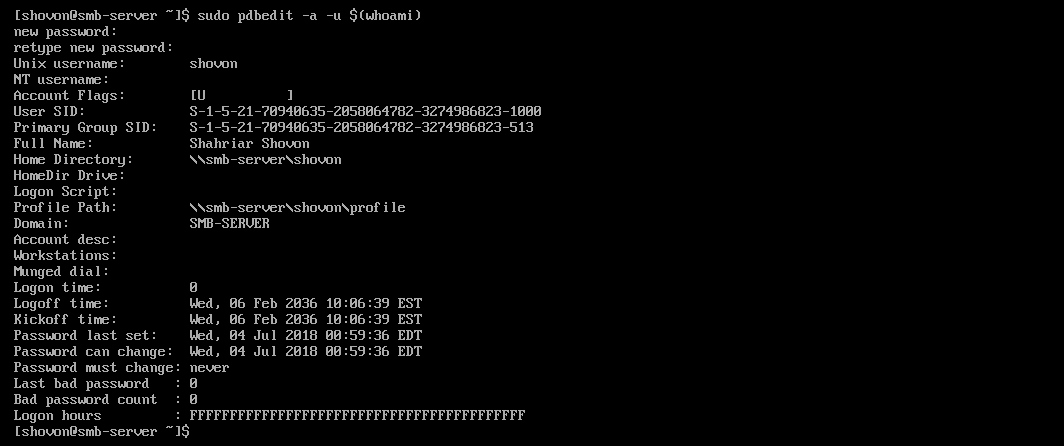
You can add your login user to Samba with the following command:

Now you have to set up a Samba password. This is the password you will use when login in a Samba share.
Type in your Samba password for the user and press <Enter>.

Re-type your Samba password and press <Enter>.

Your login user should be added.
You can add other Linux users to Samba as well with the following command:
Note: Here, USERNAME can be any Linux username.
Now you can list all the Samba users with the following command:

Allowing Samba Traffic:
Now allow the samba traffic to the smb-server machine with the following Firewalld command:

Apply the new Firewalld configuration with the following command:

Accessing Samba Shares from CentOS 7 Client:
You can install Samba client utilities to your CentOS 7 machines from which you want to mount the Samba shares from smb-server machine.
Run the following command to install the Samba client utilities on CentOS 7 client:

Now press y and then press <Enter> to continue.

Samba client utilities should be installed.

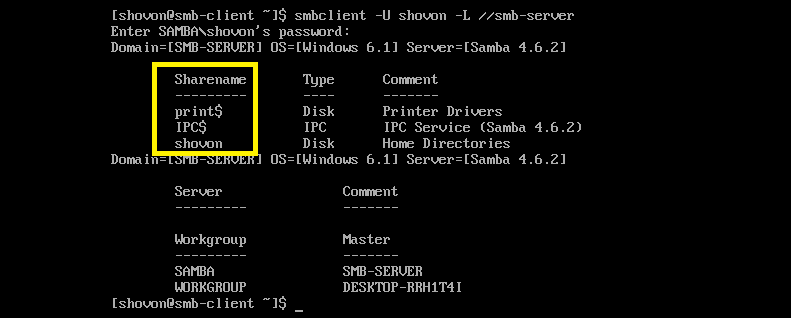
Now you can list all the available share for your login USERNAME on smb-server machine with the following command:
Note: Here USERNAME is your Samba username and HOSTNAME is the DNS name or IP of your smb-server.

Now type in your Samba password and press <Enter>.

All your shares should be listed. By default, only the user’s home directory is shared. If you want, you can add more shares.
Now you can mount your share with the following command:
//SERVER_IP/SHARENAME MOUNTPOINT
Note: USERNAME and SAMBA_PASSWORD are Samba login details, SERVER_IP is the IP address of the smb-server, SHARENAME is the name of the share and MOUNTPOINT is the location/path where you want to mount your share SHARENAME on CentOS 7.

The share is mounted.

Accessing Samba Shares from Windows Client:
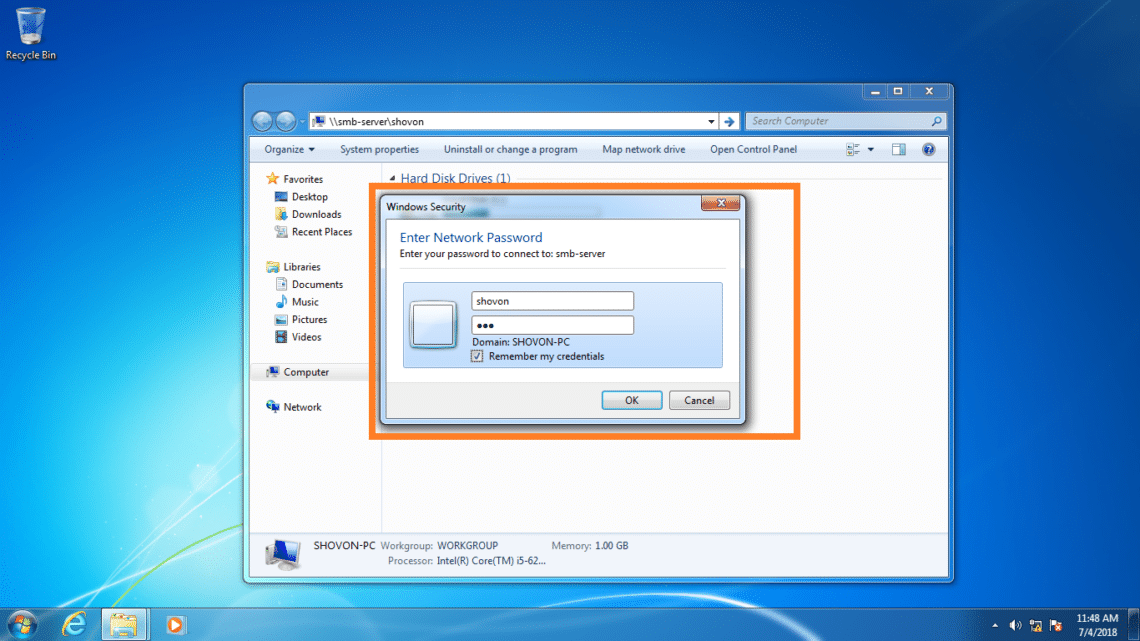
From windows, just open the File Explorer and type in \HOSTNAMESHARENAME in your location as marked in the screenshot below. Once you’re done, press <Enter>.
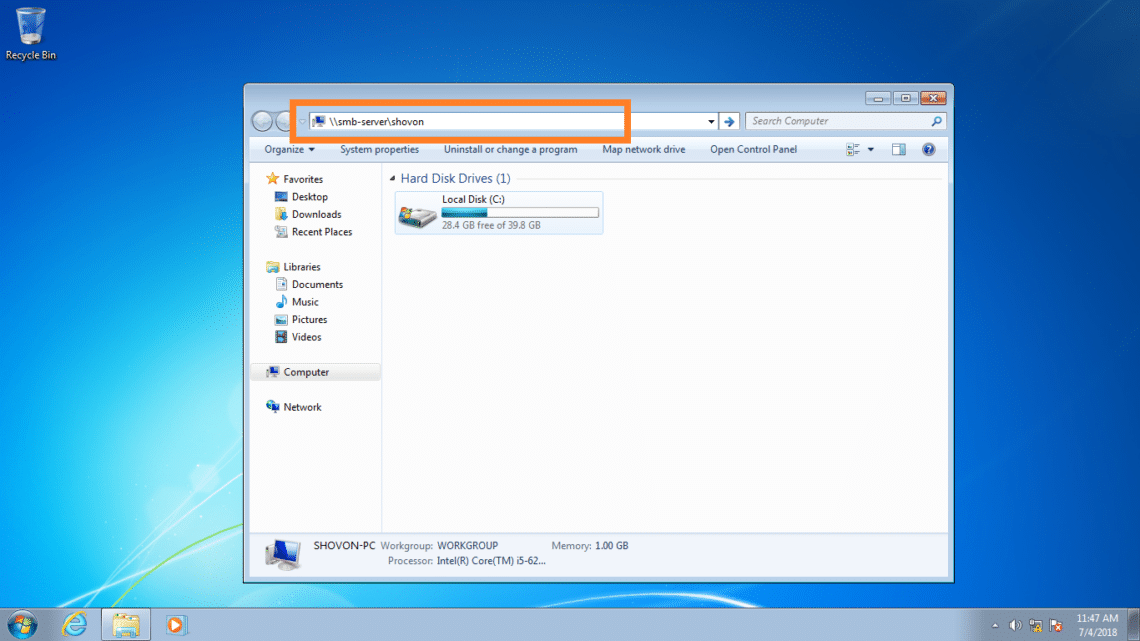
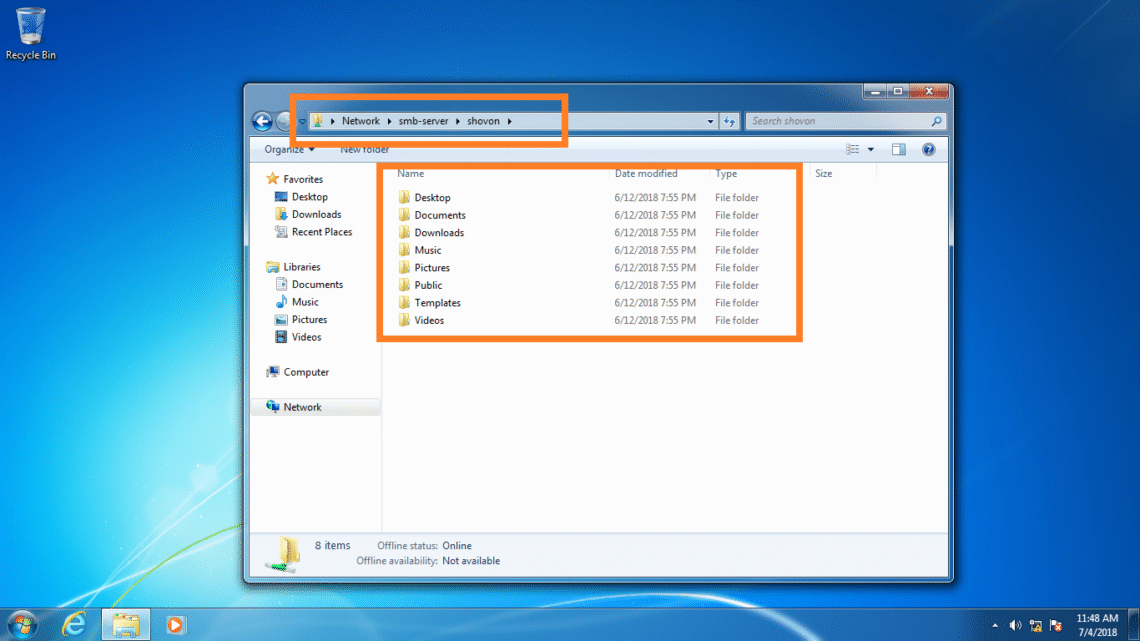
Now type in your Samba USERNAME and PASSWORD and click on OK.
You should be logged in to your share as you can see.
Adding More Shares:
If you need to add more shares, read Creating a File Share section of the article at https://linuxhint.com/install-samba-on-ubuntu/
Note: I did everything while SELinux was disabled. Working with SELinux is out of the scope of this article. Please check the SELinux documentation for more information on SELinux and how to set it up for Samba.
So that’s how you install and configure Samba share with Windows and CentOS 7. Thanks for reading this article.