In this tutorial, we will learn how to install cPanel / WHM on CentOS 7 server.
Requirements
- A fresh installation of CentOS 7 (Minimal) server.
- Minimum 2 GB of RAM and 20 GB of free disk space.
- A static IP address is configured on your server.
Getting Started
Before starting, it is recommended to update your server with the latest version. You can update the server with the following command:
Next, you will need to set a hostname for the server. The hostname must be a fully qualified domain name. You can set the hostname of your server with the following command:
Next, you will also need to disable SELinux on your server. You can disable it by editing the following file:
Change the following lines:
SELINUXTYPE=targeted
Save and close the file. Then, restart your system to apply these changes.
After rebooting the system, check the SELinux with the following command:
You should see that SELinux is disabled in the following output:
Install cPanel
cPanel provides an automated installation script to install cPanel with all necessary components. You can download and install cPanel by just running the following command:
The above script will take around 20-60 minutes to complete the installation. Once the installation has been completed successfully, you should see the following output:
WHM 11.80 is now complete. The next step is to configure your server.
2019-07-07 01:36:44 1392 ( INFO):
2019-07-07 01:36:44 1392 ( INFO): Before you configure your server, ensure that your
firewall allows access on port 2087.
2019-07-07 01:36:44 1392 ( INFO):
2019-07-07 01:36:44 1392 ( INFO): After ensuring that your firewall allows access
on port 2087, you can configure your server.
2019-07-07 01:36:44 1392 ( INFO):
2019-07-07 01:36:44 1392 ( INFO): 1. Open your preferred browser
2019-07-07 01:36:44 1392 ( INFO):
2019-07-07 01:36:44 1392 ( INFO): 2. Navigate to the following url using the address
bar and enter this one-time autologin url:
2019-07-07 01:36:44 1392 ( INFO):
2019-07-07 01:36:44 1392 ( INFO): https://139.5.237.169:2087/cpsess3438670747/login/
session=root%3aEFcxHbIjILlL14m2%3acreate_user_session%2c8846f458c886541e2ffd7ebc11683ac1
2019-07-07 01:36:44 1392 ( INFO):
2019-07-07 01:36:44 1392 ( INFO): After the login url expires you generate a new one
using the ‘whmlogin’ command or manually login at:
2019-07-07 01:36:44 1392 ( INFO):
2019-07-07 01:36:44 1392 ( INFO): https://139.5.237.169:2087
2019-07-07 01:36:44 1392 ( INFO):
2019-07-07 01:36:44 1392 ( INFO): Visit https://go.cpanel.net/whminit for more
information about first-time configuration of your server.
2019-07-07 01:36:44 1392 ( INFO):
2019-07-07 01:36:44 1392 ( INFO): Visit http://support.cpanel.net or
https://go.cpanel.net/allfaq for additional support
2019-07-07 01:36:44 1392 ( INFO):
2019-07-07 01:36:44 1392 ( INFO): Thank you for installing cPanel & WHM 11.80!
Removing /root/installer.lock.
cPanel provides a 15 days trial license. So, you will need to activate it first. You can activate the trial license with the following command:
You should see the following output:
Building global cache for cpanel…Done
Access WHM / cPanel Web Interface
WHM / cPanel is now installed and running on port 2087.
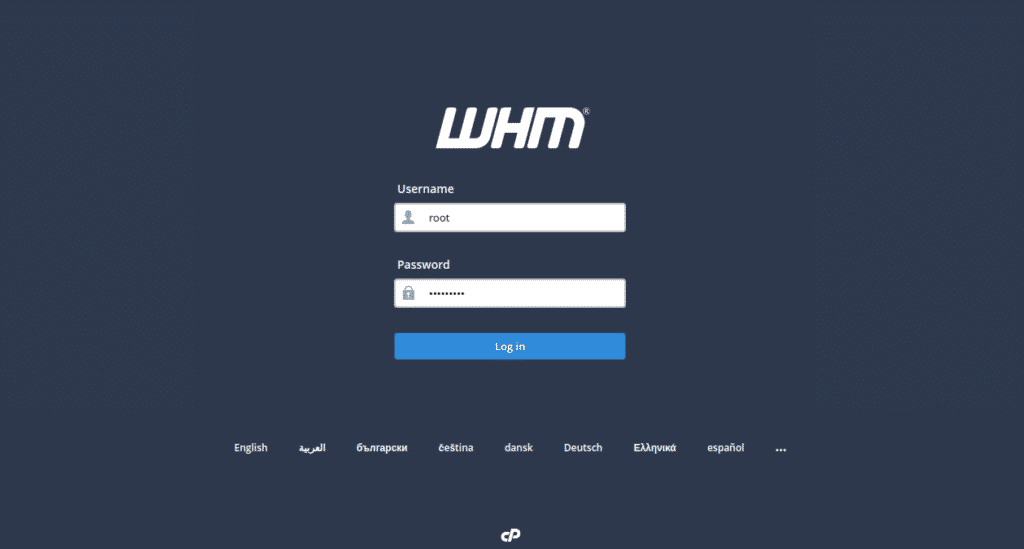
Next, open your web browser and type the URL https://your-server-ip:2087. You will be redirected to the WHM / cPanel login screen as shown in the following page:
Provide your root username and password. Then, click on the Log In button. You should see the WHM / cPanel license agreement in the following page:
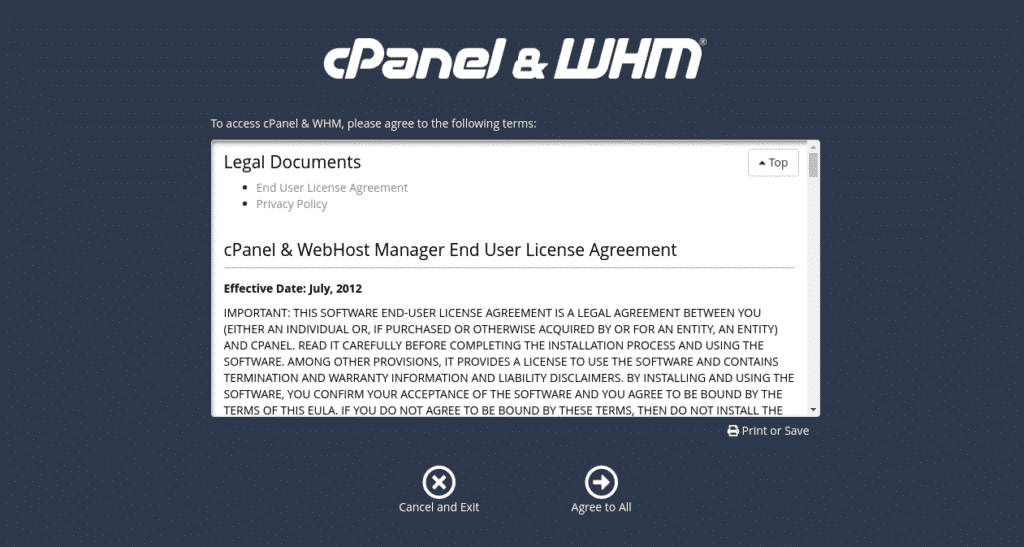
Now, click on the Agree to All. You should see the following page:

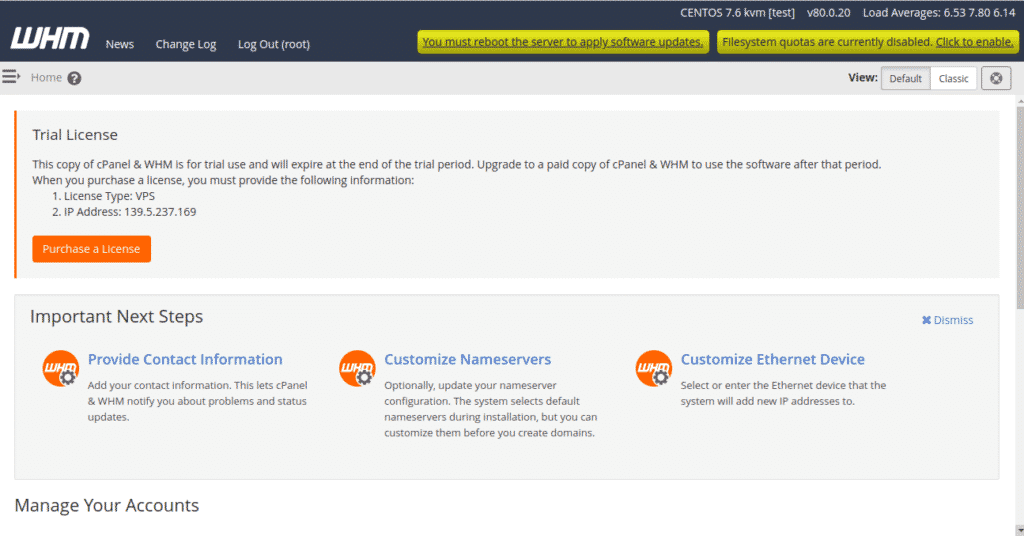
Now, provide your email address and nameserver details then click on the Finish button. You should see the WHM / cPanel dashboard in the following page:
Next, you will need to enable the FileSystem quotas. To enable it, click on the “Click to enable” top right button. You should see the following page:
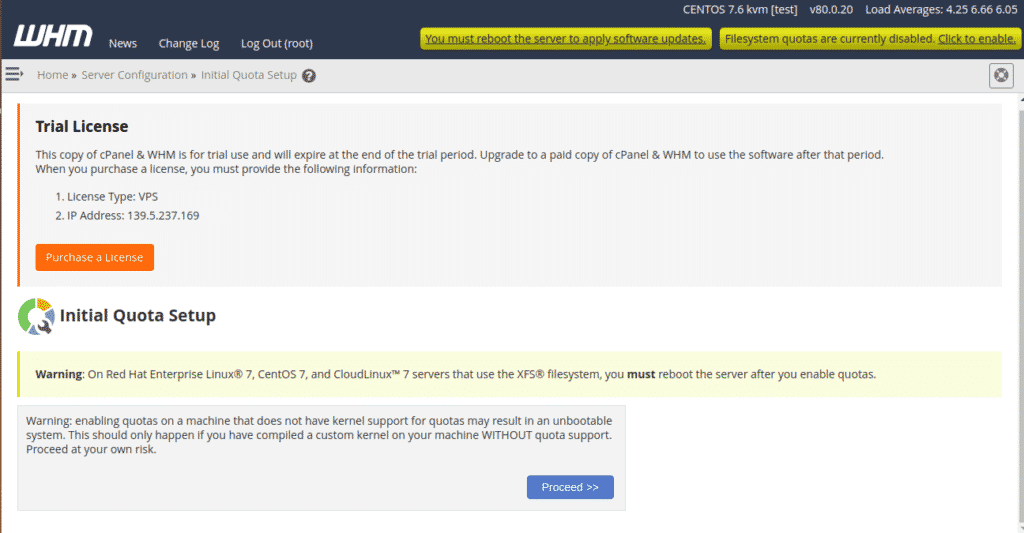
Next, click on the Proceed button. Once the FileSystem quota is enabled, you should see the following page:
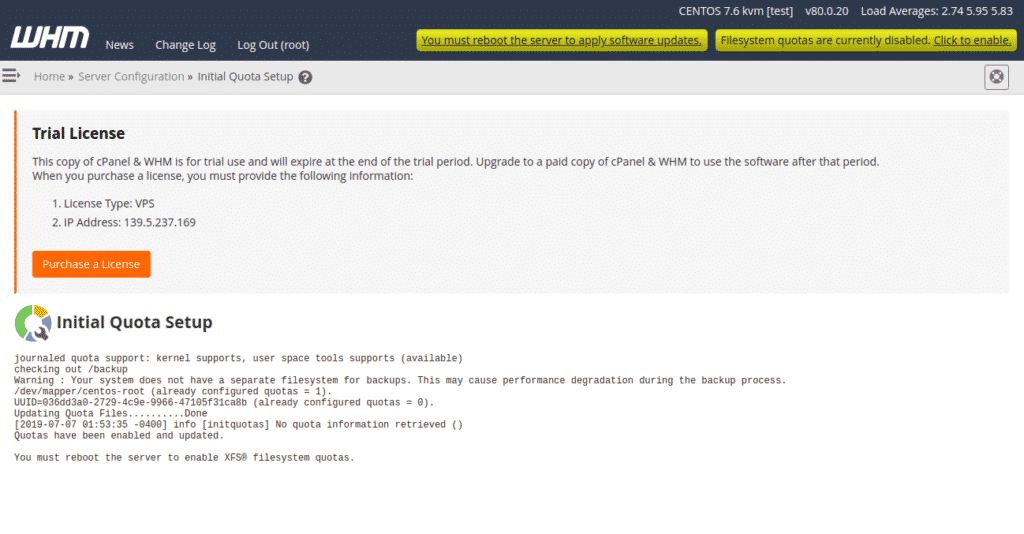
Next, reboot the server to enable filesystem quotas.
Create Your First cPanel Account
On the WHM / cPanel Dashboard, click on the Home button. You should see the following page:
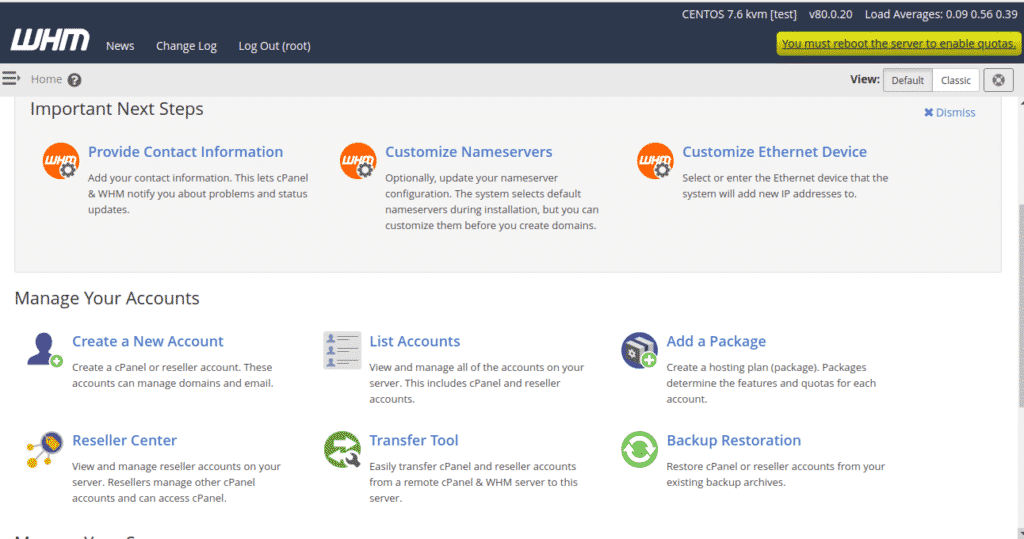
Now, click on the “Create a New Account” button. You should see the following page:
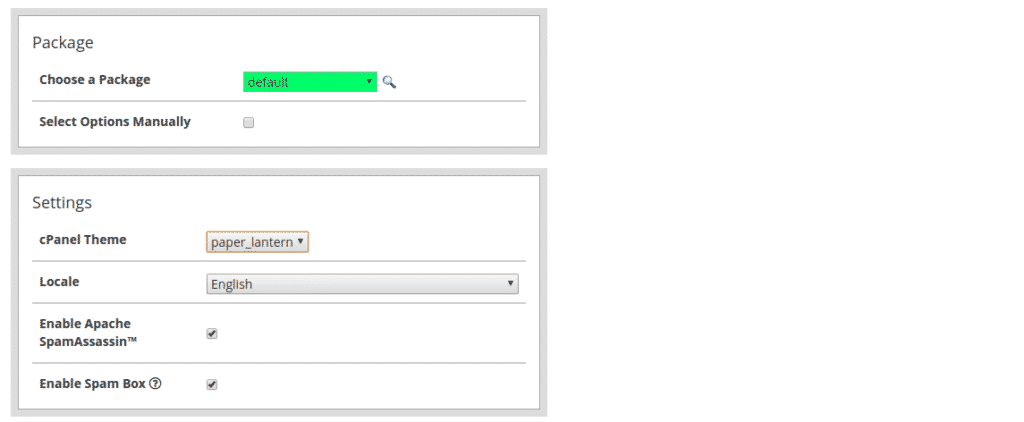
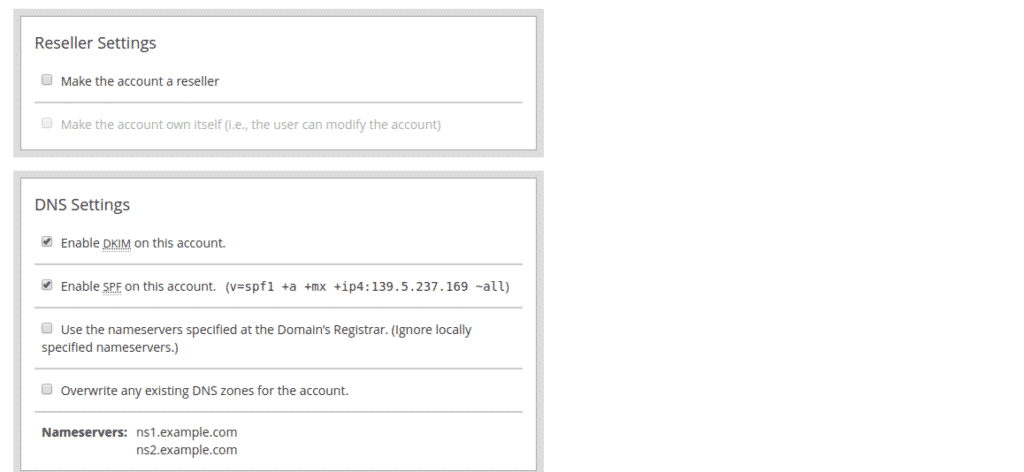
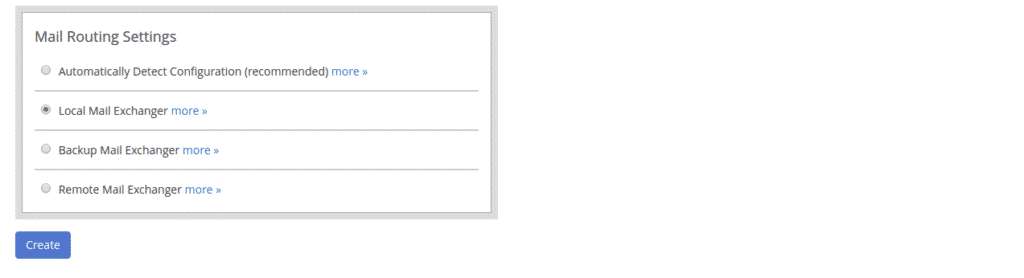
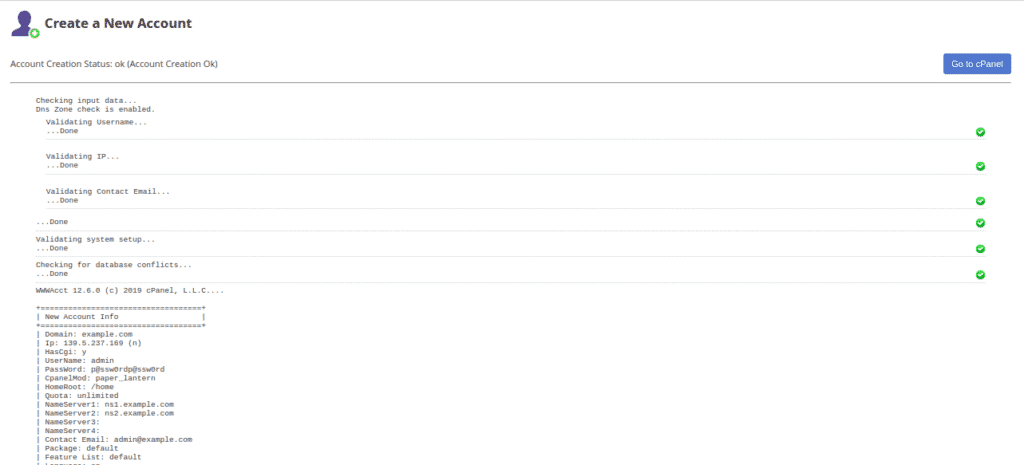
Now, provide all the required information like, domain, username, password, email, Theme, Enable Apache Spam, Enable DKIM and SPF, Select Mail routing, then click on the Create button. Once the account has been created successfully, you should see the following page:
Now, click on the “Go to cPanel“. You will be redirected to the new cPanel account dashboard as shown in the following page:
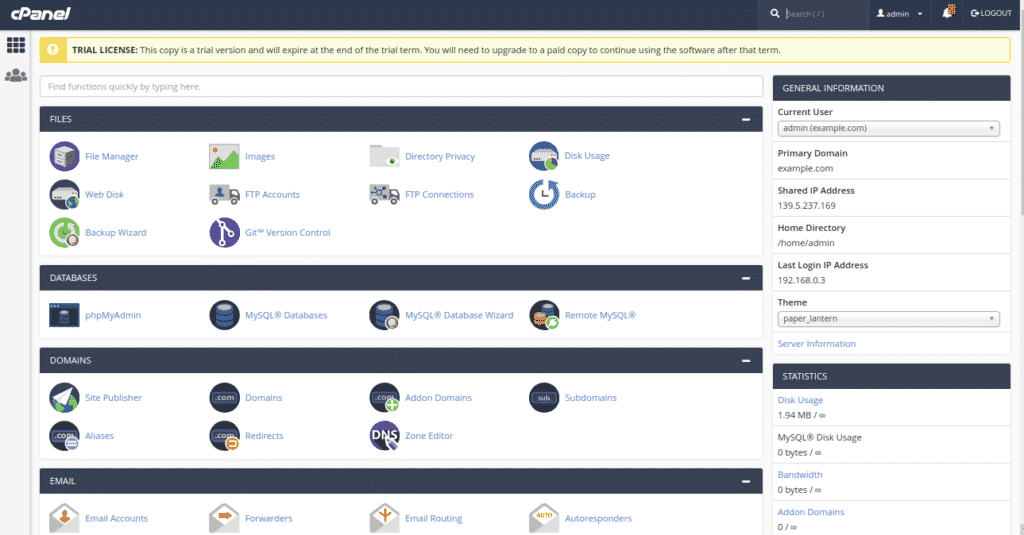
You can now create and manage websites, FTP, email, database using the cPanel dashboard.