Downloading Ubuntu Server 18.04 ISO Image:
First, you have to download Ubuntu Server 18.04 LTS ISO image from the official website of Ubuntu.
To do that, visit https://www.ubuntu.com from your favorite web browser.
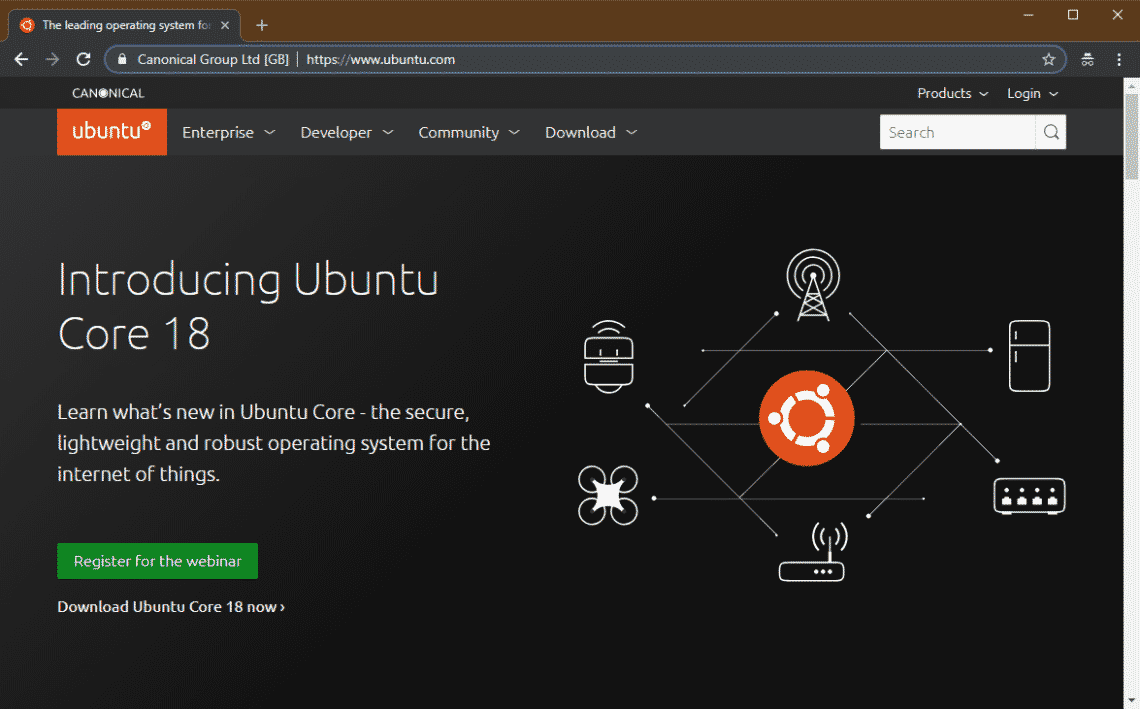
Then, go to Download > 18.04 LTS as marked in the screenshot below.

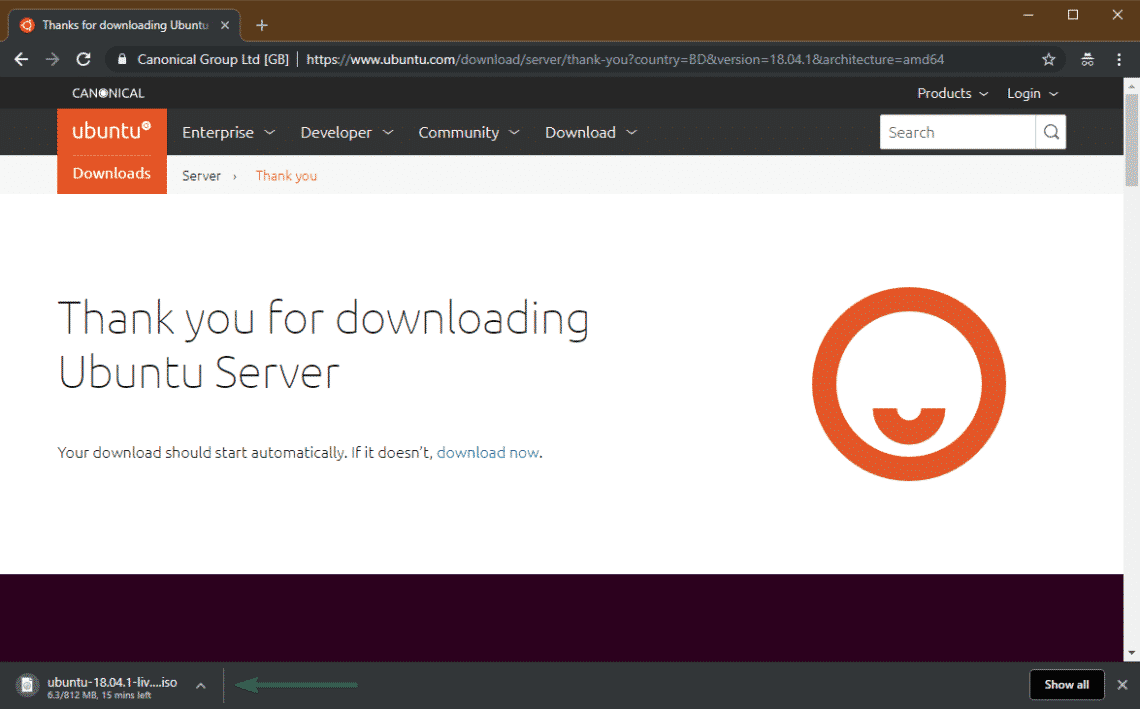
Your browser should start downloading Ubuntu 18.04 LTS ISO image.
Creating a Bootable USB Stick of Ubuntu Server 18.04 LTS:
Once the download is complete, you have to either burn the ISO image to a DVD or make a bootable USB of it.
To make a bootable USB stick of Ubuntu Server 18.04 LTS, you can use Rufus. You can download Rufus for free from https://rufus.ie/
If you’re using any Linux based operating system, then you can also make a bootable USB stick of Ubuntu Server 18.04 LTS with the following command:
NOTE: Here, /dev/sdX should be your USB stick.
Installing Ubuntu Server 18.04 LTS:
Now, insert the bootable USB stick or bootable DVD of Ubuntu Server 18.04 LTS to your server and select it from the BIOS of your server.
Now, Ubuntu Server 18.04 LTS should boot and you should see the following window. From here use the <Up> and <Down> arrow keys to select your language and press <Enter>.

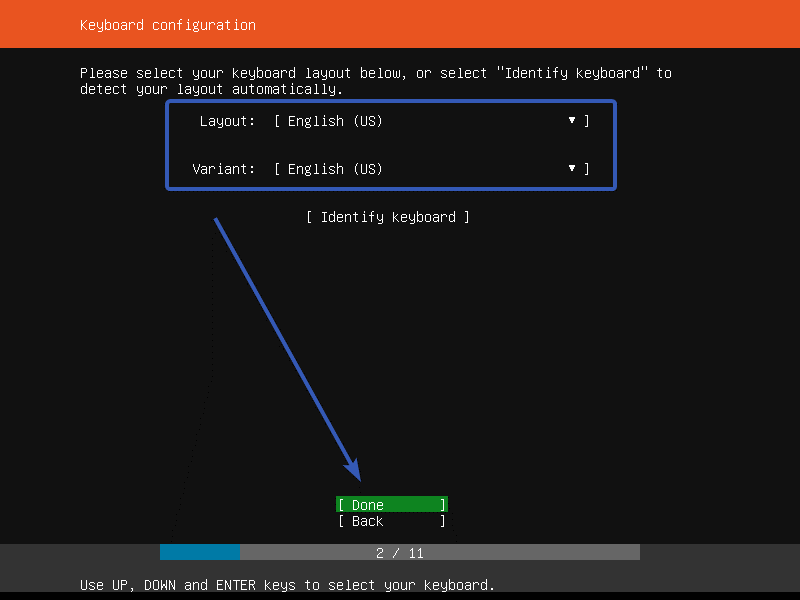
Now, select your keyboard layout and press <Enter>.
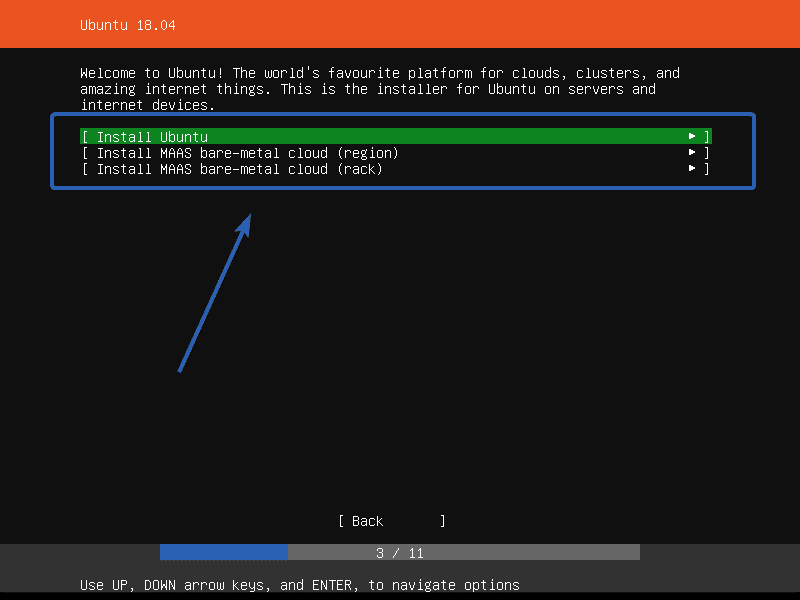
Now, select an option depending on how you want to install Ubuntu Server 18.04 LTS. For most people, it’s Install Ubuntu option. Once you’re done, press <Enter>.
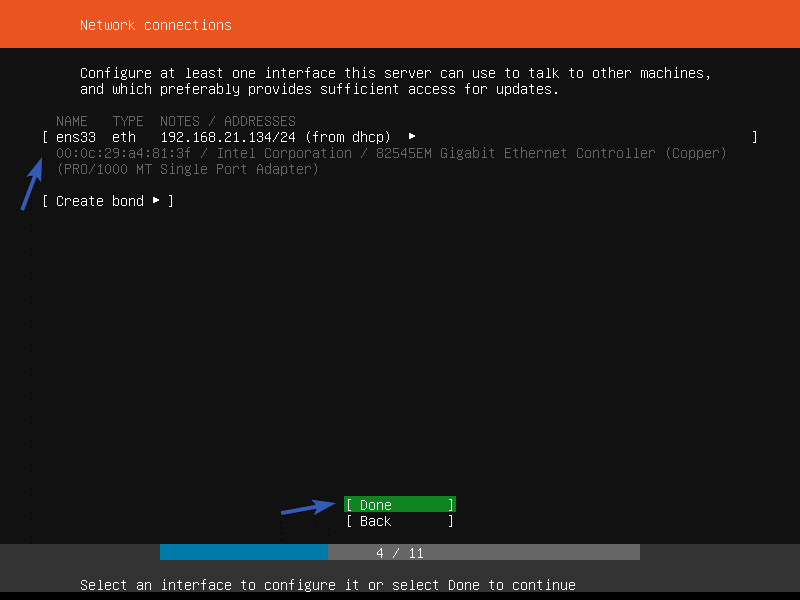
Now, you have to configure your network interfaces. I am using DHCP to configure it. You can also configure it manually if you want. Once you’re done, select Done and press <Enter>.
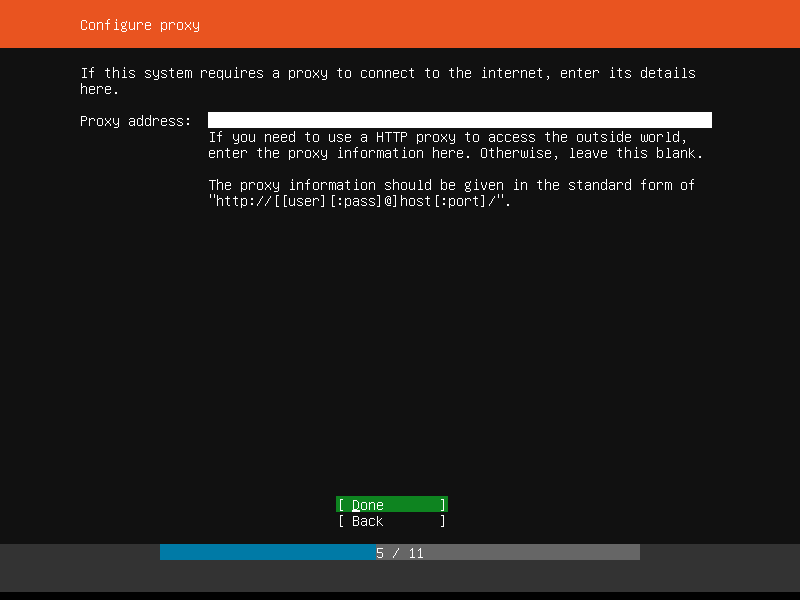
Now, if you want to use any proxy servers, you can type it in here. Otherwise, leave it empty. Then, select Done and press <Enter>.
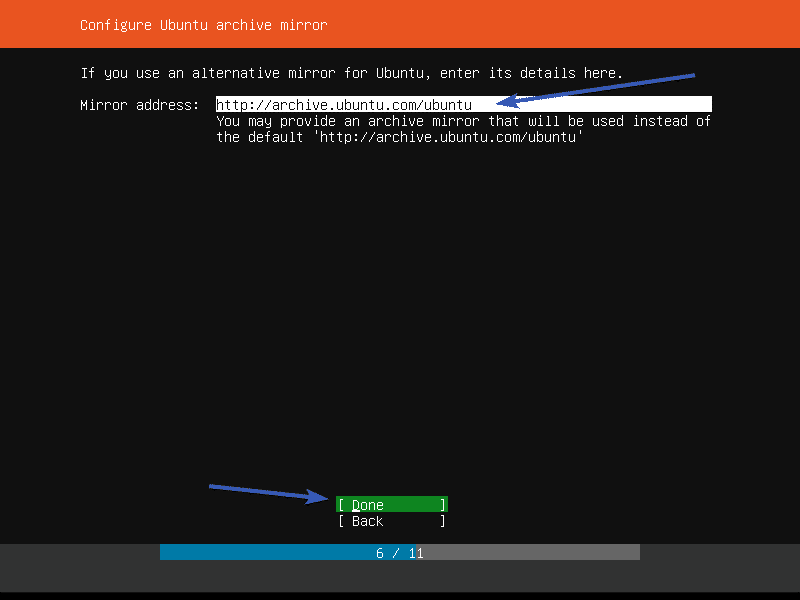
Now, you have to configure an Ubuntu archive mirror. The default one is http://archive.ubuntu.com/ubuntu. But if you know of any Ubuntu mirror that is closer to your location, you may put it on here. Once you’re done, select Done and press <Enter>.
Now, you have to partition the disk. There are 3 partitioning method for Ubuntu Server 18.04 LTS.
Use An Entire Disk – This is the simplest partitioning method. In this method, Ubuntu partitions and uses the entire disk automatically.
Use An Entire Disk And Set Up LVM – This is the same as the Use An Entire Disk method. The only difference is, Ubuntu uses LVM (Logical Volume Manager) to manage the partitions logically. So, you will be able to change the partition size later if you need to.
Manual – In this partitioning method, Ubuntu lets you partition the drives yourself.
In this article, I will show you how to use Manual partitioning method.

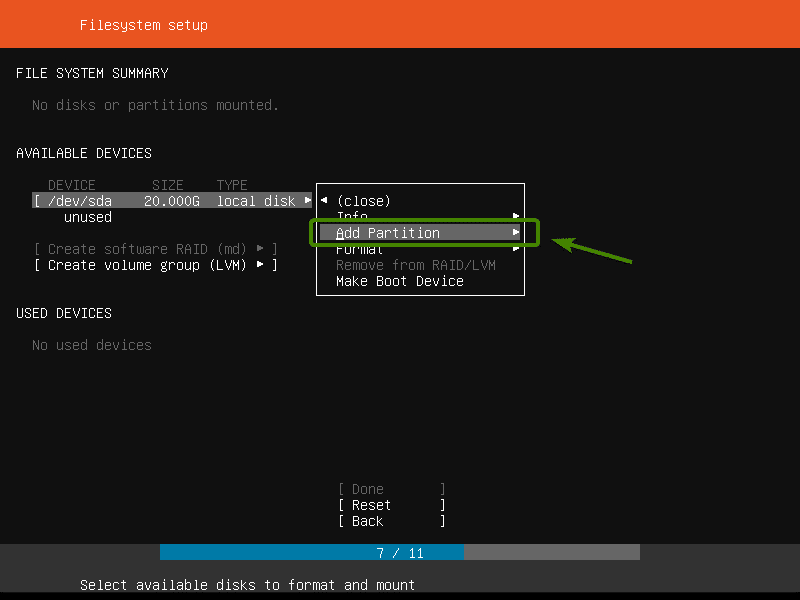
Now, select the storage device from the list and press <Enter>.

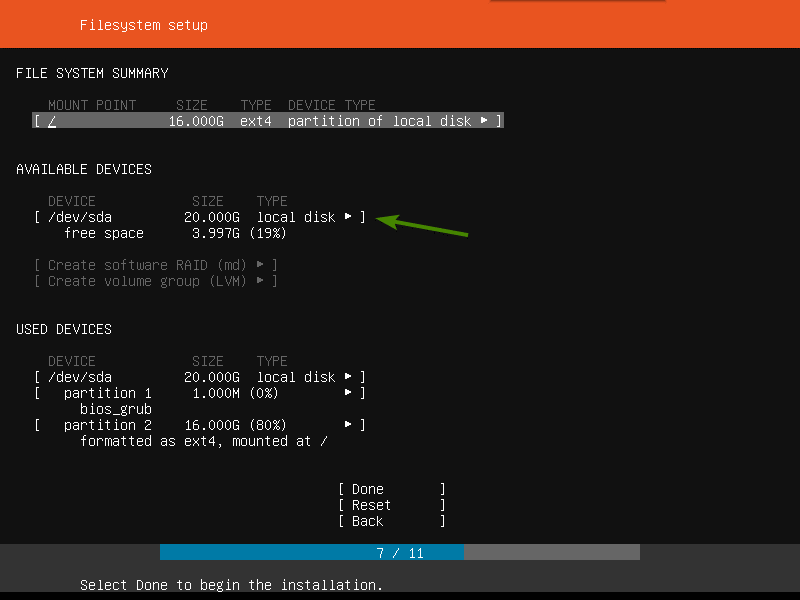
Now, select Add Partition and press <Enter>.
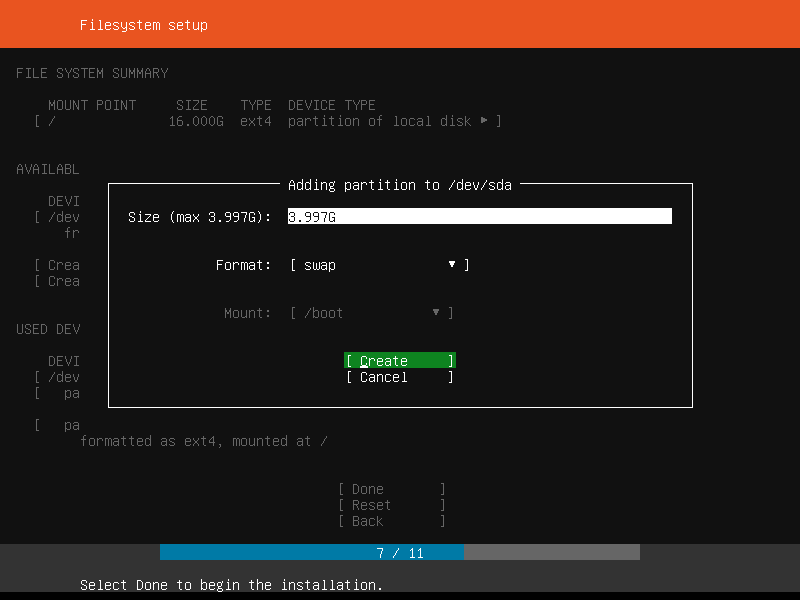
Now, to create a new partition, type in the size of the new partition, the filesystem format and the mount path. Then, select Create and press <Enter>.
You have to create at least a root (/) partition and a swap partition.
I created the root (/) partition with the settings as shown in the screenshot below.

As you can see, a new partition is created.
I also created a swap partition with the following settings.
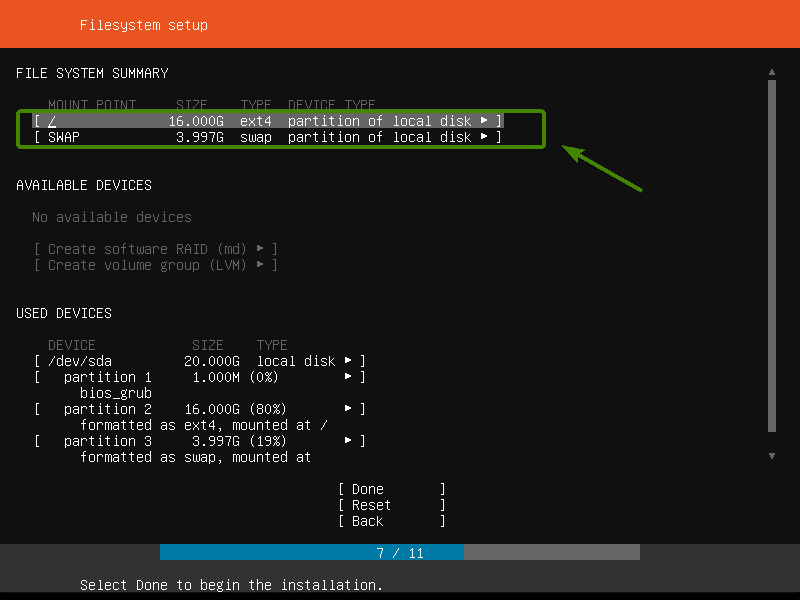
The installer should show you a summary of the partitions.
Once you’re sure that everything is just the way you want it to be, select Done and press <Enter>.
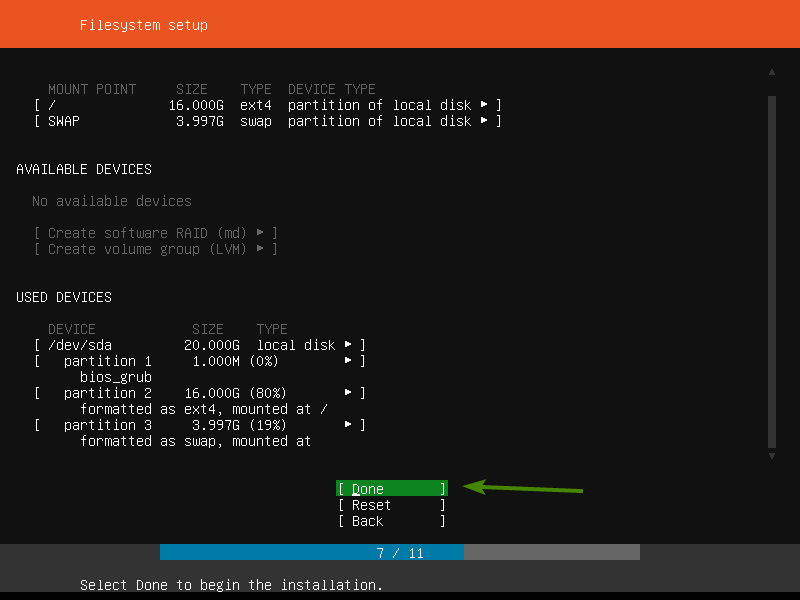
Now, to confirm it, select Continue and press <Enter>.
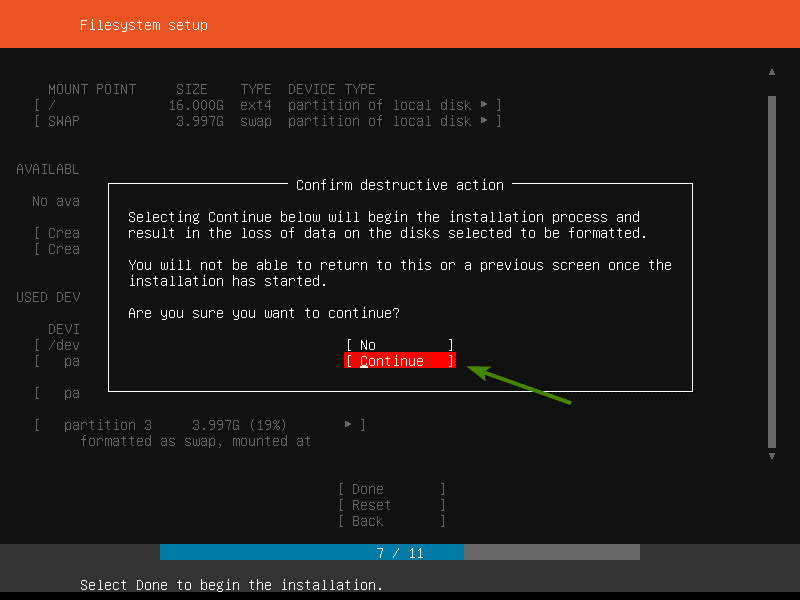
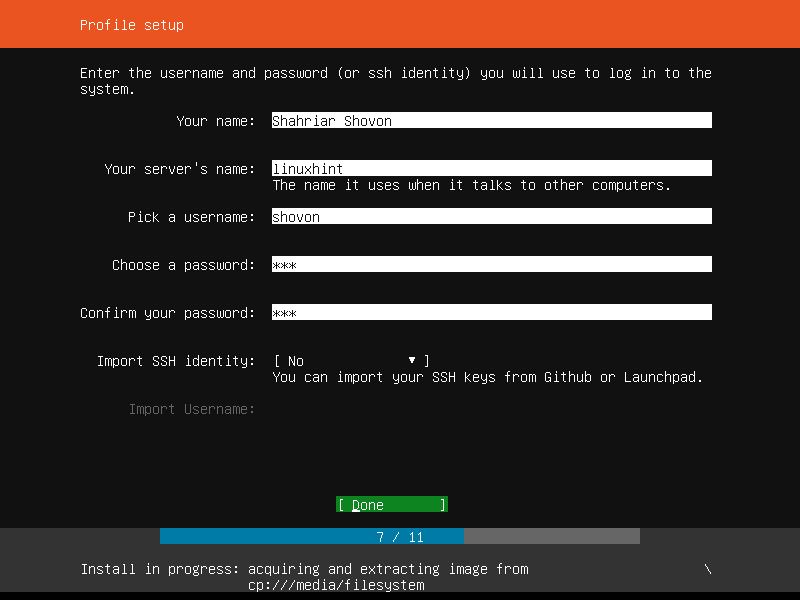
Now, type in your personal details. Once you’re done, select Done and press <Enter>.
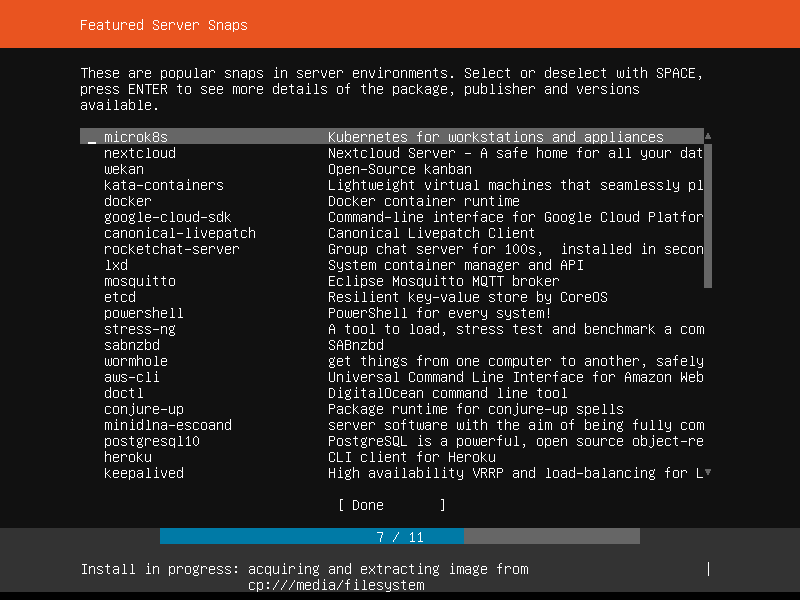
Ubuntu Server 18.04 LTS has a lot of snap packages in the snap store that you can use to set up different services. For example, if you want to install your own file sharing server, you can select nextcloud from the list. You can also install docker or lxd, PostgreSQL 10 database server and many more.
You can use <Spacebar> to select or deselect snap packages from the list. If you want to know more about any package, just select it and press <Enter>.
Once you’re done with this step, select Done and press <Enter>.
As you can see, Ubuntu Server 18.04 LTS is being installed. It may take a while to complete.

Once it’s done, select Reboot Now and press <Enter>.

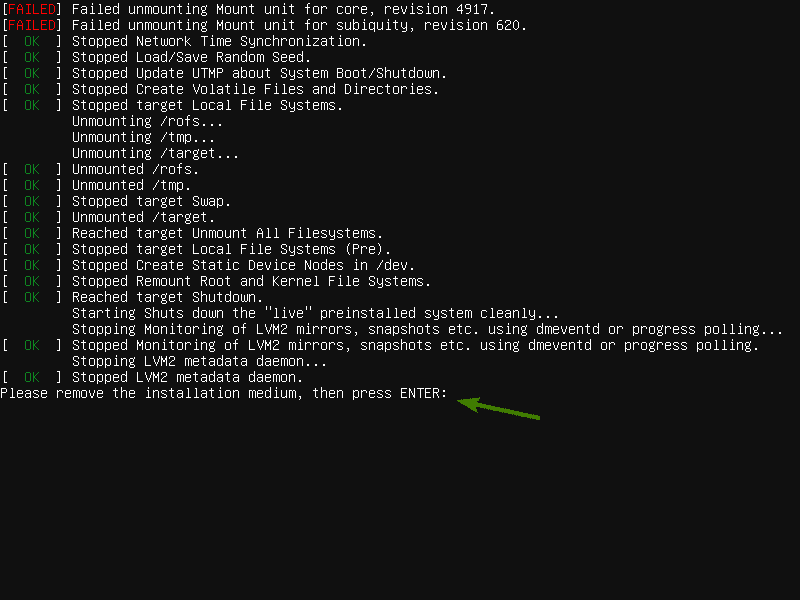
Once you see the message Please remove the installation medium, then press <Enter>, just eject the bootable USB stick or DVD from your server and press <Enter>. Your server should reboot.
Now, your server should boot into your newly installed Ubuntu Server 18.04 LTS. To login, just type in your username and password that you set during the installation process.

You should be logged in as you can see in the screenshot below.
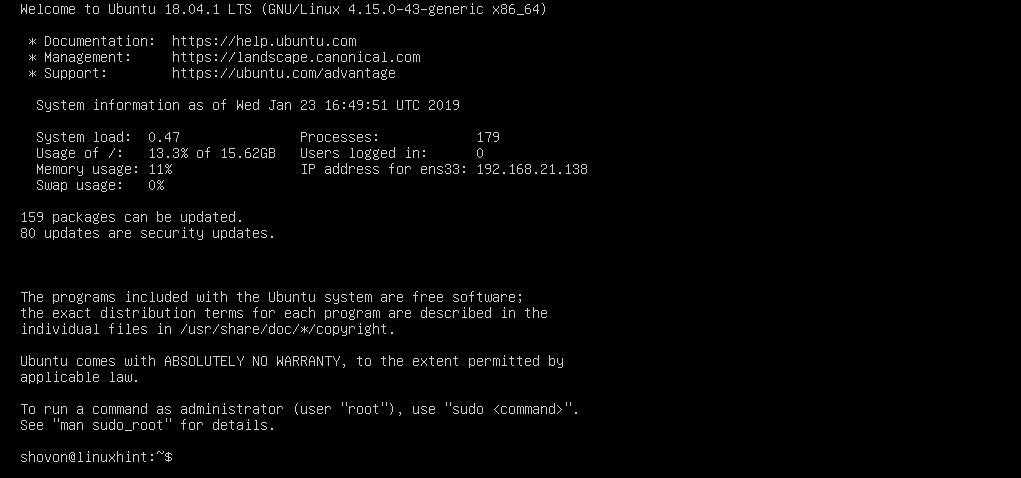
As you can see, I am using Ubuntu Server 18.04.1 LTS.

Ubuntu Server 18.04.1 LTS uses the Linux Kernel 4.15.0 at the time of this writing.

So, that’s how you install Ubuntu Server 18.04 LTS on your server. Thanks for reading this article.


