Install LLVM 5 on Ubuntu 17.10 Artful Aardvark
LLVM is a C/C++ compiler toolset just like GCC. LLVM can compile C, C++ and Objective-C. Clang provided by the LLVM toolset is able to compile C and C++ codes faster than GCC. The LLVM debugger LLDB is much more memory efficient and very fast at loading symbols compared to GCC. LLVM supports C++11, C++14 and C++17 through libc++ and libc++ ABI projects.
LLVM is available on Linux, Windows and Mac OS X. So it’s cross platform. You can either download LLVM source code and compile it yourself or download and use the pre-built binaries. For more information on LLVM, check out the official website of LLVM at http://llvm.org
In this article, I will show you how to install LLVM 5 on Ubuntu 17.10 Artful Aardvark. I will use the LLVM official Ubuntu package repository to install LLVM on Ubuntu 17.10. Let’s get started.
First go to the official website of LLVM package repository at http://apt.llvm.org. This website contains repository information that you can use to configure apt on Ubuntu and Debian.
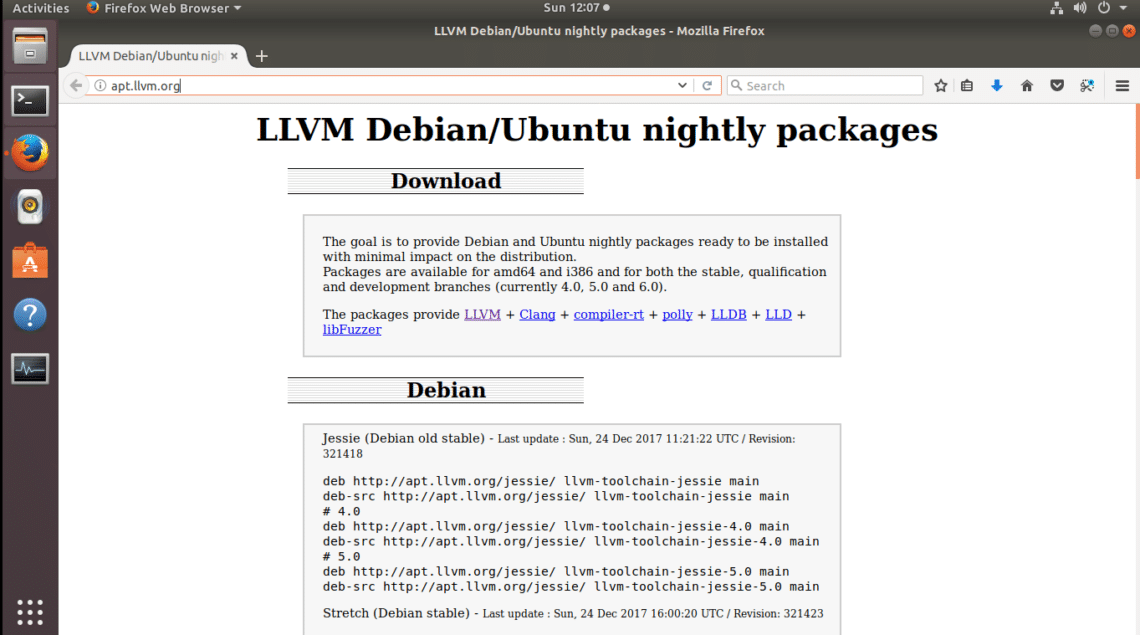
We will use Ubuntu 17.10 in this article as I stated earlier. So scroll down a little bit and you should find the following lines as shown in the screenshot below. You can either install LLVM version 4 or version 5. I will pick LLVM 5. Copy the line with Ctrl+C

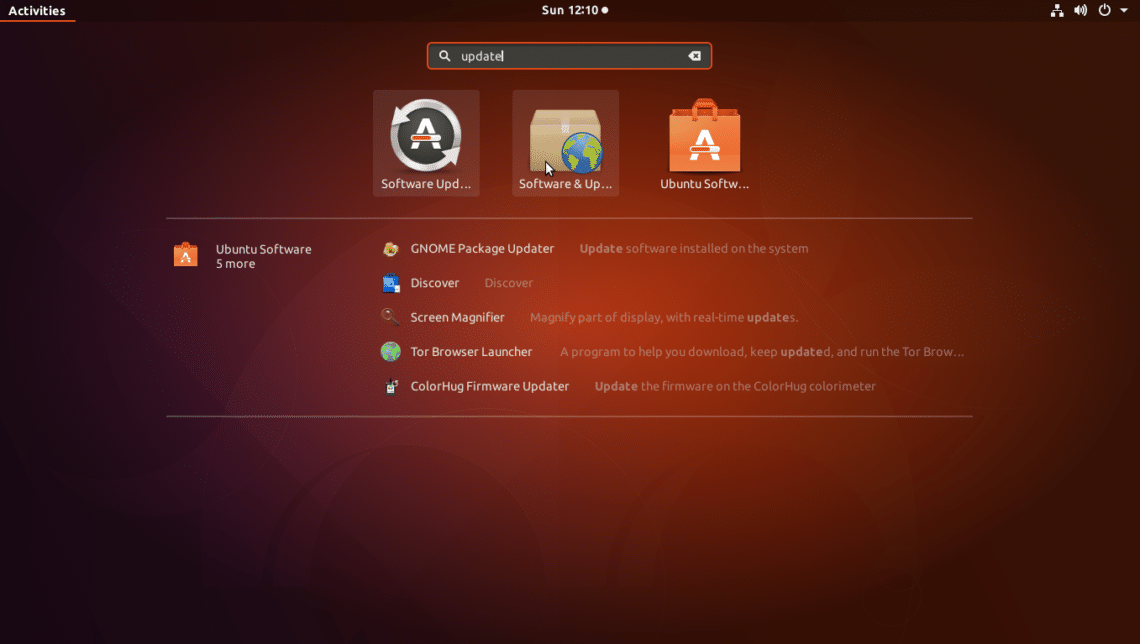
Now go to the Application Menu and search for ‘update’. You should see something like this. Click on the “Software & Updates” icon as shown in the screenshot below.
Software & Updates should open up.
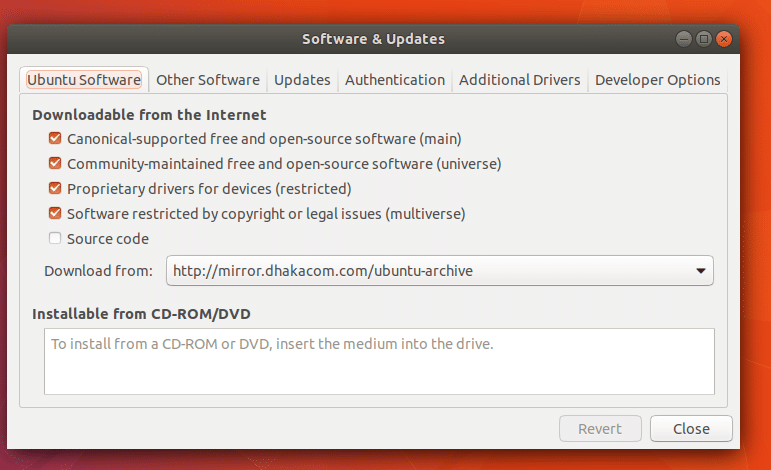
Now click on the “Other Software” tab. You should see the following window.

Now click on “Add..” button.

You should see the following window.
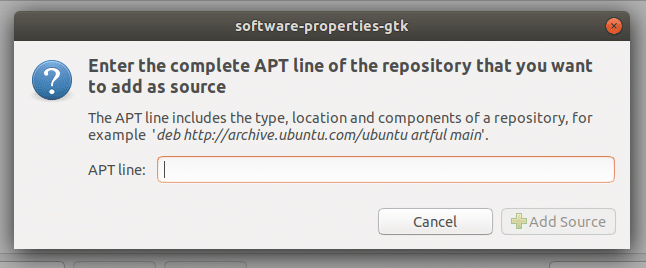
Here paste the APT line that you copied a while ago from http://apt.llvm.org
It should look as follows once you’re done pasting the APT line. Now click on “Add Source” button as shown in the screenshot below.

You should be prompted for the user password. Type in your Ubuntu login password and click on “Authenticate”.

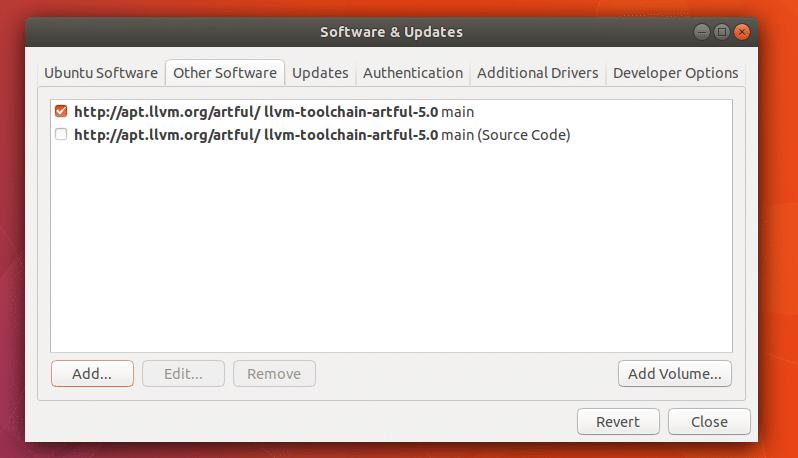
Once the APT line is added, “Software & Updates” should look as follows.
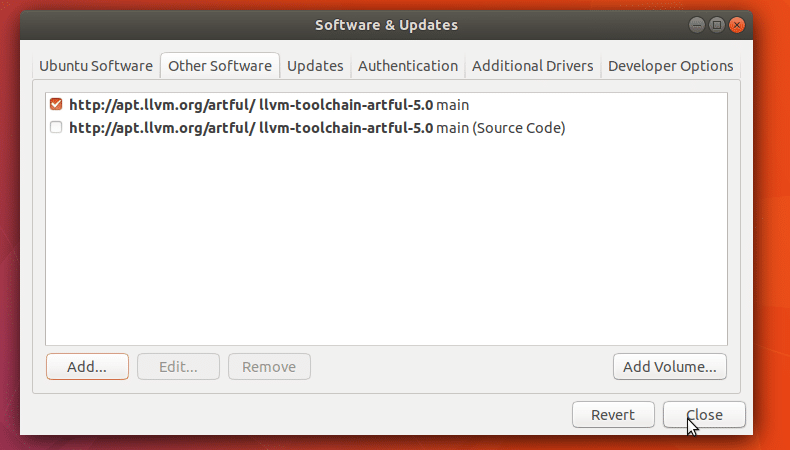
Now click on “Close” on “Software & Updates” window.
Now you should see the following window. Click on “Close” button. “Reload” button won’t work right now. Because we haven’t added the GPG key yet. I feel like it is easier to do from the terminal.

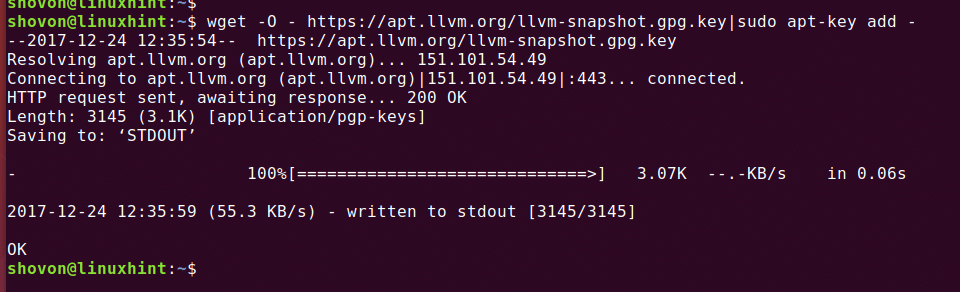
Now open a Terminal (Ctrl+Alt+T on Ubuntu) and run the following command to add the GPG key of LLVM.
The GPG key has been added.
The GPG key has been added.
Now update the package repository cache with the following command:

Now you can install LLVM Clang and LLDB.
To install Clang and LLDB only, run the following command:
Now press ‘y’ and press <Enter> to continue.

The package manager should download and install everything.

Once the installation is complete, you can run the following command to test whether LLVM Clang is working or not.
From the screenshot you can see that the installed clang version 5.0.1

Now I am going to write a simple C and C++ hello world program and try to compile it on LLVM Clang.
This is the C code I will try to compile with Clang 5.0.1
To compile C code with Clang 5.0.1, run the following code
Here I am compiling test.c source file and the output executable file will be test_ccode.
If there is any error in the source file, it will be reported. In my case, everything was okay.

Now I can run the compiled executable with the following command.
You can see that, I got the expected output.

Now I will compile the following C++ hello world source file.
using namespace std;
int main(){
cout << "Hello World" << endl;
return 0;
}
To compile C++ source file, run the following command:
Here test.cpp is the C++ source file that I am compiling and test_cpp is the exectable that will be generated as a result.
I got no errors, so the compilation was successful.

You can execute the program just like before:
You can see the output is just as expected.

So that’s how you install LLVM 5 from the LLVM official repository on Ubuntu 17.10 Artful Aardvark. Thanks for reading this article.