Let’s test Manjaro Linux in a VirtualBox VM to see how true these claims are. If you wish to follow along you can get a copy of the ISO here. We are using the variant which uses Gnome Desktop environment but you are free to pick whichever suits you best. Also if you don’t have it already, you can get VirtualBox here. It is available for Windows, Mac and most Linux distros.
Creating VM
With VirtualBox installed, let’s create a VM first. The VM type is set to Linux with Arch 64 bit version. For memory, while Manjaro recommends 1GB we are going to allocate twice of that. If your host allows you, you should allocate more memory for a better experience.
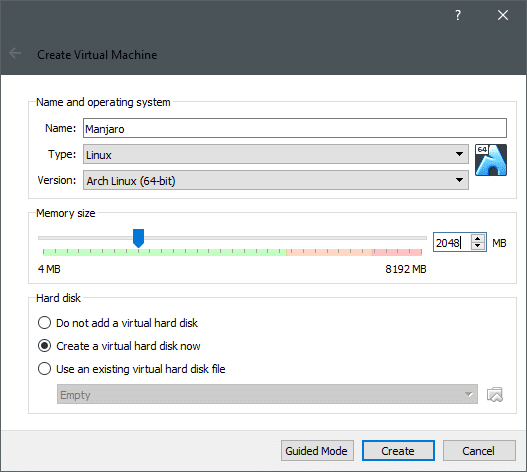
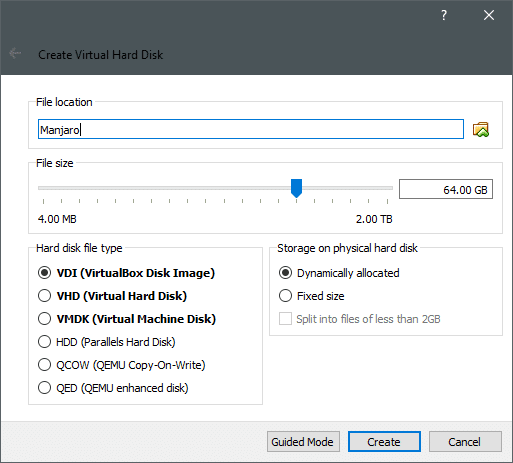
Next, let’s Create a virtual hard disk. Again, Manjaro recommends 30GB of disk space, but the more the better.
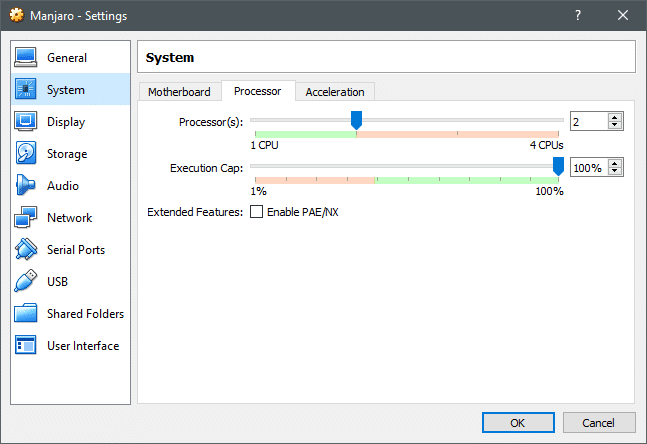
Click Create and we are done with the VM creation. We can tweak the CPU usage a little more, before installing the OS on top of this VM. To do this, right-click on the VM and go to Settings. Go to Settings → System → Processors.
Installing Manjaro
Booting the VM for the first time (just double click on the VM) and VirtualBox would ask you to select the Manjaro ISO that you downloaded earlier. Find and select it from your filesystem and the VM would boot off of it.
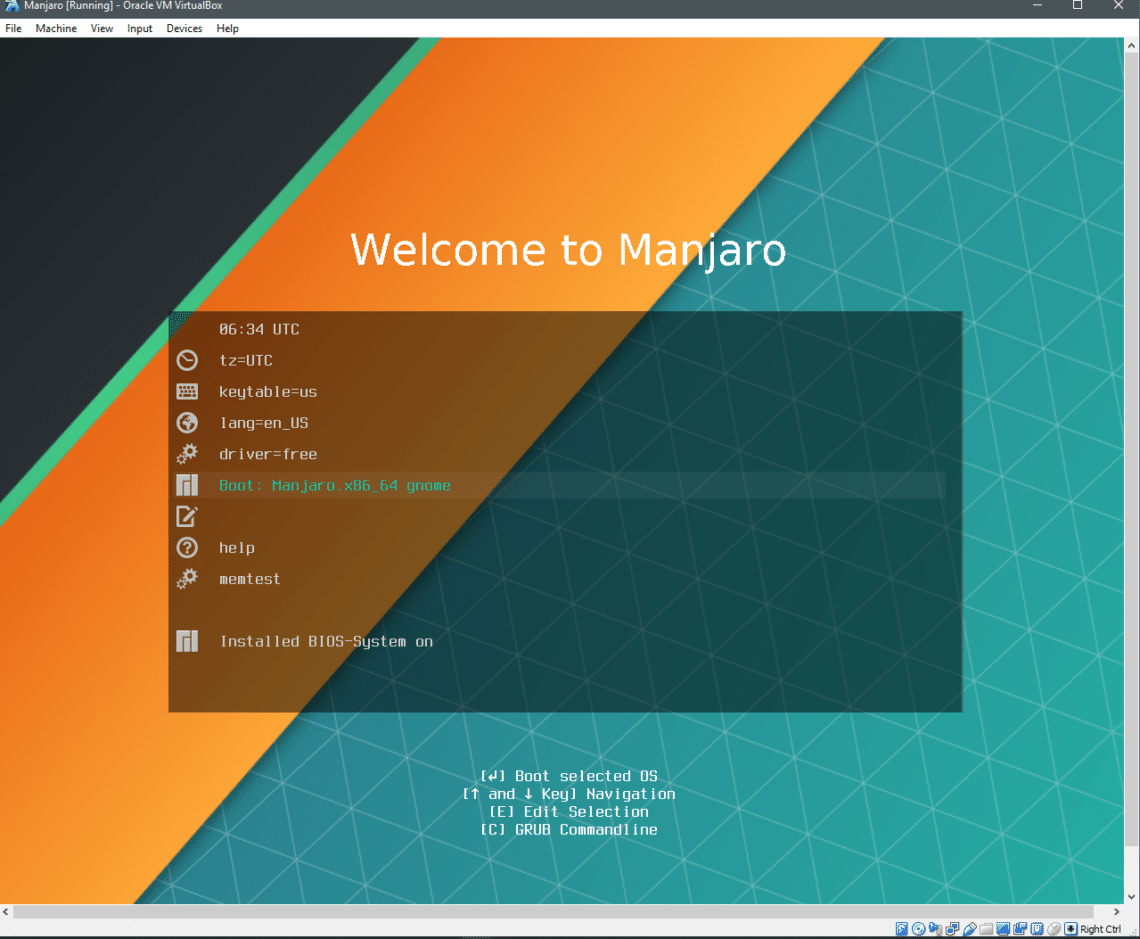
In the Boot Menu that would pop up, you can tweak your Time Zone (tz), your keyboard layout and driver support. It is good to see that Manjaro has these details sorted in the boot menu itself, instead of making users go through a tedious setup wizard. The all the defaults are good enough, except perhaps your timezone.
Once you are good with these options, select the Boot: Manjaro in the menu and hit <Enter>.
A “Hello Manjaro” Wizard will start automatically as the VM boots and it will have a built-in installer to help us in our installation.
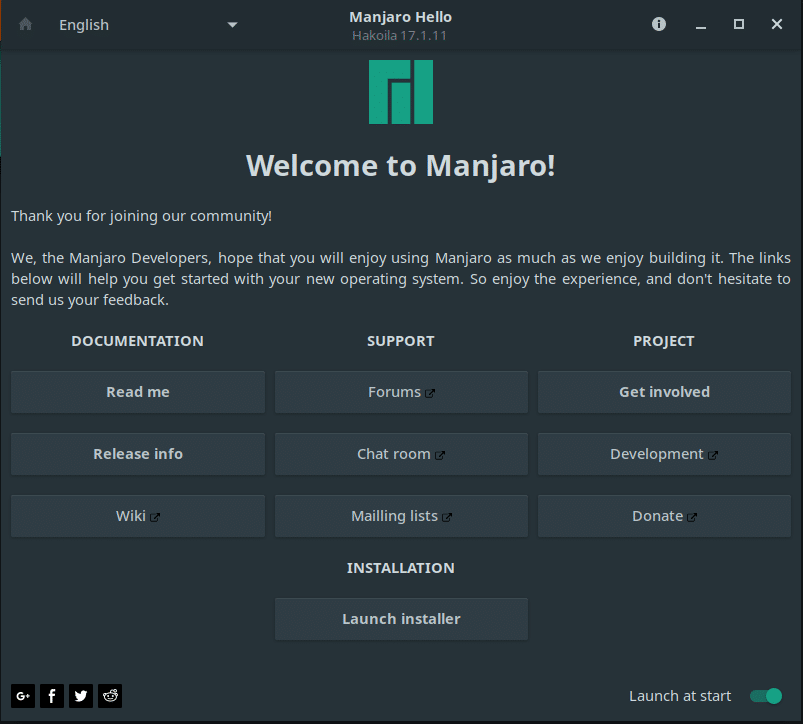
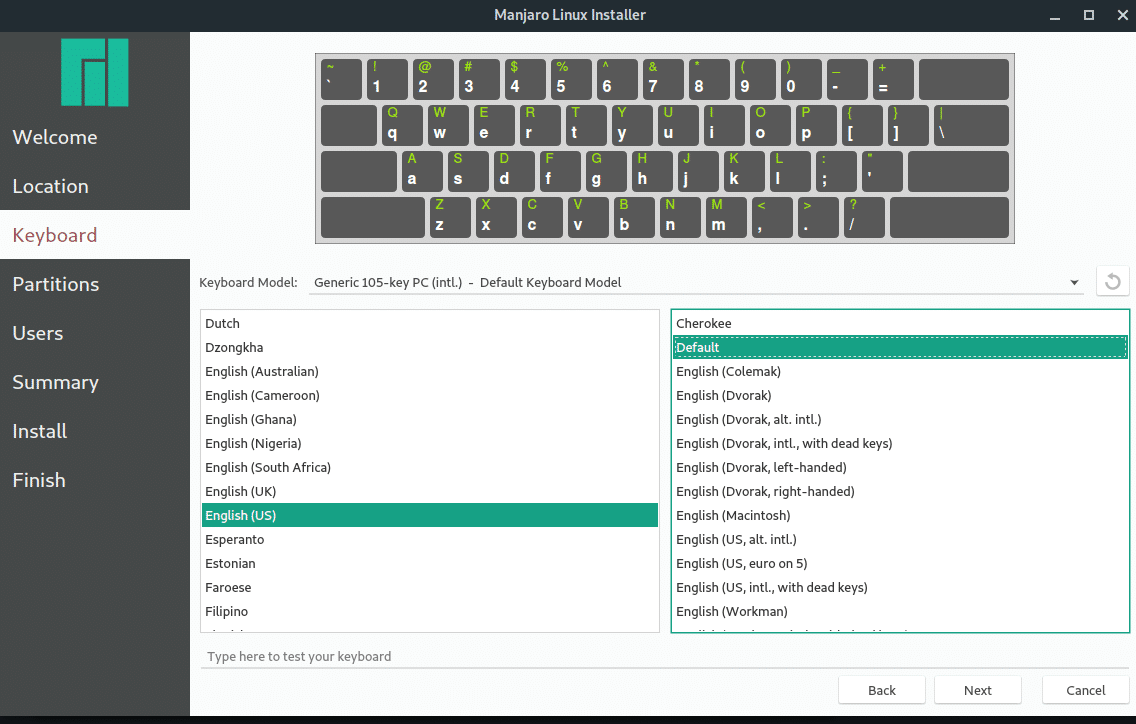
Go to “Launch installer”, select your language preference, location, timezone, keyboard layout, English (US) Default layout if you are unsure.
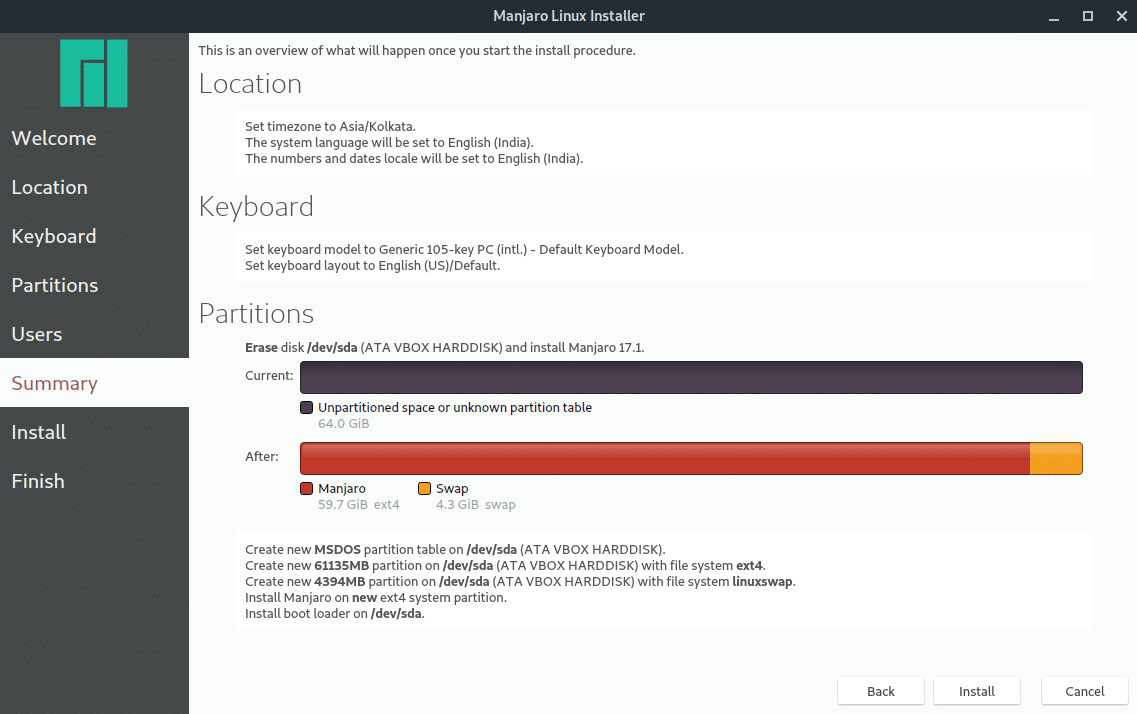
Click Next, and we get to select our OS disk in the partitions menu.
We can partition the disk to our liking, if we desire. Since the VM has just one virtual disk attached to it we select that disk and select the option Erase Disk. This will format the disk and automatically partition it to a simple layout.

If you are using a physical hard disk via passthrough, or if you are installing the OS on your physical machine, you have to be careful with the disk you select and how you choose to partition that disk.
If you are dual booting, manual partitioning is recommended, and you must try to leave the pre-existing partitions untouched. If multiple disks are involved in your workstation, try to unplug the ones which have important data on them, so you don’t accidentally format them. Backing up all your data is also recommended before you do anything with a physical disk.
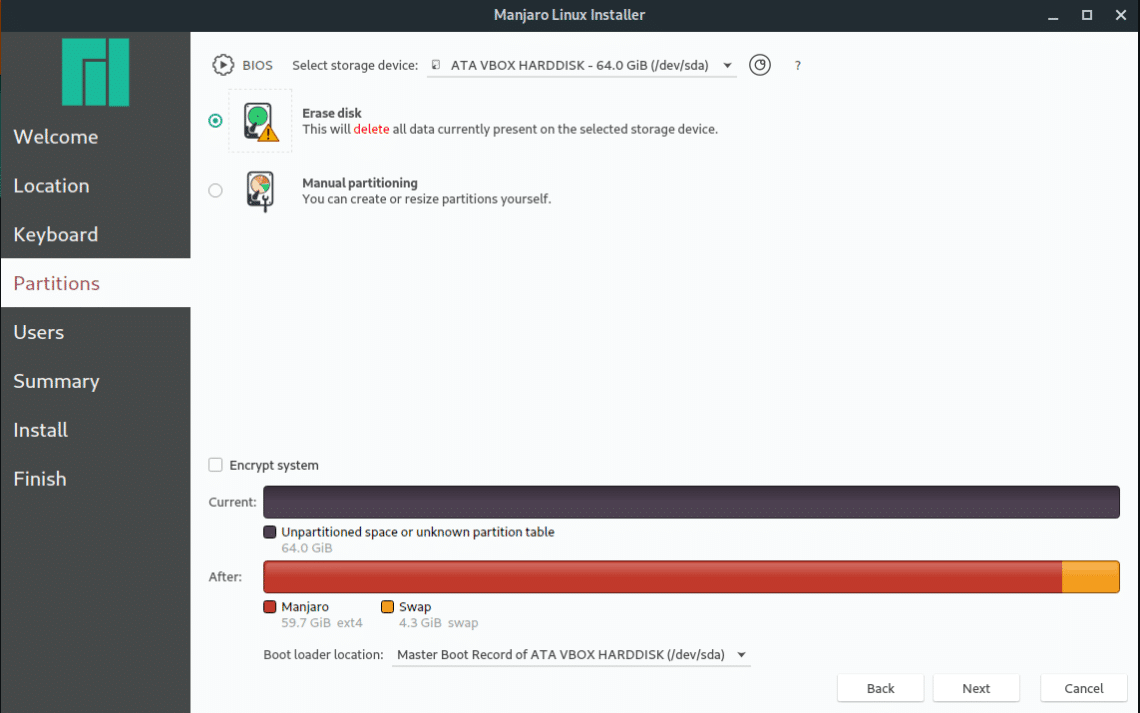
Since it is a VM with a newly created virtual disk we need not worry about these factors, and we can simply Erase disk and click on Next.
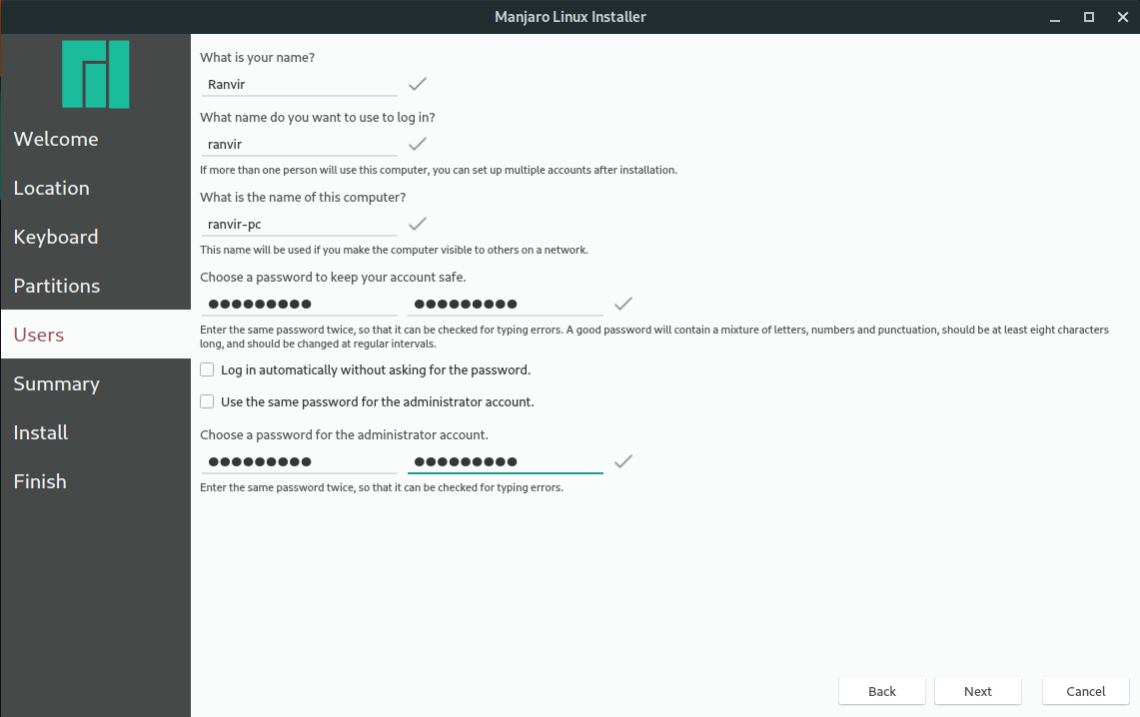
Next you have to create a user account and set password for it and your administrative account (the root user).
Click Next, after that and we can review the changes one last time before the disk is formatted and the changes are committed.
Click Install, to start the process. It might take a few minutes to finish. After which you may reboot the VM and that will take you right into the newly installed Manjaro environment. Login using your username and password.
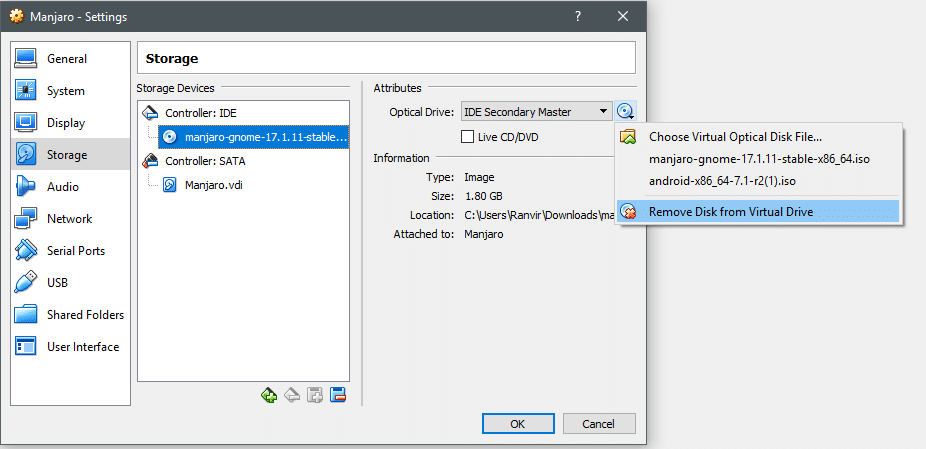
If for some reason you find yourself back into the installation menu, it just means that the ISO disk has not been automatically removed by VirtualBox. Shutdown the VM and go to VM’s Settings → Storage under the IDE controller we will see that the ISO is attached. Then from the right hand column you can use the CD icon to remove it.
Now you should be able to boot into the installed OS.
Pacman package manager
The first thing to do with any new installation is to update its packages. Being based on Arch, Manjaro supports Pacman package manager to do this job. While there are different GUI options, let’s use the terminal to make things even across various desktop environments.
You can update your system by executing the command:
Where ‘-S’ is for syncing the system with official repos. And ‘-y’ is for refreshing the local database for package to bring it up to speed with the remote ones. The ‘-u’ option is for system wide upgrade.
Once the system is upgrade to your liking, you can go ahead and install other packages too. For example, if you want to install ‘htop’, you can do it via:
And then entering `y` for yes, when prompted.
Conclusion
Arch Linux isn’t for everyone. Unless you want to spend a lot of time getting every little thing configured to your liking. While that activity has its own merits, Manjaro lowers the learning curve by getting people started out of the box, in a matter of minutes.