An Apache macro has a name, some variables, and lines of Apache configuration codes. When you want to use the macro, you call it by the macro name, pass the values for each variable, the variables are replaced with the value in the macro and then the macro expands. It makes configuration super easy and modular.
In this article, I am going to show you how to use macro to manage Apache 2 VirtualHost. So, let’s get started.
VirtualHost Setup:
In this article, I am going to implement the VirtualHost configuration as shown in fig 1 with macro. I will have 3 users bob, alice and linda. bob will host his website www.example1.com on the Apache server with the IP address 192.168.21.166. The same way alice and linda will host their websites www.example2.com and www.example3.com respectively on the same Apache server.
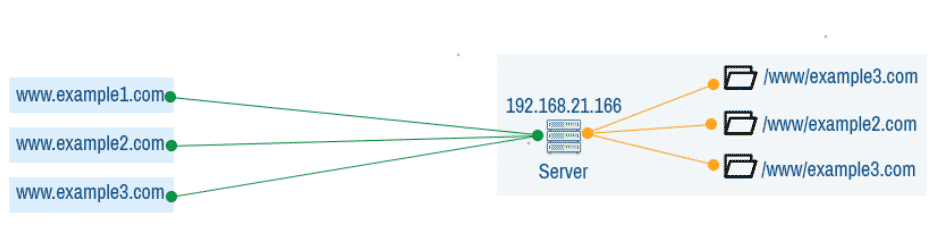
Fig 1: Name based VirtualHost in Apache 2
This article is an extension of the article I’ve written on configuring Apache VirtualHost on Ubuntu 18.04 LTS which you can read at How to Configure Apache VirtualHost on Ubuntu 18.04 LTS (link that article here).
Requirements:
If you’re new to Apache 2 configuration and you want to learn everything step by step, then please read my article How to Configure Apache VirtualHost on Ubuntu 18.04 LTS (link that article here) first. From this article, you need to follow the sections as given below:
- Installing Apache 2 Web Server
- Configuring DNS
- Directory Structures
- Creating Users
Once you follow these sections from the reference article, you can continue with the next sections in this article.
Enabling Apache 2 mod_macro Module:
By default, mod_macro module is not enabled on Apache 2 web server on Ubuntu 18.04 LTS. But, the module is there and you can easily enable it with the a2enmod command.
To enable mod_macro module, run the following command:
mod_macro should be enabled.

Creating a Macro for VirtualHost:
The default directory where you should put your macro files on Ubuntu 18.04 LTS is /etc/apache2/conf-available/.
First, navigate to the directory /etc/apache2/conf-available/ as follows:

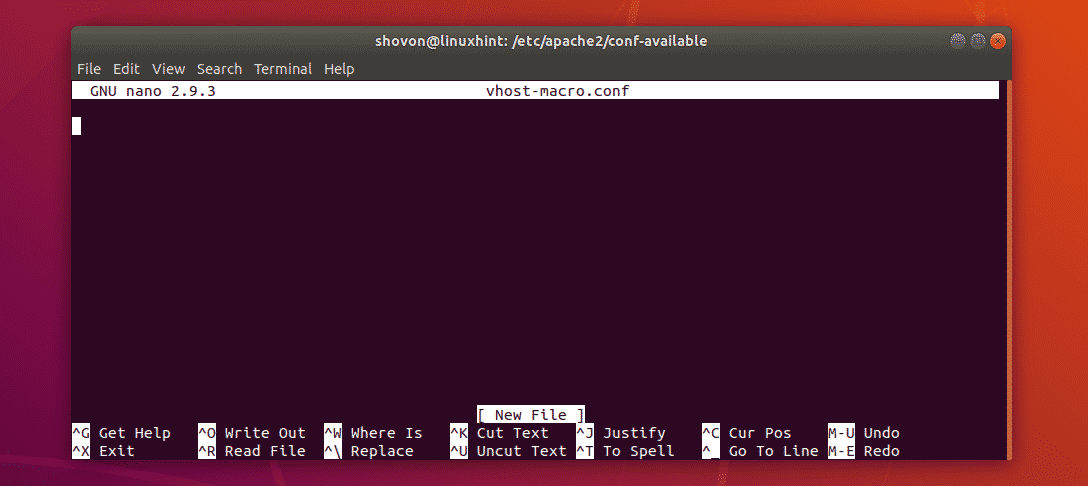
Now, create a new macro file vhost-macro.conf with the following command:

A text editor should be opened.
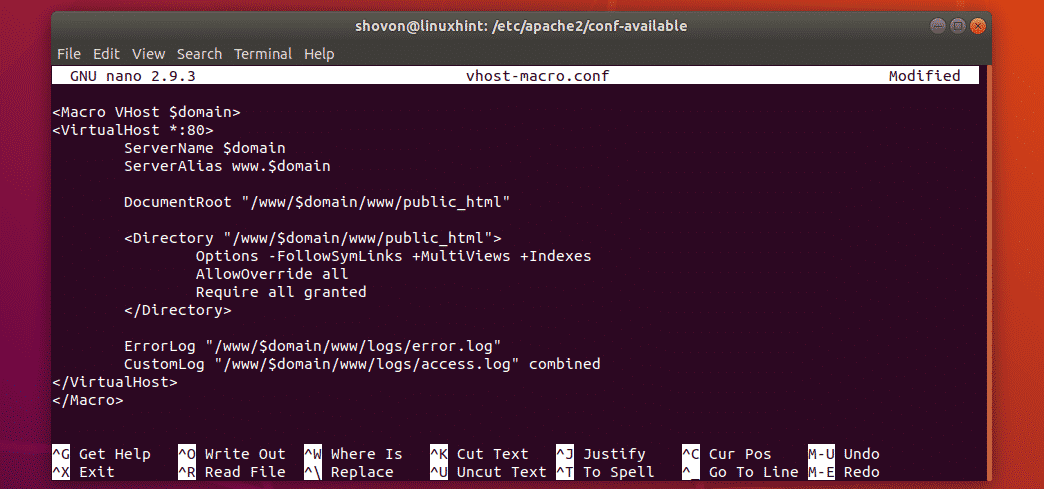
Now, type in the following lines:
<VirtualHost *:80>
ServerName $domain
ServerAlias www.$domain
DocumentRoot "/www/$domain/www/public_html"
<Directory "/www/$domain/www/public_html">
Options -FollowSymLinks +MultiViews +Indexes
AllowOverride all
Require all granted
</Directory>
ErrorLog "/www/$domain/www/logs/error.log"
CustomLog "/www/$domain/www/logs/access.log" combined
</VirtualHost>
</Macro>
Finally, the macro looks as follows. Now, save the file by pressing <Ctrl> + x followed by y and <Enter>.
Using Macro for Each VirtualHost:
In the earlier article, I created VirtualHost configuration files for bob (www.example1.com.conf), alice (www.example2.com.conf) and linda (www.example3.com.conf).
Now, it’s time to replace it with macro.
First, navigate to the default Apache 2 sites directory /etc/apache2/sites-available as follows:

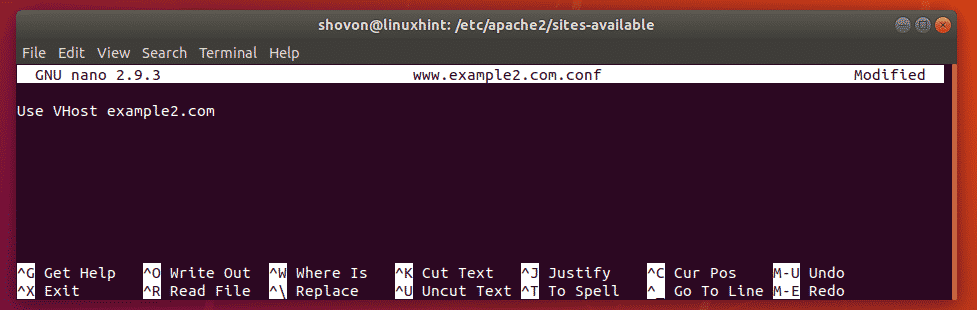
So, open the VirtualHost configuration file for bob (www.example1.com.conf) as follows:

That’s a lot of lines. Well, delete all of these lines. We don’t need those anymore.

Just put in the following line and save the file by pressing <Ctrl> + x followed by y and <Enter>.
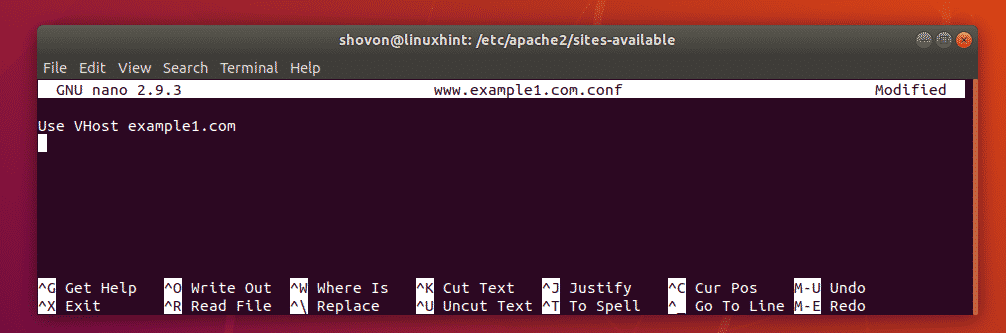
Now, do the same thing for alice (www.example2.com.conf).

Remove all the lines, type in the following line and save the file.
Again, do the same thing for linda (www.example3.com.conf).

Remove all the lines, type in the following line and save the file.
Enabling Macro:
Now, you have to enable the macro vhost-macro.conf that you just created.
To do that, run the following command:
The macro vhost-macro is enabled.

Now, restart the Apache 2 service as follows:

Testing Macro Based VirtualHosts:
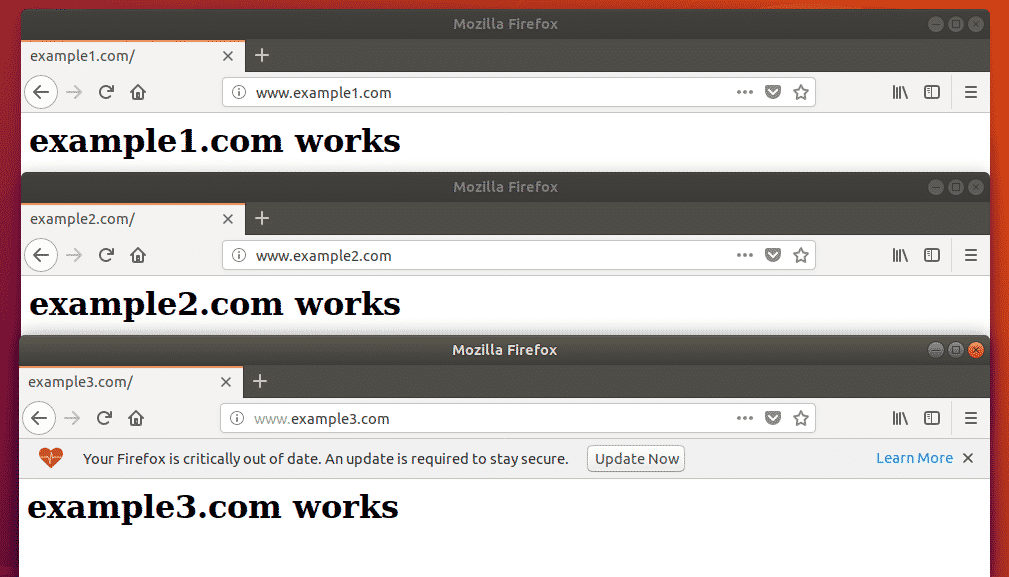
Now, try to access the websites www.example1.com, www.example2.com, www.example3.com.
As you can see, all of these websites works as expected.
Did you see how macros make a difference? Earlier we had to put lot of lines of codes in the VirtualHost configuration file. But now, only one line of code is enough to configure a VirtualHost. It makes configuring VirtualHost super easy.
So, that’s how you use Apache 2 macros to simply VirtualHost configuration on Ubuntu 18.04 LTS. Thanks for reading this article.