Lab Setup
Master Node – 192.168.43.13
Slave Node – 192.168.43.252
Step 1: Install MariaDB on both Master and Slave servers
To begin with, you need to install MariaDB on both the Master and the Slave. So follow the steps below:
First, log in to the Master server and update the system packages as shown:
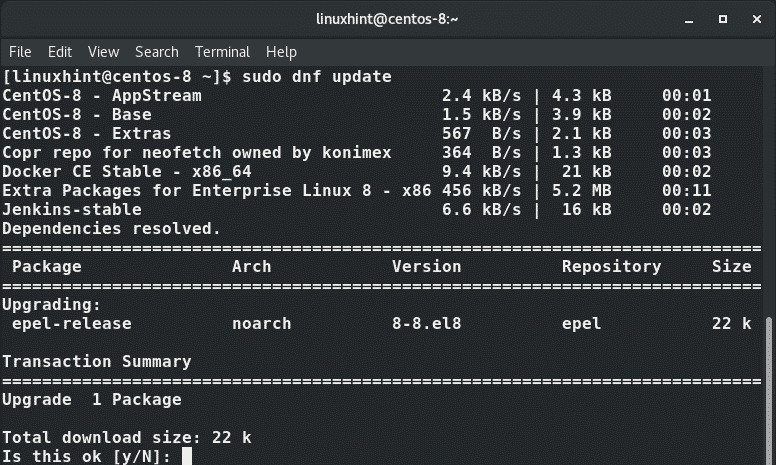
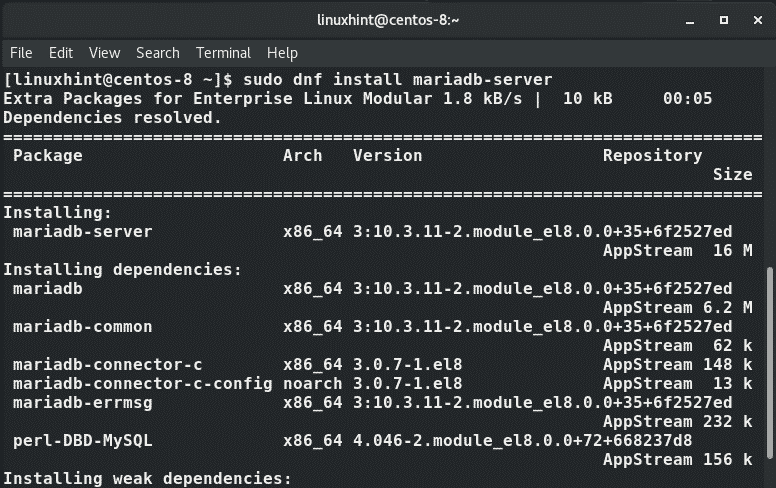
After successfully updating your system, now proceed and install MariaDB
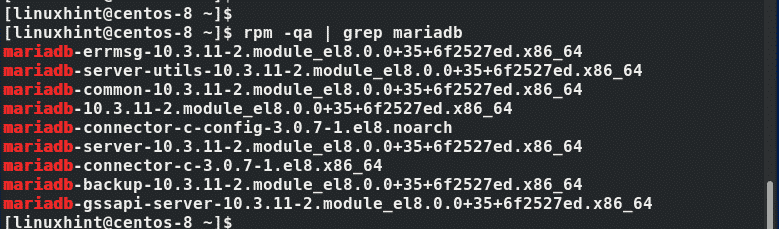
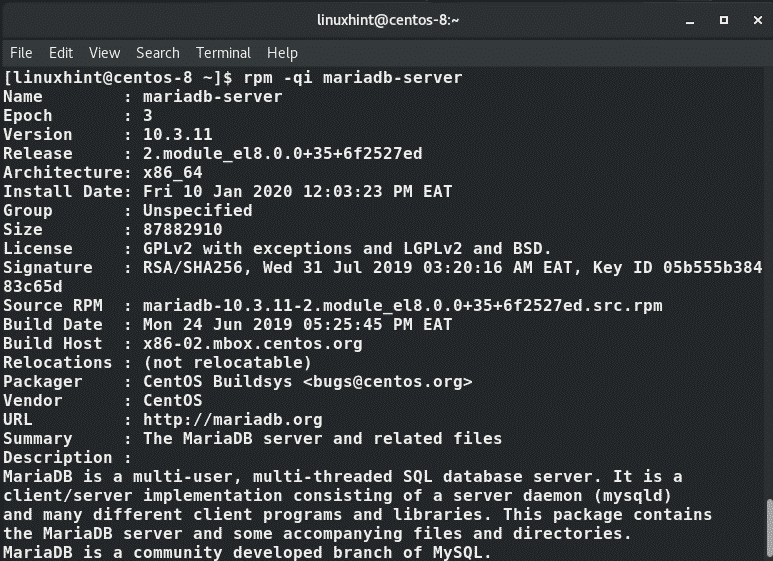
Once the installation is successful, you can verify that MariaDB is installed by running the command:
To get more detailed information, execute the command:
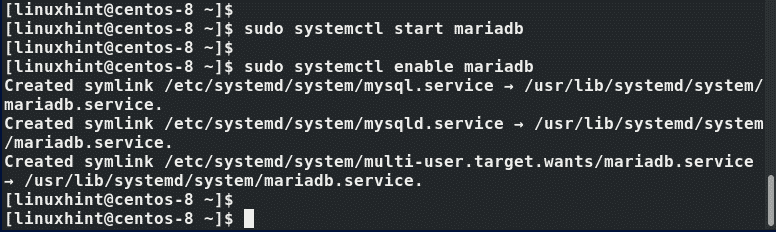
Now start the MariaDB service
Additionally, you may also enable the service to start automatically upon any boot/reboot session.
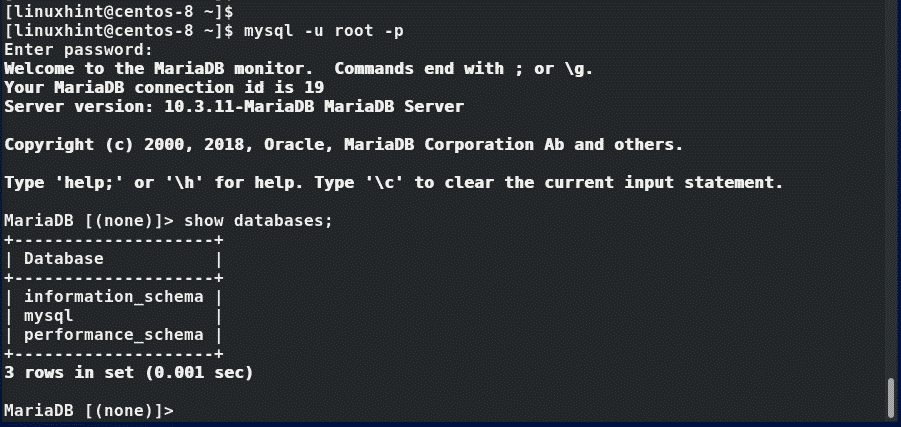
To verify that the MariaDB database engine is up and running, issue the command:
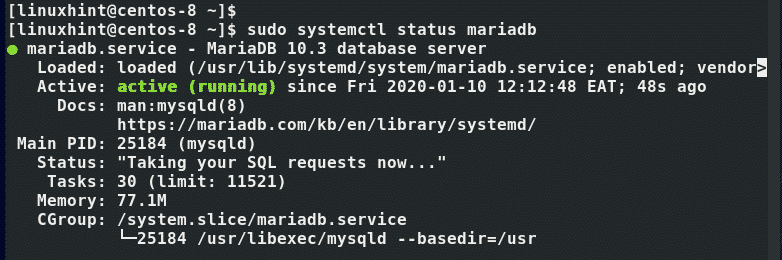
Perfect! MariaDB is up and running as we expected.
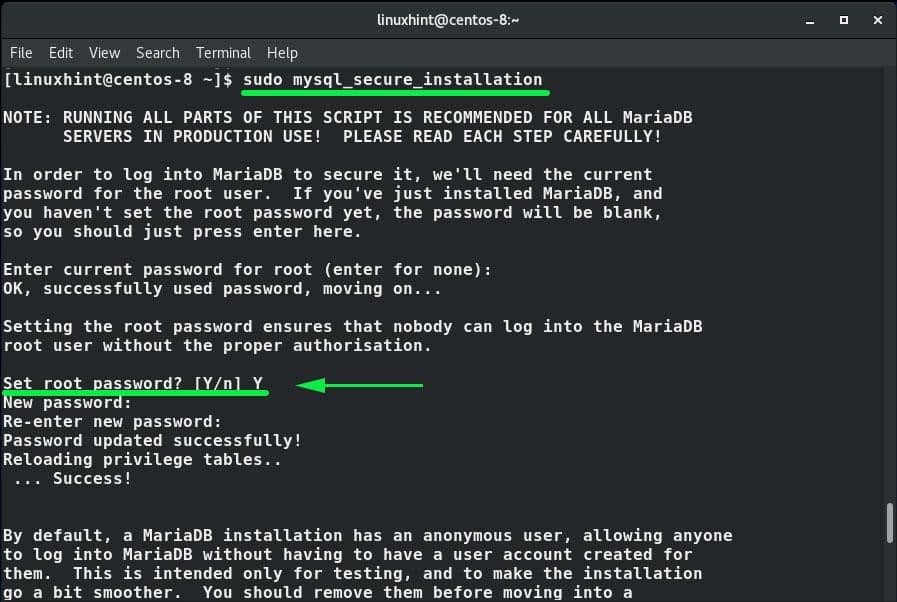
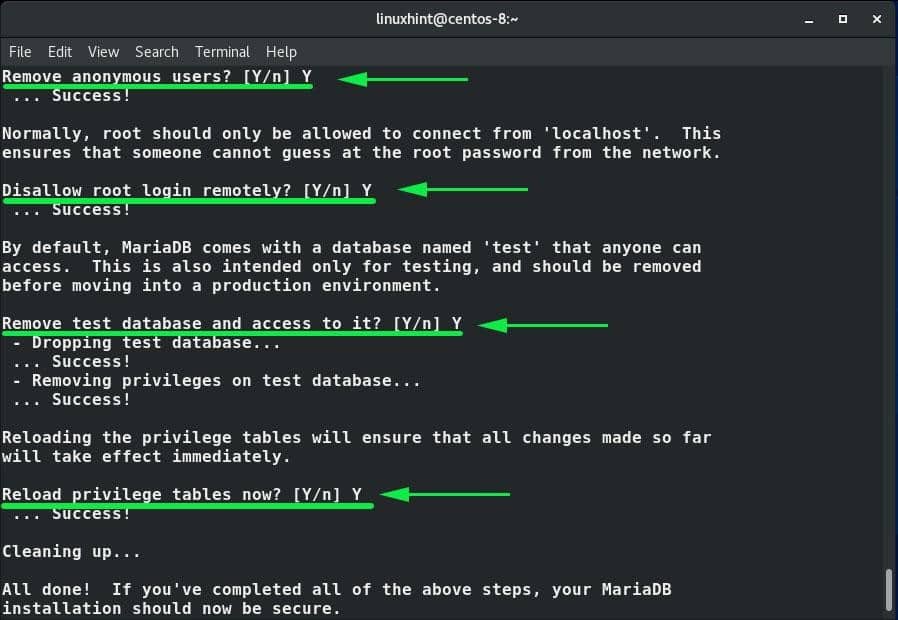
As it is, MariaDB is not secured and any user can log in to the database engine and have access to all the databases and make changes. Of course, we don’t want that to happen and securing the database should be a top priority. We, therefore, need to secure the database engine by setting a root password. So, run the command below:
What follows is an interactive prompt that will require to set the root password for the database and answer a few questions.
By default, MariaDB runs on port 3306. If you are running a firewall, you need to allow this port so that the database engine can be accessible to external users and services.
To open the port on the firewall, run the following firewall rule:
For the rule to be applied, reload the firewall:

With MariaDB successfully installed and secured on the Master server, repeat the same steps on the slave server.
Step 2: Configure MariaDB on the Master server
We need to configure MariaDB daemon so that our intended Master server acts as a server in the setup. So open the configuration file /etc/my.cnf
Append the configuration below
bind–address=192.168.43.13
server–id=1
log_bin=mysql–bin
binlog–format=ROW
Save and exit the configuration file. To effect the changes, restart the MariaDB service.
Step 3: Configure the Slave server
Just like the Master server, the slave needs to be configured to act like one. So open the configuration file as before:
Append the configuration below
bind–address=192.168.43.252
server–id=2
log_bin=mysql–bin
binlog–format=ROW
Be keen to provide a different ‘server_id’ from the Master server, which is 2 in this case. And just like the Master server, the ‘bind_address’ parameter should point to the slave’s IP address.
Save and exit the file.
Step 3: Create a replication user in the Master server
To configure the slave for replication, we need to head back to the Master node and create a replication user. Log in to the MariaDB database engine.
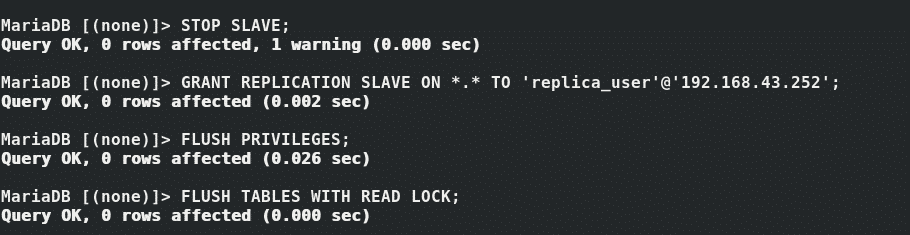
First, Stop the slave user.
The create a replication user with the commands shown:
IDENTIFIED BY ‘P@ssword123’;
Query OK, 0 rows affected (0.06 sec)
MariaDB [(none)]> FLUSH PRIVILEGES ;
Query OK, 0 rows affected (0.04 sec)
MariaDB [(none)]> FLUSH TABLES WITH READ LOCK;
Query OK, 0 rows affected (0.02 sec)
MariaDB [(none)]> EXIT;
Query OK, 0 rows affected (0.02 sec)
Thereafter, check that status of the Master by running:
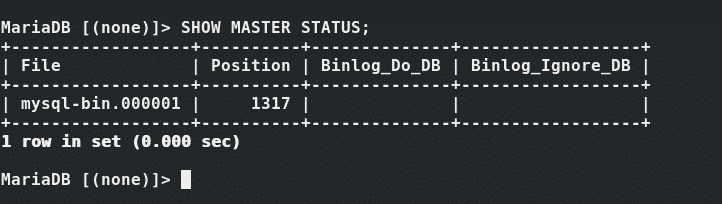
Carefully note down the values of the filename and the position. These will be later used to configure the slave for replication.
From the output above, this translates to:
File: mysql-bin.000001
Position: 1317
Exit the MariaDB engine and create a backup copy of the master server as shown:

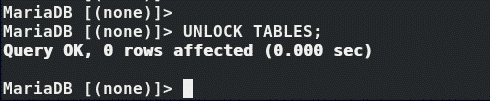
Log in back to MariaDB and unlock the tables:
MariaDB [(NONE)]> EXIT;
Remember the backup copy we created for the Master database? We ready to copy it to the Slave server. So run the command below:
Step 4: Configure the Slave for replication
Back on the slave node, import the backup file that we copied from the master to the MariaDB engine.
And then restart MariaDB service

Now log in to the MariaDB database engine and configure the slave as follows:

MASTER_PASSWORD=‘P@ssword123’, MASTER_LOG_FILE=‘mysql-bin.000001’ ,
MASTER_LOG_POS=1317;
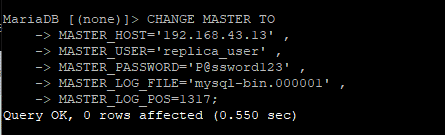
Remember the values that we said that you should remember and possibly jot them down when displaying the status of the Master server? These have finally been defined in the MASTER_LOG_FILE and MASTER_LOG_POS attributes as seen.
Finally, start the slave to initialize the Slave to begin replicating from the Master:
Then check the status of the slave
If the configuration was done perfectly, you should not get the output below free from any errors.
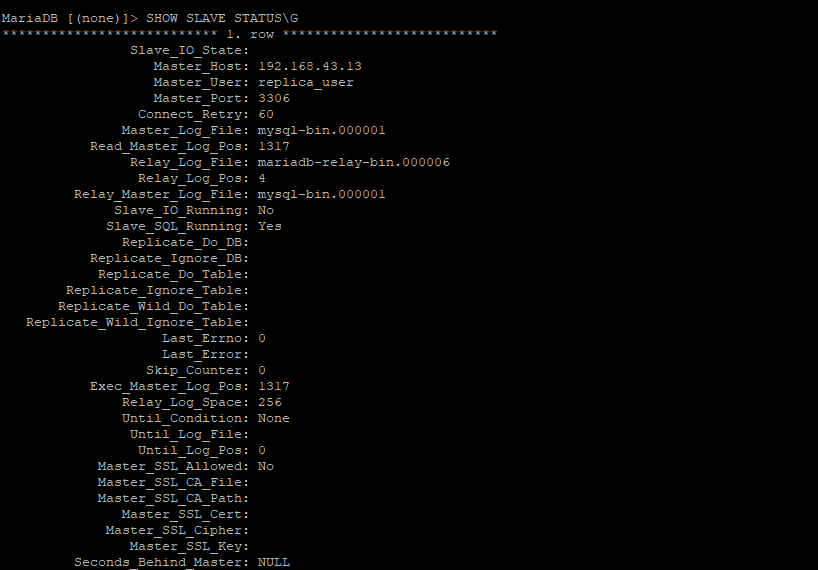
The slave is now ready for replication.
Step 5: Testing database replication
Ultimately, we need to confirm if our setup is working. So log into MariaDB instance in the Master and create a test database as shown
Then confirm the creation of the database
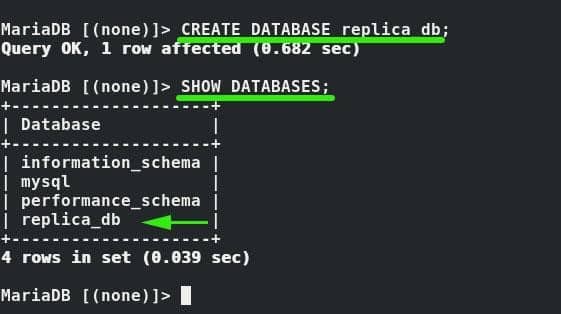
Head back to the Slave node and check if the database exists.
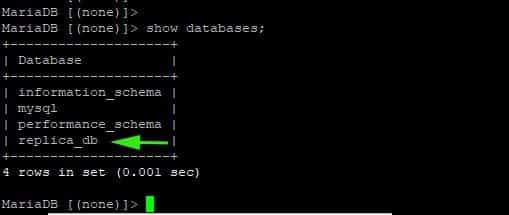
Perfect! Our setup is working! All the subsequent databases created in the Master will be automatically replicated and changes synched on the Slave node. And this brings us to the end of this guide.