While containers are ephemeral, user data needs to persist. A classic example, of this is when we try and run database container images. If you destroy the database container, the data is lost as well. What we want is a situation where the container image of, say, PostgreSQL version 9 can be replaced with an image of version 10 without us having to lose any data. This is the Docker way of upgrading software, you don’t drop inside the container and update packages using a package manager. You replace the entire container image.
Let’s see a few pitfalls you may encounter while doing this and how we can make the process much smoother and cleaner from an operational standpoint.
Prerequisites
- A docker installation
- Basic understanding of Docker CLI and docker-compose
Docker Volumes and PostgreSQL Default Behaviour
Docker volumes are the recommended way to persist data. These are file systems managed by the Docker daemon and more often than not you are expected to create one and mount it inside your container when you launch it. The Postgres official image, however, comes with a VOLUME predefined in its image description.
This means that when you run a PostgreSQL image as a container, it creates a volume for itself and stores data in there.
You can list the existing volumes using docker volume ls command and you can inspect the docker container mydb to see which of these volumes is mounted inside the database container.
DRIVER VOLUME NAME
local 8328940661c0703ed867b004ea6343b9432e70069280b71cfce592ecdd12e55d
$ docker inspect mydb
…
"Mounts": [
{
"Type": "volume",
"Name": "8328940661c0703ed867b004ea6343b9432e70069280b71cfce592ecdd12e55d",
"Source": "/var/lib/docker/volumes/8328940661c0703ed867b004ea6343b9432e70069280b71cf
ce592ecdd12e55d/_data",
"Destination": "/var/lib/postgresql/data",
"Driver": "local",
"Mode": "",
"RW": true,
"Propagation": ""
}
],
…
You will notice that the volume has a rather unfriendly name and is mounted at /var/lib/postgresql/data.
Let’s remove this container and the associated volume for now:
$ docker volume rm 8328940661c0703ed867b004ea6343b9432e70069280b71cfce592ecdd12e55d
The same is true when you create a container using a simple docker-compose file. The following is a docker-compose.yml file placed inside a directory named postgres.
services:
mydb:
image: postgres
You can feed it to docker-compose, by opening a terminal in the same directory where this file is and running:
This creates a container and a volume much like the docker run command we saw earlier. However both these methods, one involving docker-compose and another Docker CLI have a fatal problem and that’s comes into play when you need to replace the old Postgres image with a new one.
New Volumes Everytime
If you remove the above deployment by running:
The container and the network are removed but the volume sticks around and your data is safe within it. However the next time you run:
Compose will create a new volume and mount that instead of using the previously created volume. And how can it remember that the previous volume was meant for this particular PostgreSQL container anyways? But the poor user who might not even be aware of the concept of volumes will be confused wondering where all the data’s gone.
User Defined Volume
To circumvent this issue, we can use the information we gathered earlier that showed us that the volume is mounted at /var/lib/postgresql/data. Inside the container, this directory is where Postgres stores all the relevant tables and databases.
We now have to define a volume inside the compose file and mount it at this mount point. This is how the docker-compose.yml would look like.
services:
mydb:
image: postgres
volumes:
– db-data:/var/lib/postgresql/data
ports:
– 5432:5432
volumes:
db-data:
driver: local
The last line “driver: local” is completely optional and is mentioned here just to show that the “top-level key volumes” can have multiple volumes defined underneath it. db-data is one such volume who in turn has specifics, like drivers, included as an indented block underneath it.
Under the mydb service we have the volumes key once again. This “service-level volumes key” it is just a list of volumes defined under the top-level volumes key being mapped onto mount points inside the containers
When you run docker-compose up -d command the first time with the above yml definition, it will create a volume, not with a random string as its name, but db-bata as its name. Then onwards every time you bring the application down (docker-compose down) and then rerun the docker-compose up -d compose will try to create a volume named db-data but then it would notice that a volume with that name already exists. Then it will helpfully mount the same volume again. Let’s bring the application down for now:
Using PostgreSQL
The official Postgres image exposes the port 5432 much to our advantage. Strictly speaking, this is not necessary. Databases are but one of the many services running on a docker network. The other services, like web server, can talk to the database without any explicit port being published. This is because user-defined bridge networks, like the ones Docker compose creates for your apps to run on, allow member containers to freely talk to one another. So if the webserver and database are on the same bridge network then they can talk to one another even without any ports being explicitly opened.
Databases are often not exposed to the outside world, but accessed by other other services. Hence, publishing the Postgres port is not something you would often see in production.
However, we shall experiment with the containerized application to see if the data actually persist so we can expose and publish the ports for now. Modify the docker-compose.yml file with additional ports option.
services:
mydb:
image: postgres
volumes:
– db-data:/var/lib/postgresql/data
ports:
– 5432:5432/tc
volumes:
db-data:
driver: local
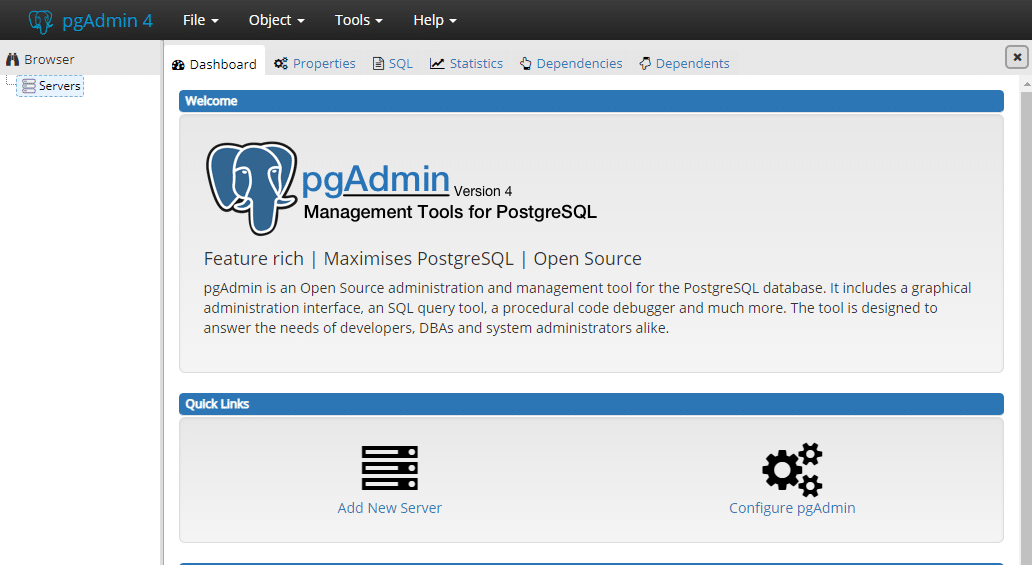
Now, we are ready to interface with the Postgres instance using pgAdmin client program. You can install this client on your local machine using your preferred method if you follow this link. After having the client installed you can connect to the database server, but first let’s start the database server.
This time incoming requests at docker host port 5432 will be forwarded to the port 5432 of the database container, where Postgres server can process it.
Connecting to the Server
Start the pgAdmin client and you can access it via your web browser. In the dashboard you will find the option called Add New Server.
Give it a reasonable name, we are going with “My Database”:

And under the connections tab enter the address where the database is running:
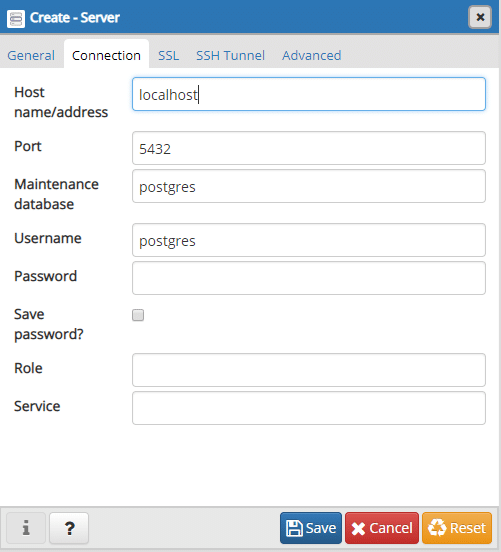
The address can be localhost if you’re running both pgAdmin and the Postgres container are running on the same machine. If you are running Postgres container on a remote VPS, for example, then the IP address of that VPS will be needed here. In general, we call it the address of the Docker Host because that’s where Docker is running.
We will leave the password field empty and the default port number 5432 is fine as well. Save the server settings and let’s create a database in there.
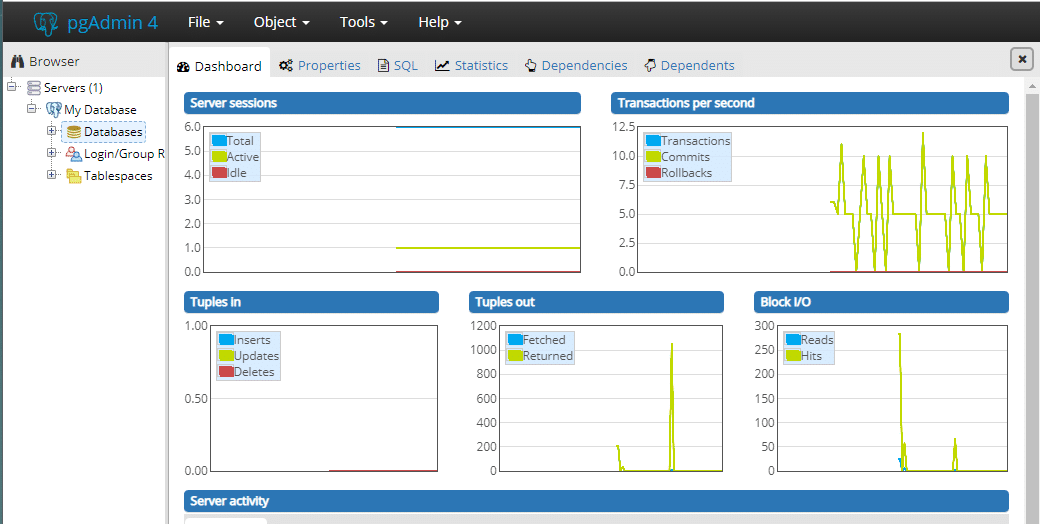
Upon successful connection you can see all the internal activities:
From the Browser menu we can quickly select My Database server and under it right-click on database and create a database.

Let’s quickly create a database called Sample Database.
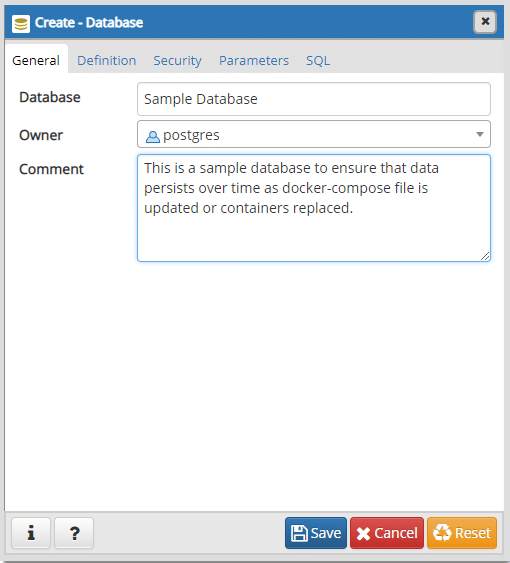
You don’t have to create anything else in here. Now we can close the window and go back to the terminal opened at the same directory where our docker-compose.yml lives.
$ docker-compose up -d
The old container is now gone and a new one has taken its place. You can open pgAdmin again and you will have to reconnect to this database (an empty password would do) and inside it you will find that everything is as you have had left it to be. There’s even a Sample Database in there.
Conclusion
We wanted to write a Docker-Compose file that made Postgres upgradeable. If a new image of Postgres comes along running Postgres 11, now you can confidently pull the new image in and run an upgrade without any worries about the state of the application being lost.
The default behaviour of Postgres image which is to create a new volume everytime a container is created is not a bad design choice. It is implemented with the best interests at heart.
But it simply puts off a new user who would be scratching his/her head wondering where all the data is getting lost and why are there so many volumes laying around in their Docker Host. Hopefully, that won’t be a problem for the readers anymore.