Run the following command to find out the options of XZ command.

Select some files that you want to test xz command. Here, the files of myDir folder are used for compressing and decompressing with xz command. Run ls -l command to show the list of files with detail information.
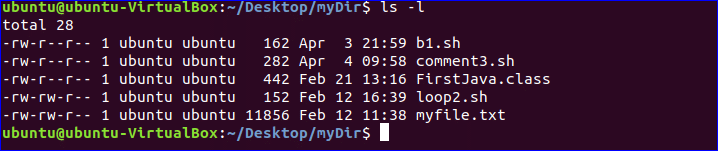
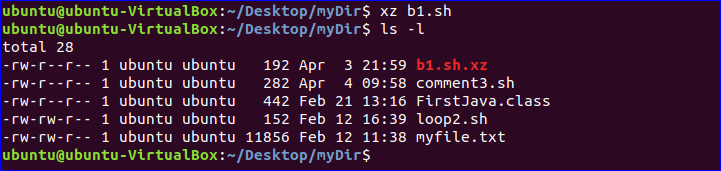
Compress single file
You can compress any simple file by giving the file name with xz command. After compression, xz command deletes the original file. Here, b1.sh file is compressed and created the compressed file named b1.sh.xz.
$ ls -l
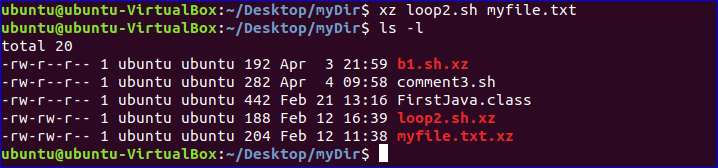
Compress multiple files
You can compress multiple files using xz command by separating each file with space. Here, two compressed files, loop2.sh.xz and myfile.txt.xz are created after deleting loop2.sh and myfile.txt.
$ ls -l
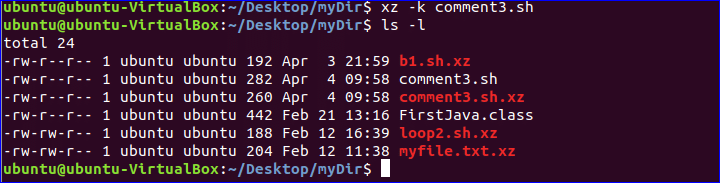
Compress file by keeping original file
If you want to keep original file with compress file then run xz command with –k option. Here, comment2.sh.xz file is created without removing comment3.sh file.
$ ls -l
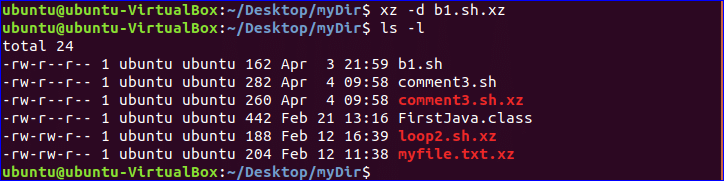
Decompress file
Like compression, when you decompress any file with xz command then it delete decompressed file after
decompression. Here, b1.sh file is created after decompressing b1.sh.xz file. –d option is used with xz command to decompress any compressed file.
$ ls -l
Decompress file by keeping compressed file
You have to use –k option with unxz command to keep the decompressed file with original file after decompression. After running the following command, loop2.sh.xz file will not be removed.
$ ls -l

Compress multiple file in a single file
If you want to create single compression file for multiple files then you need to use –c option. The following command will create new.xz compressed file after compressing b1.sh and FirstJava.class files.
$ ls -l

Retrieve information of compressed file
You can retrieve information of any compressed file by using –l option. Here, new.xz file is created by compressing two files. The following information shows that the original size of both files is 604 bytes and after compression the size is 548 bytes. You can decompress this file by using previous decompression options.

One of the major limitation of xz compression tool is that it can compress file only. You can’t compress any folder by using xz. This tool can’t also be used for creating password protected compressed file. There are other tools on Linux to create password protected compressed file. One of them is rar package. You can easily install trial version of rar package on Linux to create and open archive files. You can read the tutorial on rar package from the following link.