Changing The Shared VM Path:
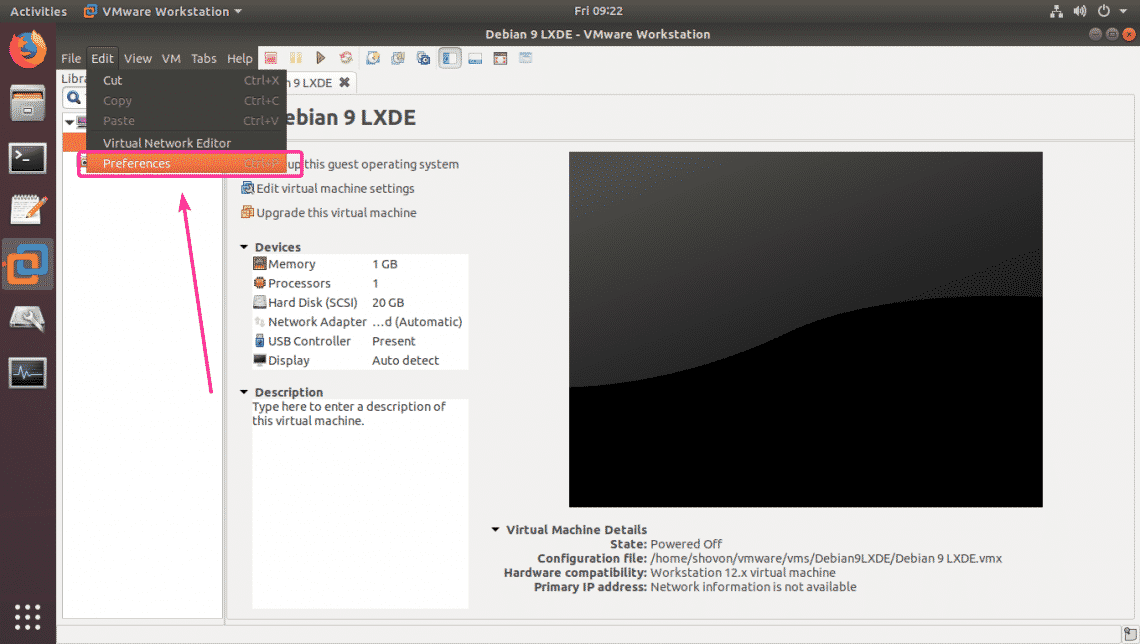
The path where the share VMs are stored is different from the path where new VMs are stored. To change the shared VM path, go to Edit > Preferences as marked in the screenshot below.
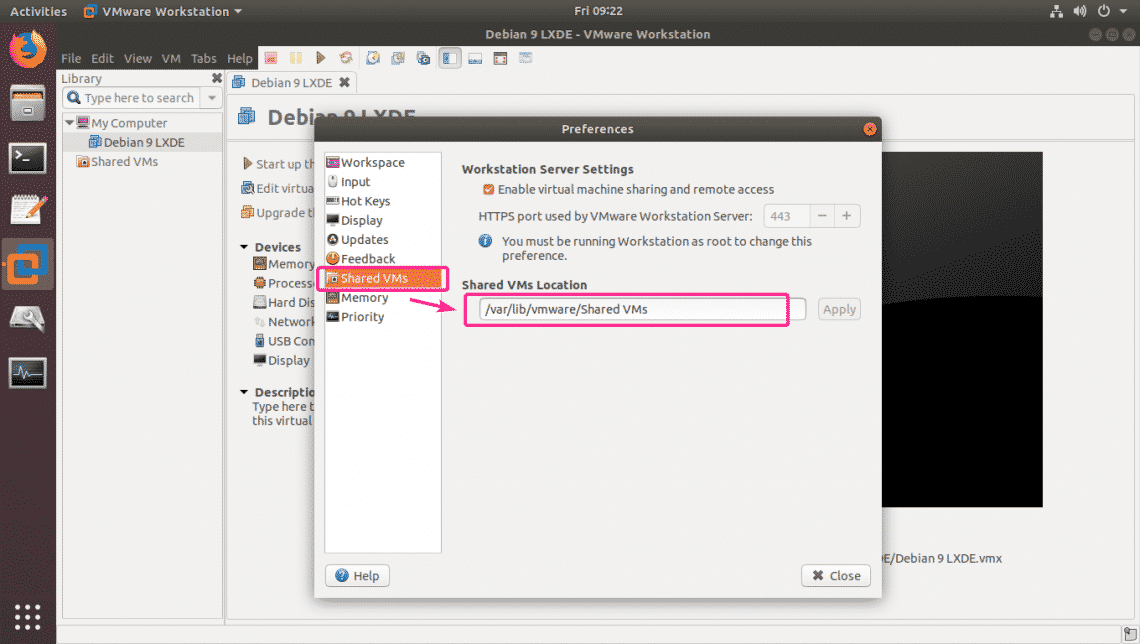
Now, go to the Shared VMs tab from the Preferences window. As you can see, the default Shared VMs Location is /var/lib/vmware/Shared VMs
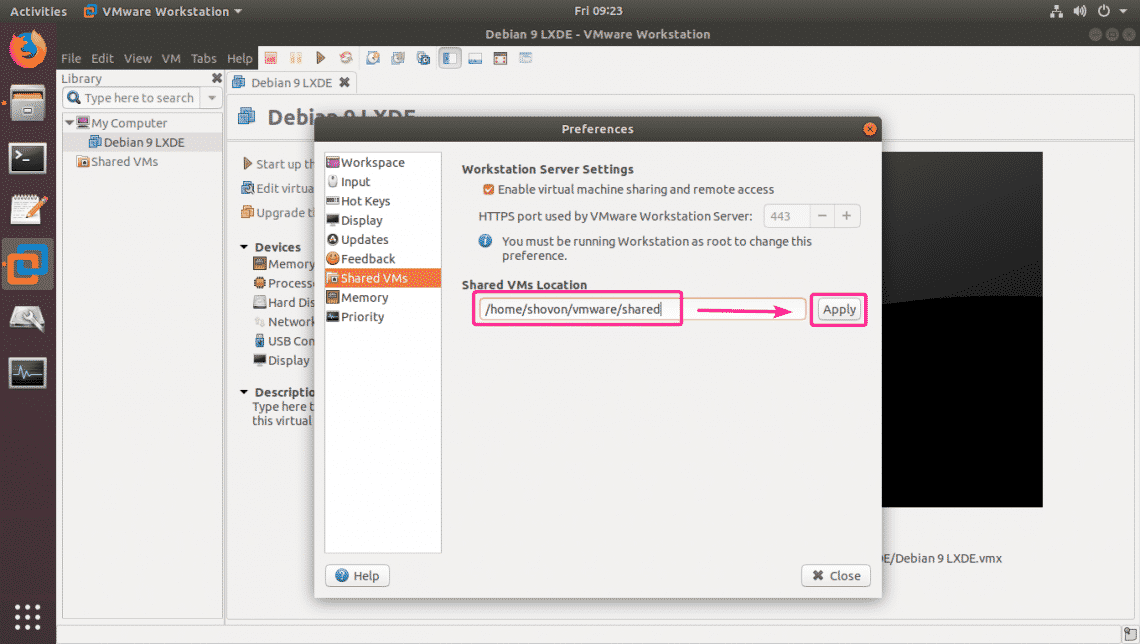
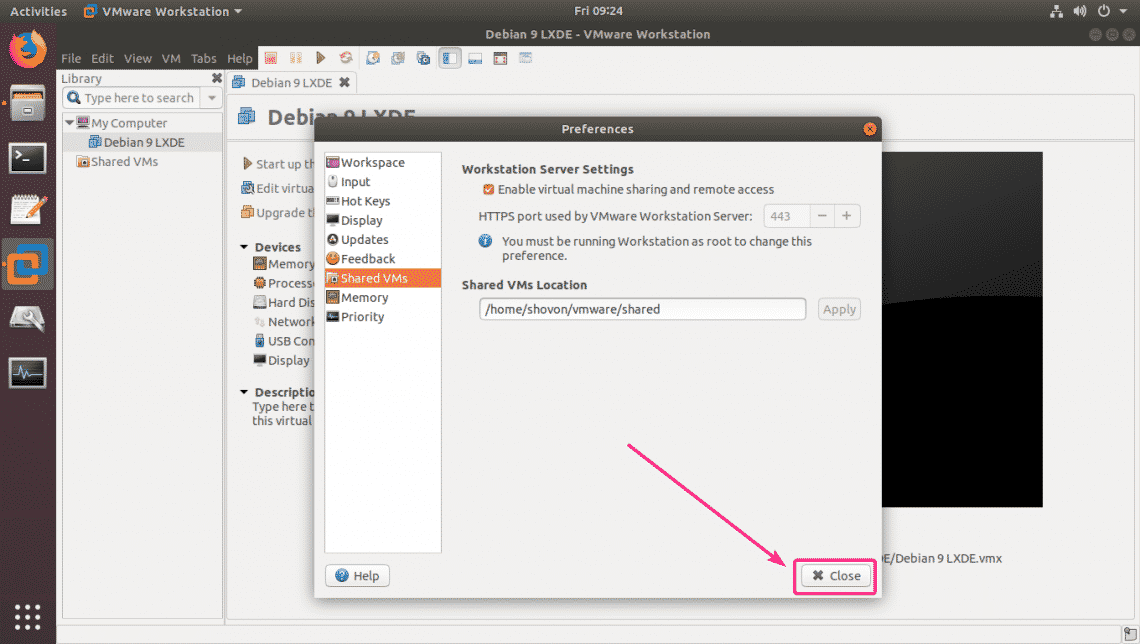
To change the default Shared VMs Location, just click on the textbox and type in a new path for your Shared VMs. Once you’re done, click on Apply.
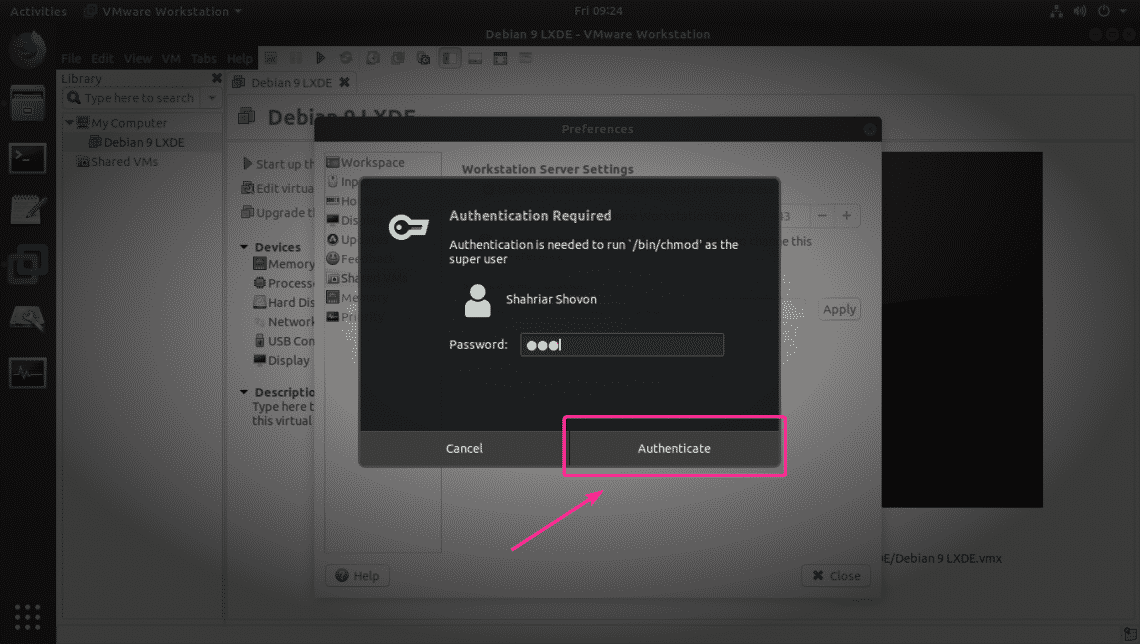
Now, you may see the following dialog box. Just type in your Ubuntu login user’s password and click on Authenticate.
The Shared VMs Location should be changed. Now, click on Close.
Sharing a Virtual Machine on VMware Workstation Pro:
Now, right click on a virtual machine that you want to share and go to Manage > Share… as marked in the screenshot below.
NOTE: To share a virtual machine, the virtual machine that you want to share must be powered off. Otherwise, you won’t be able to share that virtual machine.

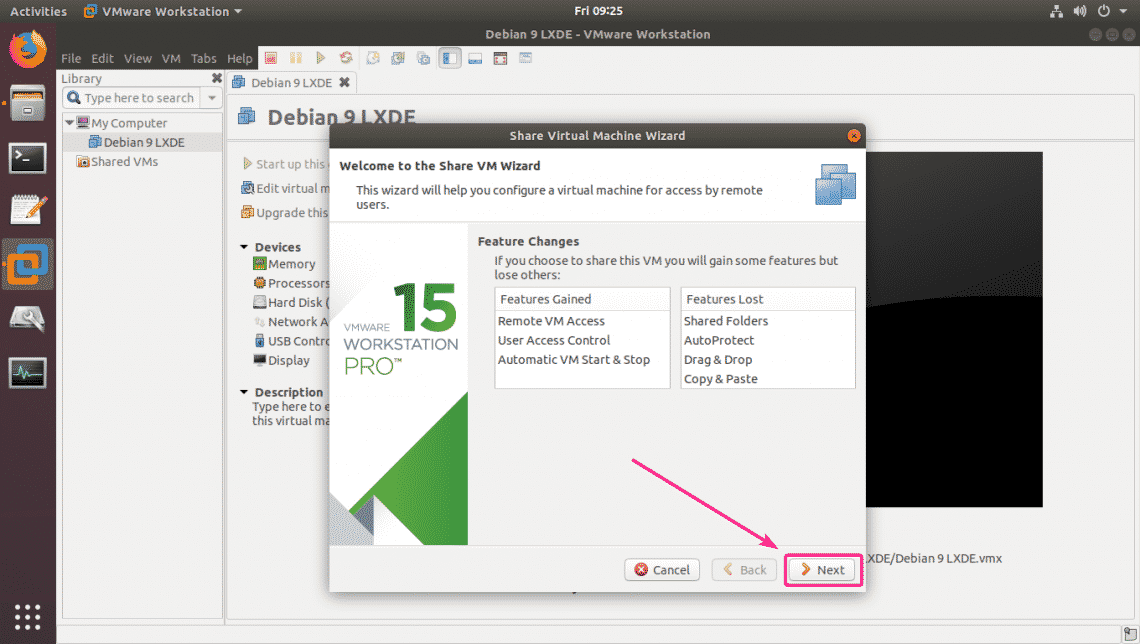
Now, you will see the following wizard. If you share a virtual machine, you won’t be able to use some of the VMware Workstation Pro functionalities such as Shared Folders, AutoProtect, Drag & Drop, Copy & Paste. But you can access the VM remotely, use User Access Control for the VM, start and stop the VM automatically.
Click on Next.
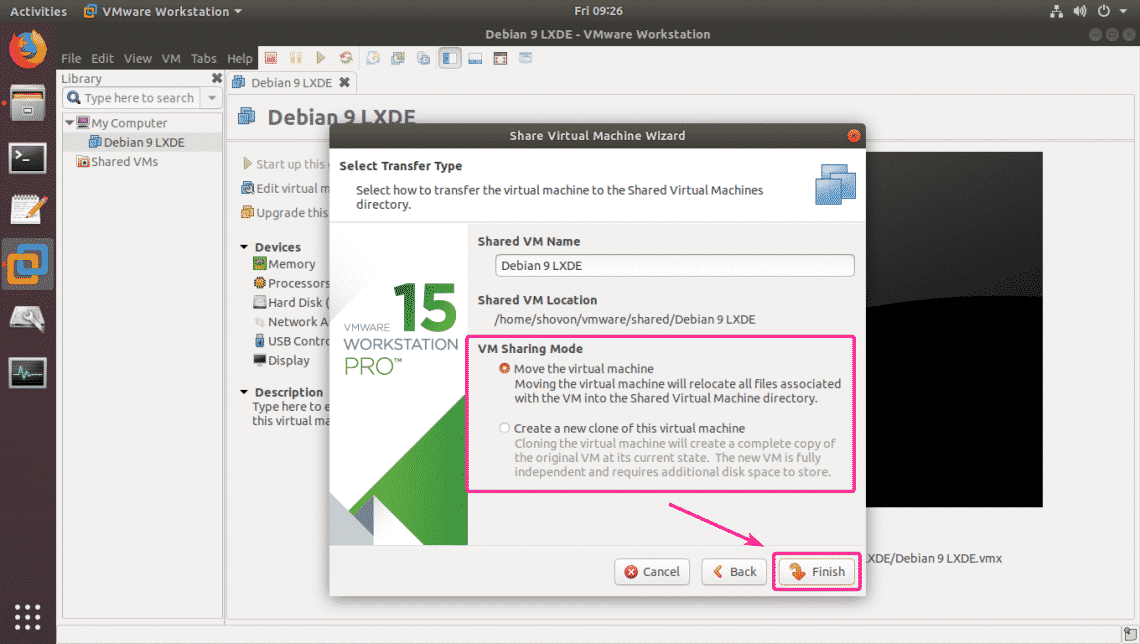
You can either create a new clone of the virtual machine and share it or just share the virtual machine. To just share the virtual machine, select Move the virtual machine from VM Sharing Mode section. To create a new clone of the virtual machine and share it, select Create a new clone of this virtual machine from the VM Sharing Mode section. You can also change the name of your shared VM from the Shared VM Name section of the wizard.
Once you’re done, click on Finish.
Your virtual machine should be shared. Now, click on Close.
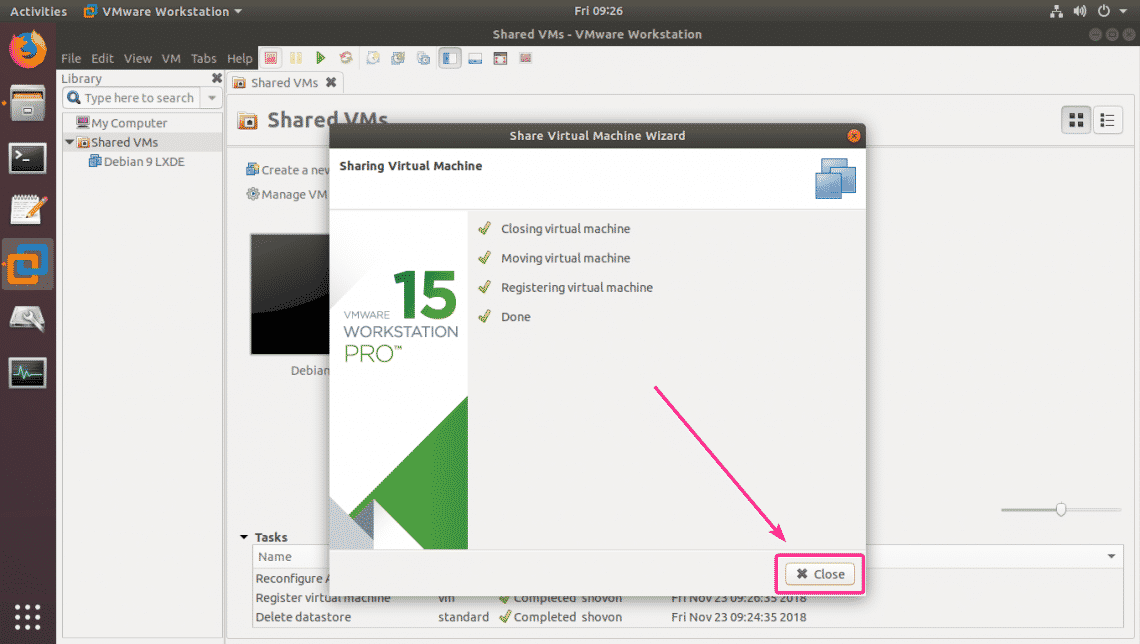
As you can see, the virtual machine is in the Shared VMs section.
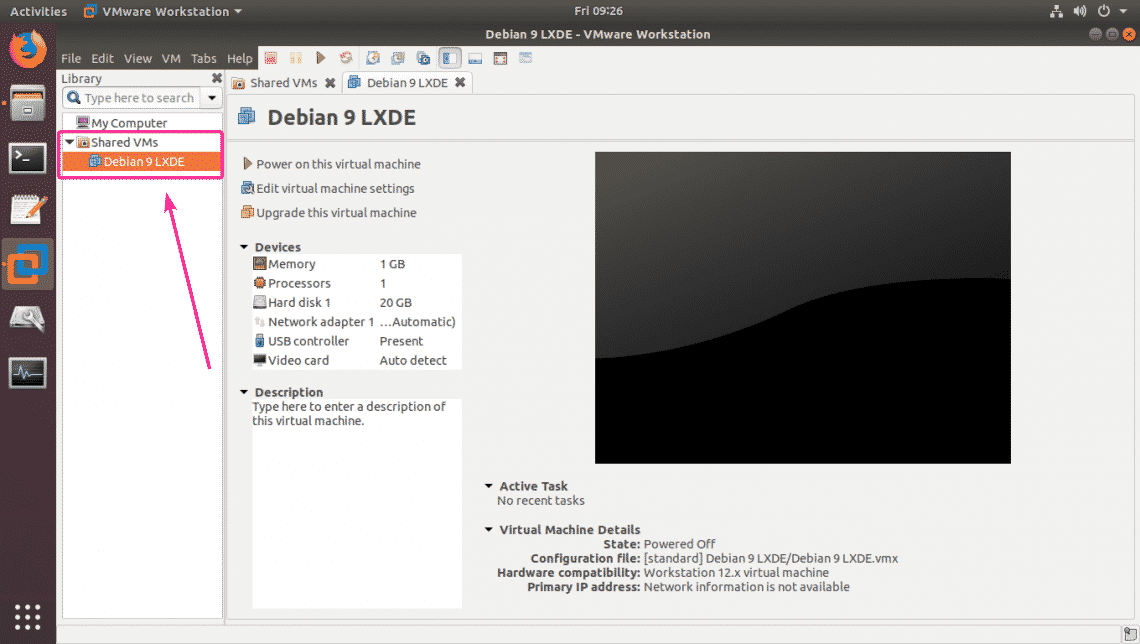
Now, start the virtual machine.
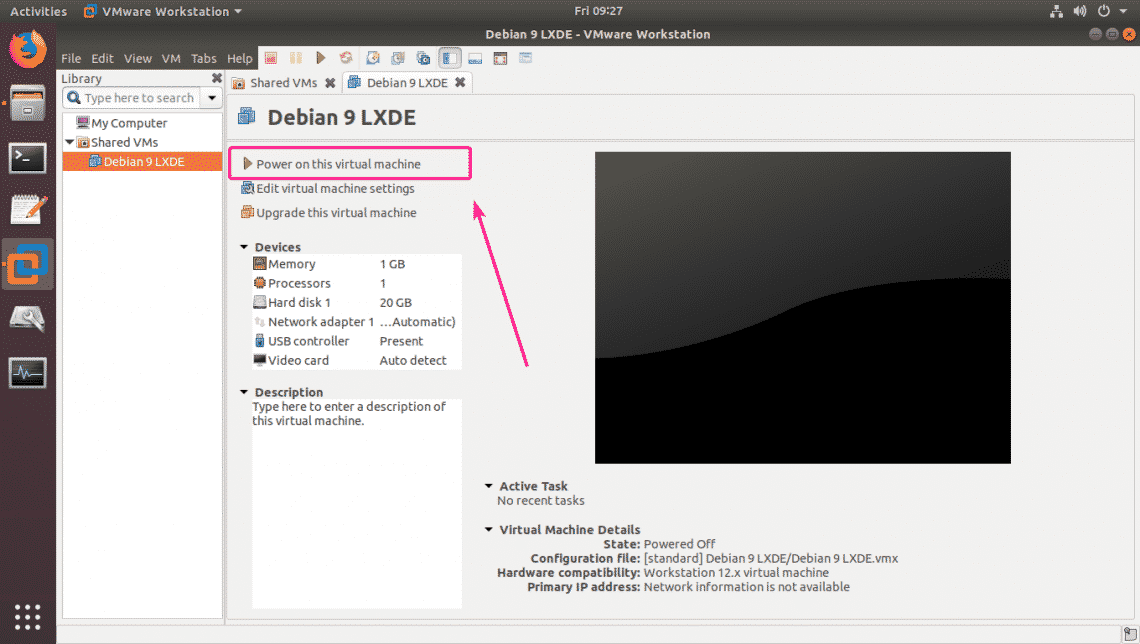
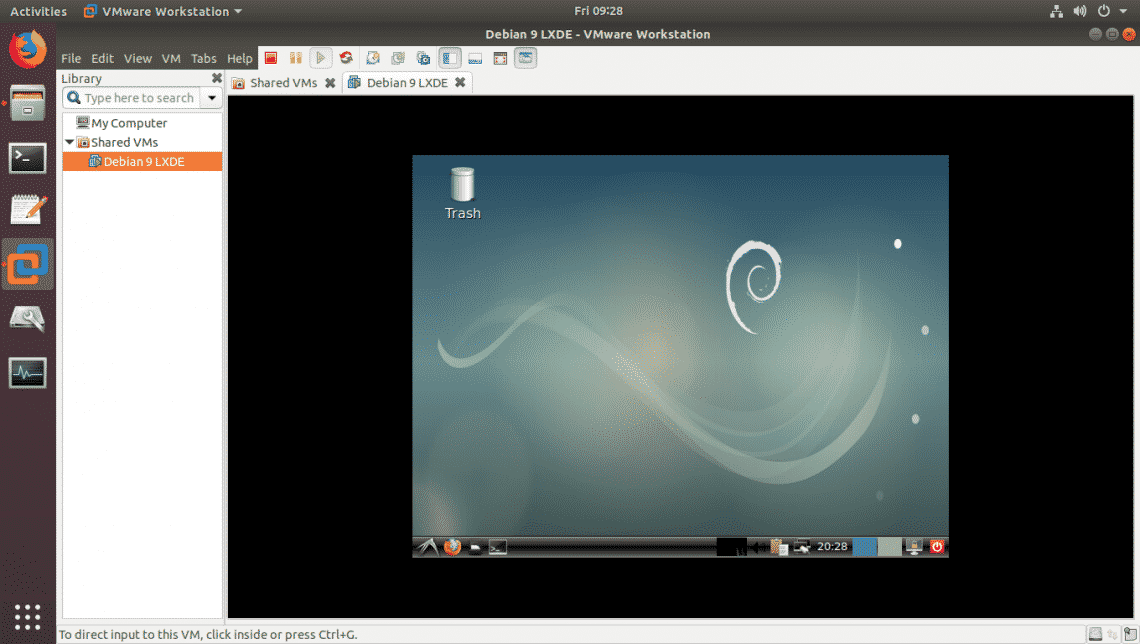
As you can see, the virtual machine has started.
Accessing the Shared Virtual Machines:
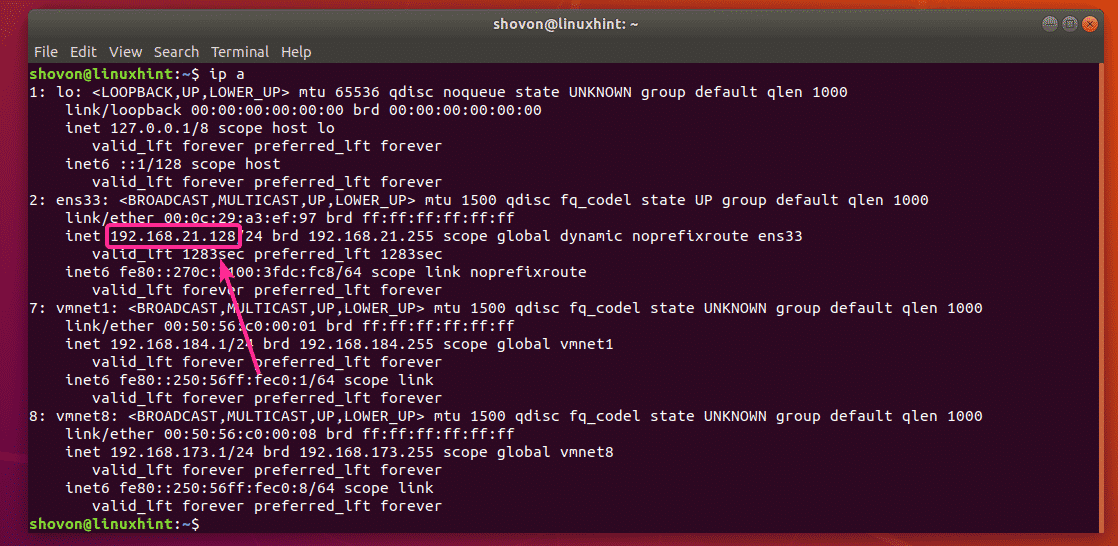
Now, you can access the shared virtual machine from another computer with VMware Workstation Pro installed. First, run the following command to find out the IP address of the computer where you shared a VM from.
As you can see, the IP address in my case is 192.168.21.128. Yours should be different. So, make sure to replace 192.168.21.128 with yours from now on.
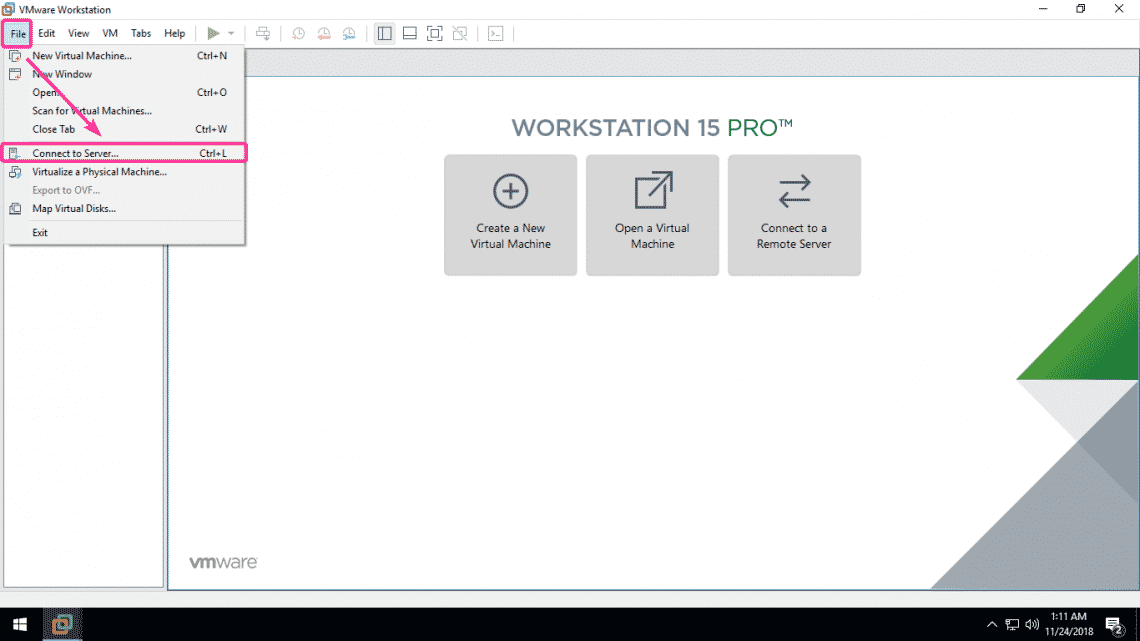
Now, open VMware Workstation Pro on another computer and go to File > Connect to Server… as marked in the screenshot below.
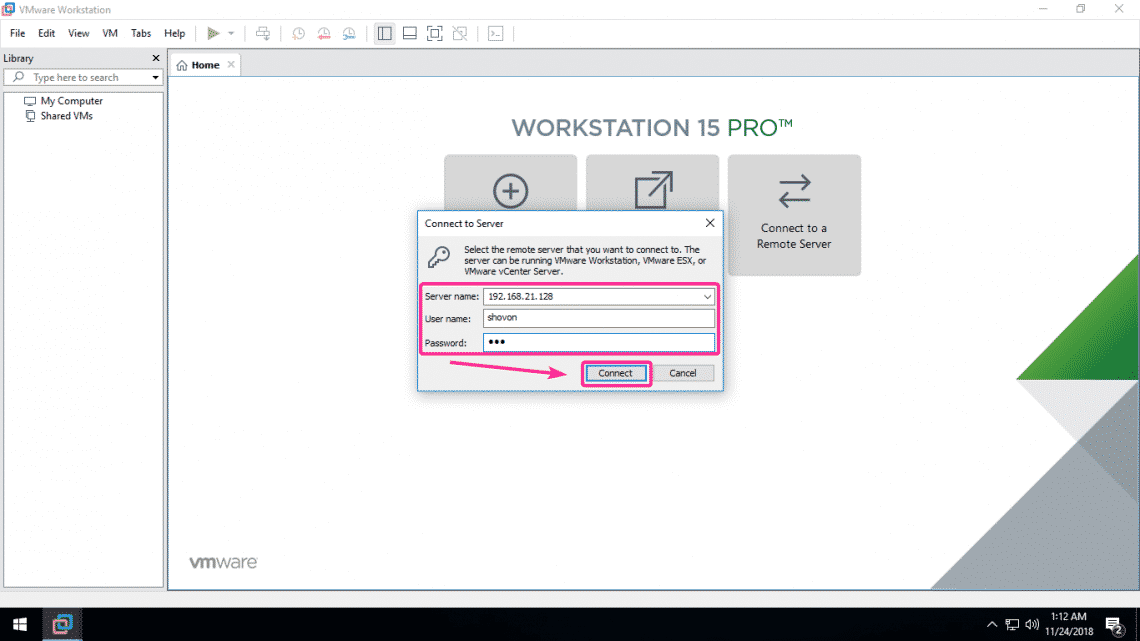
Now, type in the IP address, login information of your Ubuntu machine where VMware Workstation Pro VM is shared from and click on Connect.
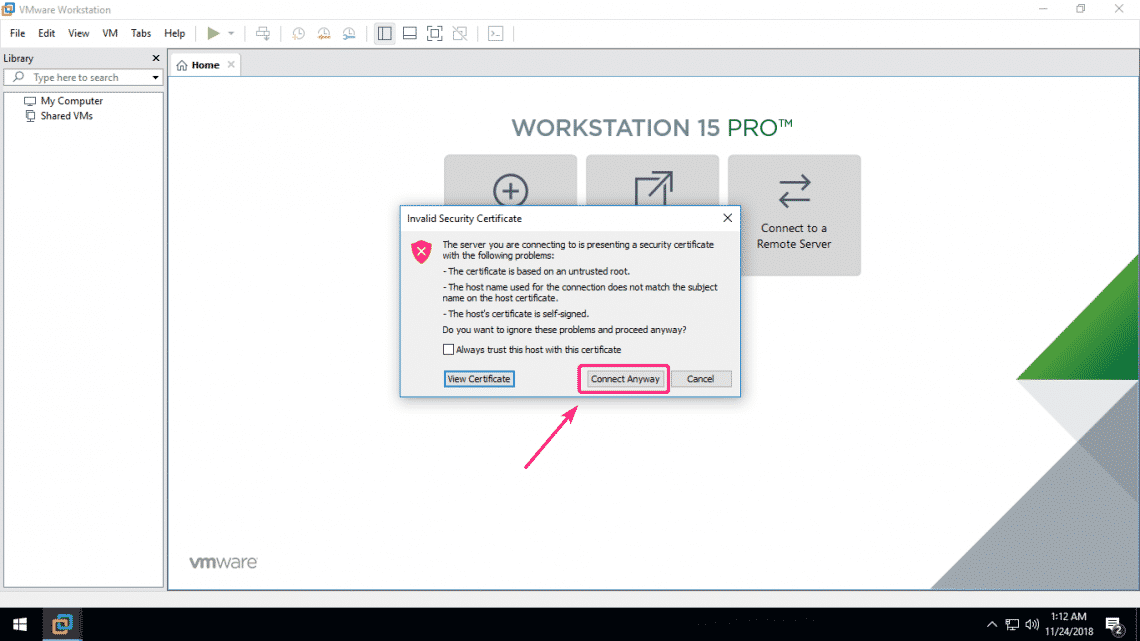
Now, click on Connect Anyway.
Now, click on any one of the three options depending on whether you want to save login information or not.
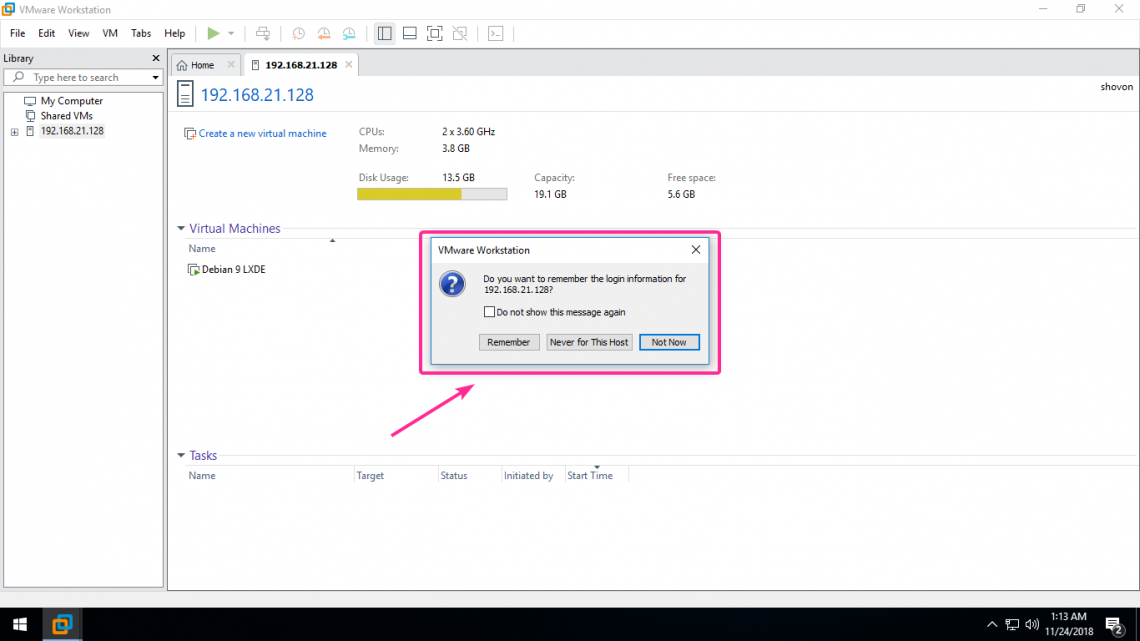
You should be connected. As you can see, all the information about the Ubuntu machine is displayed here. Also, all the shared VMs should be listed here. The Debian 9 LXDE VM that I shared is listed here. Double click on the VM that you want to use from the list.
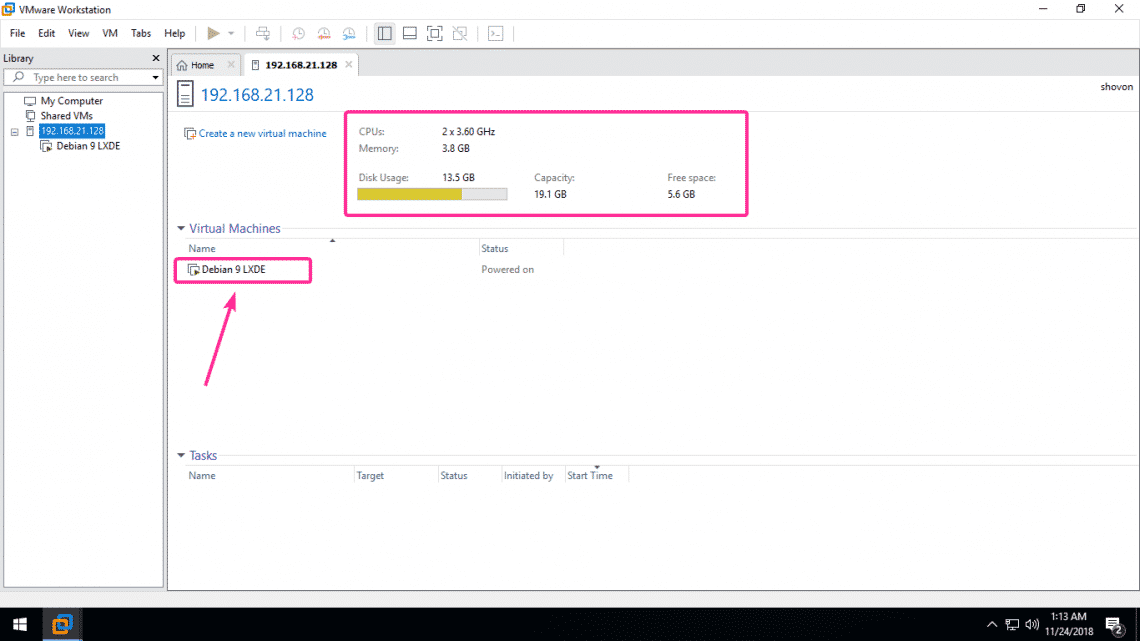
As you can see, the VM is opened. Now, you can use it from this remote VMware Workstation Pro instance.

Stop Sharing VMs:
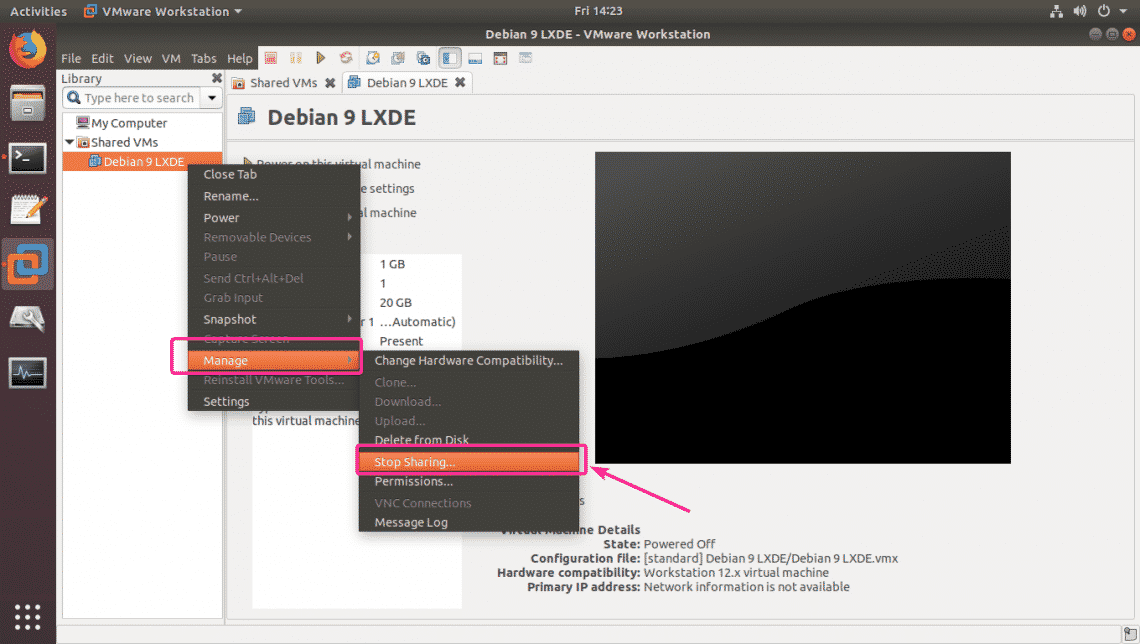
You can also stop sharing VMs. If you stop sharing a VM, it will be moved to the default virtual machine directory from the default share directory. To stop sharing VMs, first, power off the VM that you don’t want to share anymore.
Now, right click on the shared VM and go to Manage > Stop Sharing… as marked in the screenshot below.
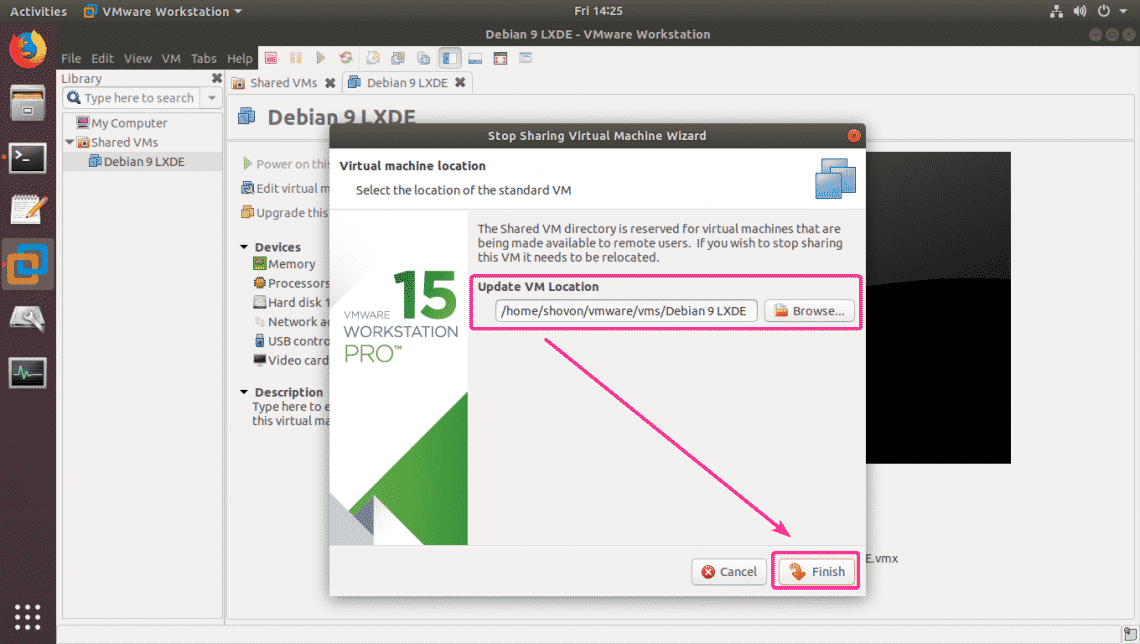
Now, make sure the path where it will be moved is correct and will not replace other virtual machines. If you want, you can change it. Just, click on the Browse… button and select a new folder for your VM. Once you’re done, click on Finish.
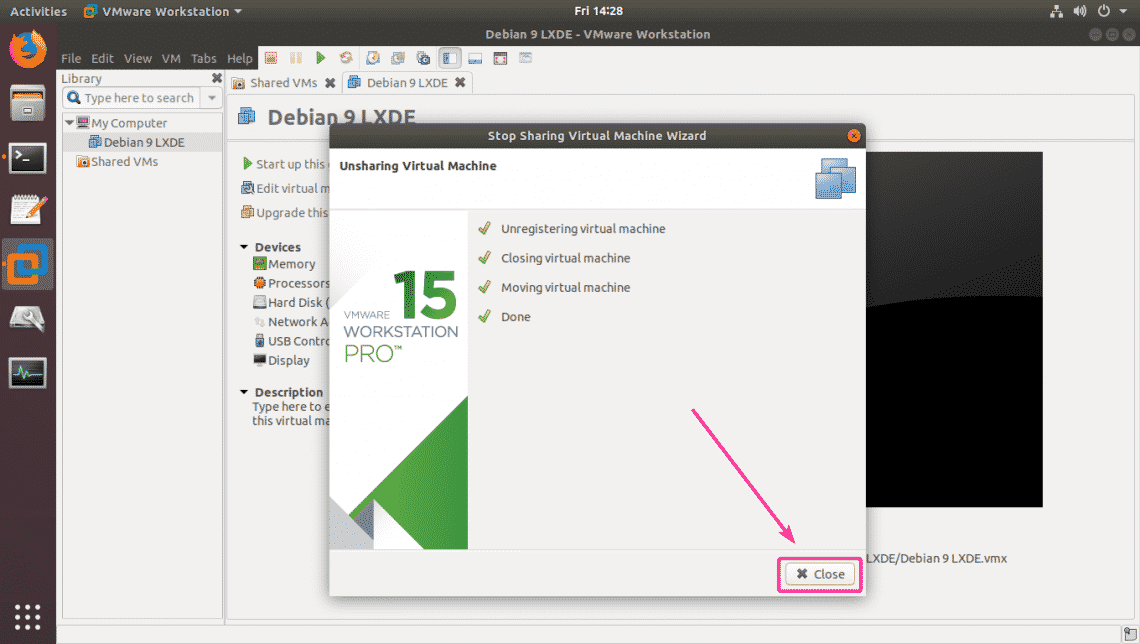
The VM will not be shared anymore. Now, click on Close.
So, that’s how you work with shared VMs on VMware Workstation Pro on Ubuntu. Thanks for reading this article.


