To learn more about GitLab, visit the official website of GitLab at https://gitlab.com In this article, I will show you how to install and configure GitLab on Debian 9. Let’s get started.
System Requirements:
GitLab recommends at least a system of 2 core processor, 8 GB of RAM, and 4 GB of swap space. But it will run on single core processor and 4 GB RAM, even though it will be very slow.
To learn more about the system requirements of GitLab, you can visit the official website of GitLab at https://docs.gitlab.com/ee/install/requirements.html#cpu
In this article, I will use a VMware virtual machine with 2 core processor and 4 GB of RAM. I don’t have a powerful machine to run GitLab with the recommended settings. But it should work just fine for the demonstration.
Installing GitLab Dependencies:
GitLab depends on some of the other packages that you must install before installing GitLab.
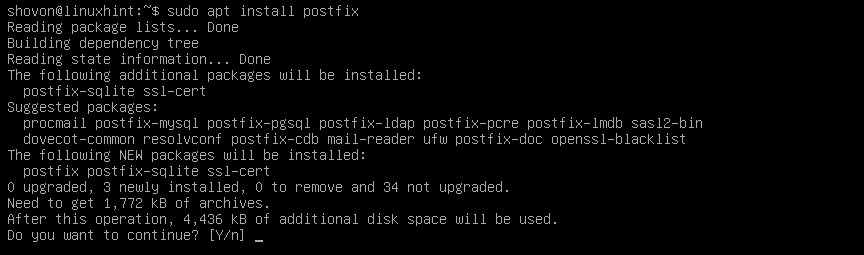
First, update the package repository cache with the following command:
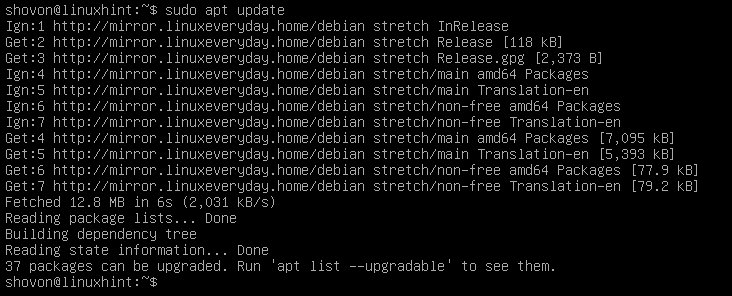
Now install the GitLab dependencies with the following command:

Now press y and then press <Enter>.
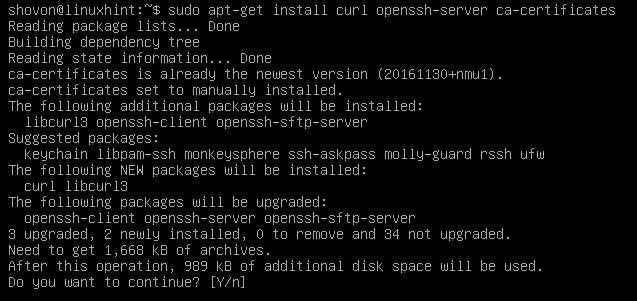
The dependencies should be installed.

Installing Postfix Mail Server:
Now you have to install the Postfix mail server on Debian 9. I wrote a detailed guide on how to install Postfix which you can read at How to Install and Configure Postfix on Ubuntu 18.04 LTS (https://linuxhint.com/install_postfix_ubuntu_1804/). I won’t go through the details of every step here. I recommend you read dedicated Postfix article of mine.
The guide focused on how to install Postfix on Ubuntu 18.04 LTS. But the procedure is the same for Debian 9 Stretch.
Run the following command to install Postfix on Debian 9:

Now press y and then press to continue.
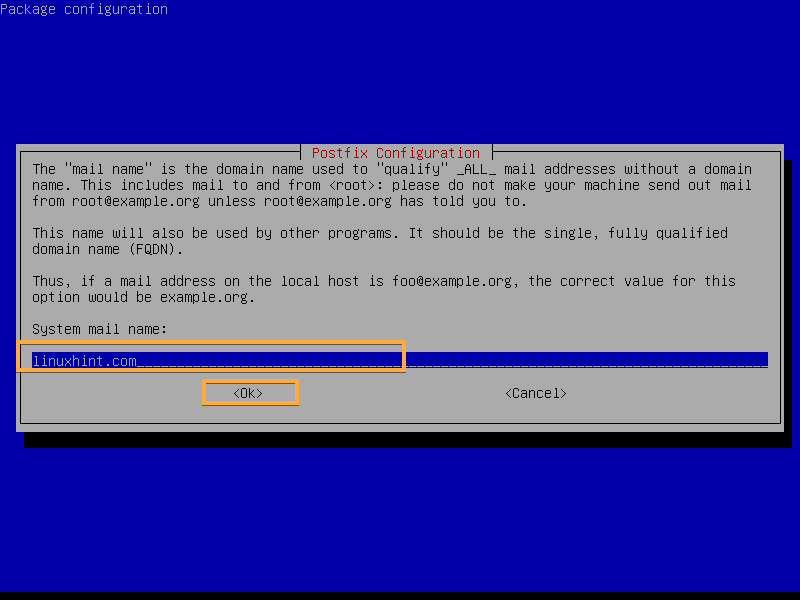
Now select Internet Site and then navigate to <OK> and then press <Enter> to continue.

Now type in your Fully Qualified Domain Name (FQDN) here and select <OK> and then press <Enter>.
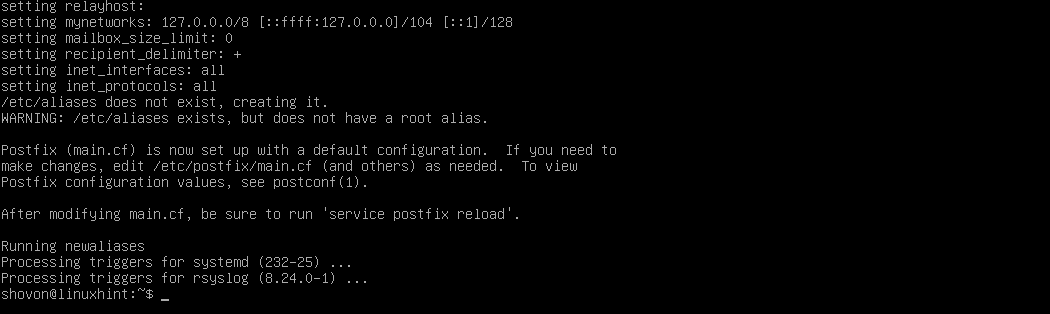
Postfix should be installed.
Adding GitLab Package Repository:
The free version of GitLab is called GitLab Community Edition or GitLab CE and the paid version of GitLab is called GitLab Enterprise Edition or GitLab EE. You have to add the package repository of either GitLab CE or GitLab EE depending on the version you want to install.
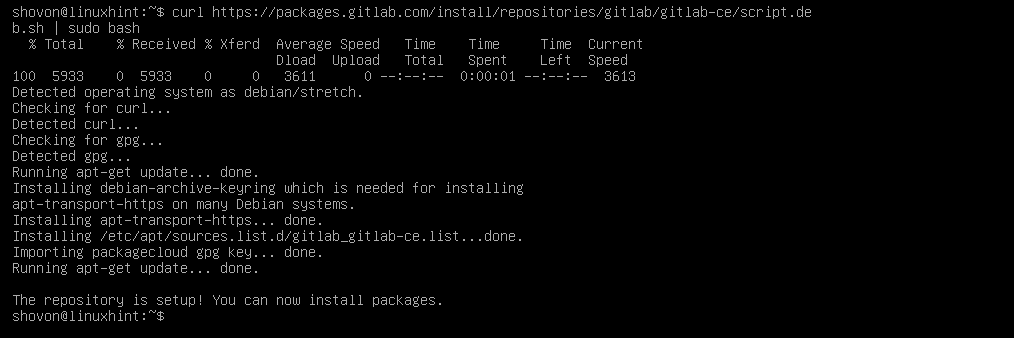
Now run the following command to add the package repository of GitLab and add the GPG key of GitLab on Debian 9 Stretch:
For GitLab CE:
script.deb.sh | sudo bash
For GitLab EE:
| sudo bash
Installing GitLab:
Now you can install GitLab CE or GitLab EE depending on the GitLab repository you added. I will go for GitLab CE.
Run the following command to install GitLab on Debian 9:
For GitLab CE:

For GitLab EE:
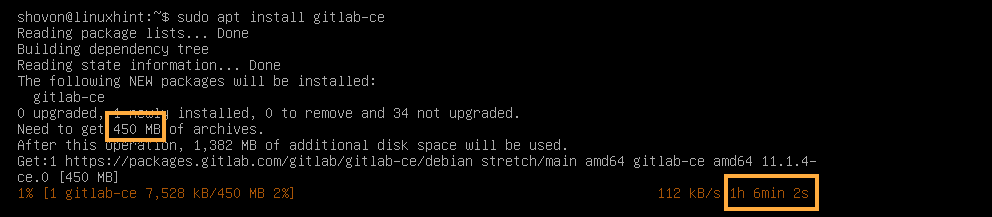
The installation process should begin. As you can see, the package is being downloaded and it is quite big in size. It should take a while to complete.
GitLab should be installed.

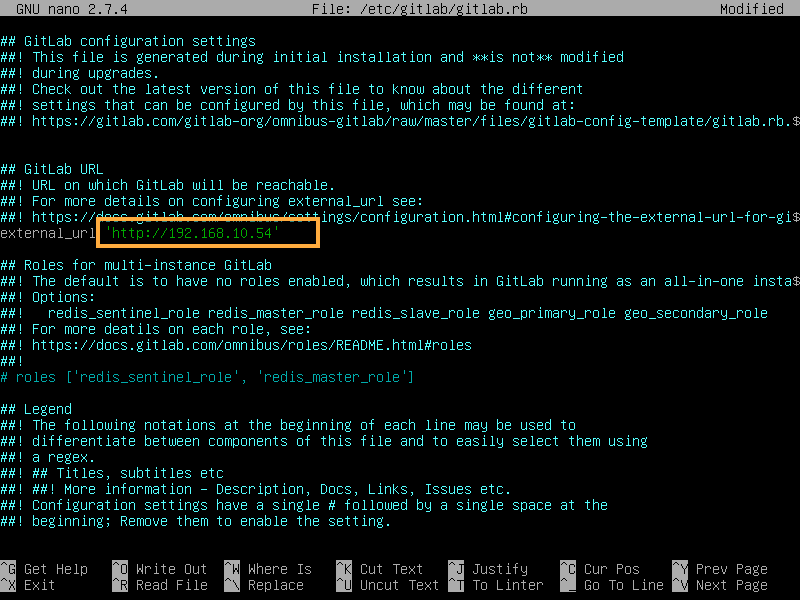
Now open gitlab.rb file with the following command:
Now change the marked URL to your IP address or Fully Qualified Domain Name (FQDN).

I changed it to my IP address as this is a test setup. In real world, you should use a FQDN here.
Once you’re done, save the file and run the following command for the changes to take effect:

GitLab should be reconfigured.

Now visit the FQDN or IP address from a web browser and you should be the following page. Type in the password you want to set for the root user and click on Change your password.

The root password for GitLab should be set.

Now you can login as root with the root password that you set. From here you can manage your GitLab account.

You can also create additional users as required.
Happy GitLabing. Thanks for reading this article.