In this article, I will show you how to install GNOME 3 extensions on Ubuntu 18.04 LTS. Let’s get started.
Installing GNOME Tweak Tool:
GNOME Tweak Tool is used to configure and manage GNOME 3 desktop environment. It can also be used to install and configure the installed extensions on GNOME 3 desktop environment.
GNOME Tweak Tool is not installed by default on Ubuntu 18.04 LTS. But it is available in the official package repository of Ubuntu 18.04 LTS. You can install it very easily from the Ubuntu Software Center or from the Terminal.
I prefer installing it from the Terminal, as Ubuntu Software Center in my virtual machine is a bit laggy.
First update the APT package repository cache with the following command:

The APT package repository cache should be updated.

Now run the following command to install GNOME Tweak Tool:

GNOME Tweak Tool should be installed.

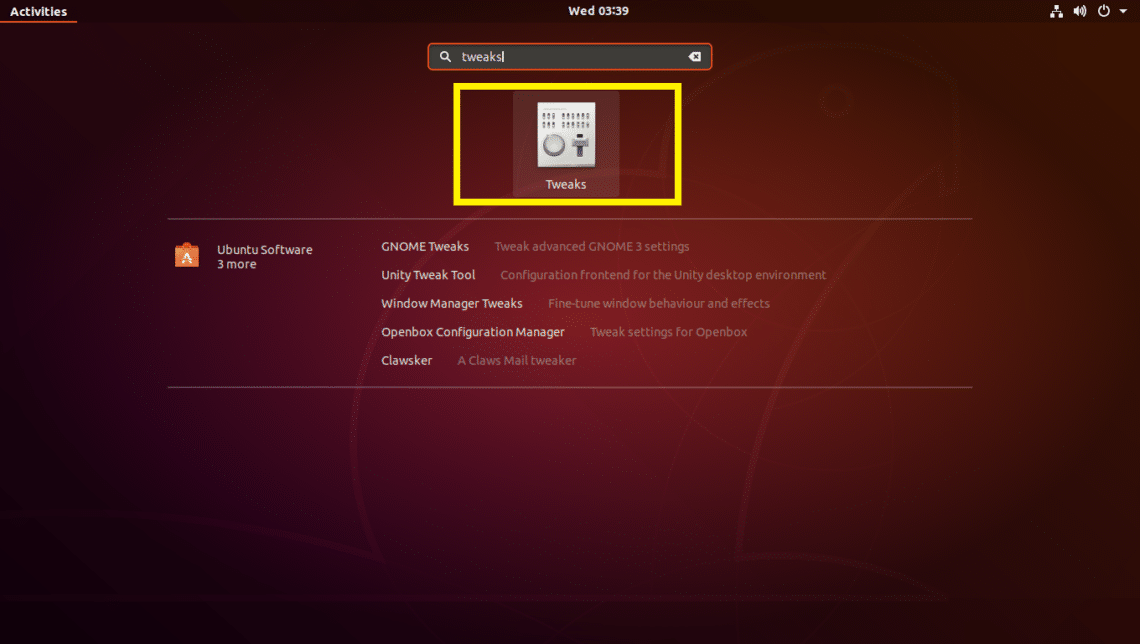
Now you can to go the Application Menu and find GNOME Tweak Tool there as you can see in the marked section of the screenshot below. Click on the Tweaks icon.
GNOME Tweak Tool should start. I will show you how to configure extensions with GNOME Tweak Tool in a later section of this article.

Installing GNOME Shell Integration Firefox Add-ons:
You usually install GNOME 3 extensions from the official website of GNOME 3 at https://extensions.gnome.org
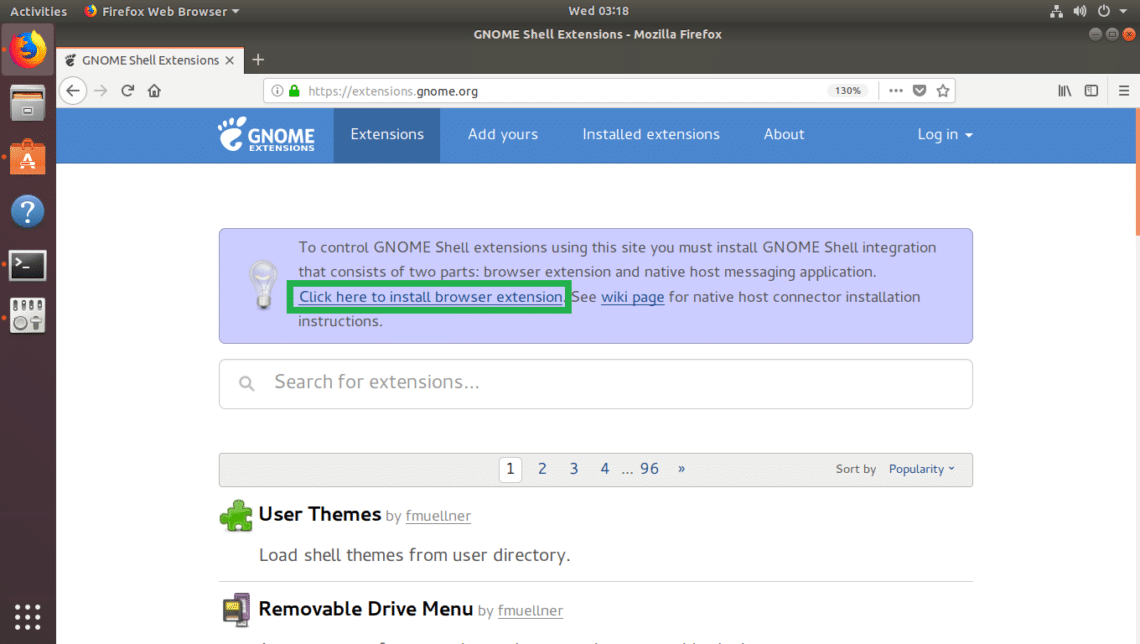
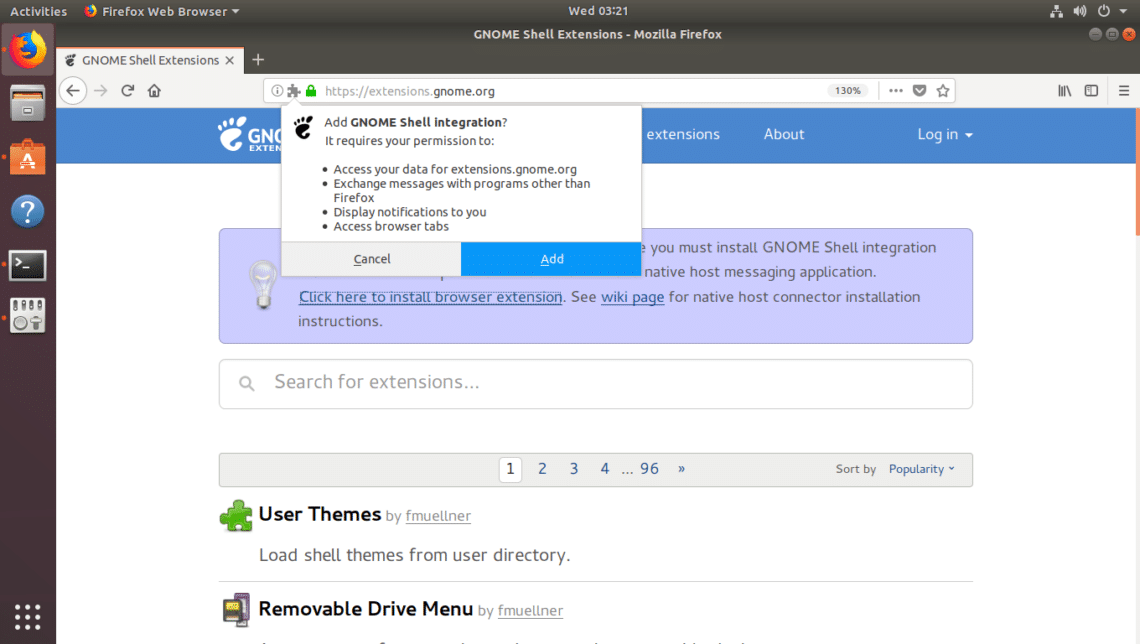
Once you visit the GNOME Extensions website, you should see the following page. Now click on the marked link to install GNOME Shell Integration Add-ons on your browser.
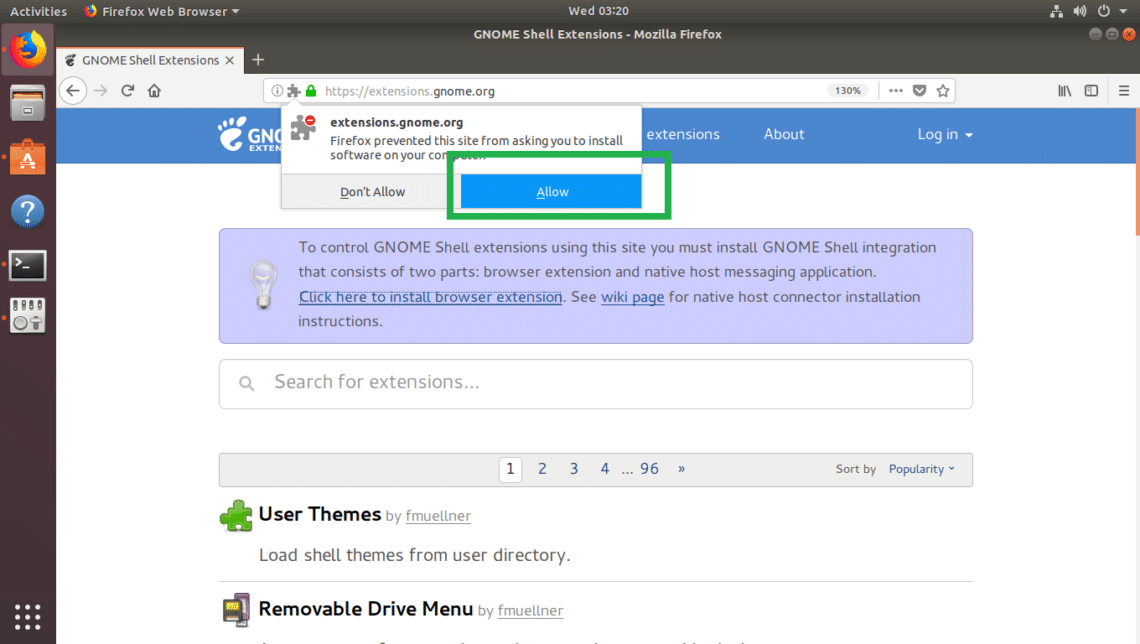
Now click on Allow.
Now click on Add.
GNOME Shell Integration Add-ons should be installed. Now click on OK.

If you refresh the page now, you may see the following error. It means we have to install native host connector for the GNOME Shell Integration to work.
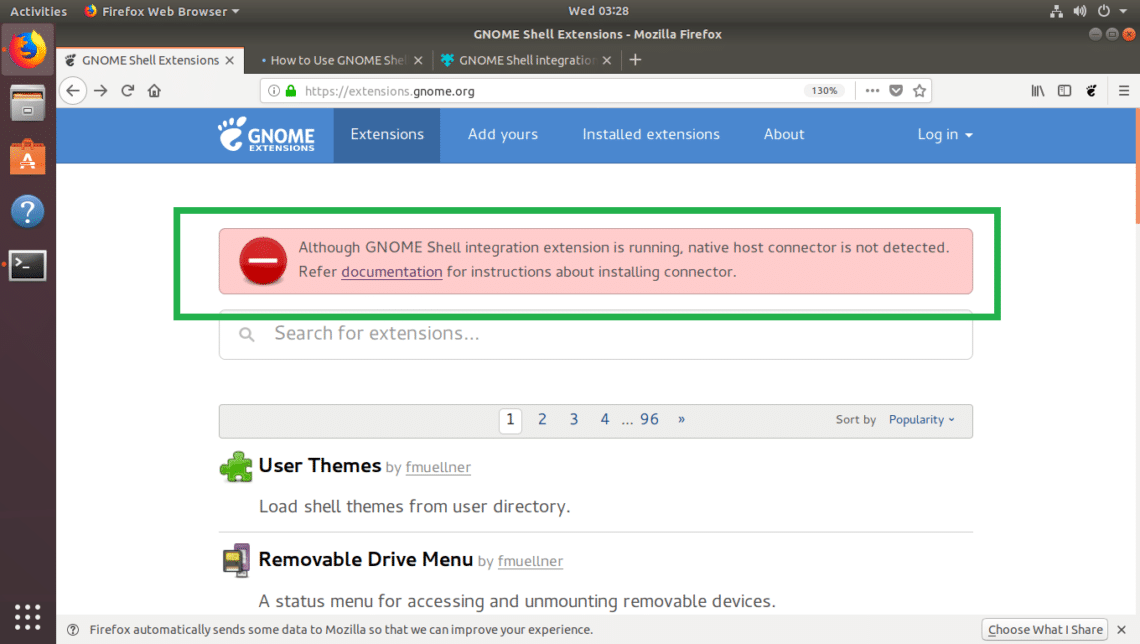
Now run the following command to install native host connector on Ubuntu 18.04 LTS:

It should be installed.

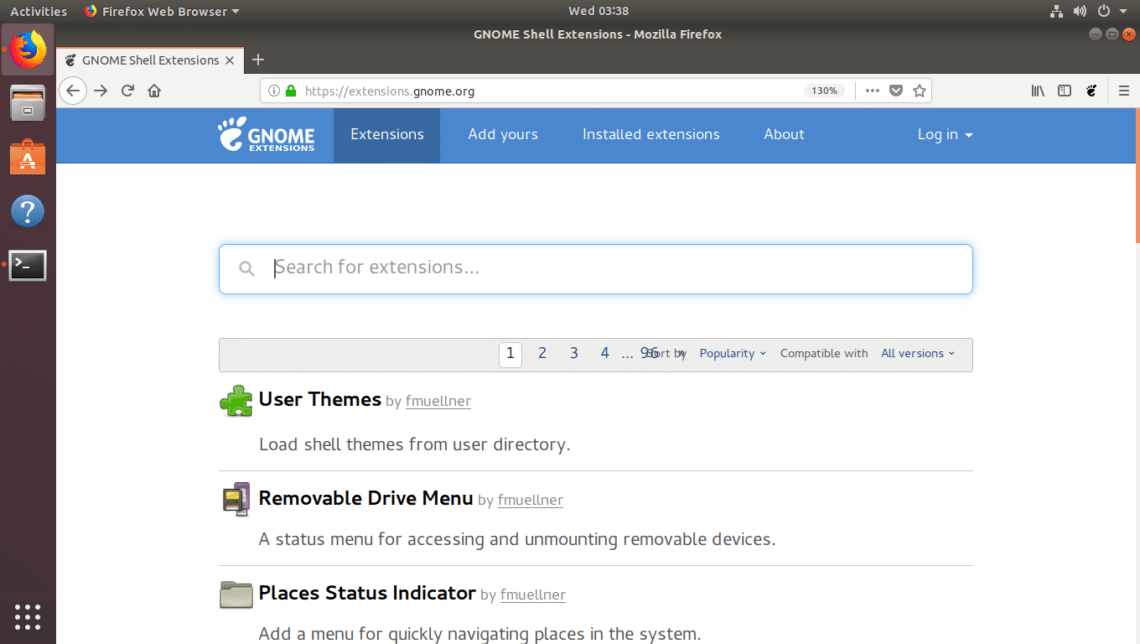
Now refresh the GNOME Extensions page and you should not see any more errors.
Installing GNOME Extensions using the Package Manager:
Some of the important GNOME extensions are available in the official package repository of Ubuntu 18.04 LTS.
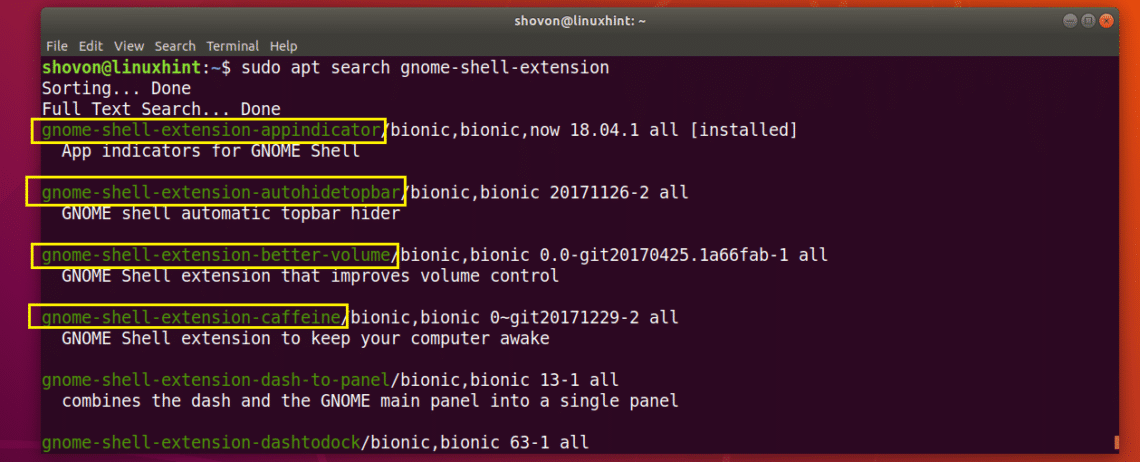
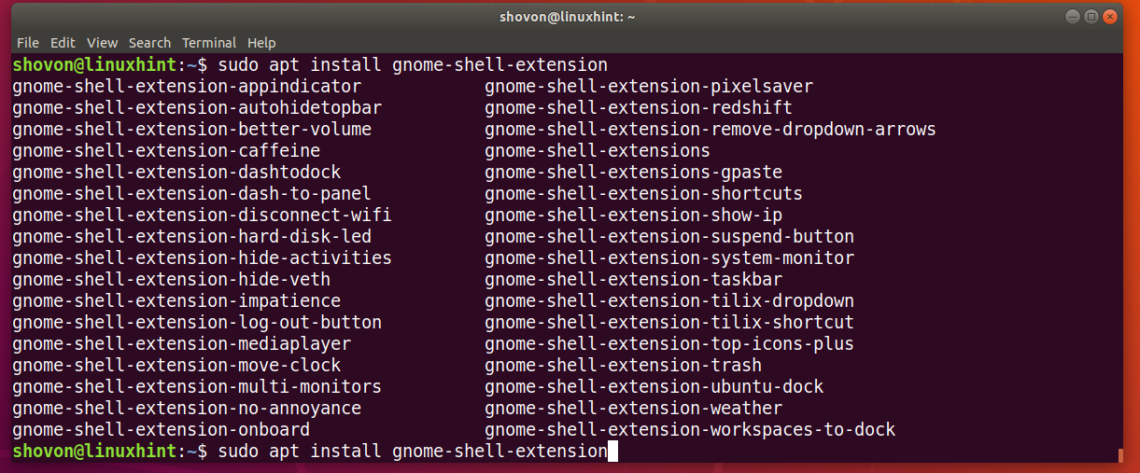
You can see a list of all the GNOME extensions available in the official package repository of Ubuntu with the following command:
All the GNOME shell extensions packages are listed. The green texts are the package name that you use to install with APT package manager.
You can also type in the following command and press <Tab> to see all the GNOME extension packages that you can install.
Let’s install gnome-shell-extension-dash-to-panel package, which is the Dash To Panel extension:

The extension should be installed.

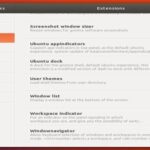
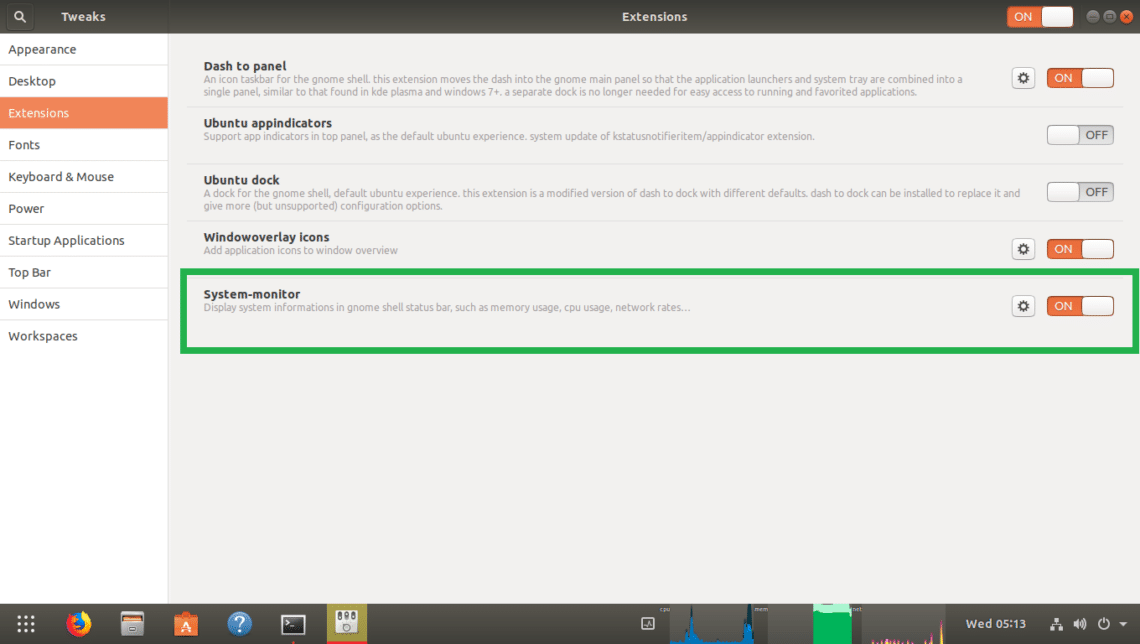
Now from GNOME Tweak Tool, go to Extensions tab and you should be able to find it. As you can see, I’ve already enabled it using the toggle button at the end as marked green in the screenshot below.
NOTE: At times, you need to restart your computer for the changes to take effect.
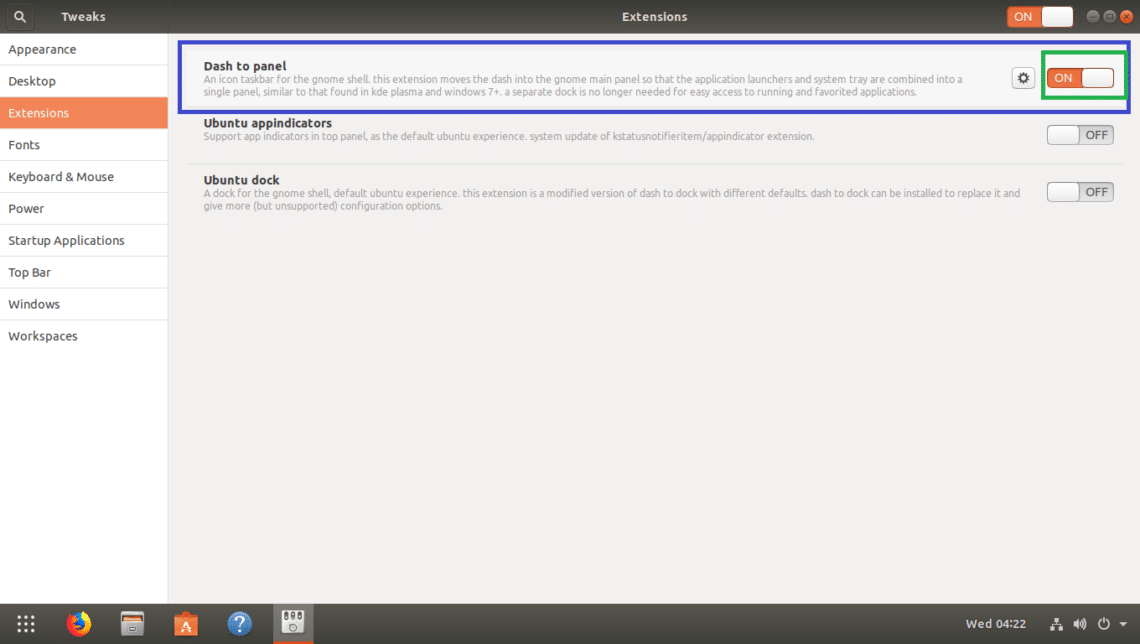
Some extensions can be configured. It the extension you installed can be configured, it should have a gear icon beside the toggle button as you can see.
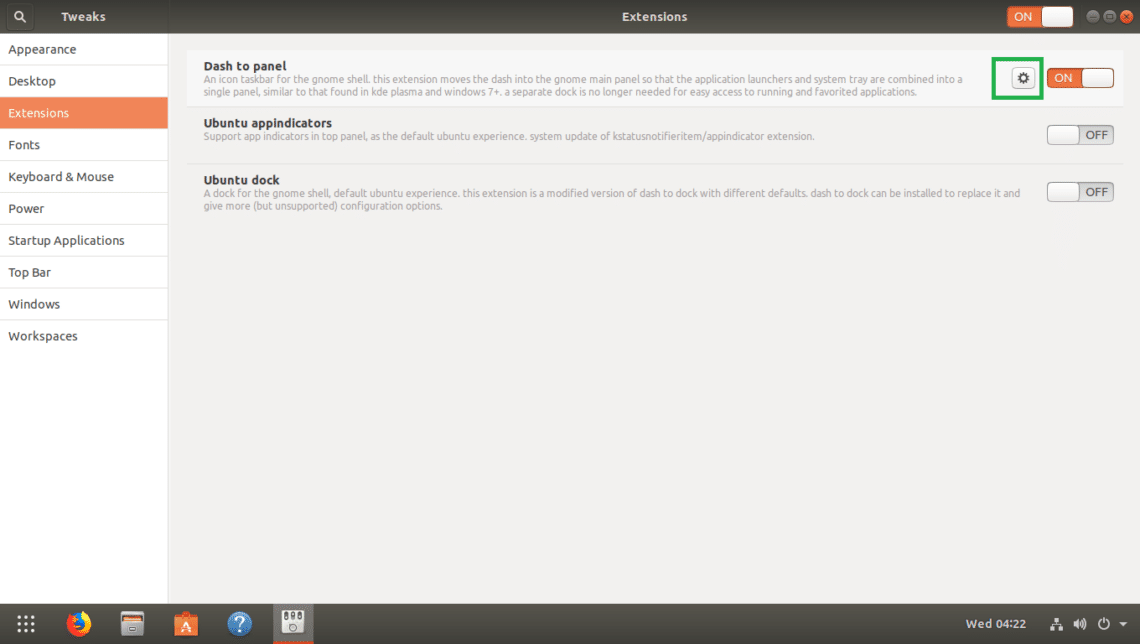
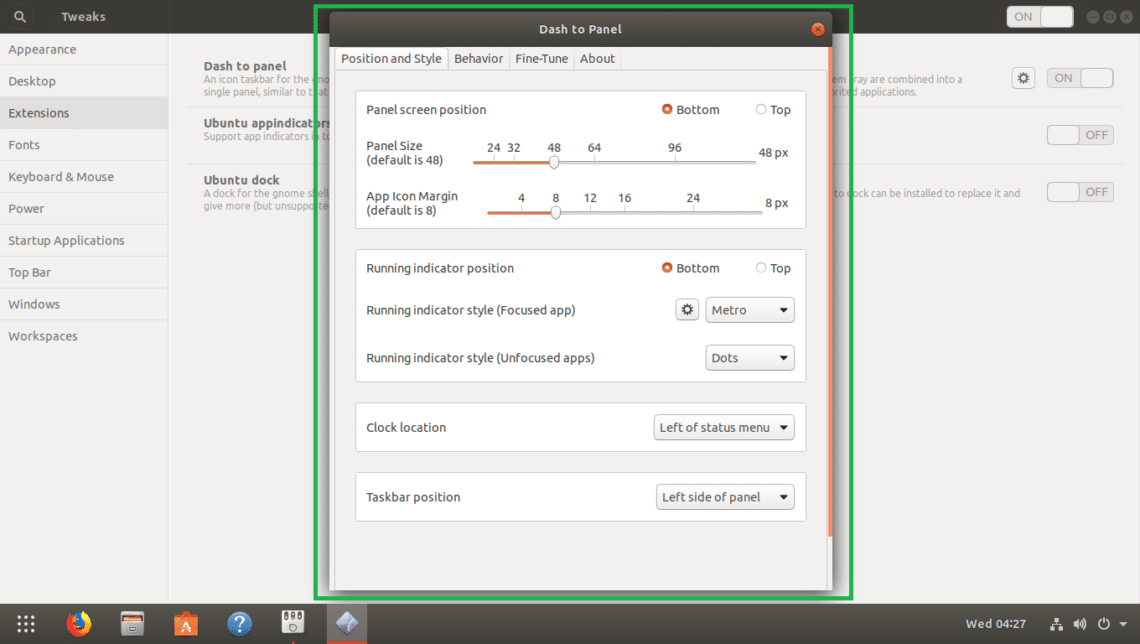
The Dash to Panel extension can be configured. As you can see, once I clicked on the gear icon, more options to configure the extension shows up.
Beautiful Dash to Panel extension:
Installing Extensions from the GNOME Extensions Website:
You can also install new extensions from the official GNOME extensions website.
First find out your GNOME Shell version with the following command:
As you can see, I am running GNOME Shell 3.28.1

Now find the extension that you want to install from https://extensions.gnome.org
Then go to the extensions page and you should see the following window.
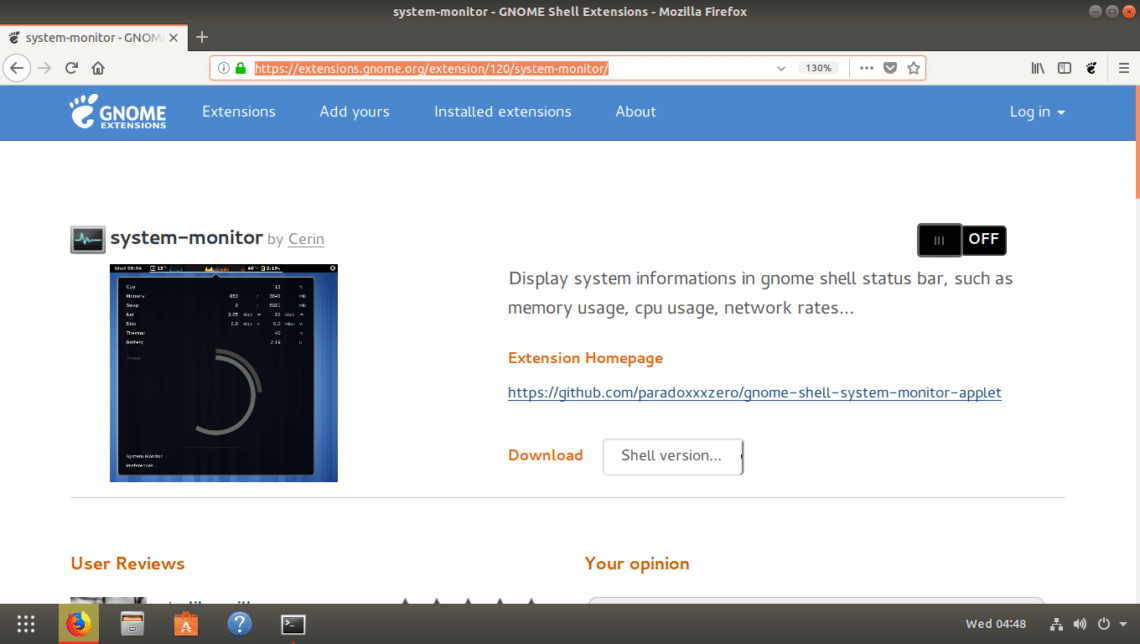
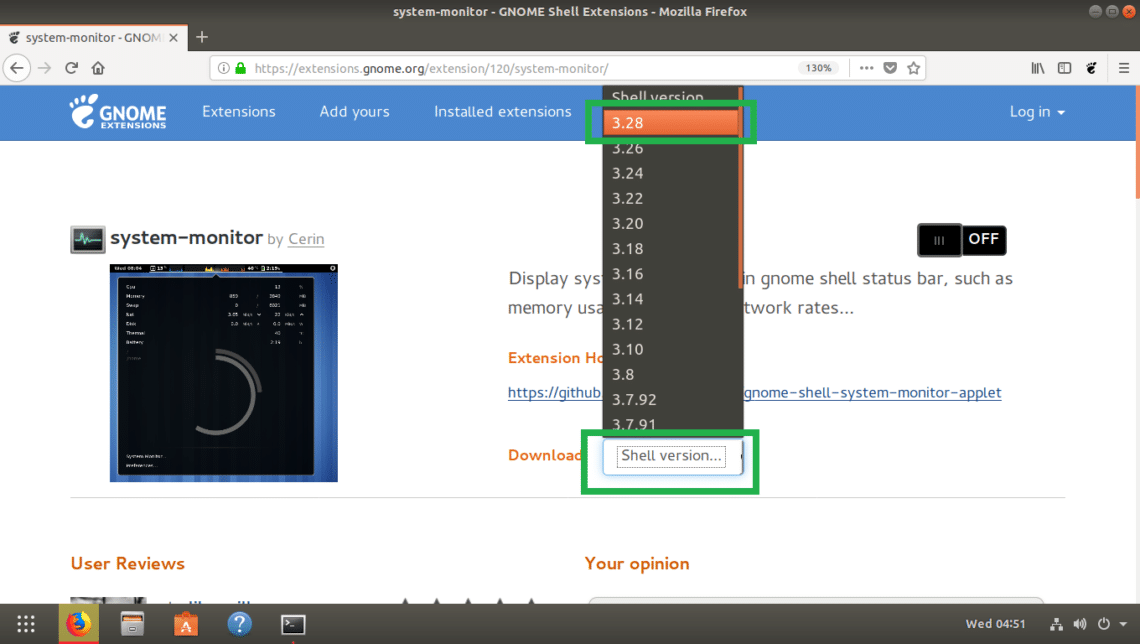
Now select your GNOME Shell version. In my case it’s 3.28.
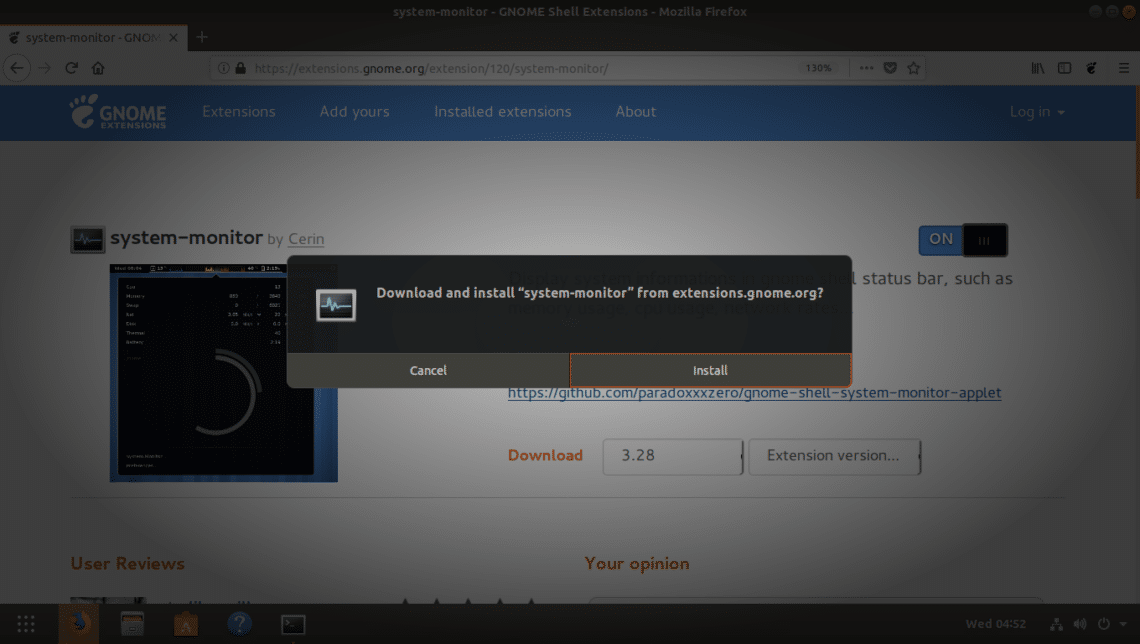
Now to install the extension, click on the marked toggle button.
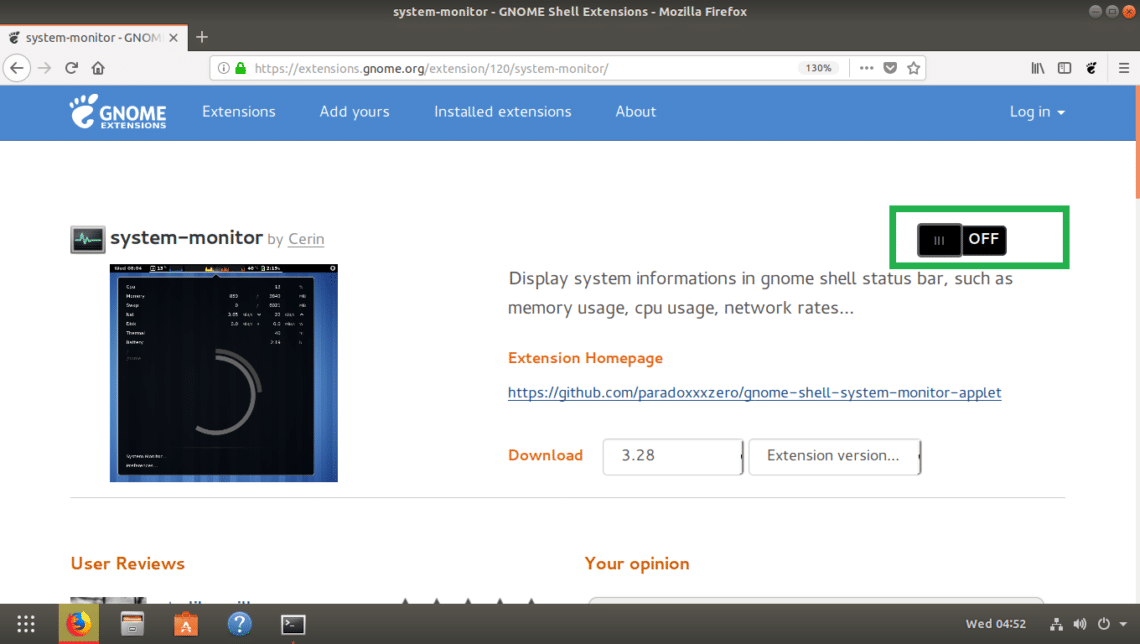
Now click on Install.
Most of the cases, the extension should be installed and activated. At times you may see errors as follows. Don’t freak out. It means, you need to install some other packages in order for the extension to work. Just install the package that it tells you to.
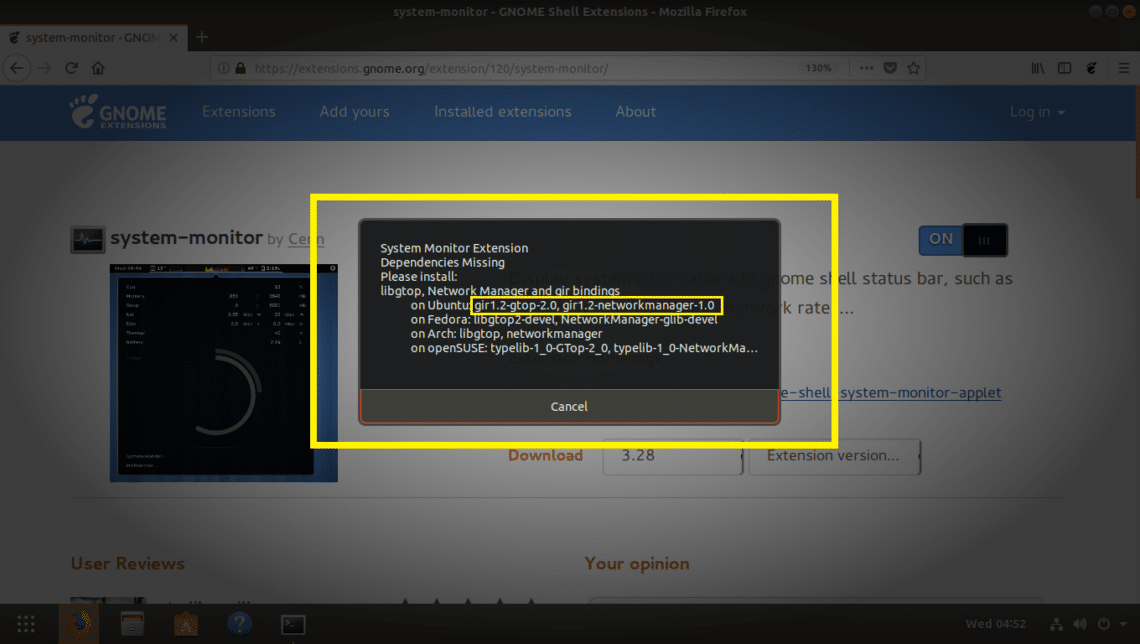
In my case, I had to run the following command:
The dependencies should be installed.
Now reboot your computer and try to install it again. It should work.
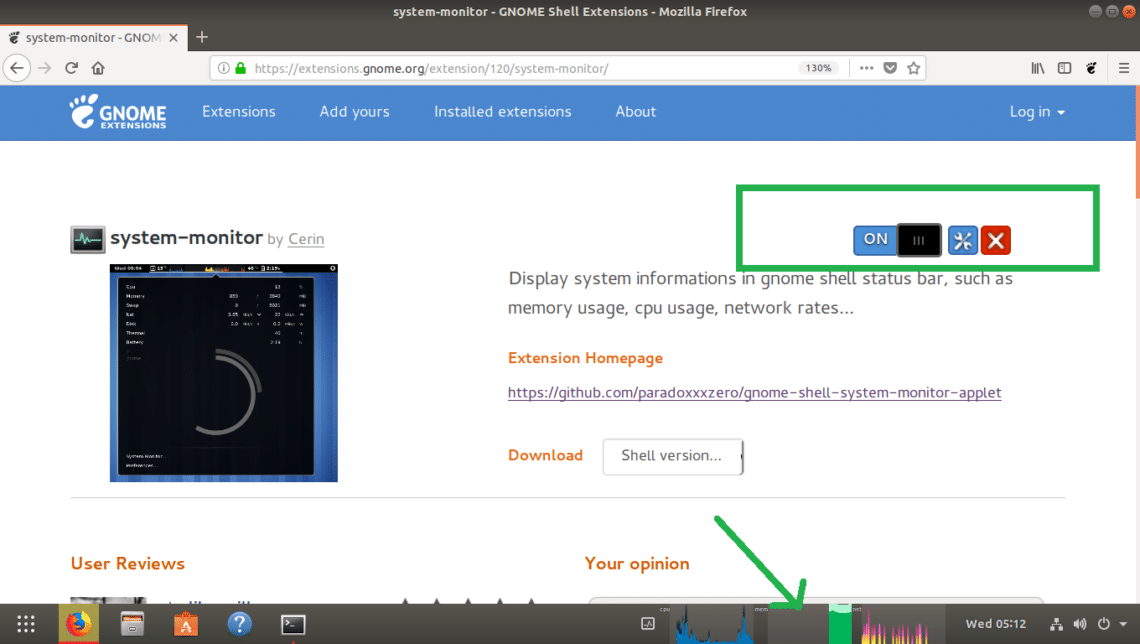
You can also manage the extension from GNOME Tweak Tool.
Conclusion:
You can install GNOME extensions from the official GNOME extensions website as well as from the official package repository of Ubuntu 18.04 LTS. But the question is, which one is better? I suggest you look for the extension you want to install in the official package repository of Ubuntu 18.04 LTS first. If you find the extension you’re looking for there, then install it using APT package manager. If you can’t find it there, then try GNOME extensions website.
If you install extensions from the official website using the APT package manager, then the dependencies of that extension will also be installed automatically. You won’t have to do anything manually. Also, you will be sure that it will work on your Ubuntu 18.04 LTS operating system.
I recommend you always try to install GNOME extensions from the official package repository of Ubuntu 18.04 LTS.