This is a howto tutorial on how to reset root password on Ubuntu 17.04 via Grub. Please note that its assumed that you have physical access to the machine in question, it cannot be done remotely. Before we proceed, lets take a quick look at what Grub is about.
What is GNU GRUB?
GNU GRUB as described here, is a Multiboot boot loader. It was derived from GRUB, the GRand Unified Bootloader, which was originally designed and implemented by Erich Stefan Boleyn.
Briefly, a boot loader is the first software program that runs when a computer starts. It is responsible for loading and transferring control to the operating system kernel software (such as the Hurd or Linux). The kernel, in turn, initializes the rest of the operating system (e.g. GNU).
Reset Root Password
- The first thing we need to do is reboot the Ubuntu 17.04 machine. While the system is rebooting, you need to press the SHIFT key on your keyboard immediately to take you to the GNU GRUB menu screen
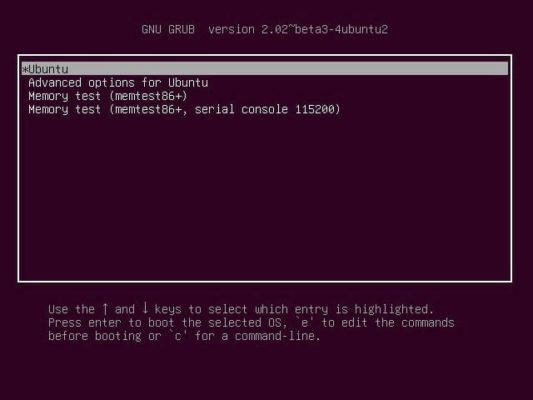
- Next select the default boot OS which in my case is Ubuntu and pess the “e” key to enter the edit screen
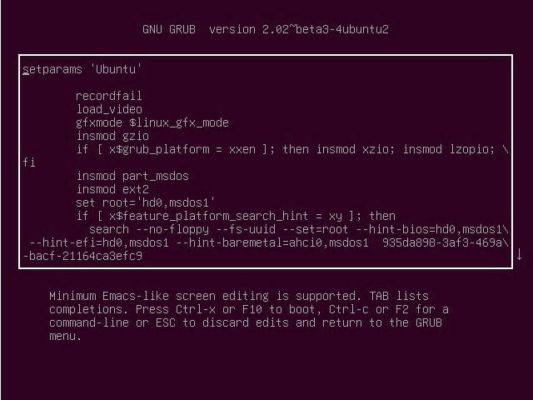
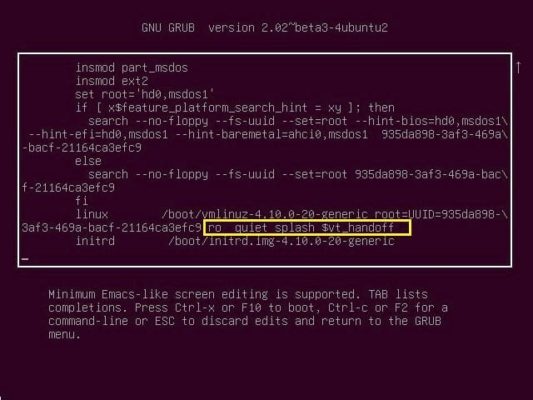
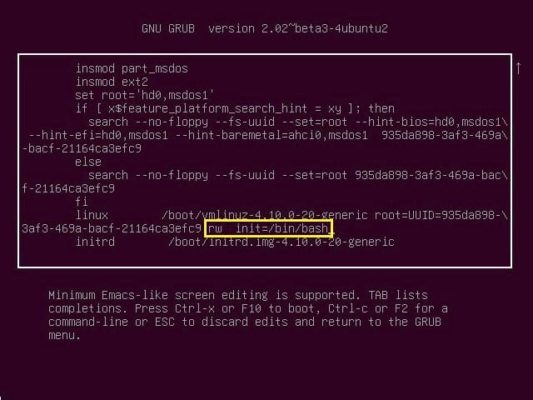
- On the GNU GRUB edit mode screen, use the arrow buttons and locate the line that starts with “linux”. Usually this would be towards the end of the screen. All you need to do is locate the section that reads “ro quiet splash $vt_handoff” and change it to “rw init=/bin/bash”. See the screenshots below before and after change
Before Change
linux              /boot/vmlinuz-4.10.0-20-generic root=UUID=935da898-
3af3-469a-bacf-21164ca3efc9  rw quiet splash $vt_handoff
After Change
linux              /boot/vmlinuz-4.10.0-20-generic root=UUID=935da898-
3af3-469a-bacf-21164ca3efc9  rw init=/bin/bash
- When done, press CTRL+x or F10 to reboot the system
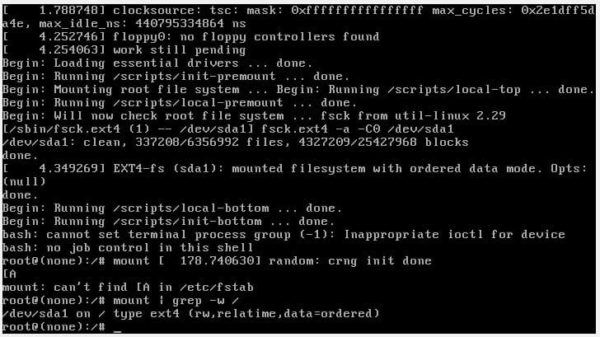
- The system will boot to a root shell command prompt screen. First lets check that your partition is in the read-write state by running the following command
root@(none):/# mount | grep -w /
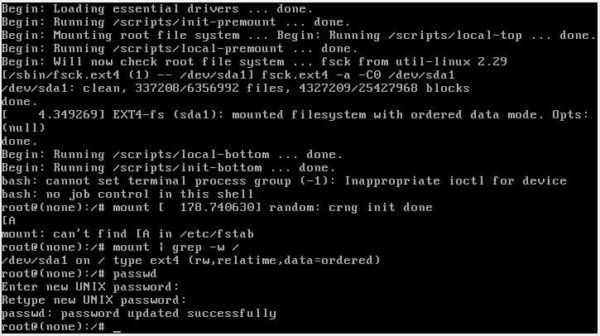
- To reset the root password, type “passwd” and follow the prompt to complete the change
- Now that the root password had been changed successfully, reboot your machine with following command
root@(none):/# exec /sbin/init
If you run into any change while carrying out this steps, please feel free to drop a comment of the challenge and we will do our our to provide a fix

