Setting Up Static IP from the GUI:
If you’re using a graphical desktop environment such as GNOME on your CentOS 7, then you can set up a static IP on CentOS 7 using the graphical user interface very easily.
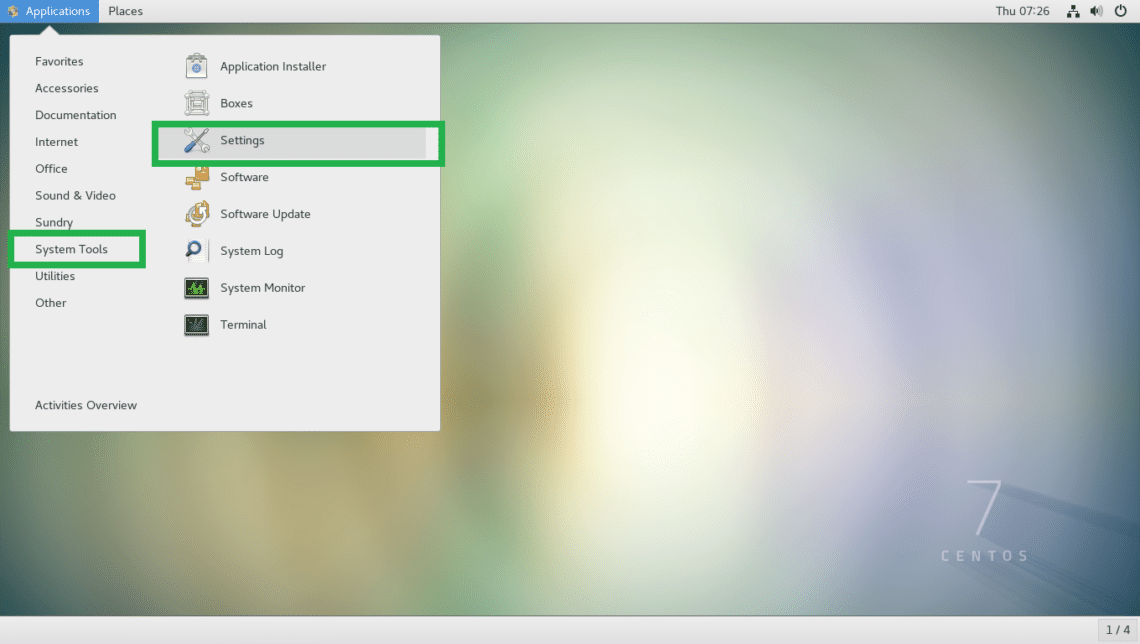
First you have to go to the Settings. You can find the Settings app in the System Tools section of the Applications menu as marked in the screenshot below.
You can also go to the Settings from the system menu as you can see in the marked section of the screenshot below.

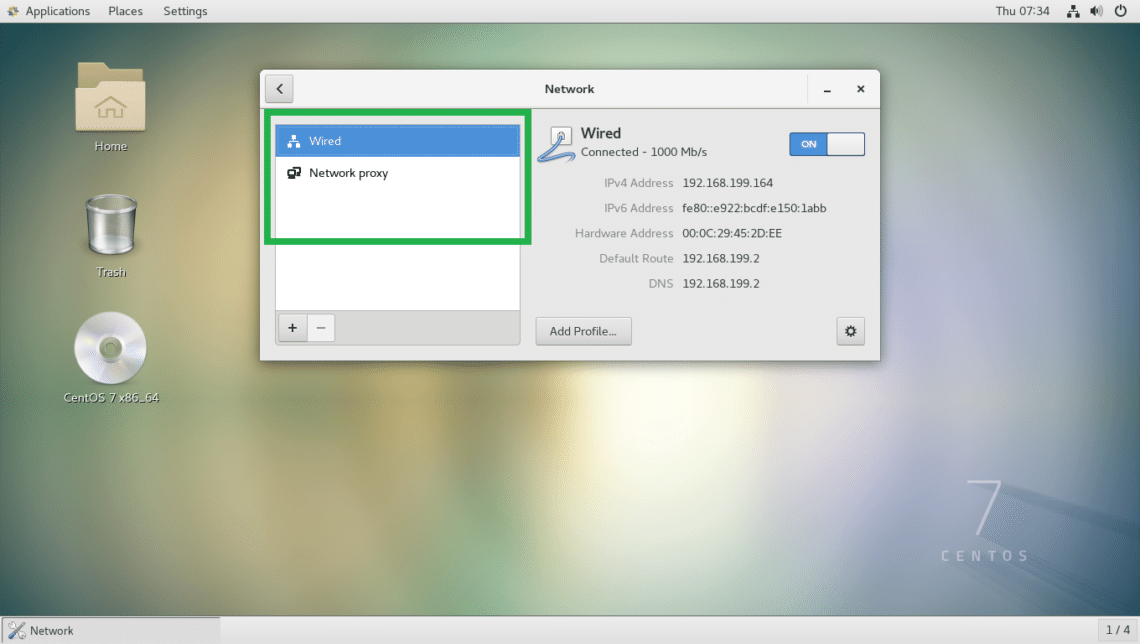
Now click on Network as marked in the screenshot below.

You should be able to find all the network connections in the left side of the Network settings app as marked in the screenshot below.
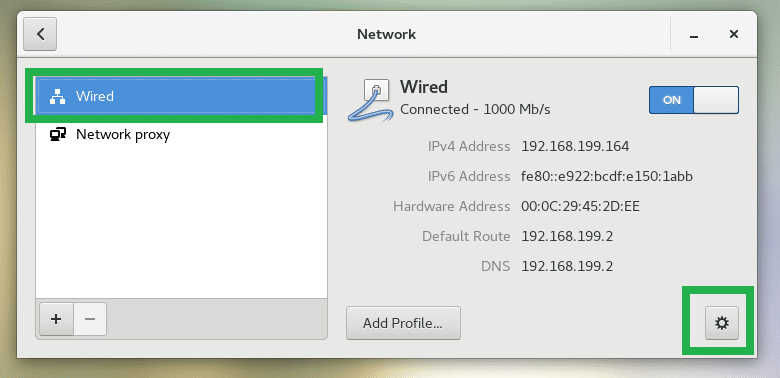
Now select a connection and click on the gear icon as marked in the screenshot below. In my case, I selected the Wired connection.
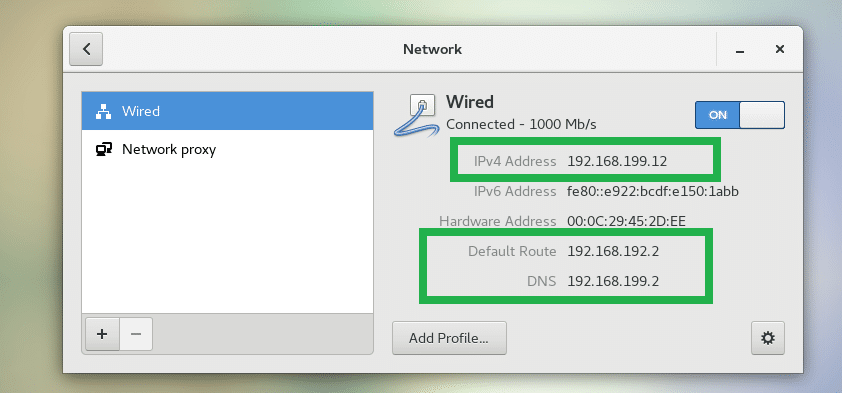
You should see the following window. On the Details tab, all the information about your current network configuration is displayed.
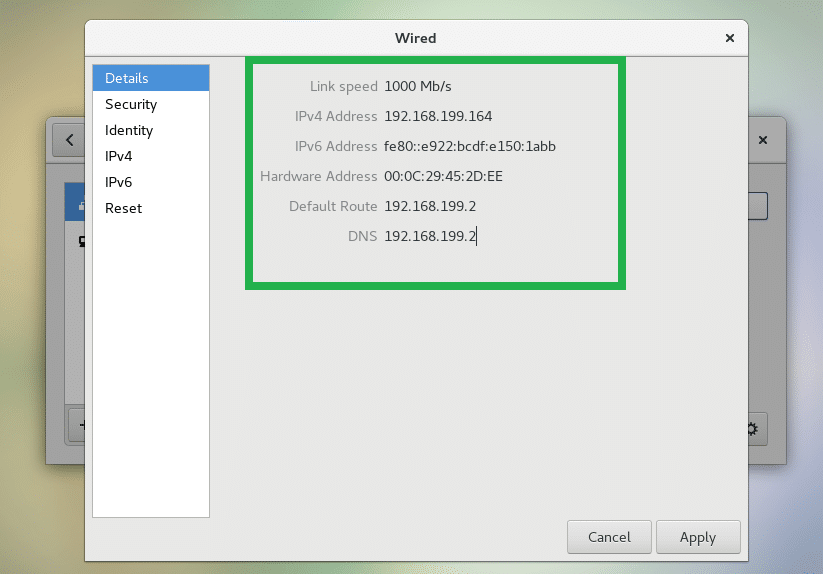
If you want to set a static IPv4 address, go to the IPv4 tab. If you want to set static IPv6 address, you can go to the IPv6 tab. I will set up a static IPv4 address, but the procedures are the same for the IPv6 address.
As you can see, I have Addresses set to Automatic (DHCP), which means DHCP is enabled on this connection.
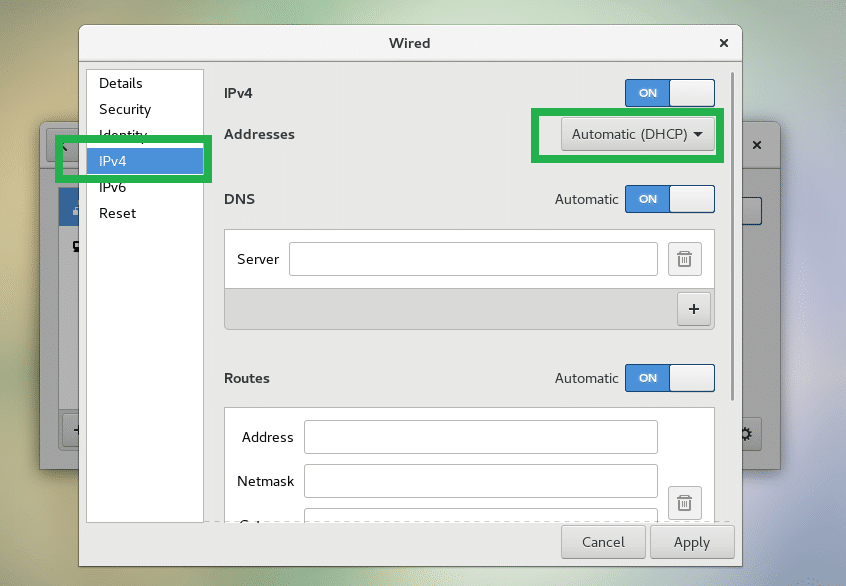
Now from the Addresses drop down menu, set it to Manual.
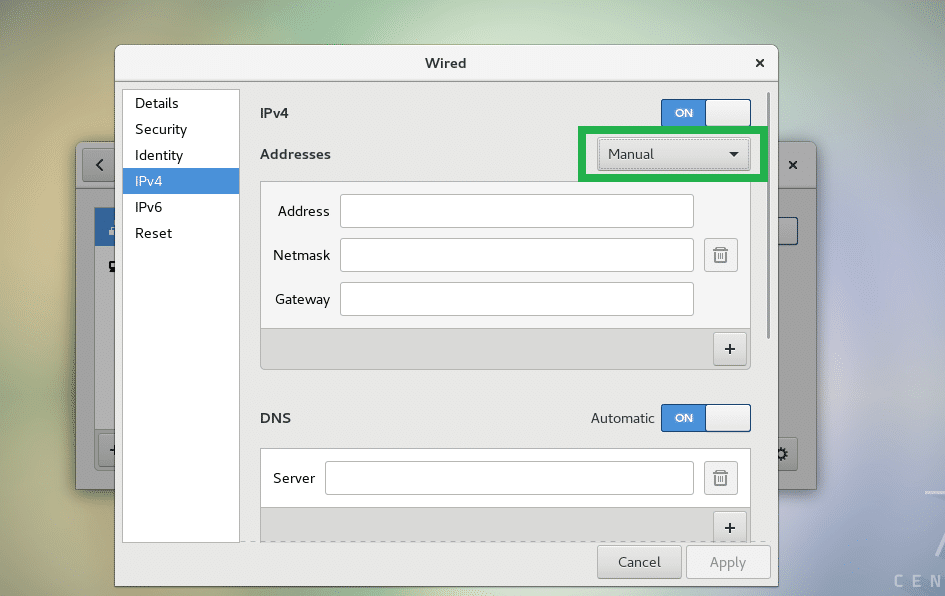
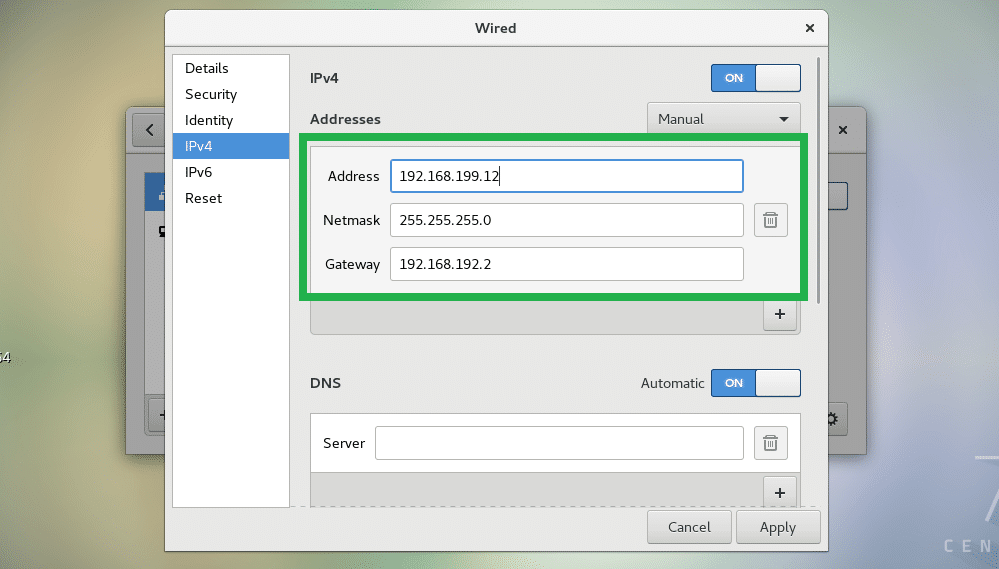
Now fill in the Address, Netmask and Gateway fields as you see fit.
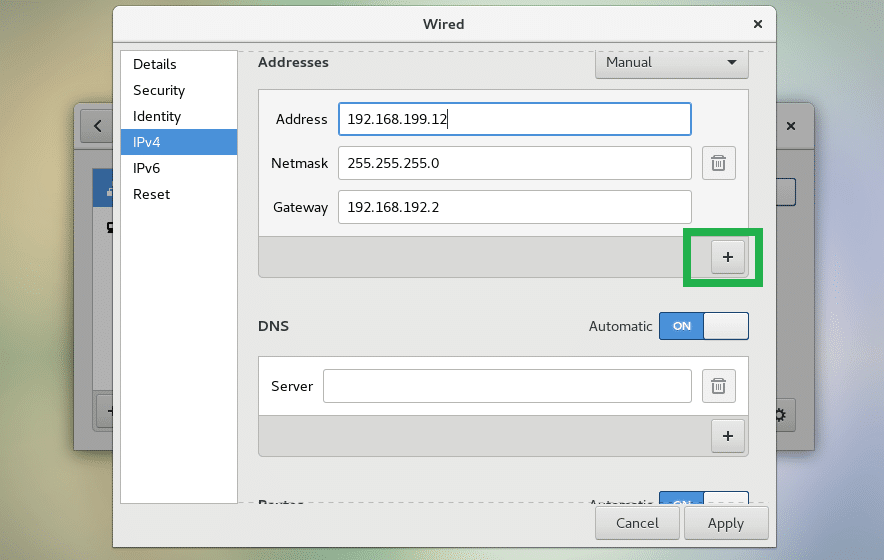
If you want, you can add multiple IP address to the same connection. Just click on the + icon as marked in the screenshot below and type in the new IP address.
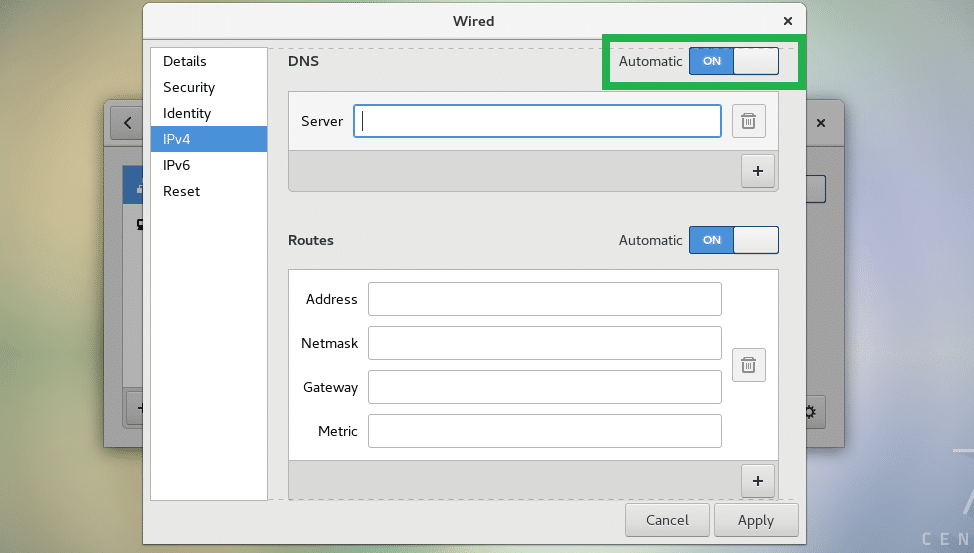
Now click on the marked toggle button to disable automatic DNS. If you’re setting up a static IP, you should also specify your DNS server address manually.
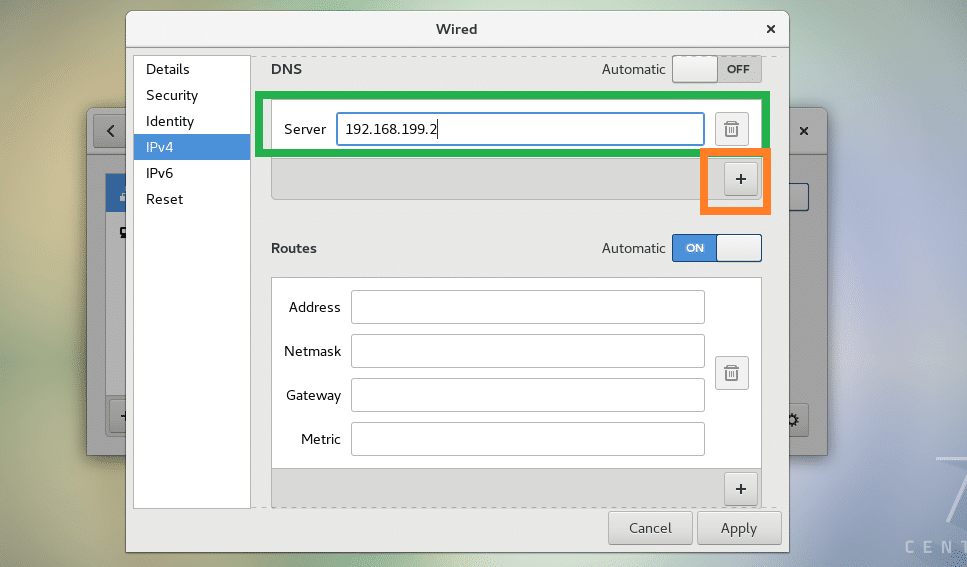
Now type in your DNS server address. You can add multiple DNS server addresses if you want. Just click on the + icon as marked in the screenshot below and type in any additional DNS server address you need.
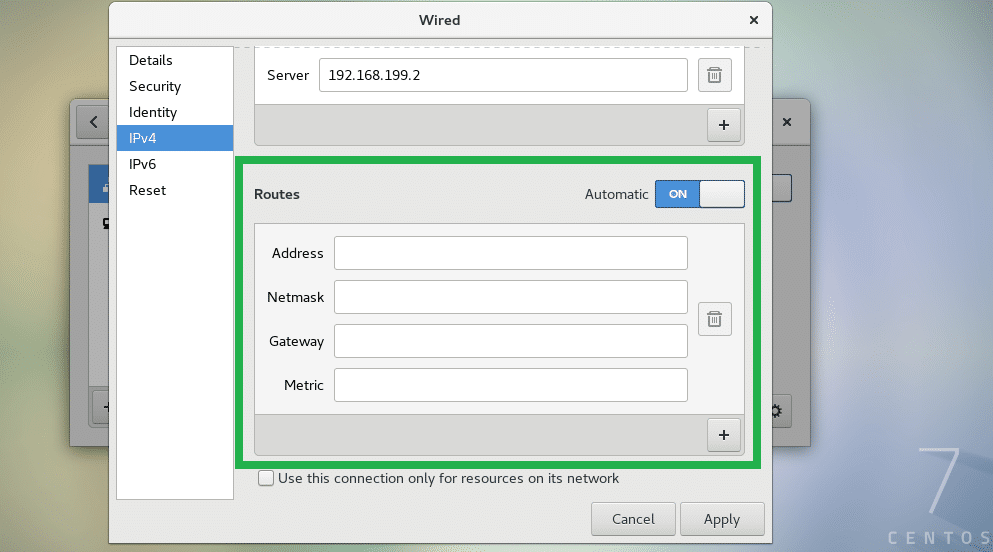
You can also do routing configuration if you need. I am not going to do that now as I don’t have routing information to enter.
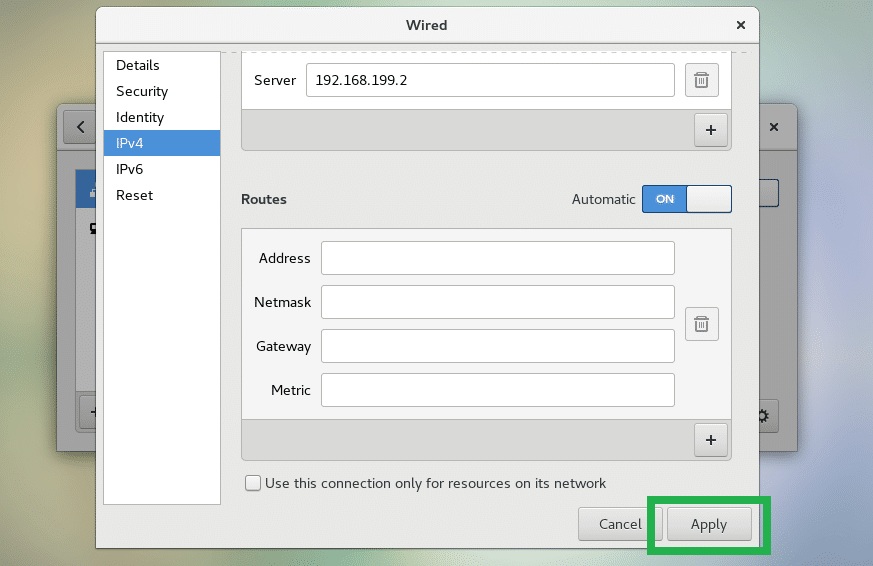
Once you’re done, click on Apply.
Now disconnect your network adapter and reconnect it and it should have a static IP assigned as you can see in the screenshot below.
Setting Up Static IP from the Command Line:
nmtui or NetworkManager Text User Interface is used to set up static IP from the command line easily. nmtui may not be installed by default on CentOS 7. But you can easily install it from the official package repository of CentOS 7.
First update the YUM package repository cache with the following command:

Now run the following command to install nmtui:

Press y and then press <Enter> to continue.

nmtui should be installed.

Now run nmtui with the following command:

nmtui should start. Now select Edit a connection and press <Enter>.
NOTE: Here you press <Tab> to navigate.

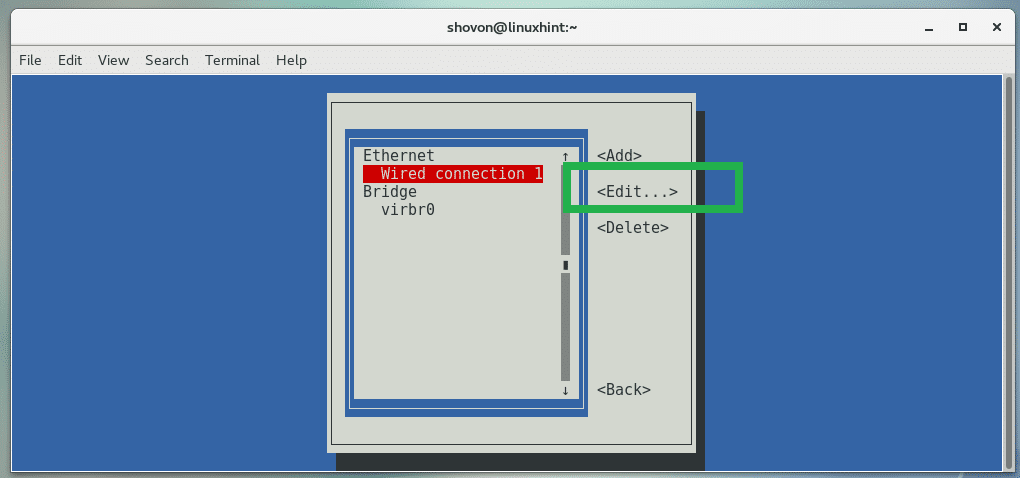
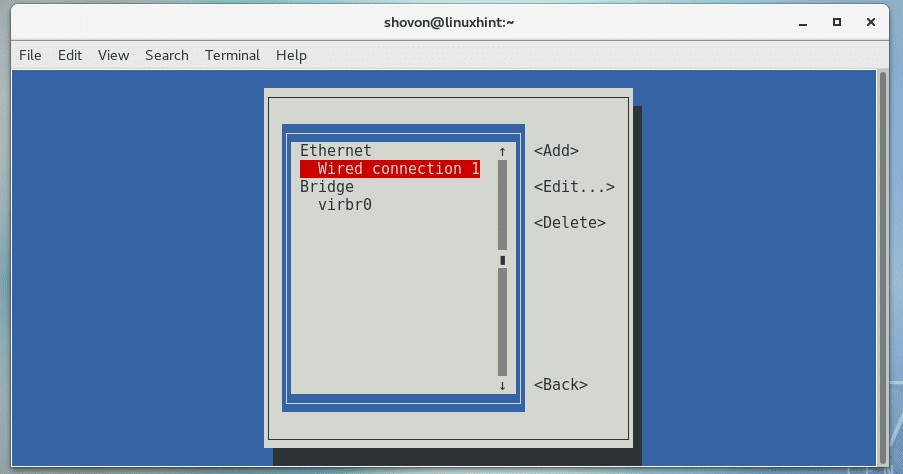
You should see the following window. All your connections should be listed here. To set static IP for a connection, select it and navigate to <Edit…> and then press <Enter>. I am going to set static IP for the Wired connection 1 connection.
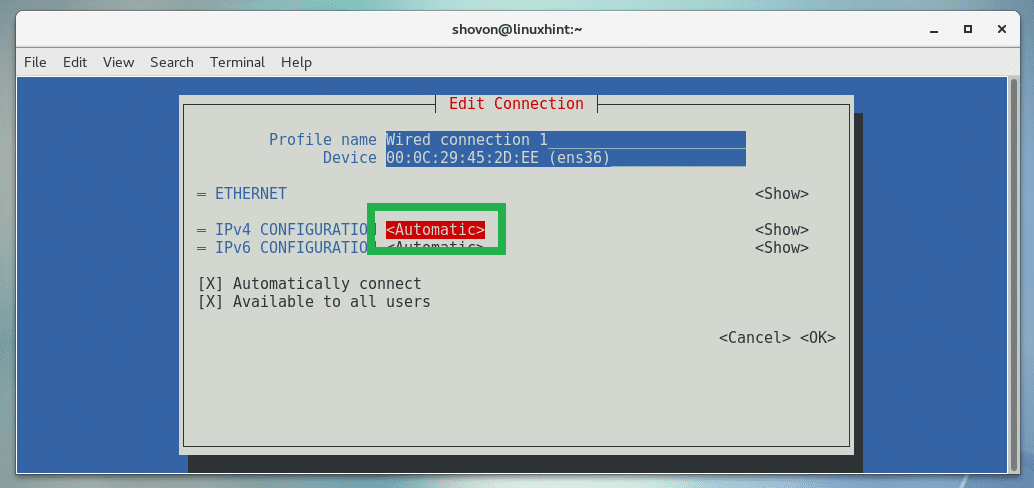
You should see the following window. From here you can set static IPv4 and IPv6 address. I am going to show you how to configure IPv4 static IP address. The IPv6 configuration is similar.

Go to IPv4 configuration’s <Automatic>, and press <Enter>.
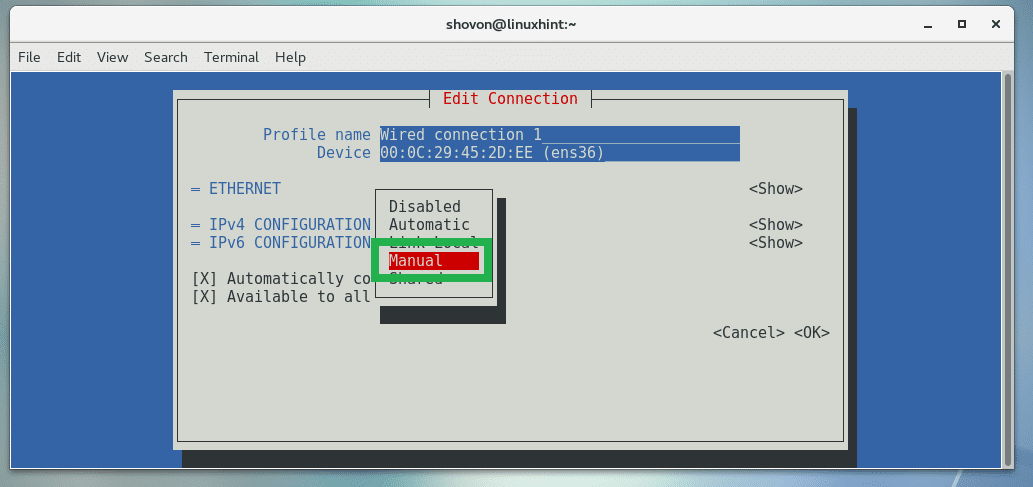
Now select Manual from the dropdown menu and press <Enter>.
Now go to <Show> and press <Enter>.

A lot of options should show up.
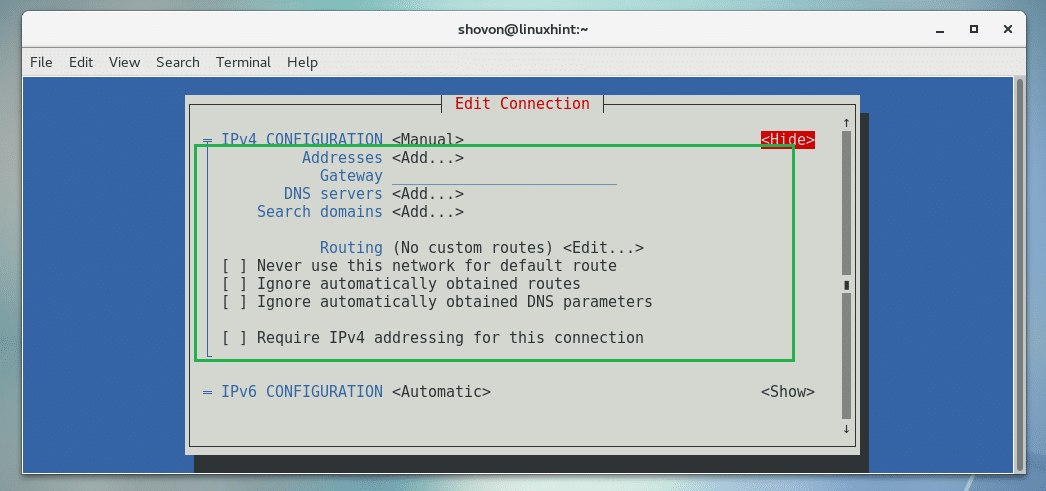
Now to add an IP address, go to Address <Add…> and press <Enter>.
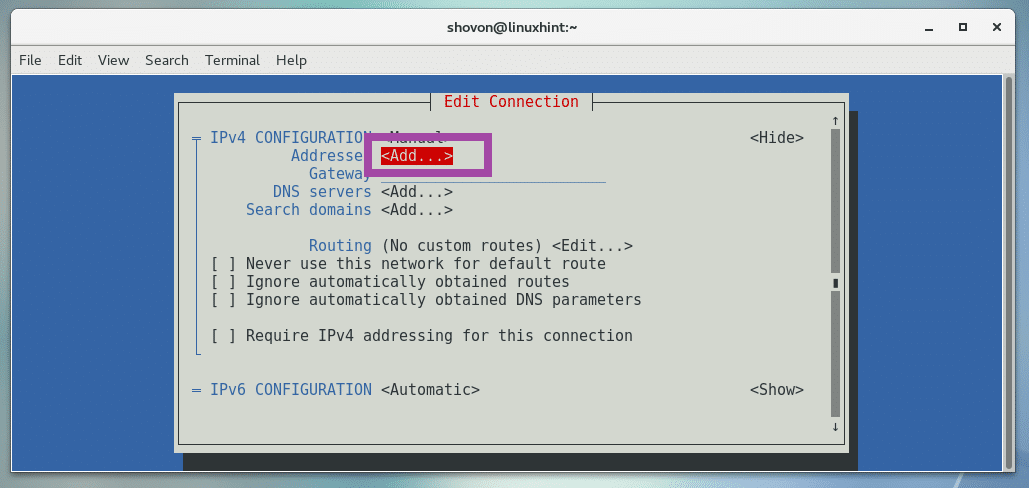
Now you can type in your IP address here.
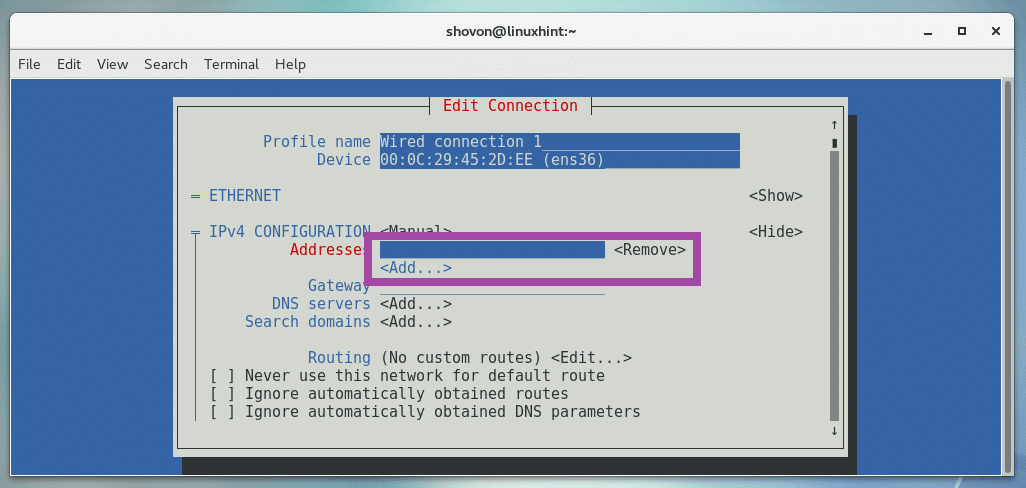
The same way, add the other information such as Gateway, DNS servers and so on.
NOTE: 192.168.199.15/24 is the CIDR notation of IP address. It means the IP address has a 24-bit subnet mask, which is 255.255.255.0

Once you’re done, scroll down to <OK> and press <Enter>.

The changes should be saved. Now press <Esc>.
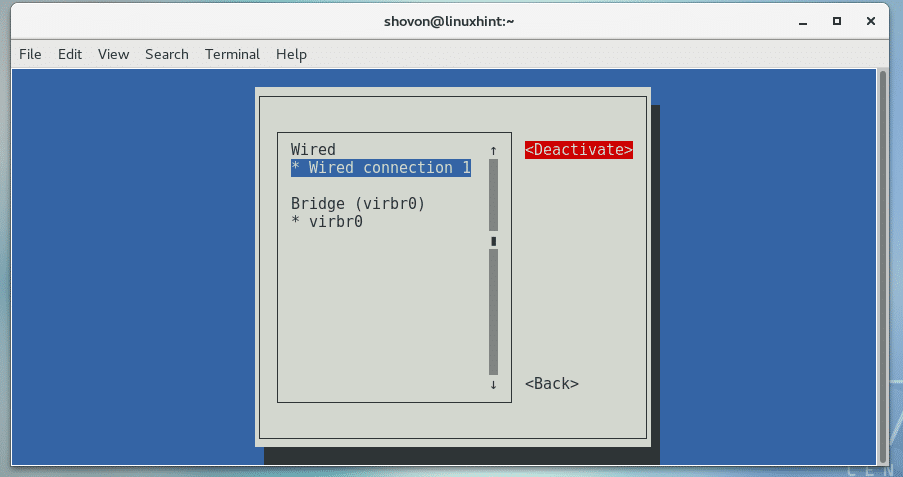
Now go to Activate a connection.

Now from here, select your connection and select <Deactivate> and press <Enter> to deactivate the connection.
Press <Enter> again.
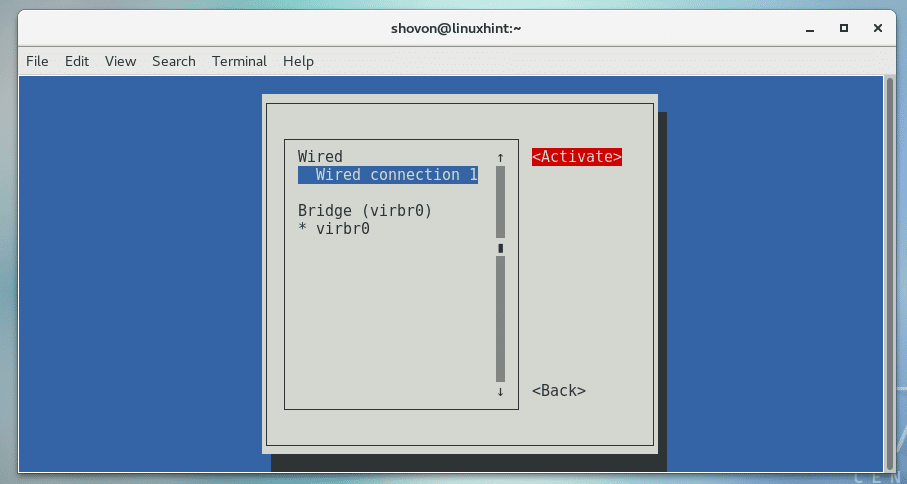
The connection should be activated.
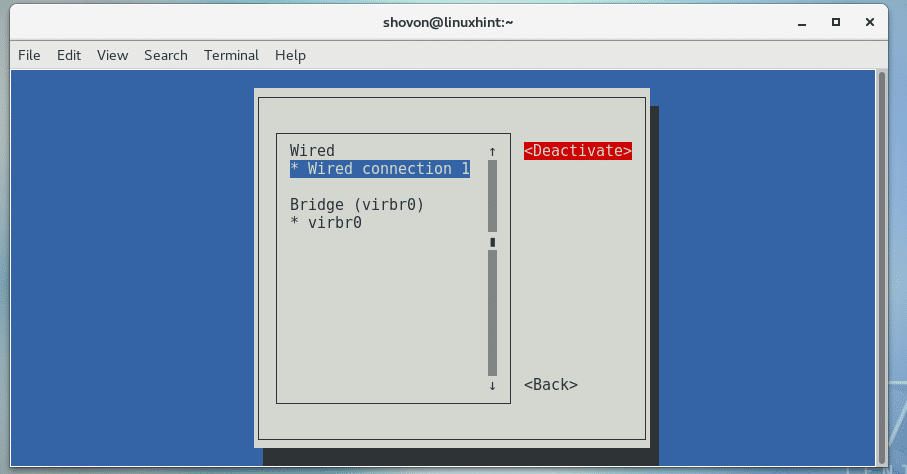
Now press <Esc> twice to go back to the terminal and run the following command:
As you can see, the IP address is changed.

That’s how you setup a static IP address on CentOS 7. Thanks for reading this article.