How to Install Oracle JDK 10 on Ubuntu 18.04
Oracle JDK is used by Java developers to develop and test Java programs. It is a must have tool for Java developers and is widely used. Oracle JDK 10 just recently came out. In this article, I will show you how to install Oracle JDK 10 on Ubuntu 18.04 Bionic Beaver. Let’s get started.
Downloading Oracle JDK 10
In this section I will show you how to download Oracle JDK 10 from the official website.
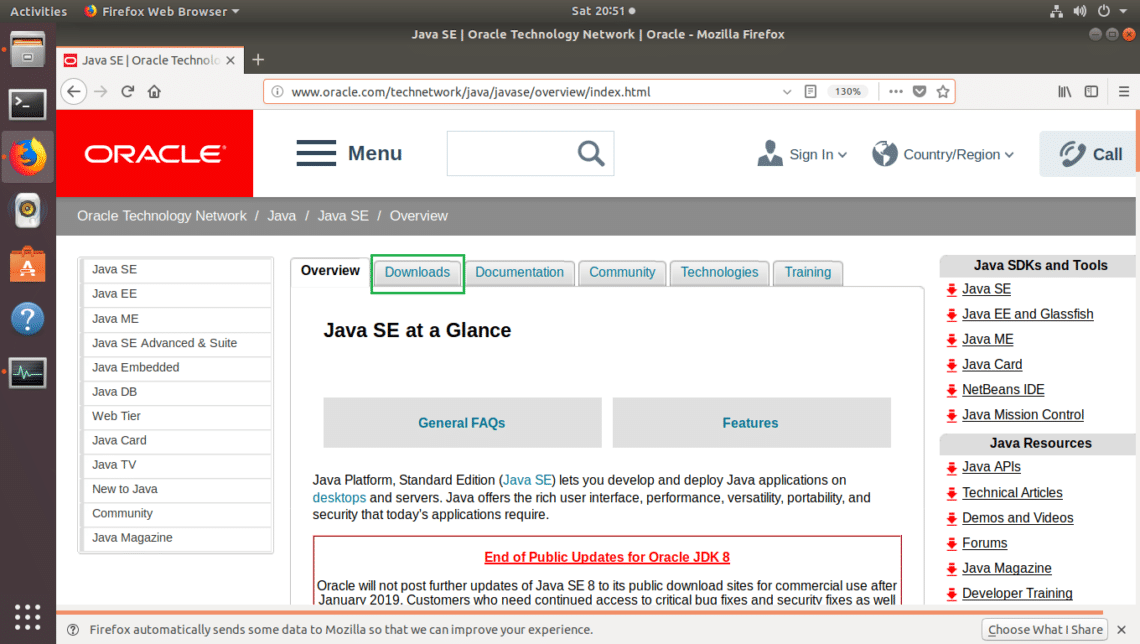
First go to the official website of Java SE at http://www.oracle.com/technetwork/java/javase/overview/index.html and you should see the following page.
Now click on the Downloads button as marked in the screenshot below.
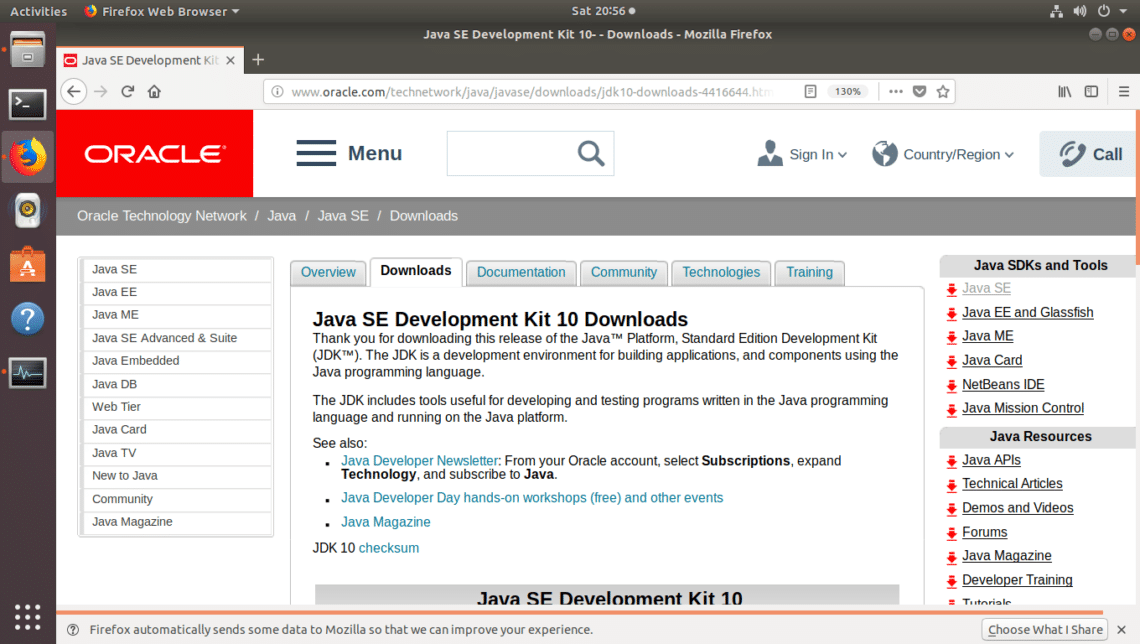
You should see the following page. Now click on Java Platform (JDK) 10 button as marked in the screenshot below.

You should see the following page.
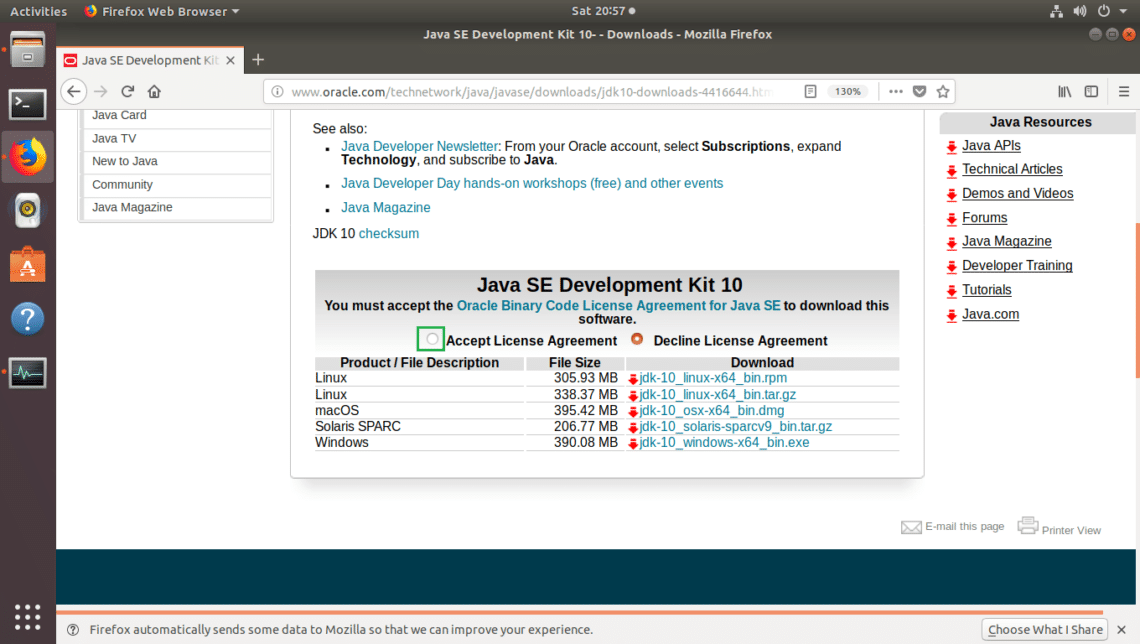
Now scroll down a little bit to the Java SE Development Kit 10 section as shown in the screenshot below. In order to download Oracle JDK 10, you must accept the license agreement. To do that click on the marked radio button labeled Accept License Agreement.
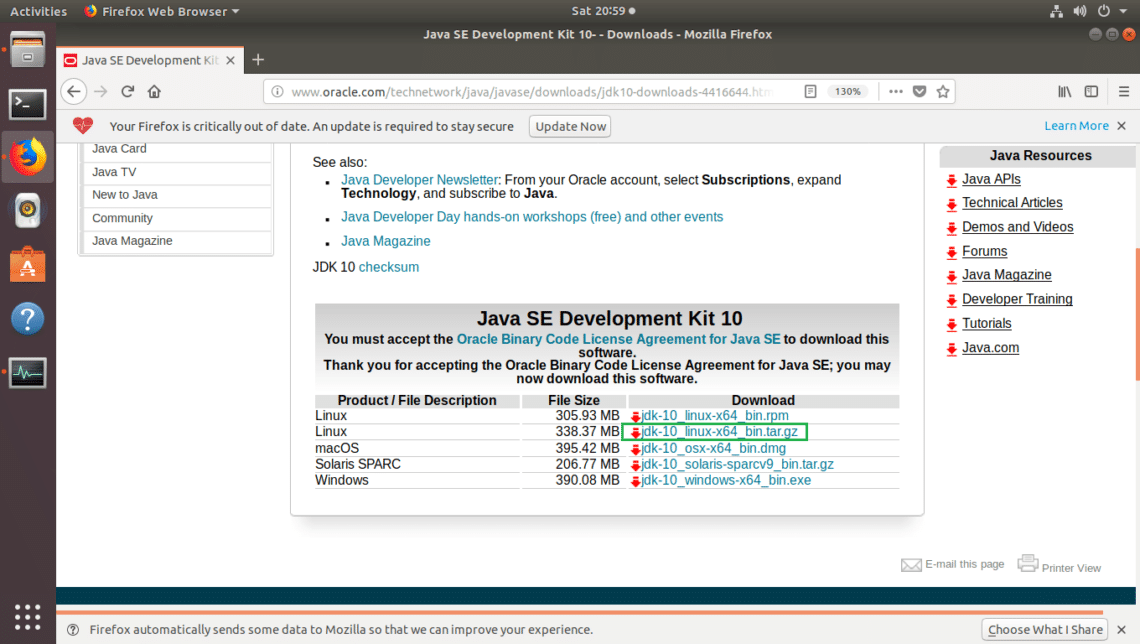
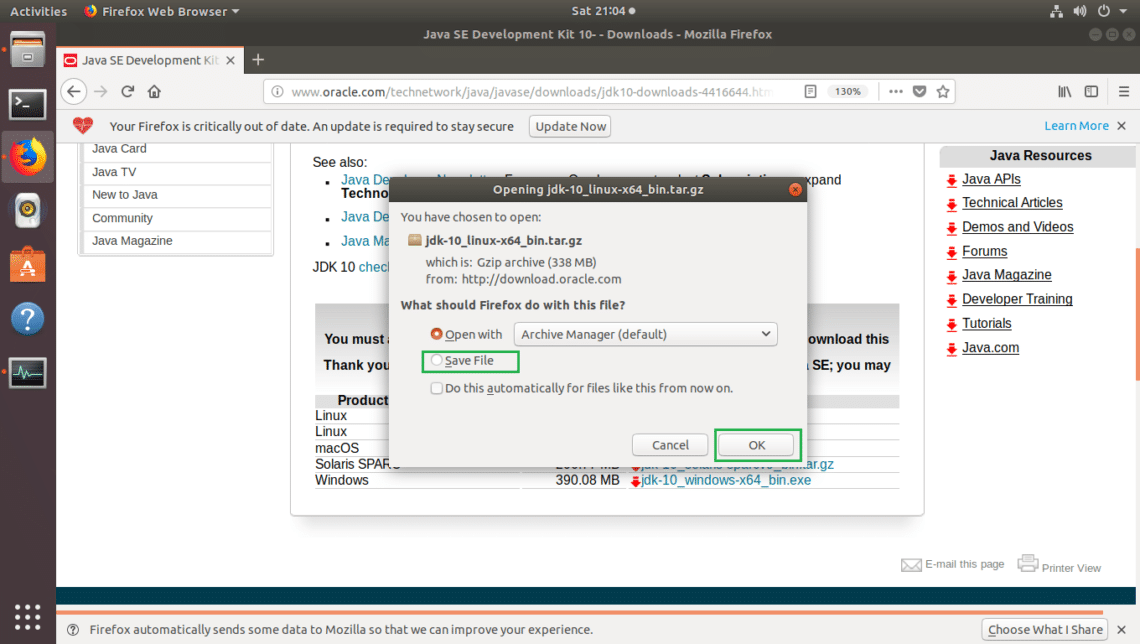
Now click on the file that has Linux as Product/File Description and ends in .tar.gz as marked in the screenshot below.
Your browser should prompt you to save the file. Click on Save File and then click on OK.
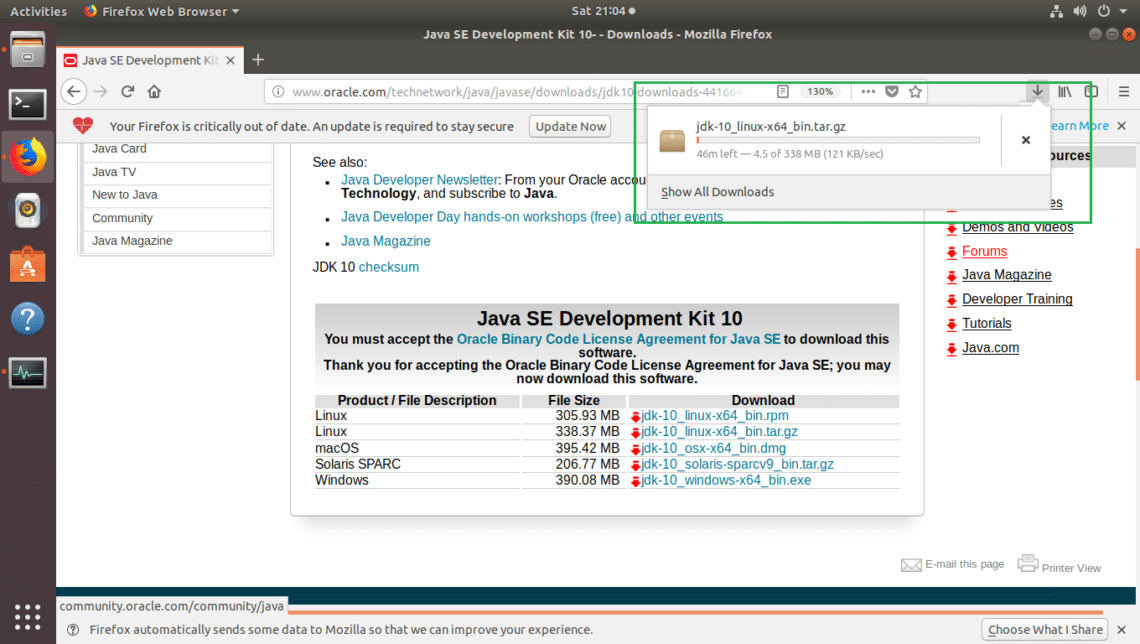
JDK should start downloading as you can see in the screenshot below.
Installing Oracle JDK 10
In this section, I will show you how to install Oracle JDK 10 on Ubuntu 18.04 LTS.
Once the Oracle JDK .tar.gz archive is downloaded, navigate to your browsers Downloads/ directory. In my case, it is in the Downloads/ directory in my user’s HOME directory.

Now if you list the directory contents with ls -lh command, you should see the file you just downloaded as marked in the screenshot below.

Now you have to extract the .tar.gz archive to your desired directory. I will extract it in the /opt directory. You can choose another directory.
Extract the Oracle JDK 10 archive with the following command:
NOTE: In my case, INSTALL_DIR is /opt

The Oracle JDK 10 archive should be extracted.
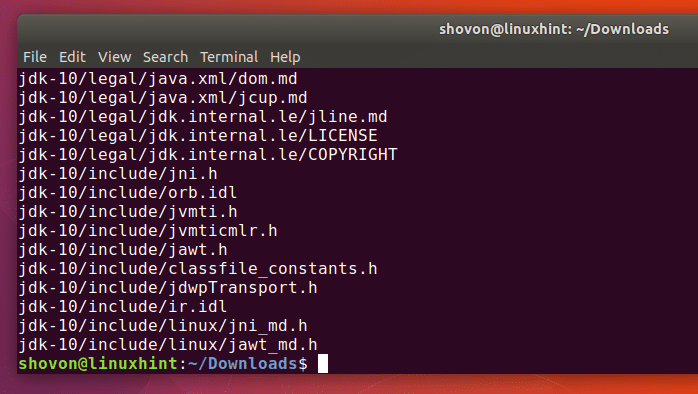
Now if you list the contents of the INSTALL_DIR directory, you should see jdk-10 directory as marked in the screenshot below.

Now you have to add Oracle JDK 10 to your PATH environment variable. Otherwise you will have to specify the full path when you run the Oracle JDK 10 commands.
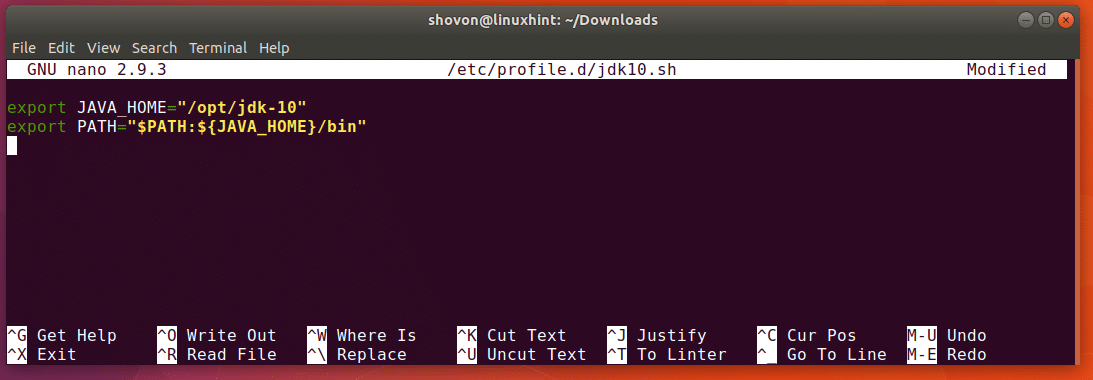
To add Oracle JDK 10 to your PATH environment variable, create a new file jdk10.sh in /etc/profile.d with the following command:

You should see the following window.
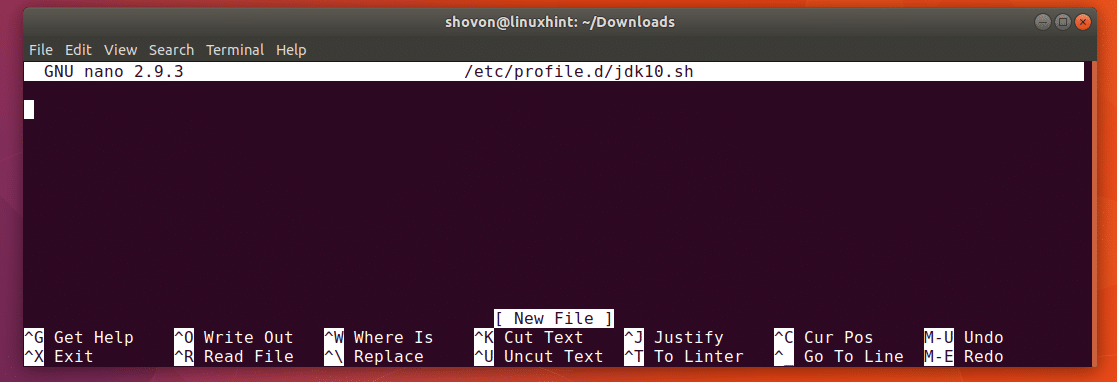
Now add the following lines to jdk10.sh file.
export PATH="$PATH:${JAVA_HOME}/bin"
NOTE: Don’t forget to change INSTALL_DIR. In my case, the INSTALL_DIR is /opt
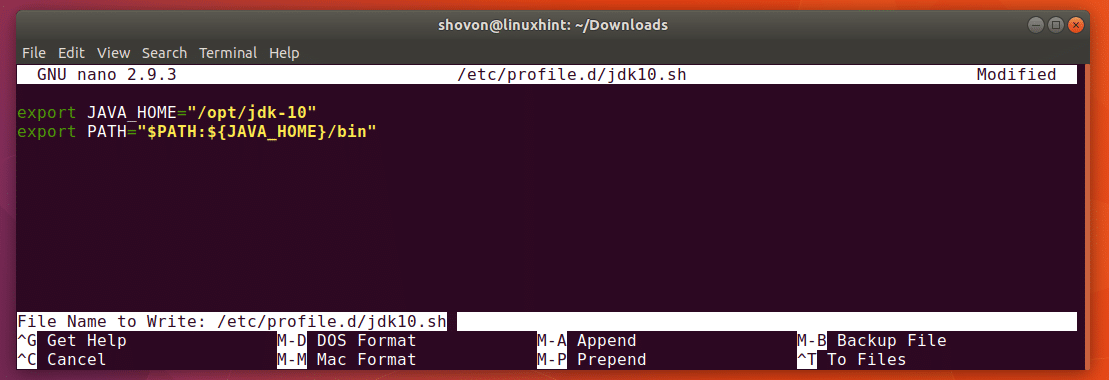
Now press <Ctrl> + x and then press y.

Now press <Enter>. The file jdk10.sh should be saved.
Now you have to restart your computer for the changes to take effect.
Run the following command to restart your computer:

Once your computer starts, run the following command to check whether JAVA_HOME environment variable is correctly set:
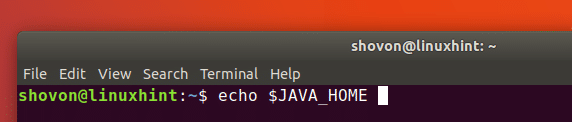
As you can see from the screenshot below, it is correctly set.

Now run the following command to check whether Oracle JDK 10 is in the PATH environment variable:

As you can see in the marked section of the screenshot below, Oracle JDK 10 is in the PATH.

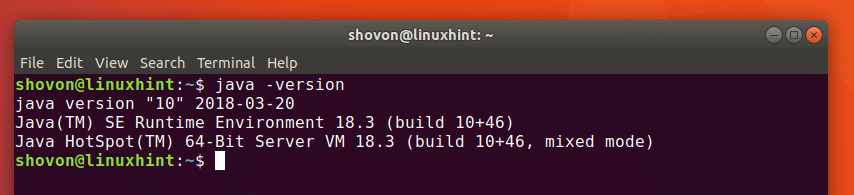
Now run the following command to check whether Oracle JDK 10 is working:

As you can see from the screenshot below, Oracle JDK 10 is working correctly.
Compiling Java Programs with Oracle JDK 10
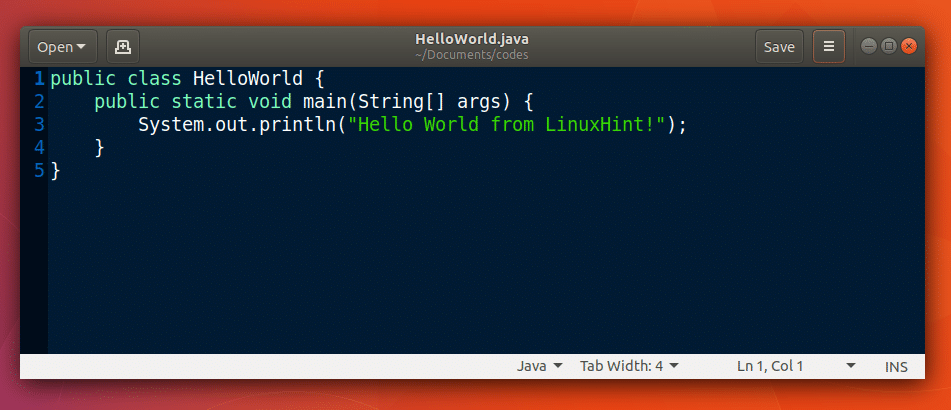
In this section, I will compile a simple hello world Java program with Oracle JDK 10. The Java source code is saved in HelloWorld.java file in ~/Documents/codes directory in my case.
Now navigate to the directory where your Java source file is saved with the following command:

Now run the following command to compile HelloWorld.java Java source file:

The HelloWorld.java Java source file should be compiled.
Running Java Programs with Oracle JDK 10
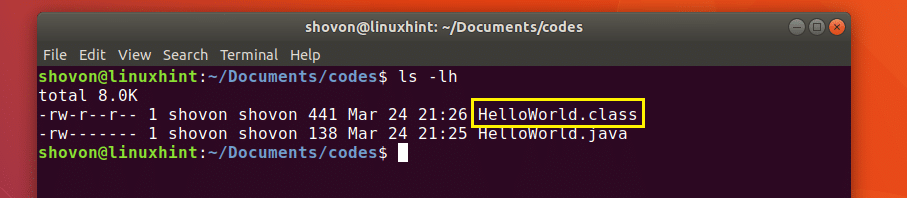
Once the Java source file is compiled, a file with the same filename as the source file should be generated as you can see in the marked section of the screenshot below. The generated file has .class extension. This is the Java byte code file and this is the file you run.
Now to run HelloWorld.class file, run the following command:
NOTE: When you run a Java program with java command, exclude the .class extension. Otherwise, you will get an error.

As you can see from the screenshot below, the correct output is displayed.

That’s how you install Oracle JDK 10 on Ubuntu 18.04 Bionic Beaver. Thanks for reading this article.