- Create, drop, rename or alter databases, tables, columns, primary keys, unique keys and indexes.
- Insert, delete and update records of the tables.
- Manage server by applying various server configuration.
- Execute different types of simple and complex queries.
- Create, drop and modify stored procedures, triggers and views.
- Import or export database or table or data from or to different formats.
To do web development works, you can install XAMPP or LAMP. If you are using XAMPP server for Ubuntu then you don’t need to install phpMyAdmin separately. It will be installed on XAMPP server by default when you will install XAMPP server. But if you are using LAMP on Ubuntu then you have to install phpMyAdmin by downloading the package. This tutorial will help you to install phpMyAdmin on Ubuntu.
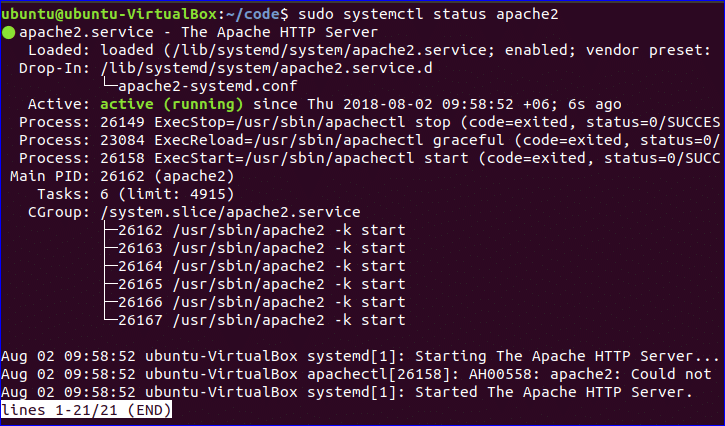
Before starting the installation process, you must confirm that LAMP is working properly. Run the following commands to check that Apache2, MySQL and PHP are installed and working.
Check the current status of web server (Apache2).
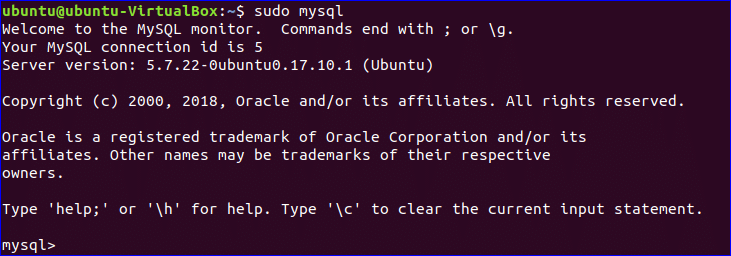
Check the connection of database Server (MySQL/MariaDB). MySQL server is installed here.
[If no password is set for root]
or
[If root user has password]
Check the version of the installed PHP.

Open any browser and check the Apache server is running.

After checking the above tasks, you can start the installation process of phpMyAdmin on Ubuntu.
Step-1: Install phpMyAdmin from Ubuntu repositories
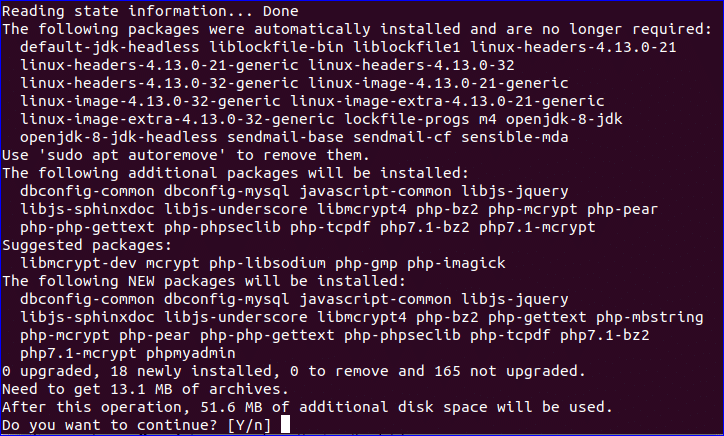
Run update command before stating the installation process of phpMyAdmin.
After update, run the following command to install phpMyAdmin from Ubuntu repositories. Press ‘y’ when it will ask for the permission to start the installation.
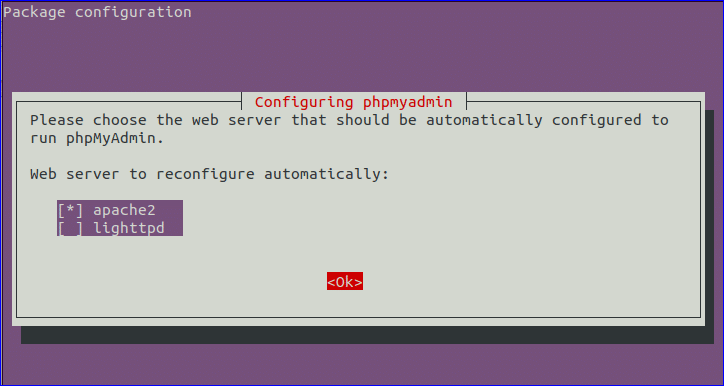
Press the space to select the server apache2, select Ok and press enter, when the following prompt appears.
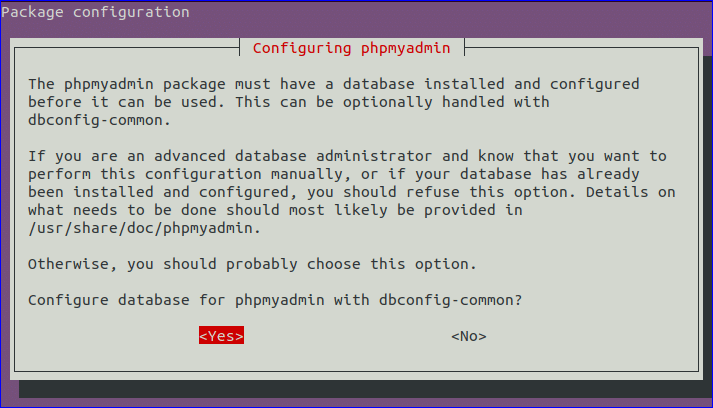
Select Yes and press enter to use dbconfig-common for setting up the database.
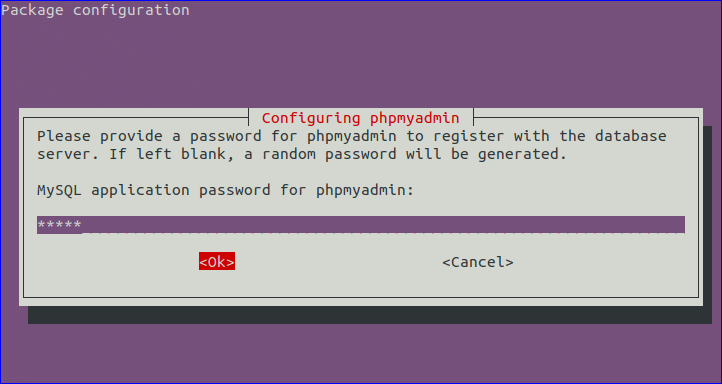
Next, you have to set MySQL password to make connection with the database server by using phpMyAdmin. Type the password, select Ok and press enter.
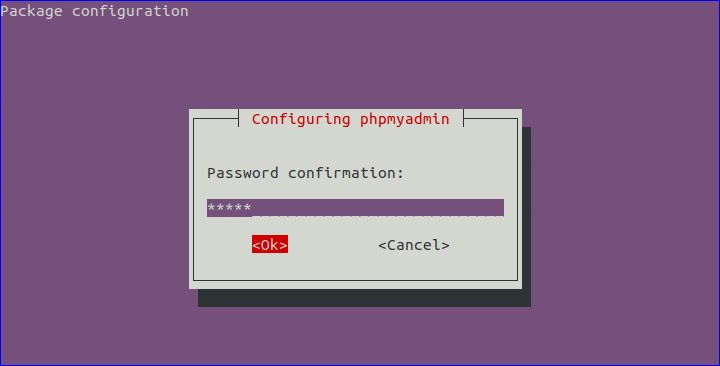
Retype the password for confirmation. Select Ok and press enter.
Run the following command to enable PHP extension, mbstring, for using phpMyAdmin Apache configuration file.
Restart apache server to get effect of the installation.
Now, phpMyAdmin is installed properly and you can go for the next step to setup other configuration of phpMyAdmin.
Step-2: Setup Authentication and Privileges
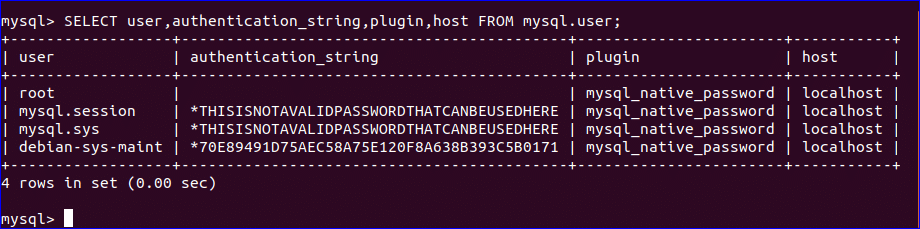
A default username and password are set at the time of installing phpMyAdmin for doing database tasks. The default username is ‘phpmyadmin’ and the password is the one that you have set in the previous step. But it is better to use phpMyAdmin by making a connection as root user to perform all type of database operations. If no password is set for root user when MySQL or MariaDB server is installed then it is necessary to set a password for the database server later. root user can use ‘auth_socket’ or ‘mysql_native_password’ plugin to make connection with the server. If ‘auth_socket’ plugin is loaded for root user then change the authentication method of root user from ‘auth_socket’ to ‘mysql_native_password’ for security purpose. You can also create new user account to access phpMyAdmin.
Configuration for root User:
Connect with the database server and check the current authentication method of root user.
Set the password for root user if not set before.
Change the authentication method of root user by using alter command if the current authentication method of root user is ‘auth_socket’. Here, authentication method is set to ‘mysql_native_password’ by default. So, there is no need to run the following command.
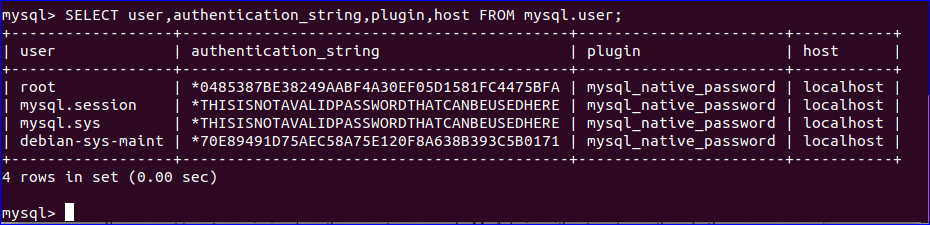
Run the following command to reload the authentication and show the effect of the modification.

Again, run the following query to check the current authentication method of root user.
Configuration for particular MySQL user:
If you want to set permission for other user to access phpMyAdmin without root user then do the following tasks.
Connect with MySQL server as a root user and create a new user. The password is set for root user in the previous step. So, you have to use –p option to connect with the server.
Execute the following query to create a new user named ‘linuxhint’;

Next, you have to set the required permissions for the new user to access the database server. Run the following command to set all permission for the new user.

Now, exit from mysql prompt.
Access phpMyadmin from browser:
Open any browser and type the following URL to check that phpMyAdmin is working properly or not.
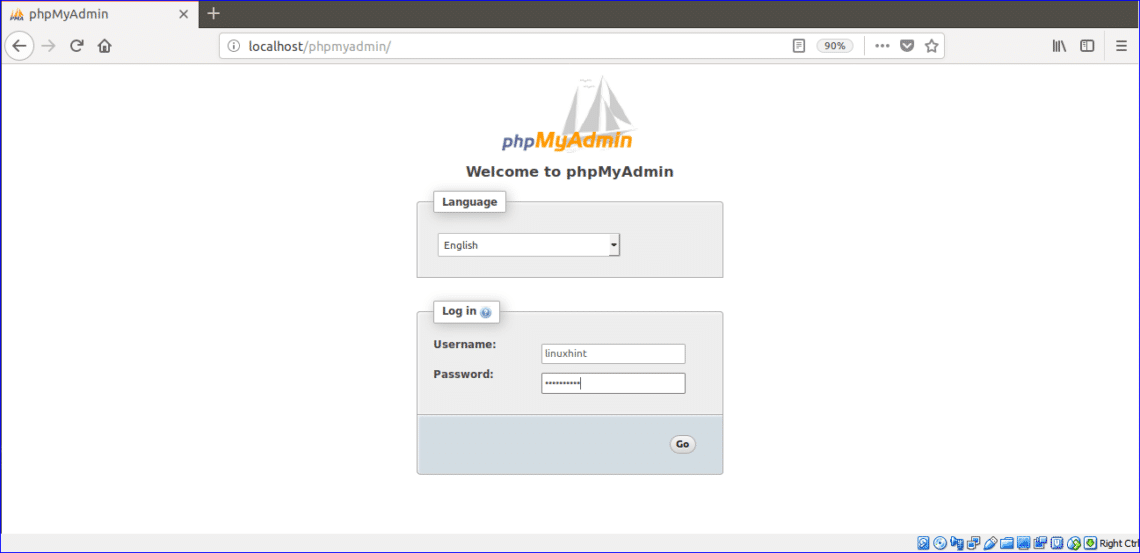
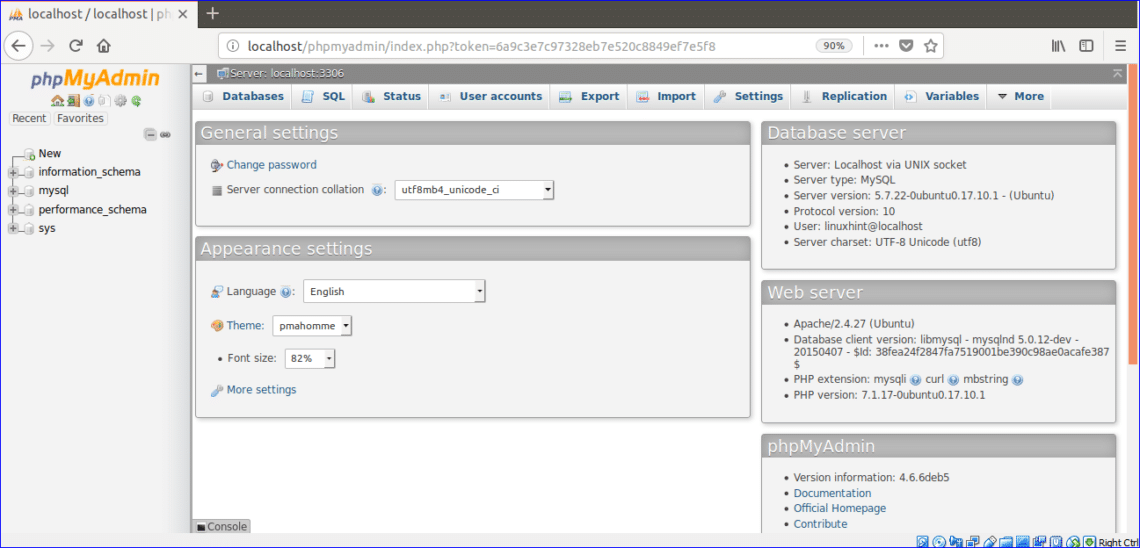
Now, login to the server by providing root or newly created user credentials. The following page will appear after login.
Step-3: Using phpMyAdmin
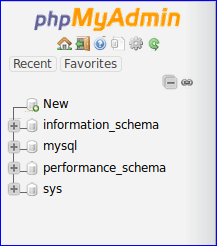
There are two panels in phpMyAdmin page. Left panel shows the list of all existing databases, tables, procedures and views. You have to click on ‘+’ button of the particular database to show the tables, procedures and views.
Right panel contains different database server information and tab options to perform particular database tasks. Five sub panels of cPanel page are General settings, Appearance settings, Database server, Web server and phpMyAdmin. The uses of these panels are explained shortly here.
General Settings:
You can use this panel to show the list of MySQL charset and change MySQL connection collation.

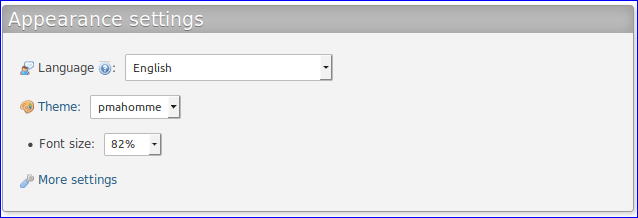
Appearance Settings:
You change the language, theme, font size and other appearance related setting from this panel.
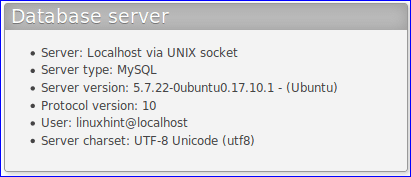
Database server:
This panel shows different information about the database server, such as, server name, type, version, connected username, charset etc.
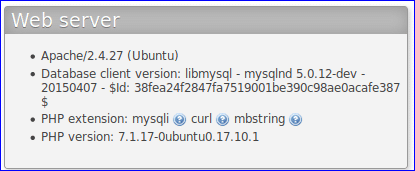
Web Server:
This panel shows information of web server, database client and PHP.
phpMyAdmin:
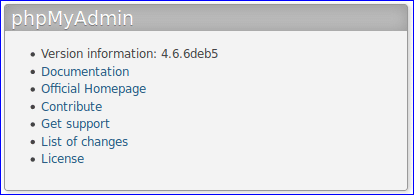
This shows phpMyAdmin version and other related information.
Tab options:
The top of the right panel contains menu tab. The user needs to use the tab options to perform various type important database operations, such as create or drop database or table, execute SQL, export or import database, create or drop trigger etc.

Now phpMyAdmin is an essential tool for any web developer to make database tasks easier. So if you want to use web interface for the database management on LAMP server then follow this tutorial properly and enjoy.