The container is then deployed and people run the software of that container. The idea is quite similar to virtual machines although Docker is more efficient. In case of a virtual machine every Operating system is independent of each other whereas in Docker containers are isolated but they share an OS kernel and whenever possible they also share binary files and libraries i.e. it helps in resource optimization. So, they can be also called as light weight Virtual Machine.
Docker Container v/s Docker Image
An image is a collection of files and some metadata. Images are made up of layers, each layer can add, change and remove files. Images can share layers to optimize disk usage, transfer times and memory use. Difference between a container and image in Docker context is that in Docker the image is a read only file system and container is an encapsulated set of processes running in a read and write copy of file system. Container is a copy of the image. The docker run command starts a container from the given image. Image is like a template used to create a container.
One can’t write changes on the image directly, he/she can create a container from the image then make changes to it. After saving those changes then it can be transformed into a layer. This new layer can then be used to create a new image on top of the old image.
Tutorial
Whenever one installs and configures Docker in their Linux OS care has to be taken to restrict access as the Docker group is equivalent to the root user. Always one must create a group and call it docker and add the user to the group then restart the Docker Daemon. It can be done by following the steps:
echo $USER
sudo gpasswd -a $USER docker
sudo service docker restart

Some of the useful docker operations to create containers and to run them in the background are given below:
- To run a docker container one needs to know the base Docker image. There is a very small and lightweight Docker image called as busy box about 5MB. One can run busybox by executing the command:
$ docker run busybox

- One must also know how to run the containers in background. There is a clock container which shows the time. The command is:
$ docker run jpetazzo/clock ( exit by Ctrl + C)
To run this container in the background one can do so by running it in the

daemon mode. Docker then gives the container id. One can check the Docker status and see the same container id being mentioned implying it is running in the background. All this can be done by the following commands.

- To kill the background containers there are two commands docker kill and docker stop. Kill is much faster than stop. Stop sends a signal to terminate the container and waits for ten seconds for it to terminate on its own and then if it doesn’t it sends a kill signal that kills the container immediately.
$docker kill/stop containerid
Docker Images and Image Tags
- To build Docker images interactively there is the requirement to follow certain steps. First one goes into the ubuntu image by following the command:
$docker run –it ubuntu bash

- Then there is requirement to update it. It can be done by the commands:
$apt-get update

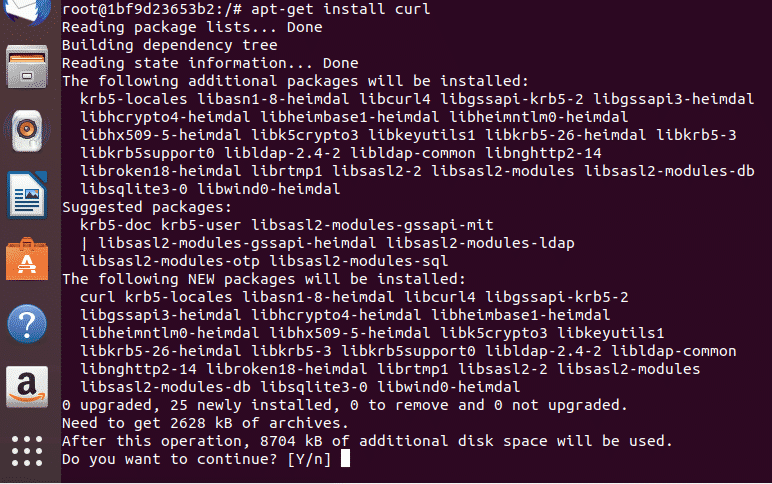
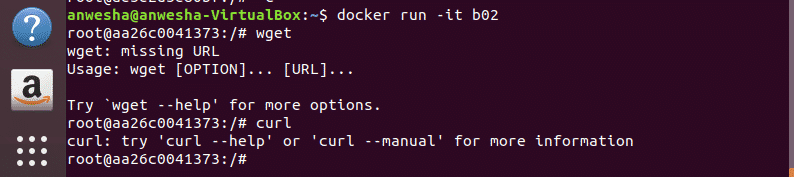
- Then one needs to install tools like wget to work on the image. So one thing one can notice from here is every time someone needs a base image to build on.
$apt-get install wget

- Then after exiting the docker image one can check status of the image or the Identification (ID) by running the command:
$docker ps -l

To compare the latest container with the base image (the ubuntu image that didn’t have wget and curl) one can run the command:
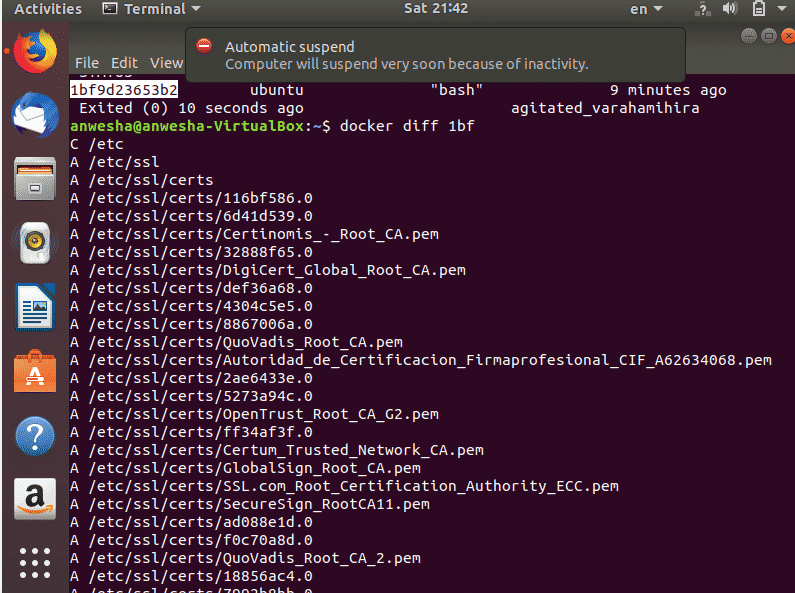
- All the changes that were done were not done to the base image but made to the copy of it (container). So image is just like a class in object oriented programming and container is the object or the instance. To make changes to a particular class one creates an instance of that class and changes the instance then to add these changes a new class with the new features is inherited from the older class. In the same way a new layer is created which helps to create a new Image with both the properties (old+new).
To save the changes to the new image one can run the command:

After the execution of this command the new image with the changes done is created. The output gives the id of the newly committed image.
- One can check the new image by running it by using the docker run command and check for all the installed tools.
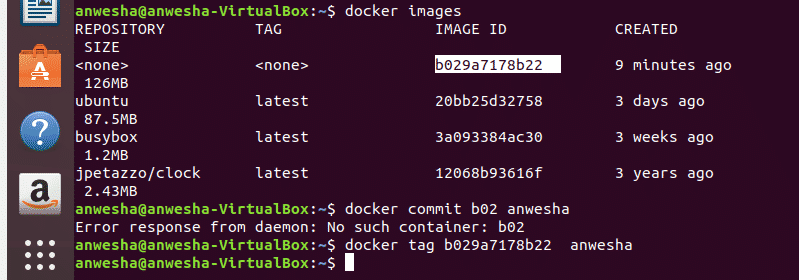
- Often there is the requirement of specifying easy to identify names or tags to the images one creates for better utilization during his/her work. The identification generated t=by the system is cumbersome so tags are used for images. When one checks the images created in docker using the command given below:$docker imagesHe/she can notice that the recently committed image has <none> written in the tag column whereas all the previous images have some other values specified.

There are three ways to name an image
- One during the creation of the image during the commit command:
$docker commit *image id* *name*
- Or after the image has already been created can use the syntax:
$docker tag *image id* *name*
One can check again to make sure if the new name has been given or not by once again running the command:
$docker images
One can also use the syntax :
$docker tag *first three characters of the image id* *new name*This syntax will rename every image having the first three characters as mentioned in the command to the name specified. This tag command explicitly names the target file to the name one prescribes in the syntax.
- One can run the command while building the image that has the following syntax:
$docker build –t username/image_name:tag_name
Username/image name is a general convention to name images as seen in the previous examples of clock images. While building that image it is specified a tag name in the same command.
Two level hierarchy is compulsory for naming in the case of a public registry but three level is also possible in case of a private registry.
- One during the creation of the image during the commit command:
CONCLUSION
In short docker image tags are aliases given to the docker ID. It is just like a nickname given to a person which is easier to use than a complicated long name. One can come across a question: What is the latest tag? It is actually the tag specified to an image when it is not tagged explicitly. It is like the default name given to the images, one must not confuse it with the latest running version of that image. The latest is just like any other tag it is not any special tag. The naming convention totally depends on the programmer’s choice so he/she can use to explicitly tag the latest images with the latest tag. So, while pulling an image one must be sure of the naming conventions used by the programmer before explicitly specifying tags to the images.